Table of Contents
Advertisement
Advertisement
Table of Contents

Related Manuals for Global Phoenix MID M1006S

Summary of Contents for Global Phoenix MID M1006S
- Page 1 Tablet Palmtop User Manual Android 2.3...
-
Page 2: Table Of Contents
Product Model: PC1001 Operation Manual The pictures or words may be inconsistent due to upgrade of product edition or specification modification and are subject to actual products without further notice. Content Content………………………………………………………………………………1 1. Appearance Description..…………………………………………………………1 2. Getting Started……………………………………………………………………1 2.1 Battery Recharge..………………………………………………………………1 2.2 Memory Card……………………………………………………………………1 2.3 Hot Plug of Memory Card and External Flash Disk……………………………1 2.4 Storage Space……………………………………………………………………1... -
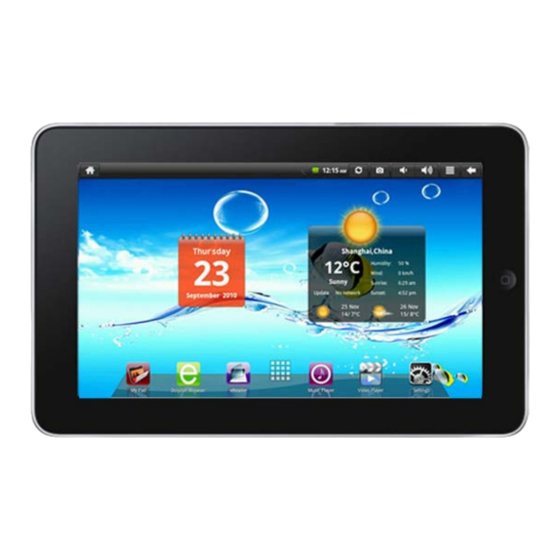
Page 3: Appearance Description
8. Hints and Tips………………………………………………………………………1 8.1 Convenient Operation Manners…………………...………………………………1 8.2 Shortcut Configuration……………………………………………………………1 8.3 Battery Hints………………………………………………………………………1 9. Personal Setting……………………………………………………………………1 9.1 Wireless and Network..……………………………………………………………1 9.2 Cable Network……………………………………………………………………1 9.3 Sound and Display………………………………………………………………1 9.4 Positioning and Security………..…………………………………………………1 9.5 Application..………………………………………………………………………1 9.6 TF Card and Equipment Memory…………………………………………………1 9.7 Language and Keyboard..…………………………………………………………1 9.8 Date and Time……………………………………………………………………1 9.9 Screen Adjustment…………………………………………………………………1... - Page 4 Front View:...
-
Page 5: Getting Started
Right View: Bottom View: Top View: 2. Getting Started Announcement: our company has always been dedicating to improving product quality and when the software edition is updated and if the finished product is inconsistent to functions described in the user manual, the finished product shall prevail. 2.1 Battery Recharge The tablet palmtop is equipped with one built-in battery and it would suggest recharging when the battery is low. -
Page 6: Content
Recharging 1. Plug the power adaptor and the recharging indicator will be red which means it’s recharging. When the battery is full, the indicator will be green. Unplug the power adaptor, the indicator will stay green. 2. During recharging, you could still use the equipment. Notice: The recharging time will be longer if the equipment is in operation. -
Page 7: Hot Plug Of Memory Card And External Flash Disk
2. Don’t forcibly unplug the memory card without the message “The TF card is removed”, or it might damage the card; 3. If the card is write-protected, it wouldn’t be formatted or written before canceling write-protection. 4. Mainstream memory cards are advised to avoid compatibility. 2.3 Hot Plug of Memory Card and External Flash Disk Don't hot plug when you are using or browsing the files in the memory card or in the external flash disk. - Page 8 Slide the unlock icon upward to enter the main interface; slide the electronic photo frame icon downward to enter photo play interface. 2. Power off:...
-
Page 9: Vibration
Slide the power off icon upward to shut down the equipment and it will be vibrating for once; slide the cancel icon downward to exit power off interface. 3. Dormancy: Press the power icon (1 second) and the system will enter the dormant status and the LCD screen will fade. -
Page 10: Input Operation
you can surf the internet. Refer 8.2 Shortcut Configuration. Wireless Network: 1. Turn the Wi-Fi switch to the left and it’s enabled; 2. Touch the setting icon on the shortcut bar; 3. Touch the Wireless Network on the setting menu; 4. -
Page 11: Desktop
4. Desktop 4.1 Status Bar The top of the screen is the status bar and there is one button on the left and five buttons on the right which are Desktop Button, Screen Capturing Button, Volume Button, Menu Button and Return Button. - Page 12 The main interface application page of the tablet palmtop has two modes: desktop gadget mode and application icon mode. You can switch modes by the central button on the shortcut bar. The desktop gadget mode is shown as follows: Click the button on the shortcut bar to enter application icon mode.
-
Page 13: Shortcut
Click the button to enter desktop gadget mode. 4.3 Shortcut On the desktop gadget mode interface, press the menu button or click the menu icon the top status bar and a shortcut menu will pop up at the bottom of the screen. The shortcut menu includes: Add, Wallpaper, Search, Notice, Desktop Setting, System Configuration. - Page 14 Window gadget If you want to add a window gadget into the main screen, press Menu → Add → Window Gadget on the desktop gadget mode interface. Choose the window gadget and add it into the main screen. Click the window gadget icon on the main screen and it will execute the corresponding operation.
-
Page 15: Desktop Gadget
4.5 Desktop Gadget You can add, delete or install desktop gadgets, add or delete application icon, move or change icon positions, drag between shortcut bar and operation area and add or delete icons in the operation area. On the desktop gadget mode interface, long press the gadget icon and a check will pop up on the screen and a trash bin icon will pop up in the center of the shortcut bar. -
Page 16: Application Software Management
Click the download option to pop up: When the file download is finished, delete the download history record or it will slow down website browsing or cause system failure. To do that, press the menu button to pop up the menu and select to delete download history. -
Page 17: Installation And Uninstallation
6.1 Installation and Uninstallation Installation If you want to install the software from a third party, please go to APK installer, Select “Installer” and then select the file with the extension name .apk in the memory card. Click “Install” to install the software, After installation, you can run the software right away or run the software on the subcategory interface. - Page 18 Click the menu to create a new folder. Directly click the folder name icon in the manager such as to return to the upper folder. You can switch between the flash disk and the memory card. Copy Files: If you want to store files in the equipment or copy files between the memory card and external flash disk, the procedures are: Copy files from the memory card to the flash disk: 1.
- Page 19 2. Click "Copy" to copy the chosen file; 3. Click the flash disk icon to choose the flash disk; 4. Below interface will pop up:...
- Page 20 5. Select the document, click “Paste” to paste the file to current category. Delete Files: Select the file you want to delete, long press the icon to pop up an operation list. Select “Delete” and a dialog box of delete confirm will pop up: Click “Yes”...
-
Page 21: Electronic Photo Frame
Software Installation: If you want to install the software in the document browser, all you have to do is click the installation file with the extension name .apk and a prompt box will pop up. Select “Install” to install the software in the equipment. 7.4 Electronic Photo Frame Click the electronic photo frame icon to browse your photos to play them in slide... -
Page 22: Multimedia Library
2. Click Setting button to pop up setting options; 3. Click special photo effects button; 4. Select Older Picture button and when the point on the right of the older picture is green, the transformation is finished. You can also adjust the brightness of day and night mode. 7.5 Multimedia Library Click Multimedia Library icon to enter the multimedia library interface as follows:... - Page 23 4. Click the thumbnail of the picture on the picture library interface to enter full screen mode. Click the screen and zoom icon will pop up for you to zoom in or zoom out the picture. Press the menu button to pop up the shortcut menu and you can share the pictures, rotate the pictures, delete the pictures, modify the pictures, set the picture as the wallpaper or contact profile.
-
Page 24: Music
7.7 Music Click the icon to enter music interface. Click the menu button to pop up the shortcut menu and play mode options available are: play all, random party play and random play all. Click the song to enter play interface:... -
Page 25: Camera
1. Click the icon to enter play list. 2. Click the icon to enter random play mode. 3. Click the icon to switch between repeat all play mode and single repeat play mode. 4. Click the menu and you can: delete the current song, add the current song to the play list, jump to the music library. -
Page 26: Hints And Tips
1. Click the icon at the bottom right and you can save your photos in DCIM/Camera directory in TF card. 2. Move the icon on the right and you can switch camera mode to film mode. 3. Click the icon on the top right to see the previous picture and you can also delete, share, set it as the wallpaper or contact profile. - Page 27 Connect to Wireless Network Click Wi-Fi icon to enter the wireless network interface shown as follows: Connect to Cable Network: Click cable network icon to enter cable network interface and manually set your IP shown as follows:...
- Page 28 Connect to ADSL: Click dialing configuration icon to enter dialing configuration interface shown as follows:...
- Page 29 Input your user name and password and click “Connect” to get access to the broadband network. Connect to 3G Network: First, you have to buy a 3G wireless card from China Telecom, China Mobile or China Unicom. The equipment at present supports: Wangxun E1916. Since our company is continuously committed to improving product quality and the software edition is always updating which will support more models in the future, please refer to the...
-
Page 30: Battery Hints
finished products. You have to buy above mentioned model to get access to 3G network. Insert your SIM card into the 3G card and then insert the 3G card into the USB port. The signal light of the 3G card will be light which means you’re ready for 3G network surfing. -
Page 31: Cable Network
Configuration. 3G Network Configuration If you want to set and manage the 3G network, press menu button → system configuration → wireless and network → 3G network management. For more information, please refer to Connect to 3G Network in 8.2 Shortcut Configuration. 9.2 Cable Network Connect to broadband network and Ethernet configuration For more information, please refer to Connect to ADSL and Connect to Cable Network in 8.2... -
Page 32: Positioning And Security
If you want to set default notice tone, please press menu button → system configuration → sound and display (sound setting) → notice tone. Operation Tone If you want to set operation tone, please press menu button → system configuration → sound and display (sound setting) → operation tone. Touch Feedback If you want vibration to the soft keyboard and UI activities, please press menu button →... -
Page 33: Application
Certificate Storage If you want to use and install security certificate, please press menu button → system configuration → Positioning and security, and operate in the certificate storage directory, such as setting certificate password. 9.5 Application Unknown Sources Tick off and you can install the applications from non-electronic market. Manage the Application If you want to manage and delete applications, please press menu button →... -
Page 34: Language And Keyboard
menu button → system configuration → TF card and equipment memory and select corresponding equipment in the memory equipment directory, such as memory card 1. You can check the total capacity and available space after going to the memory equipment interface. You also can uninstall it shown as follows: Equipment Memory If you want to check the equipment memory, please go to menu button... -
Page 35: Date And Time
Select the Language and Region If you want to choose your language and region, please press menu button → system configuration → language and keyboard → select language and region. Android Keyboard If you want to set Android keyboard, please press menu button → system configuration → language and keyboard →... -
Page 36: Screen Adjustment
9.9 Screen Adjustment If you want to adjust your touch screen, please press menu button → system configuration →touch screen adjustment. Adjust the touch screen to the hints of which will guide you to return to setting list. 9.10 About the Equipment Check the law information, equipment status and software edition... -
Page 37: Hdmi
Status If you want to check battery status, battery power level, bootup time and Wi-Fi address, please press menu button → system configuration → about equipment → status. Law Information If you want to check the law information, please press menu button → system configuration → about equipment →... -
Page 38: Tablet Palmtop Lock
You can switch the video to play it on the HDMI display equipment (such as TV with a HDMI interface) by HDMI. The maximum output resolution is 720p and its method is shown as follows: 1. Open the equipment; 2. Connect the equipment and HDMI display equipment. Open the display equipment and a HDMI connection message will pop up on the status bar. -
Page 39: Mandatory Power Off
Click the application you want to close, a close-the-service window will pop up shown as follows: Click “Stop” to power off the application and the window of the application will be disappeared. 12.2 Mandatory Power off 1. Long press the power button for 7 seconds or so and the equipment will be forced to be... -
Page 40: Restore Default Setting
powered off. 2. Press the reset button on the right bottom of the equipment and the equipment will be forced to be powered off. 12.3 Restore Default Setting If you want to reset the factory setting and erase all materials, please press menu button → system configuration →... - Page 41 SJ/T11363-2006 Requirements for Concentration Limits for Certain Hazardous Substances in Electronic Information Products. However, it conforms to EU RoHS directives (Including the exemption clause of EU RoHS directives). Note: This table is about all toxic or hazardous substances or elements status which may be used in this product and users could consult toxic or hazardous substances or elements status of all components.
Need help?
Do you have a question about the MID M1006S and is the answer not in the manual?
Questions and answers