Table of Contents
Advertisement
User's Guide
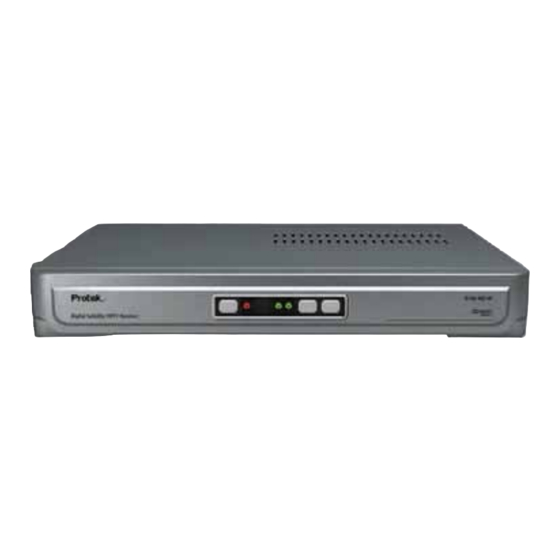
Full HD Digital Satellite Receiver
Full HD Digital Satellite Receiver
HD Video Formats 1080i, 720p, 576p
Internet Connection Ethernet Port
USB 2.0 Ready
Dolby Digital 5.1 Audio Decoding
Smart Card Reader
HD Analog & HD Digital Output
Scart Video/ Audio Output
Max. 9999 TV & 4999 Radio Channels
Advertisement
Table of Contents

Related Manuals for Protek 9700HD IP

Summary of Contents for Protek 9700HD IP
- Page 1 User’s Guide Full HD Digital Satellite Receiver Full HD Digital Satellite Receiver HD Video Formats 1080i, 720p, 576p Internet Connection Ethernet Port USB 2.0 Ready Dolby Digital 5.1 Audio Decoding Smart Card Reader HD Analog & HD Digital Output Scart Video/ Audio Output Max.
- Page 2 Safety Information CAUTION RISK OF ELECTRIC SHOCK DO NOT OPEN CAUTION : TO AVOID THE RISK OF ELECTRIC SHOCK, DO NOT OPEN. NO USER SERVICEABLE PARTS INSIDE REFER SERVICING TO QUALIFIED SERVICE PERSONNEL ONLY. The lightning flash with arrowhead symbol within an equilateral triangle is intended to alert the user to the presence of un-insulated "dangerous voltage"...
- Page 3 Important safeguards These important safeguard messages will help ensure your enjoyment and proper use of the HD-Receiver and accessories. Please read them carefully before you begin to operate your HD-Receiver product. 1. Read and Retain this User's Guide This User's Guide should be read before the HD-Receiver is operated and retained for future reference. 2.
-
Page 4: Table Of Contents
Contents 1. Overview of the equipment 1-1. Front Panel 1-2. Rear Panel 1-3. Remote Control 1-4. Accessories 2. Connecting your HD-Receiver 2-1. Antenna Connection 2-2. Video Connection 2-2-1. HDMI (High Definition Multimedia Interface) connection 2-2-2. Connecting to a HDTV with HD YPbPr 2-2-3. - Page 5 Contents 4-3. Installation 4-3-1. Switch Type 4-3-2. LNB Setup 4-3-3. Motorized System 4-3-3-1. DiSEqC 1.2 Setting 4-3-3-2. USALS Setting 4-3-4. Channel Scan 4-3-5. Edit Satellite 4-4. Smart Card 4-5. System Information 4-6. USB Menu 4-6-1. Contents Browser 4-6-2. Connect Drive 4-6-3.
-
Page 6: Overview Of The Equipment
1. Overview of the equipment This section summarize HD-Receiver Buttons, Remote Control and the Terminals. 1-1. Front Panel STAND-BY : Press to turn the HD-STB on or Stand-by POWER Indicator : Displays STB operation status. In Stand-by mode, STB will display a RED light. -
Page 7: Remote Control
1. Overview of the equipment 1-3. Remote Control Switch the HD-Receiver between standby mode and operation mode. Change HD Video Display Format Switch the sound on / off. among 1080i, 720p or 576p. Change the satellite on the program list. Switch between Television services and Radio services. -
Page 8: Connecting Your Hd-Receiver
2. Connecting your HD-Receiver This chapter describes how to connect your HD-Receiver to the TV and other equipments. The HD-Receiver provides various connection methods for your TV, VCR and other equipments. 2-1. Antenna Connection Connect satellite antenna cable to the LNB IN socket of the HD-Receiver. If you have another Satellite Receiver, you may link it from the LOOP OUT connector. -
Page 9: Connecting To A Hdtv With Hd Ypbpr
2. Connecting your HD-Receiver 2-2-2. Connecting to a HDTV with HD YPbPr Attention: Please make sure that the Output Select Switch is in YPbPr position! Connect YPbPr Video cable to the HD terminal on the rear of HD-Receiver. Connect the other end of YPbPr Video cable to the HD YPbPr input terminal on the HDTV. -
Page 10: Audio Connection
2. Connecting your HD-Receiver 2-3. Audio Connection This HD-Receiver can support three different methods for connecting audio signals. Each of the audio connections delivers the same audio sound. You can select desired audio connection by following the Audio Connection Diagrams below. Please make sure, if you are using HDMI connection, you do not need this Audio Connection. -
Page 11: Getting Started
3. Getting Started Step-1. Check the contents in the gift box. After opening the gift box, you should check up and find the following items. Digital HD-Receiver Note : Remote Control If you find missing or broken part, then ask to User’s Guide supplier or contact to service center. -
Page 12: Using The Menu System
4. Using the MENU System 4-1. Preferences In the Menu system you can adjust whole setting and function of HD-Receiver. If you press the button, the menu screen MENU will display. You can move up/down using button in the Remote Control. Press button to select the items. -
Page 13: Installation
4. Using the MENU System 4-2. System Setup You should configure the system settings appropriately to your television set and other appliances. 4-2-1. 4:3 Channels Display As If you have 16:9 wide-screen TV and current serviced program is 4:3 then you can select full screen mode or pillar box mode. -
Page 14: Motorized System
4. Using the MENU System 4-3-3. Motorized System If you are using motor system, you can calibrate the antenna followed by below menus (DiSEqC 1.2 or USALS) depends on which motor system you have. You can dynamic check up the received signal status with quality and strength bar at the right side of OSD. -
Page 15: Smartcard
4. Using the MENU System 4-4. SmartCard Some broadcaster broadcast scrambled service and it required paid subscription for watching TV. The scrambled services can only be watched with subscription card. This HD-Receiver has One Smart card slot for insert the Subscription Card. -
Page 16: Direct Buttons Of The Remote Control
5. Direct Buttons of the Remote Control You can use following Remote Control Buttons for searched programs 5-1. INFO (Information) If you press button, then detailed information of current program will be shows on bottom of the INFO display. While displaying banner, if you press button again then current program’s synopsis(NOW) INFO will be displayed at top of the banner. -
Page 17: Teletext
4. Using the MENU System 5-5. TELETEXT On some services, such information as weather reports, news or stock quotations is provided by means of teletext. If current program provides teletext service, it will display on the information display. For activate teletext service, press button. -
Page 18: Firmware Upgrade
6. Firmware Upgrade The HD-Receiver has a specific firmware which is stable and convenient use. However, for improvement of the product functionality, new firmware may be released. You can get the latest firmware from your Protek Distributor or directly at www.protek.tv 6-1. -
Page 19: Specifications
8. SPECIFICATIONS 1) Tuner SPECIFICATION ITEM Input Connector 1 x F type 75 Ohm. Output Connector 1 x F type 75 Ohm, Loop through Frequency Range 950MHz to 2150MHz Input Impedance 75 Ohm, Nominal Signal Level -25 dBm to -65 dBm Vertical +13.0V~+14.0V LNB Power &...
Need help?
Do you have a question about the 9700HD IP and is the answer not in the manual?
Questions and answers