Table of Contents
Advertisement
Advertisement
Table of Contents

Related Manuals for BenQ 2720S

Summary of Contents for BenQ 2720S
- Page 1 BENQ P ROFESSIONAL CANNER 2740S ERVICE UIDE...
-
Page 3: Table Of Contents
Table of Contents Table of Contents .............. i Chapter 1 System Overview..........1-1 1.1 Features ................1-1 Chapter 2 Specifications and Section Namess ....2-1 2.1 Specifications ..............2-1 2.2 Sectional Diagram..............2-2 Chapter 3 Theory of Operation ........3-1 3.1 Fundamental of Optic Process .......... - Page 4 Chapter 6 Trouble-shooting..........6-1 6.1 Error Code Identification from “Status” LED ......6-1 6.2 No Function after Power On:..........6-1 6.3 Cannot Link with Host Computer: ........... 6-1 6.4 Flash "1" time: ..............6-2 6.5 Flash "2" times: ..............6-2 6.6 Flash "4"...
- Page 5 Appendix B Spare Parts Ordering Information....B-1 B.1 Ordering Information............B-1 B.2 Spare Parts List ..............B-1 Appendix C Explosive Diagram ........B-1 C.1 Ordering Information............B-1 C.2 Spare Parts List ..............B-1 Table of Contents API Confidential No Copy/Reproduction allowed...
-
Page 7: Chapter 1 System Overview
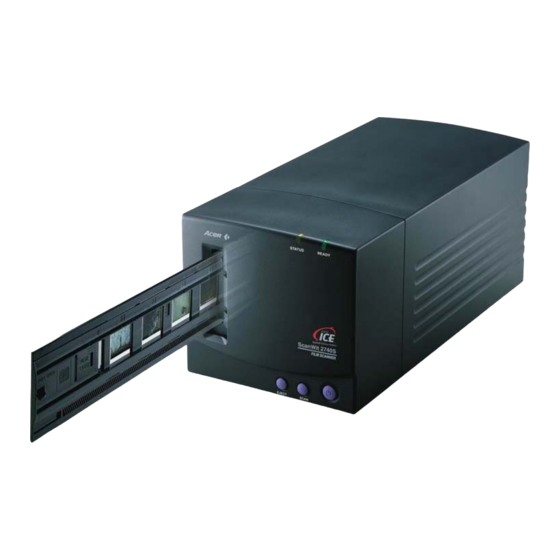
Chapter 1 System Overview This chapter includes an overview of the professional film scanner features. 1.1 Features 2700 × 2700 dpi optical resolution 36-bits, over 68.7 million colors for true-to-life accuracy Fast scan speed: complete a 2700 dpi scan within 40 sec. Auto Positioning and Focusing Technology to secure a sharper image Advanced zero-reflection optical design for a undistorted scan image Auto-loading mechanism can preview/scan up to six frames at one... -
Page 9: Chapter 2 Specifications And Section Namess
Chapter 2 Specifications and Section Names This chapter lists the specifications and section names of the film scanner. 2.1 Specifications Machine Type Professional film scanner Scan Method 3 pass , color CCD Scan Mode grayscale 12 bits/pixel (4096 levels of gray) color 48 bits/pixel (over 68.7 billion colors) Optical Resolution 2700 ×... -
Page 10: Sectional Diagram
For Macintosh Power PC with 32MB RAM CD-ROM drive Mac OS 8.6-9.1 Power Consumption 25 Watt maximum Power Requirement Voltage 100, 110, 220, or 240V (AC) Frequency 50/60Hz Environment Requirement Operational Temperature 10℃ to 40℃ Relative Humidity 10% to 90% 2.2 Sectional Diagram The main parts of the scanner are shown in the Figure 2-1, Figure 2-2, and Figure 2-3, and Figure 2-34, and the names of the parts are listed in... - Page 11 Figure 2-1 Main Parts Diagram Base Motor Frame Feed Roller Lamp Gear Gear Inverter Board Pulley Gear Belt Bot + Tape E-Ring Panel Board Foot Rubber Screw Pulley Frame Bracket Screw P-Spring 1 23 Spring – Top base 39 Screw Pulley Spring Screw...
- Page 12 Shutter Friction PE Screw Sutter Bracket Feed Bracket Screw Shutter Spring DC Motor Strip Friction PE Scan Motor Idle Pulley IR Led Board Motor Rubber Torque Limiter Table 2-1 Main Parts List Figure 2-2 CCD Module Section Module Rack 1 Tuning Holes Tape E-Ring Plastic Nylon 2.1*5*0.5T Lens Window Cover...
- Page 13 Figure 2-3 PCB Frame Section PL Board Power Inlet Main Board Screw Power Shield Screw Power Board Screw SCSI ID Switch Insulation Table 2-3 PCB Frame Section Parts List Specifications and Section Names API Confidential No Copy/Reproduction allowed...
- Page 14 Base Lamp IR Led Board Screw Preheater Table 2-4 IR Led Board Section Parts List Figure 2-4 IR Led Board Section API Confidential Specifications and Section Names No Copy/Reproduction allowed...
-
Page 15: Chapter 3 Theory Of Operation
Chapter 3 Theory of Operation This chapter describes the optic process and the scan sequences of the Film Scanner. 3.1 Fundamental of Optic Process There are three steps for the optic process: Auto-Focusing, Imaging and Receiving. 3.1.1 Auto Focusing By moving lens cartridge forward/backward the object (film/slide) and analysis the signal to get the focus in an optimized status. -
Page 16: Scan Process
Figure 3-2 Receiving 3.2 Scan Process 3.2.1 Preset Put the to-be-scanned object (Slide/Film) into holder and gently insert into holder insertion slot. Two types of holders are supplied with film scanner: filmstrip and slide holders. 3.2.2 Auto-Focus First the holder will do “White balance”, which means CCD reads signals from calibration area in holder to be “White”. - Page 17 3.2.5 Scan Applying a lens to form an image. And this image must be precisely formed on the color CCD. Then color CCD receives the light, transfers the intensity of light to voltage, and outputs the voltage to processor. 3.2.6 Output The scanned image of the object is output on the monitor after detail and complex calculations.The detail flow chart is shown in Figure 3-3.
- Page 18 START PRESET AUTO-FOCUS PREVIEW PICK TARGET ENVIRONMENT IMAGING RECEIVING PROCESSING MONITOR MORE IMAGE PROCESS Figure 3-3 Scan process flow chart API Confidential Theory of Operation No Copy/Reproduction allowed...
-
Page 19: Chapter 4 Mechanism
Chapter 4 Mechanism This chapter illustrates the mechanisms of the film scanner and describes the functions of these mechanisms. The scanner's mechanism can be divided into two major departments: ※ Optics Module ※ Transmission Module 4.1 Optics Module The parts to compose optics module are showed as below (Figure 4-1). This module ensures that the object can exactly form an image and transform light energy to voltage signal, which is critical for the image management. - Page 20 The optics process can be divided into three steps in detail: light source, imaging and receiving. The light path diagram is shown in Figure 4-2. And the three steps will be described in the following: Figure 4-2 Diagram of Light Path 4.1.1 Light Source Using a lamp to be the light source here.
- Page 21 OBJECT IMAGE Figure 4-3 Optic Relation Note: The lens is fixed by a hex screw in the carriage as shown in Figure 4-1. If you loosen the hex nut, then you can adjust the lens, and the object distance is changed. When the object distance is changed, the image distance changes according to the formula.
-
Page 22: Transmission Module
4.2 Transmission Module This module contains the stepping motor, which provides enough power and torque to drive the film/slide holder. Figure 4-4 Transmission Gear Diagram The gear transmission diagram is shown as above and gear numbers are also listed. The purpose of the gear transmission is to reduce the speed of the stepping motor. -
Page 23: Chapter 5 Electrical Systems
Chapter 5 Electrical Systems 5.1 Overview The overview of electrical systems of film scanner is shown in Figure 5-1. Host Computer SCSI Interface Cable MainBoard ASIC Scanner Controller Power Board Analog Circuits Elements ICE Function CCD module (Line motor) CCD,Inverter,Lamp, Home Sensor Figure 5-1 Electrical Systems Overview The 2740S scanner is composed of 7 PCB boards: Power board, Main... - Page 24 The main module is composed of the main board. This module is located at the bottom of the 2740S scanner. The I/O module is the SCSI output port, and the line motor.. ICE Function SCSI Output port Main Board CCD/Sensor Board Line Motor Inverter...
- Page 25 by AP2106A (ASIC scanner controller) and by a single-chip microprocessor: W78E516B which is compatible with 8052. When requested, these pixels data are transferred via SCSI output port to host computer. To get the whole image data, the line motor steps forward to next scan-line, and the same procedures are conducted for this scan-line.
- Page 26 CCD Video Output Analog Circuit Sync. ADC Clk CCD Timing CCD Basic Timing ADC Bus SCSI ASIC CCD Basic Timing & I/O Interface Resolution Control Digital Shading With Gamma Correction Halftone, LineArt W78E516 SCSI slave controller & interface Line Motor Aux Ports( for Motors ) Driver (6219...
-
Page 27: Scsi Interface
interfacing between scanner and HOST computer. The single-chip microprocessor, W78E516 fetches its programs from the ROM embedded in itself. It is dedicated to control the startup/initialization, and self test. To scan an image, the host computer sends a series of SCSI commands to set and get scanning parameters. - Page 28 D B 0 ~ D B 7,D B P : D ata B u s w ith O dd P arity B SY :B u sy S E L :S elec C /D :C on tro l/D ata I/O : In p u t/O u tpu t M S G :M essage R E Q :R eq u est A T N : A ttentio n...
-
Page 29: Scanner Controller (Asic & Μp)
Figure 5-6 5.3 Scanner Controller (ASIC & µP) The AP2106A (ASIC scanner controller) includes the following features: 1. 12-bit ADC data input. 2. Support 1-color or 3-color simultaneous scanning. 3. A programmable color CCD timing generator. 4. CPU interface: This ASIC provides an 8051-compatible microprocessor bus interface for connecting to an external 8051 series MCU. -
Page 30: Analog Circuits
5. External System RAM: This ASIC supports 256k*16, 1M*16, 2M*16, and 4M*16 EDO DRAMs for storing shading, gamma tables, and buffering data to transmit to host PC. 6. Host I/O interface: Connect to host PC via SCSI. 7. Digital signal processing: even-odd compensation, digital shading, 1-D LPF, Gamma correction, binary image processing. -
Page 31: Ccd Head/Elements
The image are captured from color CCD (Charge Coupled Device). The CCD transfers the light intensity to electrical charges via photo-diodes, then these charges are sampled and shifted serially with analog charge coupled devices and, then, converted into sampled voltage. The sampled voltage is amplified and transmitted into MainBoard. -
Page 32: Main Flow Chart Of Film Scanner
5.5.3 CCD/Home Sensor Board There is one connector on the CCD board in 2740S scanner (referring to figure 5-9), the connector description is as following. 2 7 4 0 S C C D P C B C C D Figure 5-9 5.6 Main Flow Chart of Film Scanner Start (power-on) Initial communication mode... -
Page 33: Connectors Of Scanner 2740S
5.7 Connectors of Scanner 2740S This section describes the connectors of film scanner, including all printed circuit boards in Scanner 2740S. Some connector definitions are duplicated for convenient referring. 5.7.1 SPS Board This PCB board has 2 connectors (J1, J2) and a power switch. J2 is connected to the adapter. - Page 34 5.7.2 MainBoard ASIC 78e516 ASIC MOTOR DRIVER Host Figure 5-11 Main Board of Film Scanner Connector J1 on Scanner 2740S MainBoard J1 is connected to the line motor to drive the stepping motor. Pin # Signal name Description LM1A Line motor pulse phase 1 of coil A LM1B Line motor pulse phase 1 of coil B LM2A...
- Page 35 5.7.3 CCD Board There are two connectors on the CCD board in film Scanner. See figure 5-12 Pin 2 Pin 1 CCD Board Screw hole Screw hole Figure 5-12 CCD Board of Film Scanner Electrical Systems API Confidential 5-13 No Copy/Reproduction allowed...
-
Page 37: Chapter 6 Trouble-Shooting
Chapter 6 Trouble-shooting 6.1 Error Code Identification from “Status” LED When the LED flashes: “1” time - FLASH or Firmware Upgrade error “2” times - DATA RAM error “3” times – Reserved “4” times – ASIC (AP2106) error “5” times - Line Motor/Home Sensor error “6”... -
Page 38: Flash "1" Time
6.4 Flash "1" time: ⊙ U8 --- DRAM ⊙ U2 --- ASIC (AP2106A) 6.5 Flash "2" times: ⊙ U6 --- DRAM ⊙ U2 --- ASIC (A2106) 6.6 Flash "4" times: ⊙ U2 --- ASIC (AP2106) ⊙ PCB TRACE on the MainBoard 6.7 Flash "5"... -
Page 39: Scan Quality Not Good
6.10 Scan Quality not Good: ⊙ Mechanism --- Holder not correctly inserted, Old Lamp, CCD Mechanism ⊙ U1 OR U2 6.11 Power Supply 6.11.1 No Function after Power On: ⊙ Power input --- Regulators/Power Cord/Power Switch ⊙ U3 --- CPU 80C32 ⊙... -
Page 41: Chapter 7 Maintenance
Chapter 7 Maintenance This chapter gives step by step instructions for maintaining the 2740S film scanner. 7.1 Precaution Make sure that you unplug the film scanner before disassembling. Unless otherwise specified, reassemble the scanner by reversing the disassembly procedure. Do not disassemble the CCD board and lens. If it is necessary to plug in the adapter cord and operate the scanner after it is disassembled, pay special attention to the following: A. - Page 42 before removing the housing. Figure 7-1 Housing Disassembly API Confidential Maintenance No Copy/Reproduction allowed...
-
Page 43: Transmission Section
7.3 Transmission Section To remove scan motor: Remove two screw We can remove scan motor Figure 7-2 Remove Scan Motor Maintenance API Confidential No Copy/Reproduction allowed... - Page 44 To remove scan transmissional assembly: 1. Remove 4 screws 2. Place trimmer on the pulley 3. We can remove scan transmissional assembly Figure 7-3 Remove Scan Transmissional Assembly 1/2 API Confidential Maintenance No Copy/Reproduction allowed...
-
Page 45: Pcb-Frame Section
Figure 7-4 Remove Scan Transmissional Assembly 2/2 7.4 PCB-frame Section To removing PCB-frame: A. Remove the three screws in Fig.7-2. B. Disconnect the connectors between main board and wires in. C. Remove all the screws, then you can get the main board and power board. -
Page 46: Panel Board Section
Figure 7-5 Remove PCB Frame 7.5 Panel Board Section To remove Panel board A. Remove the two screws in Fig.7-6. B. Disconnect the connectors between panel board and wires in. API Confidential Maintenance No Copy/Reproduction allowed... - Page 47 Figure 7-6 Remove Panel Board IR Board Section Figure 7-7 Remove IR Board Maintenance API Confidential No Copy/Reproduction allowed...
-
Page 48: About Resolution
7.6 About Resolution The resolution is the most important performance of the scanner, and it is under the influence of many factors. Taking the attention to these factors and you can get the maximum resolution and performance. These factors are described in the following: (1) Lamp When the lamp is out of order the intensity of light will reduce and the CCD can't receive enough light to output voltage signal. -
Page 49: Appendix A Frequently Asked Questions
Appendix A Frequently Asked Questions A.1 General Questions Q: What is the minimum hardware configuration required for using a scanner? A: (1) Processing Capability 586 Pentium processor or above with 16MB RAM is the suggested minimum required configuration. Additional RAM can improve the speed of image processing and large hard disk storage space can be used as data swapping once the memory is not enough. -
Page 50: Miraphoto
Q: How to get the updated driver of the scanner? A: You can have our most updated driver from our web-site: Please download the most update from the web: http://www.Benq.com.tw/global/service/scan/drivers.htm http://www.Benq.com/drivers/imaging_drivers.html Q: Is the scanner compatible with TWAIN? A: The scanner is TWAIN compatible. With this specification, the scanner can work with any Windows or Mac applications that support the TWAIN standard. - Page 51 Q: Why I can’t scan after install MiraPhoto on my Windows 95? A: This is probably because you mis-direct system to install driver for Windows 98. To replace with driver for 95, follow these steps: 1. Delete Sti2740S.inf & ClrScan.inf two files under \\windows\inf. 2.
- Page 52 4. Re-install MiraPhoto and reboot computer. Q: Why is the scanned image always darker than the original? A: Please adjust the gamma value from the "Monitor Gamma" menu. Choose "Monitor Gamma..." to open the Monitor Gamma dialog box shown below: API Confidential Frequently Asked Questions No Copy/Reproduction allowed...
- Page 53 In this dialog box, there are four color bars which stand for the red, blue, green and gray colors. In the right of the color bars are the four scroll bars used for the adjustment of the four colors respectively. •...
-
Page 54: Hardware (Scanner
(1) Continuous tone color printer (such as dye-sublimation printer) The scanning resolution should be set the same as the resolution of the printer. (2) Halftone printer (such as laser or inkjet printer) The scanning resolution dependent on both the gray level you want and the resolution of the printer. - Page 55 just select “do not install SCSI card” and complete installing the driver. Q: Why the Scanner cable is only 100cm length to connect it to A: The cable that comes with scanner is in standard length. If you need a longer cable, you have to: 1.
- Page 56 then make sure the lock switch is at unlock position. (3) If the scan module moves twice and the LED indicator keeps blinking, the scanner likely has the hardware problem. Please contact the local dealer or supplier for the support. (4) Make sure the driver is installed.
-
Page 57: Others
card. If there is no “scanners” section in Device Manager, Please Click the “EPPSCSI Miniport Driver Vx.x” on the “SCSI Controllers” and then click the “Refresh” button and the “scanners” section will come out. After clicking the Refresh button and the Scanners selection still doesn’t come out. - Page 58 If the CD is out of order, please contact the dealer from whom you purchased the scanner. But for an instant solution to use the scanner, Please go to BENQ , Inc. web site to download newest version driver in: Please download the most update from the web: http://www.Benq.com.tw/global/service/scan/drivers.htm...
-
Page 59: Appendix B Spare Parts Ordering Information
ScanWit 2740S film scanner. B.1 Ordering Information When you place a parts order, be sure to indicate the following data on the list: Part Number Description Quantity Send your order to the Parts Distribution Department of BENQ Customer Service Division. -
Page 60: B.2 Spare Parts List
B.2 Spare Parts List Spare Parts for BENQ 2740S film scanner (99.S0661.X1X) REV.: 0 Issue Date: November 23, 2000 Part Number Description Comment Module 55.S0601.001 Main Board 55.61602.001 Power Board 55.61604.001 Panel Board 55.61605.001 Sensor Board 57.61624.001 CCD Module 25.30023.001 Cold Cathod Lamp 55.61606.001... - Page 61 DC motor (Smallest one) - For 22.80023.031 scanning Assy Gear +Rack+TL (Including 60.61614.001 E-Ring) 42.61602.011 GearB-2,(new with fiber-glass) 60.S0601.001 Assy Housing ID 60.61603.001 Assy Pully Note: This information is subject to change without notice. Please contact BENQ for most updated information.
- Page 62 Taoyuan 333, Taiwan, R.O.C. Tel:+886-2-2799-8600 Tel:+886-3-359-5000 Fax:+886-2-2799-8822 Fax:+886-3-359-9000 http://www.benq.com.tw http://www.benq.com.tw America Europe Benq Corporation America Inc. Benq Corporation Europe BV 2641 Orchard Parkway, Building 3, Ekkersrijt 4130, 5692 DC Son San Jose, CA 95134, U.S.A. The Netherlands Tel:+1-408-228-8000 Tel:+31 (499) 750 500 Fax:+1-408-228-8001 Fax:+31 (499) 750-599 http://www.benq.com...
-
Page 63: Appendix C Explosive Diagram
Appendix C Explosive Diagram Acer Communications & Multimedia... - Page 66 API Confidential Explosive Diagram Acer Communications No Copy/Reproduction allowed & Multimedia...
- Page 67 Acer Communications & Multimedia...
Need help?
Do you have a question about the 2720S and is the answer not in the manual?
Questions and answers