Sign In
Upload
Download
Table of Contents
Contents
Add to my manuals
Delete from my manuals
Share
URL of this page:
HTML Link:
Bookmark this page
Add
Manual will be automatically added to "My Manuals"
Print this page
×
Bookmark added
×
Added to my manuals
Manuals
Brands
Fujitsu Manuals
Storage
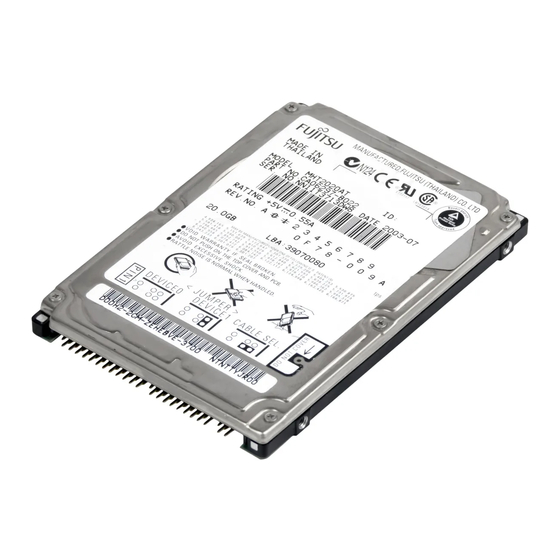
MHT2020AT
Product manual
Fujitsu MHT2020AT Product Manual
Fujitsu computer drive user manual
Hide thumbs
1
2
3
4
5
6
7
8
9
10
11
12
13
14
15
16
17
18
19
20
21
22
23
24
25
26
27
28
29
30
31
32
33
34
35
36
37
38
39
40
41
42
43
44
45
46
47
48
49
50
51
52
53
54
55
56
57
58
59
60
61
62
63
64
65
66
67
68
69
70
71
72
73
74
75
76
77
78
79
80
81
82
83
84
85
86
87
88
89
90
91
92
93
94
95
96
97
98
99
100
101
102
103
104
105
106
107
108
109
110
111
112
113
114
115
116
117
118
119
120
121
122
123
124
125
126
127
128
129
130
131
132
133
134
135
136
137
138
139
140
141
142
143
144
145
146
147
148
149
150
151
152
153
154
155
156
157
158
159
160
161
162
163
164
165
166
167
168
169
170
171
172
173
174
175
176
177
178
179
180
181
182
183
184
185
186
187
188
189
190
191
192
193
194
195
196
197
198
199
200
201
202
203
204
205
206
207
208
209
210
211
212
213
214
215
216
217
218
219
220
221
222
223
224
225
226
227
228
229
230
231
232
233
234
235
236
237
238
239
240
241
242
243
244
245
246
247
248
249
250
251
252
253
254
255
256
page
of
256
Go
/
256
Contents
Table of Contents
Bookmarks
Table of Contents
Table of Contents
For Safe Operation
Revision History
Overview of Manual
Operating Environment
Important Alert Items
Important Alert Messages
Manual Organization
CHAPTER 1 Device Overview
Features
Functions and Performance
Adaptability
Interface
Device Specifications
Specifications Summary
Model and Product Number
Power Requirements
Environmental Specifications
Acoustic Noise
Shock and Vibration
Reliability
Error Rate
Media Defects
Load/Unload Function
Advanced Power Management
Chapter 2 Device Configuration
Device Configuration
System Configuration
ATA Interface
Drive Connection
Drives Connection
Chapter 3 Installation Conditions
Dimensions
Mounting
Cable Connections
Device Connector
Cable Connector Specifications
Device Connection
Power Supply Connector (CN1)
Jumper Settings
Location of Setting Jumpers
Factory Default Setting
Master Drive-Slave Drive Setting
CSEL Setting
Power up in Standby Setting
CHAPTER 4 Theory of Device Operation
Outline
Subassemblies
Disk
Spindle
Actuator
Air Filter
Circuit Configuration
Power-On Sequence
Self-Calibration
Self-Calibration Contents
Execution Timing of Self-Calibration
Command Processing During Self-Calibration
Read/Write Circuit
Read/Write Preamplifier (Preamp)
Write Circuit
Read Circuit
Digital PLL Circuit
Servo Control
Servo Control Circuit
Data-Surface Servo Format
Servo Frame Format
Actuator Motor Control
Spindle Motor Control
Chapter 5 Interface
Physical Interface
Interface Signals
Signal Assignment on the Connector
Logical Interface
I/O Registers
Command Block Registers
Control Block Registers
Host Commands
Command Code and Parameters
Command Descriptions
READ SECTOR(S) (X'20' or X'21')
Read Multiple (X'c4')
READ DMA (X'C8' or X'C9')
READ VERIFY SECTOR(S) (X'40' or X'41')
WRITE SECTOR(S) (X'30' or X'31')
Write Multiple (X'c5')
WRITE DMA (X'CA' or X'CB')
Write Verify (X'3C')
RECALIBRATE (X'10' to X'1F')
SEEK (X'70' to X'7F')
Initialize Device Parameters (X'91')
Identify Device (X'ec')
Identify Device Dma (X'ee')
Identify Device
Set Features (X'ef')
Set Multiple Mode (X'c6')
Set Max Address
Execute Device Diagnostic (X'90')
READ LONG (X'22' or X'23')
WRITE LONG (X'32' or X'33')
Read Buffer (X'e4')
Write Buffer (X'e8')
IDLE (X'97' or X'E3')
IDLE IMMEDIATE (X'95' or X'E1')
STANDBY (X'96' or X'E2')
STANDBY IMMEDIATE (X'94' or X'E0')
SLEEP (X'99' or X'E6')
CHECK POWER MODE (X'98' or X'E5')
SECURITY DISABLE PASSWORD (F6H)
Table of Contents
1F7 (CM)
SECURITY ERASE UNIT (F4H)
SECURITY FREEZE LOCK (F5H)
SECURITY SET PASSWORD (F1H)
SECURITY ERASE PREPARE (F3H)
Table of Contents
(DH) X X X DV
1F1 (Fr)
1F2 (Sc)
1F3 (Sn)
1F4 (Cl)
1F5 (Ch)
1F7 (CM)
At Command Issuance (I-O Register Contents)
1F1 (Fr)
1F2 (Sc)
1F3 (Sn)
1F4 (Cl)
1F5 (Ch)
1F6 (Dh)
1F7 (ST) Status Information
At Command Completion (I-O Register Contents)
1F7 (St)
(DH) X X X DV
(ST) Status Information
1F1 (ER) Error Information
Device Configuration (X'b1')
1F2 (Sc)
1F3 (Sn)
1F4 (Cl)
1F5 (Ch)
1F6 (Dh) DV
(DH) X X X DV
1F1 (ER) Error Information
Download Micro Code (92H)
1F2 (Sc)
1F3 (Sn)
1F4 (Cl)
1F5 (Ch)
Error Posting
Command Protocol
PIO Data Transferring Commands from Device to Host
PIO Data Transferring Commands from Host to Device
Commands Without Data Transfer
DMA Data Transfer Commands
Other Commands
Overview
Ultra DMA Feature Set
Initiating an Ultra DMA Data in Burst
Phases of Operation
Ultra DMA Data in Commands
Pausing an Ultra DMA Data in Burst
The Data in Transfer
Terminating an Ultra DMA Data in Burst
Initiating an Ultra DMA Data out Burst
The Data out Transfer
Ultra DMA Data out Commands
Pausing an Ultra DMA Data out Burst
Terminating an Ultra DMA Data out Burst
Ultra DMA CRC Rules
Series Termination Required for Ultra DMA
PIO Data Transfer
Timing
Multiword Data Transfer
Initiating an Ultra DMA Data in Burst
Ultra DMA Data Transfer
Ultra DMA Data Burst Timing Requirements
Sustained Ultra DMA Data in Burst
Host Pausing an Ultra DMA Data in Burst
Device Terminating an Ultra DMA Data in Burst
Host Terminating an Ultra DMA Data in Burst
Initiating an Ultra DMA Data out Burst
Sustained Ultra DMA Data out Burst
Device Pausing an Ultra DMA Data out Burst
Host Terminating an Ultra DMA Data out Burst
Device Terminating an Ultra DMA Data out Burst
Power-On and Reset
CHAPTER 6 Operations
Device Response to the Reset
Response to Power-On
Response to Hardware Reset
Response to Software Reset
Response to Diagnostic Command
Power Save Mode
Defect Processing
Power Commands
Spare Area
Alternating Processing for Defective Sectors
Read-Ahead Cache
DATA Buffer Structure
Caching Operation
Using the Read Segment Buffer
Write Cache
Cache Operation
Acronyms and Abbreviations
Comment Form
Advertisement
Quick Links
1
Features
2
Interface
3
Device Specifications
4
Device Configuration
5
Ata Interface
Download this manual
C141-E192-01EN
MHT2080AT, MHT2060AT, MHT2040AT
MHT2030AT, MHT2020AT
DISK DRIVES
PRODUCT MANUAL
Table of
Contents
Previous
Page
Next
Page
1
2
3
4
5
Advertisement
Chapters
Table of Contents
13
Table of Contents
157
Table of Contents
162
Table of Contents
Need help?
Do you have a question about the MHT2020AT and is the answer not in the manual?
Ask a question
Questions and answers
Related Manuals for Fujitsu MHT2020AT
Storage Fujitsu MHT2080BH Product Manual
Fujitsu computer drive user manual (264 pages)
Storage Fujitsu MHT2060BH - Mobile 60 GB Hard Drive Installation Manual
Manual/user guide (12 pages)
Storage Fujitsu MHT2080AH - 80GB 5400 RPM PATA Hard Drive Product Manual
Disk drives (250 pages)
Storage Fujitsu MHT2040AT Product Manual
Fujitsu computer drive user manual (256 pages)
Storage Fujitsu MHK2120AT Product Manual
(11 pages)
Storage Fujitsu MHW2040AT - Mobile 40 GB Hard Drive User Manual
Manual/user guide (15 pages)
Storage Fujitsu MHW2080AT Product Manual
Disk drives (278 pages)
Storage Fujitsu MHW2040BH - Mobile 40 GB Hard Drive Installation Manual
Manual/user guide (12 pages)
Storage Fujitsu MHY2250BH Product/Maintenance Manual
Disk drives (322 pages)
Storage Fujitsu MHW2040BS Product Manual
Fujitsu computer drive user manual (296 pages)
Storage Fujitsu MHA2021AT Product Manual
(177 pages)
Storage Fujitsu MHW2160BJ Product/Maintenance Manual
Disk drives (320 pages)
Storage Fujitsu MHV2200BT Product Manual
(292 pages)
Storage Fujitsu MHV2160BT Maintenance Manual
Disk drive (42 pages)
Storage Fujitsu MHU2100AT Maintenance Manual
2.5-inch hard disk drive with a built-in controller (40 pages)
Storage Fujitsu MHU2100AT Product Manual
Mhu series, 2.5-inch hard disk drives (278 pages)
This manual is also suitable for:
Mht2060at
Mht2030at
Mht2080at
Mht2040at
Table of Contents
Save PDF
Print
Rename the bookmark
Delete bookmark?
Delete from my manuals?
Login
Sign In
OR
Sign in with Facebook
Sign in with Google
Upload manual
Upload from disk
Upload from URL


Need help?
Do you have a question about the MHT2020AT and is the answer not in the manual?
Questions and answers