
Related Manuals for RCA STB7766G1


Summary of Contents for RCA STB7766G1
- Page 1 STB7766G1 www.1800customersupport.com/RCA It is important to read this instruction book prior to using your new product for the fi rst time. - 24 -...
-
Page 2: Ac Adapter
SAFETY PRECAUTIONS The lightning fl ash with an arrowhead symbol, within the equilateral triangle, is intended to alert the user to the presence of uninsulated “dangerous voltage” within the product’s enclosure that may be of suffi cient magnitude to cause an electric shock. CAUTION RISK OF ELECTRIC SHOCK The exclamation point within the equilateral triangle is... -
Page 3: Aaa Batteries (For Remote Control)
IMPORTANT SAFETY INSTRUCTIONS Read these instructions. Keep these instructions. Heed all warnings. Follow all instructions. Do not use this apparatus near water. Clean only with a dry cloth. Do not block any of the ventilation openings. Install in accordance with the manufacturer’s instructions. -
Page 4: Table Of Contents
ACCESSORIES AC Adapter ..........................x 1 Remote Control ........................x 1 AAA Batteries (for Remote Control) ..................x 2 RF Cable ..........................x 1 CONTENTS Safety Precautions ........1 On-Screen Menu-Option ......15-17 Important Safety Instructions ..... 2 Clock ..............15 Accessories .......... -
Page 5: Remote Control
REMOTE CONTROL • Point the remote control at the REMOTE SENSOR located on the unit. • When there is a strong ambient light source, the perform ance of the infrared REMOTE SENSOR may be degraded, causing unreliable operation. • The recommended effective distance for remote operation is about 16 feet (5 meters). To Install Batteries 1. -
Page 6: Quick Start Guide
QUICK START GUIDE STEP 1: CONNECTIONS When this converter box is powered on, digital signals from the ANTENNA RF IN jack are converted to analog signals and output from the TV RF OUT jack or the VIDEO OUT jack. When this converter box is in standby state, analog RF TV signals pass through the box and output from the TV RF OUT jack. - Page 7 QUICK START GUIDE STEP 2: TURNING ON THE UNIT 1. While the AC adapter is connected and the unit is on standby, power will be consumed and the power indicator is RED. 2. Press the STANDBY/ON button to turn on the unit. The power indicator is GREEN. STEP 3: SETTING THE OSD LANGUAGE 1.
- Page 8 QUICK START GUIDE DISPLAY CONTENTS When receiving a 16:9 digital broadcast signal, STB7766G1 Digital TV Converter will convert the 16:9 picture to fi t a 4:3 TV screen. Enter Aspect Ratio Menu to select among four conversion modes. AUTO MODE (DEFAULT) Displays all programs based on the aspect ratio of the program to 4:3 TV screen.
-
Page 9: Quick Start Guide
QUICK START GUIDE Letter Box Mode The entire 16:9 picture will be displayed on your TV, but there will be unused areas (black bars) along the top and bottom edges of your TV screen. Letter Box SQUEEZED MODE The entire 16:9 picture will be fi lled up your TV display but there will be distorted in the picture. Squeezed USING A 16:9 TV WITH THE DIGITAL TV CONVERTER It is recommended that you use the Squeezed option to obtain the best picture format. -
Page 10: Control Reference Guide
CONTROL REFERENCE GUIDE Remote Control MUTE Button Press to turn off the sound. MENU Button Press to display the on-screen menu or switch back to the previous menu screen. CURSOR ( , , , ) Buttons Use to highlight selections on a menu screen and adjust certain settings. -
Page 11: Control Reference Guide
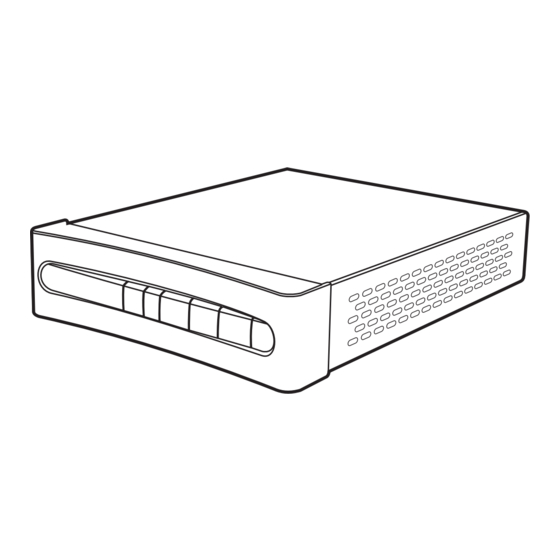
CONTROL REFERENCE GUIDE Front View Back View Remote Sensor TV RF OUT Terminal Receives infrared signals from the remote Use to connect your TV using a coaxial cable. control. When this Conventer Box is powered on, CH-/CH+ Buttons analog RF signals output from the TV RF Press to select the channel upward or OUT terminal. -
Page 12: Connections
CONNECTIONS When this converter box is powered on, digital signals from the ANTENNA RF IN jack are converted to analog signals and output from the TV RF OUT jack or the VIDEO OUT jack. When this converter box is in standby state, analog RF TV signals pass through the box and output from the TV RF OUT jack. -
Page 13: Power Supply
POWER SUPPLY Using the AC Adapter The supplied 9V adapter operates on AC 120V ~ 60Hz. While the AC adapter is connected and the unit is on standby, power will be consumed and the power indicator is RED. Cautions: • The AC adapter included with this unit is for its use only. Do not use it with other equipment. •... -
Page 14: Basic Operation
BASIC OPERATION Searching for Channels Automatically 1. Press the MENU button on the remote control. 2. Use the buttons to select the CHANNEL menu. 3. Use the button to select Channel Scan and press the ENTER button or the button to start scanning. Notes: •... -
Page 15: On-Screen Menu-Channel
ON-SCREEN MENU - CHANNEL Use the menu confi guration to set detailed options for each function. Press the MENU button on the remote control to open the menu screen. • To return to the previous menu press the MENU button on the remote control. •... -
Page 16: On-Screen Menu-Option
ON-SCREEN MENU - CHANNEL Output Channel You can select NTSC RF output channel. 1. Press the MENU button on the remote control. 2. Use the buttons to select the CHANNEL menu. 3. Use the button to select Output Channel then press the ENTER button or the button. -
Page 17: Language
ON-SCREEN MENU - OPTION Language 1. Press the MENU button on the remote control. 2. Use the buttons to select the OPTION menu. 3. Use the button to select Language then press the ENTER button or the button. 4. Use the buttons to select English / Español DCC View (Spanish) / Français (French). -
Page 18: On-Screen Menu-Option
ON-SCREEN MENU - OPTION DCC View Use this to set the character font. Only DCC (Digital Closed Caption) is set to Custom, DCC View is activated. 1. Press the MENU button on the remote control. 2. Use the buttons to select the OPTION menu. Standard 3. -
Page 19: On-Screen Menu-Lock
ON-SCREEN MENU - LOCK Lock System 1. Press the MENU button on the remote control. 2. Use the buttons to select the LOCK menu. 3. Use the button to position the cursor on the input fi eld and enter password. If you have not specifi... -
Page 20: Tv Rating-Children
ON-SCREEN MENU - LOCK TV Rating-Children TV Rating-Children is for classifying the age level of TV programs for children. 1. Press the MENU button on the remote control. 2. Use the buttons to select the LOCK menu. 3. Use the buttons to select TV Rating-Children then press the ENTER button or the button. -
Page 21: Movie Rating
ON-SCREEN MENU - LOCK Movie Rating 1. Press the MENU button on the remote control. Permits all programs 2. Use the buttons to select the LOCK menu. 3. Use the buttons to select Movie Rating then press the ENTER button or the button. -
Page 22: Maintenance
MAINTENANCE Cleaning the Unit • Be sure to turn the unit off and disconnect the AC adapter before maintaining the unit. • Wipe the unit with a dry soft cloth. If the surfaces are extremely dirty, wipe clean with a cloth that has been dipped in a weak soap-and-water solution and wrung out thoroughly. -
Page 23: Limited Warranty
Model no....................Product name ..............Type of set ......................................Serial no....................Invoice no................. Date purchased ..................Dealer name ..............FOR SERVICE AND REPAIR, PLEASE VISIT www.1800customersupport.com/RCA Specifi cations and external appearance are subject to change without notice. - 22 -... - Page 24 © 2008 AVC Multimedia Trademark(s) ® Registered Marca(s) ® Registrada(s) Printed in China - 23 - 811-776691W052...
Need help?
Do you have a question about the STB7766G1 and is the answer not in the manual?
Questions and answers