Table of Contents
Advertisement
Advertisement
Table of Contents

Related Manuals for Samsung YV-150


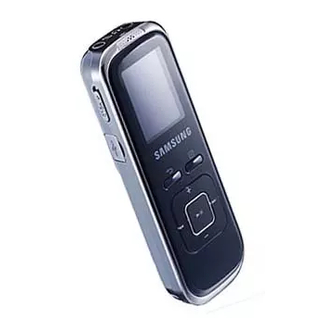
Summary of Contents for Samsung YV-150
- Page 1 Voice REC YV-150...
-
Page 2: For Your Safety
Read this manual carefully to ensure proper use of the player and For Your Safety to avoid any danger or physical damage. WARNING Failing to heed the player instructions may cause serious injury. Product Use Improper use can result in explosion, To avoid your hearing damage fire or electric shock. - Page 3 Always use the accessories Please be aware that we provided by or approved by claim no responsibility for Samsung. damage from data loss due to breakdown, repair or other causes. Do not spray water on the Avoid malfunction player.
-
Page 4: Table Of Contents
Basic Information.........7 Listening to Voice or Music File ............7 Components ........38 Section Repeat .........10 Button Functions Creating a Playlist Using Samsung ....11 Screen Display Information ........39 Media Studio Connecting the Earphone & Microphone To Play a Playlist .....................12 ...42... - Page 5 Chapter 4. Setting Chapter 6. Appendix Menu Tree ...........62 Setting ..........54 Product Specifications ......63 .......54 Setting Date/Time ..55 Setting Display Off / Sleep Timer .....56 Setting Language / Beep ......57 Setting Volume Limit ........58 Setting Default ......59 System Information Chapter 5. Troubleshooting Troubleshooting.........60...
-
Page 6: Product Features
Product Features Long & High Quality Recording! MP3, WMA, and TS3 Playback You can play a voice file in MP3 or TS3 You can record the high quality from SP formats. (Standard), HQ (High Quality) and SHQ (Super High Quality) in addition to a long You can play a music file in MP3 or WMA recording time. -
Page 7: Basic Information
Basic Information Components Checking the Accessories Player USB Cable External Device Cable External Microphone Phone Cable Phone Recording Earphones Hand Strap Adaptor Installation CD AAA / LR03 Batteries Design of accessories is subject to change for the purpose of improvement, without notice. - Page 8 Basic Information Components (continued) Front & Left Side External Device / Microphone Jack Earphone Jack Built-in Microphone Screen Display Hold Switch USB Connection Port Back [ ] Button Menu [ ] Button Volume Control Button Move File / Quick Search Button Power, Play / Pause, Select Button...
- Page 9 Rear & Right Side Hand Strap Hook Recording Button Built-in Speaker Folder / Bookmark Button Section Repeat / Delete Button Battery Cover [Strap Fastening]...
-
Page 10: Button Functions
Basic Information Button Functions Buttons Functions and Use Press and hold to turn the power on/off. Press to play/pause. Press to control the volume. Press to move the previous or next file one by one. Press and hold to fast scan files. Press to move to the previous level. -
Page 11: Screen Display Information
Basic Information Screen Display Information Voice Recording ” ’ ˝ Œ Ô ´ 0030 ˇ ¨ VOICE_0030 ˆ Recording Ø ∏ Mode Display Remaining Recording Time Display Voice Recording Quality Display Record / Standby Display Noise Reduction Display Hold Display VOR(Voice Operated Recording) Remaining Capacity of Battery Display Dispaly... -
Page 12: Connecting The Earphone & Microphone
Basic Information Connecting the Earphone & Microphone Connecting the Earphone √ Top Earphones Connecting the External Microphone √ Top External Microphone... -
Page 13: Inserting The Battery
Basic Information Inserting the Battery Slide the battery cover in the direction of the arrow as shown in the diagram and open it. Insert rightly the batteries fitting their poles (+,-). Be careful not to reverse the poles of the batteries. -
Page 14: Basic Use
Basic Use Turning the Power On & Off Turning the Power On Press and hold the [ ] button. 0029 Power is turned on. VOICE_0030 Standby Turning the Power Off Press and hold the [ ] button. Power is turned off. If you press and hold the [REC] button in power-off condition, the player turns on and voice recording will start. -
Page 15: Volume Control
Volume Control Press the [ ] button to control the volume. The volume bar appears. You can control the volume from 0 to 30. Vol. 15 Press the [ ] button to increase the volume or the [ ] volume to decrease it. - Page 16 Basic Use (continued) Searching for files with <File Browser> Search easily for files using the <File Browser> function. Press and hold the [ ] button to move to the main menu. Press the [ ] button to select <File Browser> and press the [ ] button.
- Page 17 File Deletion Press the [ ] button during pausing to select <File Browser> and press the [ ] button. Use the [ ] button to select the file you want to delete in the file list and press and hold the [DEL] button. Delete? Press the [ ] button to select <YES>...
-
Page 18: Loading Your Desired File
Loading Your Desired File Use Media Studio to transfer music files Installing Samsung Media Studio from your PC to the player. Install the program on PCs running Windows 2000 or Windows XP after logging on with the Administrator account. Please refer to the PC user manual on how to log on with the CAUTION Administrator account. -
Page 19: Connecting To Your Pc
Loading Your Desired File Connecting to your PC Connect the small end (A) of the USB cable to the USB connection port of the player. Connect the other end (B) of the USB cable to the USB port ( ) of your PC. <USB Connected>... -
Page 20: Adding Files/Folders In Samsung Media Studio
Loading Your Desired File Adding Files/Folders in Samsung Media Studio Media Studio enables you to select and organize files and folders in preparation for transfer to your player. [YV-150] [YV-150] Please refer to Help for more information on how to use Media Studio. - Page 21 Connect the player to your PC. Before you start! √ Page 18 Media Studio must be installed on your PC. Media Studio will automatically start when the player is connected to your PC. If the program does not start automatically, double-click the Media Studio icon on the desktop.
-
Page 22: Transferring Files To The Player With Samsung Media Studio
Loading Your Desired File Transferring Files to the Player with Samsung Media Studio Perform the following steps to transfer files from your PC to the player. [YV-150] [YV-150] Portable window Music recognition technology and related data are provided by Gracenote and Gracenote CDDB ®... - Page 23 Connect the player to your PC. Before you start! √ Page 18 Media Studio must be installed on your PC. Media Studio will automatically start when the player is connected to your PC. If the program does not start automatically, double-click the Media Studio icon on the desktop.
-
Page 24: Using As A Removable Disk
You can use the player as a removable Using as a Removable Disk storage device. Connect the player to your PC. Before you start! Open files/folders to transfer from your PC. Open <My Computer> ➝ <V150> from the desktop. Select the files/folders to transfer from your PC and drag and drop them to a folder of your choice in the <V150>. -
Page 25: Disconnecting From Your Pc
Follow the steps below to prevent damage to the Disconnecting from your PC player and data when disconnecting from your PC. Place the mouse cursor on the top the@ icon on the taskbar at the bottom right corner of the desktop and click the left mouse button. -
Page 26: Installing Tts
Installing TTS TTS (Text-to-Speech) is a converting program that converts text into voice. TTS reads out the text you entered on your PC in a human voice, a great help to enhance your language skill. Before you start! Insert the installation CD provided with the player into the CD-ROM drive. Click <Install TTS>. -
Page 27: Using Tts
Using TTS Click the TTS icon on your desktop. Before you start! Œ ´ ˇ ¨ ˆ Ø ∏ ” ’ ˝ Ô ¯ Spring has come. Ò Ú Æ ı ˜ New: To create a new text. Print: To print the text file. Open: To open a file on your PC. - Page 28 Using TTS (continued) To set Option Dictionary Press the [Option ] button. In the Dictionary option, you can " Define Setting Reading" for the words. For instance, if you want the system to read the Language: To select the lanuguage for word “IT”...
-
Page 29: Creating A Ts3 File
Creating a TS3 File You can use the TTS program to convert text into a voice file in TS3 format. Click the TTS icon on your desktop. Before you start! Enter the text that you want to convert into a voice file. Press the [Generation] Button. -
Page 30: Voice Recording
Press the [REC] button. Voice recording starts. Recording Time Mode Model YV-150 X(512MB) 33 hours 16 hours 8 hours YV-150 Z(1GB) 66 hours 33 hours 16 hours YV-150 Q(2GB) 132 hours 66 hours 32 hours... -
Page 31: To Stop Recording
To stop recording Press the [REC] button again. Voice recording stops. The recording file is automatically stored in the selected folder. You can save a maximum of 300 files in a folder. Press the [ ] button if you want to pause recording. If you press and hold the [REC] button in power-off condition, the player turns on and voice NOTE recording will start. -
Page 32: Using Voice Recording Menu
Voice Recording Using Voice Recording menu To select Voice Recording Quality Press the [ ] button in standby mode. The voice recording menu appears. Voice REC Qua Press the [ ] button to select <Voice REC Quality> and press the [ ] button. - Page 33 To set VOR <Voice Operating Recording> You can set the player to record only if a sound or voice is detected. Press the [ ] button in standby mode. The voice recording menu appears. Voice REC Qua Press the [ ] button to select <VOR>...
-
Page 34: Recording With A Phone
Voice Recording Recording with a phone You can record phone conversation in your player. Before you start! Turn on the player and check the battery capacity. Phone Cable External Device Cable Phone Recording Adaptor Connect the phone connector to the phone recording adapter. Connect the phone to the phone recording adapter using the phone cable. -
Page 35: Listening To Voice Or Music File
Listening to Voice or Music File You can listen to a recorded file or Listening to Voice or Music File music file that is transferred to the player. Turn on the player and check the battery capacity. Before you start! Press and hold the [ ] button to move to the main menu. -
Page 36: To Pause Playback
Listening to Voice or Music File Listening to Voice or Music File (Continued) To pause playback Press the [ ] button while the file is playing. The file playback will be paused. Press the [ ] button again. The file will play from the point where it stopped. Power is automatically turned off when none of the buttons have been pressed for a certain time in the standby and the music pause mode for power saving purposes. - Page 37 To play from the beginning of the current file Press the [ ] button after 3 seconds of play. The current file starts playing from the beginning. To play the previous/next file Press the [ ] button within 3 seconds of play. The previous file will start playing.
-
Page 38: Section Repeat
Listening to Voice or Music File This function enables you to listen to specific parts of a file Section Repeat repeatedly. Recommended for language learning. Turn on the player and check the battery capacity. Before you start! To set a section to repeat Play a file of your choice. -
Page 39: Creating A Playlist Using Samsung Media Studio
Listening to Voice or Music File Creating a Playlist Using Samsung Media Studio A playlist is a list of your favorite songs. [YV-150] [YV-150] Click <My Album> on the top of Media Studio. The <My Album> window appears. Click <New Album> on the bottom. - Page 40 Listening to Voice or Music File Creating a Playlist Using Samsung Media Studio (Continued) Adding Music files to a Playlist Click <My PC> on the top of Media Studio. The <My PC> window appears. [YV-150] Click <My Album> in the right corner of the window.
-
Page 41: To Play A Playlist
Listening to Voice or Music File To Play a Playlist For more information, see pages 39~40 to see how to create and transfer Before you start! playlists to your player. Press and hold the [ ] button to move to the main menu. -
Page 42: Using Voice & Music Play Menu
Listening to Voice or Music File Using Voice & Music Play menu To select AVSS (Auto Voice Searching System) You can set to detect only the section of recorded contents on the voice file before playing it. Press the [ ] button in voice or music play mode. - Page 43 The <Voice> mode in <DNSe> will be displayed only if you play a voice file. What is DNSe? NOTE DNSe is a sound effect function for the player developed by Samsung and consists of 3D. The 3D adds a stereophonic sound effect to the music.
-
Page 44: Setting A Bookmark
Setting a Bookmark Setting a Bookmark Once you bookmark on an important part of a file, you can enjoy it at any time you want. Turn on the player and check the battery capacity. Before you start! Press and hold the [ ] button to move to the main menu. - Page 45 To play a bookmark Press and hold the [ ] button to move to the main menu. Press the [ ] button to select <Bookmark> and press the [ ] button. The bookmark list appears. Bookmark Press the [ ] button to select the desired bookmark and press the [ ] button.
-
Page 46: Listening To Fm Radio
Listening to FM Radio Listening to FM Radio Connect the earphones, then turn on the player, and check the battery Before you start! capacity. Press and hold the [ ] button to move to the main menu. Press the [ ] button to select <FM Radio>... -
Page 47: To Switch To Manual Mode
To switch to manual mode Select this mode if you want to manually search through the FM band one frequency at a time. Press the [ ] button in preset mode. The preset mode menu appears. Go to Manual Mo Delete Preset Press the [ ] button to select... -
Page 48: To Automatically Search For Frequencies
Listening to FM Radio Listening to FM Radio (Continued) To automatically search for frequencies Press and hold [ ] button in manual mode. Manual Mode The broadcast station frequency nearest from the point the button is MANUAL Mono released will be searched. 93.9 Auto Searching.. -
Page 49: Setting Fm Presets
Listening to FM Radio Setting FM Presets You can preset favorite radio frequencies for later use. To automatically set Presets Press the [ ] button in FM Radio mode. The FM Radio menu appears. Go to Preset Mod Press the [ ] button to select <Auto Preset>... - Page 50 Listening to FM Radio Setting FM Presets (Continued) To manually set Presets Press the [ ] button the desired frequency in manual mode. Go to Preset Mod Press the [ ] button. Add Preset The manual mode menu appears. Auto Preset FM Sensitivity Press the [ ] button to select <Add Preset>.
-
Page 51: To Delete Presets
Listening to FM Radio To Delete Presets Press the [ ] button to select the preset frequency you want to delete and press the [ ] button Go to Manual Mo in preset mode. Delete Preset The preset mode menu appears. Auto Preset Press the [ ] button to select <Delete Preset>... -
Page 52: Using Fm Radio Menu
Listening to FM Radio Using FM Radio menu To set FM Sensitivity The higher FM sensitivity is, the more frequencies that can be received. Press the [ ] button in FM Radio mode. The FM Radio menu appears. Go to Manual Mo Press the [ ] button to select <FM Sensitivity>... -
Page 53: Moving To The Playback Screen
Moving to the Playback Screen Turn on the player and check the battery capacity. Before you start! Press and hold the [ ] button to move to the main menu. Press the [ ] button to select <Now Playing> and press the [ ] button. -
Page 54: Chapter 4. Setting
Setting Setting Date/Time You can set the current date and time. Press and hold the [ ] button to move to the main menu. Press the [ ] button to select <Settings> and press the [ ] button. The setting menu appears. Press the [ ] button to select <Date/Time Set>... -
Page 55: Setting Display Off/Sleep Timer
Setting Setting Display Off/Sleep Timer To set Display Off If no button is pressed within the time set shown below, the display screen will automatically turn off. Press any button to turn it back on. Press and hold the [ ] button to move to the main menu. -
Page 56: Setting Language/Beep
Setting Setting Language/Beep To set Language You can set the preferred language for the menu. Press and hold the [ ] button to move to the main menu. Press the [ ] button to select <Settings> and Settings press the [ ] button. -
Page 57: Setting Volume Limit
Setting Setting Volume Limit To set Volume Limit You can avoid hearing damage by setting the limit of the volume when using the earphone. Press and hold the [ ] button to move to the main menu. Settings Press the [ ] button to select <Settings>... -
Page 58: Setting Default
Setting Setting Default This will return the settings to the factory default. Press and hold the [ ] button to move to the main menu. Press the [ ] button to select <Settings> Set as and press the [ ] button. default? The setting menu appears. -
Page 59: System Information
Setting You can check information on the firmware version, System Information memory capacity. Press and hold the [ ] button to move to the main menu. Firmware Ver. Press the [ ] button to select <Settings> 1.00 WA and press the [ ] button. -
Page 60: Troubleshooting
Troubleshooting If a malfunction is experienced, check the following. If the problem persists, contact a Samsung Service Center near you. Checkpoints & Troubleshooting Problems If the player ran out of the battery, it doesn’t turn on. Power will not turn on. - Page 61 Files or data are damage not only to files/data but also to the player. You have missing. to be extra cautious as Samsung is not responsible for data loss. Abnormal Play Time Check if the file is in VBR (Variable Bit Rate) format.
-
Page 62: Menu Tree
Menu Tree You can quickly view the menu structure. Menu Selection Voice REC File Browser Bookmark FM Radio Settings Now Playing Date/Time Set Display Off Sleep Timer Language Beep Volume Limit Default Set About... -
Page 63: Product Specifications
Product Specifications Model name YV-150 Power 1.5V X 2 (AAA/LR03 Alkaline Battery) MPEG1/2/2.5 Layer3(8Kbps ~ 320Kbps, 8KHz ~ 48KHz) Formats Supported WMA(48kbps~192kbps, 22kHz~48kHz), TS3 Available number of folders / files Folder: up to 400, File: up to 2000 Earphone Output 22mW/CH (16Ω) - Page 64 License The product player accompanying this user manual is licensed under certain intellectual property rights of certain third parties. This license is limited to private non-commercial use by end-user consumers for licensed contents. No rights are granted for commercial use. The license does not cover any product player other than this product player and the license does not extend to any unlicensed product player or process conforming to ISO/IEC 11172-3 or ISO/IEC 13818-3 used or sold in combination with this product player.
-
Page 65: Contact Samsung World Wide
Contact SAMSUNG WORLD WIDE If you have any questions or comments relating to Samsung products, please contact the SAMSUNG customer care center. Country Customer Care Center Web Site CANADA 1-800-SAMSUNG (726-7864) www.samsung.com/ca MEXICO 01-800-SAMSUNG (726-7864) www.samsung.com/mx U.S.A 1-800-SAMSUNG (726-7864) www.samsung.com/us... - Page 66 0120-327-527 www.samsung.com/jp MALAYSIA 1800-88-9999 www.samsung.com/my PHILIPPINES 1800-10-SAMSUNG (726-7864) www.samsung.com/ph SINGAPORE 1800-SAMSUNG (726-7864) www.samsung.com/sg THAILAND 1800-29-3232, 02-689-3232 www.samsung.com/th TAIWAN 0800-329-999 www.samsung.com/tw VIETNAM 1 800 588 889 www.samsung.com/vn Turkey 444 77 11 www.samsung.com.tr SOUTH AFRICA 0860-SAMSUNG (726-7864) www.samsung.com/za U.A.E 800-SAMSUNG (726-7864)8000-4726 www.samsung.com/mea...
- Page 67 REV 2.0...
Need help?
Do you have a question about the YV-150 and is the answer not in the manual?
Questions and answers