Table of Contents
Advertisement
Quick Links
Advertisement
Table of Contents

Related Manuals for Planet WAP-6000


Summary of Contents for Planet WAP-6000
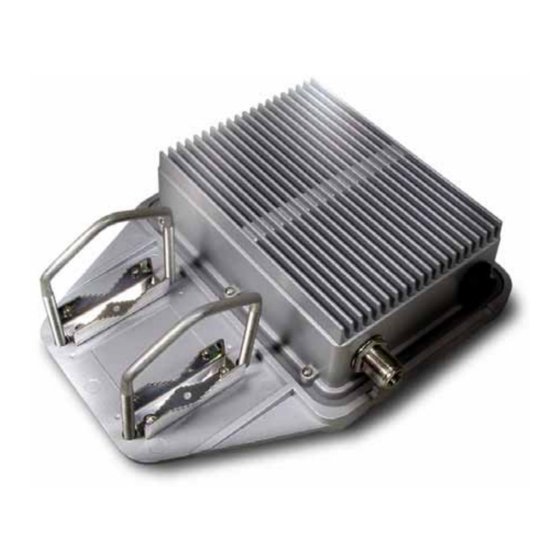
- Page 1 802.11g WLAN Outdoor AP with Bridge WAP-6000 User’s Manual Version 2.0...
-
Page 2: Fcc Caution
Copyright Copyright© 2005 by PLANET Technology Corp. All rights reserved. No part of this publication may be reproduced, transmitted, transcribed, stored in a retrieval system, or translated into any language or computer language, in any form or by any means, electronic, mechanical, magnetic, optical, chemical, manual or otherwise, without the prior written permission of PLANET. - Page 3 Do not dispose of WEEE as unsorted municipal waste and have to collect such WEEE separately. Revision User’s Manual for PLANET 802.11g WLAN Outdoor AP with Bridge Model: WAP-6000 Rev: 1.0 (December, 2005) Part No. EM-WAP6000v2...
-
Page 4: Table Of Contents
TABLE OF CONTENTS CHAPTER 1 INTRODUCTION....................1 1.1 P ......................1 ACKAGE ONTENTS 1.2 F ......................... 1 EATURES 1.3 S ........................2 PECIFICATION 1.5 W ....................3 IRELESS ERFORMANCE CHAPTER 2 HARDWARE INSTALLATION ................4 CHAPTER 3 INITIAL SETUP....................7 3.1 S ...................... -
Page 5: Chapter 1 Introduction
30 times faster than T1 and ADSL connection speed. There are four operating modes supported in WAP-6000: AP, AP with WDS (Bridge), Wireless Client, and Repeater. The multiple operation modes selection makes WAP-6000 suitable for widely open space applications such as WISPs, campuses, and airports. -
Page 6: Specification
1.3 Specification Model WAP-6000 Standard IEEE 802.11b, 802.11g Signal Type DSSS (Direct Sequence Spread Spectrum) Modulation OFDM with BPSK, QPSK, 16QAM, 64QAM, DBPSK, DQPSK, CCK Port 10/100Mbps RJ-45 port * 1 Antenna Connector Reverse N-type male * 1 Output Power... -
Page 7: Wireless Performance
Keep the number of walls, or ceilings between AP and clients as few as possible; otherwise the signal strength may be seriously reduced. Place WAP-6000 in open space or add additional WAP-6000 as needed to improve the coverage. -
Page 8: Chapter 2 Hardware Installation
WAP-6000. 1. Locate an optimum location for the WAP-6000. 2. Assemble the antennas to WAP-6000. Try to place them to a position that can best cover your wireless network. The antenna’s position will enhance the receiving sensitivity. 3. Using provided CAT5 waterproof cable; connect the waterproof connector port of the WAP-6000 to the ODU port of DC Injector. - Page 9 OUTDOOR INSTALLATION WARNING IMPORTANT SAFETY PRECAUTIONS: LIVES MAY BE AT RISK! Carefully observe these instructions and any special instructions that are included with the equipment you are installing. CONTACTING POWER LINES CAN BE LETHAL. Make sure no power lines are anywhere where possible contact can be made.
- Page 10 Refer to the National Electrical Code for grounding details. IF A PERSON COMES IN CONTACT WITH ELECTRICAL POWER, AND CANNOT MOVE: DON’T TOUCH THAT PERSON, OR YOU MAY BE ELECTROCUTED. Use a non-conductive dry board, stick or rope to push or drag them so they no longer are in contact with electrical power.
-
Page 11: Chapter 3 Initial Setup
Locator shows you the Device Name, Device Type, IP Address, Ethernet MAC Address and Firmware Version. Assign an IP address to WAP-6000. Just click on the “IP Setting” icon. Then you will see a “Login” dialog box for asking user name and password. Please input your user name and password into the column. - Page 12 Otherwise, you can manually setup IP address. Keep the default IP setting if you are not familiar with TCP/IP setting. After you finish IP setting, click on “Apply” to save the configuration. Please click “Web” icon and refer to next chapter for more configuration of WAP-6000.
-
Page 13: Chapter 4 Web Configuration
2. Enter the IP address of your WAP-6000 in the address field (default IP address is http://192.168.1.1). Please note that your PC’s IP address should be on the same IP subnet of the WAP-6000. For example, you can configure your PC’s IP address to 192.168.1.2 if WAP-6000 is with IP 192.168.1.1. -
Page 14: Wireless Station List
4.1.2 Wireless Station List This page can help user identify current clients who already associated to the WAP-6000. You can also click on the MAC address column then the system will show the detail technical information for each wireless station. -
Page 15: System Properties
4.1.3 System Properties Device Name You may assign any name to the WAP-6000. Memorable, Unique names are helpful especially if you are employing multiple access points on the same network. The device name needs to be less than 32 characters. After verify the name you input and click “Apply”... -
Page 16: Ip Settings
Administrator Name You change the administrator login name in this field. Password Type the new password here if you need to change it. Confirm Password Re-type the new password again, then click the “Apply” below to save the changes. 4.1.5 IP Settings This page can configure system IP address. -
Page 17: Wireless Network
The wireless security settings configure the security of your wireless network. There are three wireless security mode options supported by the WAP-6000: WEP, WPA-PSK and WPA. (WPA stands for Wi-Fi Protected Access, which is a security standard stronger than WEP encryption. WEP stands for Wired Equivalent Privacy.) - Page 18 WPA security mode. Once you setup the AP to work in security mode, all wireless stations will also need to have corresponding settings. System default setting is “No Security”. Authentication type Select the appropriate value - "Open System" or "Shared Key". All Wireless stations must then be set to use the same method.
- Page 19 Select the type of algorithm, TKIP or AES. Group key update Enter the time interval in seconds which instructs the WAP-6000 how often it interval should change the encryption keys. Usually the security level will be higher if you set the period shorter to change encryption keys more often.
- Page 20 Select the type of algorithm, TKIP or AES. Group key update Enter the time interval in seconds which instructs the WAP-6000 how often it interval should change the encryption keys. Usually the security level will be higher if you set the period shorter to change encryption keys more often.
-
Page 21: Wireless Advanced Settings
This value indicates the frequency interval of the beacon. A beacon is a (20-1000) packet broadcast by the WAP-6000 to keep the network synchronized. A beacon includes the wireless LAN service area, the AP address, the Broadcast destination address, a time stamp, Delivery Traffic Indicator Maps, and the Traffic Indicator Message (TIM). - Page 22 Protection Mode should remain default value (Auto) unless you are having severe problems with your 11g Wireless LAN products not being able to transmit to the WAP-6000 in an environment with heavy 802.11b traffic. To enable this function boosts the WAP-6000’s ability to catch all 11g Wireless transmissions but will severely decrease performance.
-
Page 23: Mac Filter
4.1.9 MAC Filter Click on the “Enable MAC Filtering” button, the rule have allow only station in list (accept) or allow any station unless in list (deny). You can edit the MAC Filtering Table in you need associated the access point. -
Page 24: Firmware Upgrade
Enter the location of the new firmware file in the file path field, or click the “Browse” button to find the firmware upgrade file. Then click on the “Upgrade” button, and follow the on-screen instructions. The whole firmware upgrade process will take around 60 seconds. 4.1.12 Reboot Click on “Reboot” button to restart WAP-6000. -
Page 25: Wireless Client Mode
Client” mode and click “Apply” at System Properties page. You also need to reboot the WAP-6000. After the system reboot is done, you can see the page as below. Status page shows the WAP-6000 is now working in Wireless Client mode. -
Page 26: Wireless Network
Network type Here indicates the WAP-6000 works in AP mode or Client mode (Infrastructure mode / Ad Hoc mode). SSID Here displays current SSID assigned to the WAP-6000. BSSID The MAC address of the associated AP. Connection status This column shows current connection status. If WAP-6000 already connects to an Access Point or station, here will show “Associated”. -
Page 27: Wireless Security
BSSID column; the system will join you to the SSID you specify after reboot. In the Site Survey page you can also see the details of all SSID currently available. 4.2.3 Wireless Security In Wireless client mode, WAP-6000 has support WEP and WPA-PSK security mechanisms. Please refer to section 4.1.7 for detailed descriptions of the security configuration. -
Page 28: Ethernet Client List
Repeater is able to retransmit the signal of a remote AP. Choose repeater mode if you want to extend the range of your original AP. In order to setup this mode, you need to choose “Repeater” mode and click “Apply” at System Properties page. You also need to reboot the WAP-6000 to make the setting effective. -
Page 29: Wireless Network
After all the changes are made, you can check the “Connect Status” page to check current SSID and link quality / signal strength. Some more information is available at that page. 4.3.2 Wireless Security In Repeater mode, WAP-6000 supports only WEP security mechanisms. Please refer to section 4.1.7 for detailed descriptions. -
Page 30: Wireless Bridge
4.4 Wireless Bridge Wireless Bridge is WDS (Wireless Distribution System) operation as defined by the IEEE802.11 standard has been made available. In IEEE 802.11 terminology a "Distribution System" is system that Interconnects, so-called, Basic Service Sets (BSS). A BSS is best compared to a "Cell", driven by a single Access Point (one of those circles in the diagram below). - Page 31 Considerations before installation – Loop Prevention – Be careful to plan you WDS connections, prevent your wireless network topology to have loop. Once loop shows up, you network traffic will become unstable. Performance – The system can support up to 8 WDS links. But all links and wireless stations that operate at the same time will all share single radio bandwidth.
-
Page 32: Wireless Network
4.4.1 Wireless Network After enable the Wireless Bridge mode, you can click on “Wireless Network” to assign the SSID, Wireless Mode and Work Channel. 4.4.2 Wireless Security WDS mode has support WEP and WPA-PSK. Please refer to section 4.1.7 for the detail of the configuration. -
Page 33: Appendix A Glossary
Appendix A Glossary 802.11b - An IEEE wireless networking standard that specifies a maximum data transfer rate of 11Mbps and an operating frequency of 2.4GHz. 802.11g - An IEEE wireless networking standard that specifies a maximum data transfer rate of 54Mbps, an operating frequency of 2.4GHz, and backward compatibility with 802.11b devices. - Page 34 Fragmentation -Breaking a packet into smaller units when transmitting over a network medium that cannot support the original size of the packet. Gateway - A device that interconnects networks with different, incompatible communications protocols. Hardware - The physical aspect of computers, telecommunications, and other information technology devices.
- Page 35 data transmission. SSID (Service Set IDentifier) - Your wireless network's name. Static IP Address - A fixed address assigned to a computer or device that is connected to a network. Subnet Mask - An address code that determines the size of the network. Switch - 1.
Need help?
Do you have a question about the WAP-6000 and is the answer not in the manual?
Questions and answers