Table of Contents
Advertisement
Advertisement
Table of Contents

Related Manuals for Pivos XIOS DS Media Play!

Summary of Contents for Pivos XIOS DS Media Play!
- Page 1 Technology Group, Inc. Media Play! USER GUIDE...
-
Page 2: Table Of Contents
TABLE OF CONTENTS Box Contents ..................................3 Introduction ..................................3 Features ..................................3 Remote Control (IR) ................................5 Start Up ....................................5 Home Screens of the XIOS DS ............................. 6 Home Screen ..................................7 Local media/MuSIC/PIctures/Games ..........................7 Market ................................... 8 Browser .................................. - Page 3 About Media Box................................. 20 App Draw & Widgets ................................ 20 Advance Apps ................................... 21 Network (SAMBA function) ............................21 Upgrade ..................................23 Copy rights ..................................25 GPL Statement .................................. 25 Warranty ................................... 25 Product Support Reference .............................. 25...
-
Page 4: Box Contents
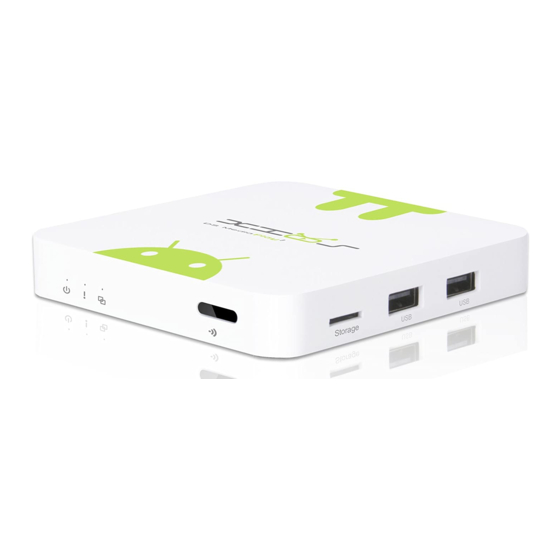
BOX CONTENTS • Check to see if all the contents are in the box! • 1 x XIOS DS • 1 x XIOS DS IR REMOTE • 1 x 5V POWER SUPPY • 1 x HDMI (1.3) CABLE INTRODUCTION Experience a smarter TV. With the XIOS DS, connect entertainment and productivity to your HDTV. The XIOS DS is an Android powered device capable of High definition playback. - Page 5 Support flash player 10.2 hardware acceleration Support up to Full HD 1080P video decoding. High Connectivity for File Sharing Support Google play store Support Google Chrome browser Multi User Interface (optional) Video format support: DAT/MPEG/MPE/MPG/M2V/ISO/TS/VOB/AVI/MKV/MP4/MOV/3GP/3GPP/FLC/AVI/WMA/TS/M2TS/M3TS/M4TS/M5T S/MTS/M4V/FLV/3G2. Audio format support: MP3/WMA/WAV/OGG/OGA/FLAC/ALAC/APE/AAC/M4A/AC-3/DTS/RM.
-
Page 6: Remote Control (Ir)
REMOTE CONTROL (IR) [01] Standby [02] Menu [03] Up [04] VOL+ [05] VOL-- [06] Right [07] Down [08] Left [09] OK [10] Exit [11] Notification START UP Setting up the XIOS DS is simple. 1. Connect the XIOS DS to the TV with the provided HDMI cable 2. -
Page 7: Home Screens Of The Xios Ds
Boot Screen Loading Screen HOME SCREENS OF THE XIOS DS Upon your first startup of the XIOS DS, you’ll be given the option of two types of home launcher. The first being the standard ICS home page that allows for customization and Widgets. The second is the XIOS DS version with a layout that has easy quick launch icons. -
Page 8: Home Screen
HOME SCREEN This section describes the Home screen using the XIOS DS customized skin. From the home screen, you have several options in the form of quick launch buttons. The selection box is in the center. Use the remote to scroll left and right. -
Page 9: Market
Notice the “add” button. You can customize this page with apps that apply to the option. For any of the custom quick launch pages, for example, add all the media player apps here for quick organized apps for music or videos. to add a media app. -
Page 10: Browser
Add apps to this page as you would for the other customizable pages. However, in this case, only add Marketplace related apps like Google’s Play app, which is their online marketplace for app downloads. This is a screenshot of Google Play app, a marketplace for apps. -
Page 11: Settings
*TIP if you have a USB keyboard + mouse, plug it directly into one of the available USB ports on the XIOS DS to make the typing experience better. SETTINGS In the “Settings” panel, you can set preferences and enable or disable functions. WI-FI The XIOS DS has a built-in wireless feature. -
Page 12: Ethernet
ETHERNET The fastest network connection is through wire/network-cable. It is recommended that you use a wired connection for higher bit-rate videos streamed from a NAS or network-drive. Click “ON” in Ethernet setting, it will connect to network automatically if you are using basic DHCP settings for your router. DATA USAGE Useful data transfer information can be found in the “Data usage”... -
Page 13: More
MORE In the “More” tab, you’ll find less commonly used network preferences. In cases that require more network customizations, these options are available for those power-users. It includes VPN, Portable hotspot and Proxy settings. To access VPN (Virtual Private Network ), you need to setup your VPN setting first. Select and enter your VPN information, and click the MENU button on the upper right corner or press F1 button on the keyboard to save /cancel settings. -
Page 14: Proxy Settings
PROXY SETTINGS If you choose to connect via Ethernet, make sure the Ethernet setting is enabled first. A network IP is assigned. The XIOS DS DS Media Play will automatically connect to your DHCP Server. You can also manually configure your network setting. -
Page 15: Display
DISPLAY In “Display” you can customize the appearance of the user interface. Set wallpaper, output mode, display position and font size. OUTPUT MODE The default resolution is 720P. For higher resolution, select the preference and click ok when you are prompt to keep the setting. -
Page 16: Display Position
screen will remain black. After 15 seconds it will revert back to the previous setting. During the blank screen do not press any buttons on the remote. DISPLAY POSITION Use direction and Enter/Ok buttons on remote control to adjust display position when the screen is not display as full screen on your TV. -
Page 17: Storage
Change the font size. *Tip: The “HUGE” font size is the best for HDTV use. STORAGE Shows the storage used of the OS and SD card. APPS... -
Page 18: Accounts & Sync
List all apps on different status. In this setting panel, you have several options. You can see you app status. You can stop the app from working. You can clear any information or history. You can move the app from internal memory to external. -
Page 19: Language & Input
Enable unknown sources, it will allow you to install non-market apps. LANGUAGE & INPUT Change OSD language and input method. The default input method is android standard keyboard. If you are using our IR remote control, enter into “Default” option and switch to remote controller input method. -
Page 20: Factory Reset
FACTORY RESET Choose factory reset, it will erase all user data of the box. DATA & TIME Set the time of the box. DEVELOPER OPTIONS This option is for debugging. Enable USB debugging, and the ADB function will work with Ethernet or Wi-Fi. -
Page 21: About Media Box
ABOUT MEDIA BOX. You will find firmware version under build number. APP DRAW & WIDGETS For the Android Platform, the “App Draw” is where all the installed apps are. From the draw all the apps are arrange by icon alphabetically. As more apps are installed some will be off screen. To access them, simply press down on the directional pad. -
Page 22: Advance Apps
(Note: Widget are only available with the standard android launcher not with XIOS DS launcher) ADVANCE APPS NETWORK (SAMBA FUNCTION) - Page 23 When you open network app for the first time, it will scan all shared folders in local area network. Scanned shared folders Choose one of them, and you will see a green icon appeared on the right.
-
Page 24: Upgrade
Click the second button to confirm the choice. Then, click and open the folder to browse videos, music, pictures and documents inside it. UPGRADE From the App Draw, find the app that is named Update. In the Update app choose the option “Local update”. To upgrade the firmware, download the new firmware into the root directory of any external storage device. - Page 25 * Warning: During the upgrade do not turn off device.
-
Page 26: Copy Rights
Here is a list of some great support reference if you have any additional questions about using our products. Pivos Forums: Our forums community is a great way for discuss product tips, guides and third party add-ons with fellow users. You can visit http://www.pivosforums.com...
Need help?
Do you have a question about the XIOS DS Media Play! and is the answer not in the manual?
Questions and answers