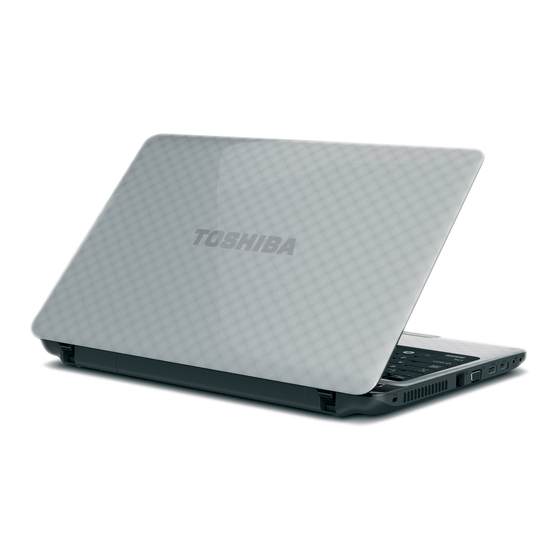
Toshiba Satellite L750 Series User Manual

Toshiba Satellite L750 Series User Manual

Hide thumbs Also See for Satellite L750 Series:
Table of Contents

Advertisement

User's Manual
Satellite L750/L755/L750D/L755D
Satellite Pro L750/L750D
Series

Advertisement

Table of Contents
loading

Summary of Contents for Toshiba Satellite L750 Series

  • Page 1 User’s Manual Satellite L750/L755/L750D/L755D Satellite Pro L750/L750D Series...
  • Page 2: Table Of Contents

    Table of Contents Copyright..........vi Disclaimer .
  • Page 3 Writing CD/DVD/Blu-ray™ discs ......4-9 TOSHIBA VIDEO PLAYER ....... . . 4-19 Using WinDVD BD for TOSHIBA .
  • Page 4 TOSHIBA support ........
  • Page 5 Satellite L750/L755/L750D/L755D/Satellite Pro L750/L750D Copy Protection ......... . F-4...
  • Page 6: Copyright

    Devices, Inc. Windows, Microsoft and Windows logo are registered trademarks of Microsoft Corporation. Bluetooth is a trademark owned by its proprietor and used by TOSHIBA under license. HDMI, the HDMI logo and High-Definition Multimedia Interface are trademarks or registered trademarks of HDMI Licensing LLC.
  • Page 7: Fcc Information

    Only peripherals complying with the FCC class B limits may be attached to this equipment. Operation with non-compliant peripherals or peripherals not recommended by TOSHIBA is likely to result in interference to radio and TV reception. Shielded cables must be used between the external devices and the computer’s external monitor port, Universal Serial Bus...
  • Page 8: Eu Declaration Of Conformity

    This product is carrying the CE-Mark in accordance with the related European Directives. Responsible for CE-Marking is TOSHIBA Europe GmbH, Hammfelddamm 8, 41460 Neuss, Germany. The complete and official EU Declaration of Conformity can be found on TOSHIBA’s web site http://epps.toshiba-teg.com on the Internet. CE compliance...
  • Page 9: Working Environment

    This product was designed to fulfil the EMC (Electromagnetic Compatibility) requirements to be observed for so-called “Residential, commercial and light industry environments”. TOSHIBA do not approve the use of this product in working environments other than the above mentioned “Residential, commercial and light industry environments”.
  • Page 10: Canadian Regulatory Information (Canada Only)

    Note that Canadian Department of Communications (DOC) regulations provide, that changes or modifications not expressly approved by TOSHIBA Corporation could void your authority to operate this equipment. This Class B digital apparatus meets all requirements of the Canadian Interference-Causng Equipment Regulations.
  • Page 11: Japan Regulations

    Satellite L750/L755/L750D/L755D/Satellite Pro L750/L750D The hookflash (timed break register recall) function is subject to separate national type approvals. It has not been tested for conformity to national type regulations, and no guarantee of successful operation of that specific function on specific national networks can be given.
  • Page 12: Type Of Service

    FCC. In the event repairs are ever needed on your modem, they should be performed by TOSHIBA Corporation or an authorized representative of TOSHIBA Corporation.
  • Page 13: Instructions For Ic Cs-03 Certified Equipment

    Satellite L750/L755/L750D/L755D/Satellite Pro L750/L750D Fax branding The Telephone Consumer Protection Act of 1991 makes it unlawful for any person to use a computer or other electronic device to send any message via a telephone fax machine unless such message clearly contains in a...
  • Page 14: Notes For Users In Australia And New Zealand

    Satellite L750/L755/L750D/L755D/Satellite Pro L750/L750D The Ringer Equivalence Number (REN) assigned to each terminal device provides an indication of the maximum number of terminals allowed to be connected to a telephone interface. The termination on an interface may consist of any combination of devices subject only to the requirement that the sum of the Ringer Equivalence Numbers of all the devices does not exceed 5.
  • Page 15 Satellite L750/L755/L750D/L755D/Satellite Pro L750/L750D Notes for use of this device in New Zealand ■ The grant of a Telepermit for a device in no way indicates Telecom acceptance of responsibility for the correct operation of that device under all operating conditions. In particular the higher speeds at which...
  • Page 16: Following Information Is Only Valid For Eu-Member States

    For more detailed information about the collection and recycling programmes available in your country, please visit our website (http://eu.computers.toshiba-europe.com) or contact your local city office or the shop where you purchased the product. User’s Manual...
  • Page 17: Disposing Of The Computer And The Computer's Batteries

    The new European Union (EU) chemical regulation, REACH (Registration, Evaluation, Authorization and Restriction of Chemicals), entered into force on 1 June 2007. Toshiba will meet all REACH requirements and is committed to provide our customers with information about the chemical substances in our products according to REACH regulation.
  • Page 18: Following Information Is Only For Turkey

    Satellite L750/L755/L750D/L755D/Satellite Pro L750/L750D Following information is only for Turkey: ■ Compliant with EEE Regulations: Toshiba meets all requirements of Turkish regulation 26891 “Restriction of the use of certain hazardous substances in electrical and electronic equipment”. ■ The number of possible pixel failures of your display is defined according to ISO 13406-2 standards.
  • Page 19: Precautions

    Satellite L750/L755/L750D/L755D/Satellite Pro L750/L750D Panasonic System Networks DVD Super Multi UJ8A0 ■ Blu-ray™ Writer UJ240 ■ HITACHI-LG Data Storage, Inc. DVD Super Multi GT50F/50N ■ Blu-ray™ Combo GT30F ■ Hitachi-LG Data Storage, Inc. 22-23,KAIGAN 3-CHOME, MINATO-KU,TOKYO,108-0022 JAPAN Precautions CAUTION: This appliance contains a laser system and is classified as a “CLASS 1 LASER PRODUCT.”...
  • Page 20: Preface

    Preface Congratulations on your purchase of the Satellite L750/L755/L750D/L755D/Satellite Pro L750/L750D series computer. This powerful notebook computer provides excellent expansion capability, includes multimedia functionality, and is designed to provide years of reliable, high-performance computing. This manual tells how to set up and begin using your Satellite L750/L755/L750D/L755D/Satellite Pro L750/L750D computer.
  • Page 21 Satellite L750/L755/L750D/L755D/Satellite Pro L750/L750D Icons Icons identify ports, dials, and other parts of your computer. The indicator panel also uses icons to identify the components it is providing information Keys The keyboard keys are used in the text to describe many computer operations.
  • Page 22 Satellite L750/L755/L750D/L755D/Satellite Pro L750/L750D Terminology This term is defined in this document as follows: Start The word "Start" refers to the " " button in Windows 7. HDD or Hard disk Some models are equipped with a "Solid State drive Drive (SSD)"...
  • Page 23: General Precautions

    General Precautions TOSHIBA computers are designed to optimize safety, minimize strain and withstand the rigors of portability. However, certain precautions should be observed to further reduce the risk of personal injury or damage to the computer. Equipment connected to the protective earthing of the building installation...
  • Page 24: Creating A Computer-Friendly Environment

    Satellite L750/L755/L750D/L755D/Satellite Pro L750/L750D Creating a computer-friendly environment Place the computer on a flat surface that is large enough for the computer and any other items you are using, such as a printer. Leave enough space around the computer and other equipment to provide adequate ventilation.
  • Page 25: Pressure Or Impact Damage

    Satellite L750/L755/L750D/L755D/Satellite Pro L750/L750D Pressure or impact damage Do not apply heavy pressure to the computer or subject it to any form of strong impact as this can damage the computer's components or otherwise cause it to malfunction. Mobile phones Please be aware that the use of mobile phones can interfere with the audio system.
  • Page 26: Equipment Checklist

    Some of the features described in this manual may not function properly if you use an operating system that was not pre-installed by TOSHIBA. Equipment checklist Carefully unpack your computer, taking care to save the box and packaging materials for future use.
  • Page 27 ■ TOSHIBA Recovery Media Creator ■ TOSHIBA VIDEO PLAYER (Is preinstalled with some models) ■ WinDVD BD for TOSHIBA (Is preinstalled with some models) ■ TOSHIBA Resolution+ Plug-in For Windows Media Player (Is preinstalled with some models) ■ Corel Digital Studio (Is preinstalled with some models) ■...
  • Page 28: System Recovery

    Getting Started Getting Started ■ All users should be sure to read the section Starting up for the first time. ■ Be sure to read the enclosed Instruction Manual for Safety and Comfort for information on the safe and proper use of this computer. It is intended to help you be more comfortable and productive while using a notebook computer.
  • Page 29: Connecting The Ac Adaptor

    ■ Always use the TOSHIBA AC adaptor that was included with your computer, or use AC adaptors specified by TOSHIBA to avoid any risk of fire or other damage to the computer. Use of an incompatible AC adaptor could cause fire or damage to the computer possibly resulting in serious injury.
  • Page 30 Getting Started 1. Connect the power cord to the AC adaptor. Figure 1-1 Connecting the power cord to the AC adaptor (2-pin plug) Figure 1-2 Connecting the power cord to the AC adaptor (3-pin plug) Either a 2-pin or 3-pin adaptor/cord will be included with the computer depending on the model.
  • Page 31: Opening The Display

    Getting Started Opening the display The display panel can be opened to a wide range of angles for optimal viewing. While holding down the palm rest with one hand so that the main body of the computer is not raised, slowly lift the display panel - this will allow the angle of the display panel to be adjusted to provide optimum clarity.
  • Page 32: Turning On The Power

    Getting Started Turning on the power This section describes how to turn on the power - the Power indicator will then indicate the status. Please refer to the Monitoring of power condition section in Chapter 6, Power and Power-Up Modes for more information. ■...
  • Page 33: Turning Off The Power

    Getting Started Turning off the power The power can be turned off in one of three modes, either Shut Down Mode, Hibernation Mode or Sleep Mode. Shut Down Mode When you turn off the power in Shut Down Mode no data will be saved and the computer will boot to the operating system's main screen the next time it is turned on.
  • Page 34 Getting Started ■ Before entering Sleep Mode, be sure to save your data. ■ Do not install or remove a memory module while the computer is in Sleep Mode. The computer or the memory module could be damaged. ■ Do not remove the battery pack while the computer is in Sleep Mode (unless the computer is connected to an AC power source).
  • Page 35: Hibernation Mode

    Getting Started When you turn the power back on, you can continue where you left when you shut down the computer. ■ When the computer is in Sleep Mode, the power indicator will blink amber. ■ If you are operating the computer on battery power, you can lengthen the overall operating time by turning it off into Hibernation Mode - Sleep Mode will consume more power while the computer is off.
  • Page 36: Restarting The Computer

    Getting Started Starting Hibernation Mode You can also enable Hibernation Mode by pressing FN + F4 - please refer to Chapter 5, Keyboard, for further details. To enter Hibernation Mode, follow the steps below. 1. Click Start. 2. Point to the arrow icon ( ) and then select Hibernate from the menu.
  • Page 37: System Recovery Options

    Getting Started ■ Press the power button and hold it down for five seconds. Once the computer has turned itself off, wait between ten and fifteen seconds before turning the power on again by pressing the power button. System Recovery Options There is a hidden partition allocated on the hard disk drive for the System Recovery Options.
  • Page 38: System Recovery

    Getting Started System Recovery This section describes the creation of Recovery Media and their use. Creating Recovery Media This section describes how to create Recovery Media. ■ Be sure to connect the AC adaptor when you create Recovery Media. ■ Be sure to close all other software programs except the Recovery Media Creator.
  • Page 39 Getting Started 5. After Recovery Media Creator starts, select the type of media and the title you wish to copy, and then click the Create button. Restoring the pre-installed software from the Recovery hard disk drive A portion of the total hard disk drive space is configured as a hidden recovery partition.
  • Page 40 4. A menu will be displayed from which you should follow the on-screen instructions. When drivers/utilities are installed, you can setup the respective drivers/utilities from the following place. To open the setup files, Click Start -> All Programs -> TOSHIBA -> Applications and Drivers. User’s Manual 1-15...
  • Page 41: Chapter 2 The Grand Tour

    Chapter 2 The Grand Tour This chapter identifies the various components of the computer - it is recommended that you become familiar with each before you operate the computer. Legal Footnote (Non-applicable Icons) For more information regarding Non-applicable Icons, please refer to the Legal Footnotes section in Appendix F.
  • Page 42: Left Side

    The Grand Tour Memory media slot This slot lets you insert an SD™/SDHC™/SDXC™ memory card, miniSD™/microSD™ Card, Memory Stick™ (PRO™) and MultiMediaCard™. Refer to the Optional devices section in Chapter 3, Hardware, Utilities and Options. Keep foreign metal objects, such as screws, staples and paper clips, out of the Memory media slot.
  • Page 43 The Grand Tour LAN jack This jack lets you connect to a LAN. The adaptor has built-in support for Ethernet LAN (10 megabits per second, 10BASE-T), Fast Ethernet LAN (100 megabits per second, 100BASE-TX). Some models are equipped with a Gigabit Ethernet LAN (1000 megabits per second, 1000BASE-T).
  • Page 44: Right Side

    The Grand Tour HDMI out port HDMI out port can connect with Type A connector HDMI cable. HDMI cable can send video and audio signals. In addition to this, it can send and receive control signals. Some models are equipped with an HDMI out port.
  • Page 45: Back

    The Grand Tour Modem jack The modem jack lets you use a modular cable to connect the modem directly to a telephone line. Some models are equipped with a modem jack. ■ Connection to any communication line other than an analog phone line could cause a PC system failure.
  • Page 46: Underside

    The Grand Tour Underside The following figure shows the underside of the computer. You should ensure that the display is closed before the computer is turned over to avoid causing any damage. 1. Battery lock 3. Memory module slot 2. Battery release latch Figure 2-5 The underside of the computer Battery lock Slide the battery lock to release the battery pack...
  • Page 47: Front With The Display Open

    The Grand Tour Front with the display open This section shows the computer with the display panel open. In order to open the display, lift the display panel up and position it at a comfortable viewing angle for you. Figure 2-6 The front of the computer with the display panel open 1.
  • Page 48: Video Mode

    You can use it for video chatting or video conferences using a communication tool such as Windows Live Messenger. TOSHIBA Web Camera Application will help you to add various video effects to your video or photograph.
  • Page 49: Indicators

    The Grand Tour Do not put any magnetic objects close to this switch as they may cause the computer to automatically enter Hibernation Mode and shut down even if the Panel Power Off feature is disabled. Display hinges The display hinges allow the display panel to be positioned at a variety of easy-to-view angles.
  • Page 50: Keyboard Indicators

    The Grand Tour DC IN The DC IN indicator normally glows white when power is being correctly supplied from the AC power adaptor. However, if the output voltage from the adaptor is abnormal, or if the computer's power supply malfunctions, this indicator will flash amber.
  • Page 51: Optical Disc Drives

    This section describes the types of writable CD/DVD/Blu-ray™ discs. Check the specifications of your drive to see the types of discs it can write. Use TOSHIBA Disc Creator and Corel Digital Studio to write compact discs. Refer to Chapter 4, Operating Basics.
  • Page 52: Ac Adaptor

    The Grand Tour DVDs ■ DVD-R, DVD+R, DVD-R (Dual Layer) and DVD+R (Double Layer) discs can be written only once. The recorded data cannot be erased or changed. ■ DVD-RW, DVD+RW and DVD-RAM discs can be recorded more than once. Blu-ray™...
  • Page 53 Always use the TOSHIBA AC adaptor that was included with your computer, or use AC adaptors specified by TOSHIBA to avoid any risk of fire or other damage to the computer. Use of an incompatible AC adaptor could cause fire or damage to the computer possibly resulting in serious injury.
  • Page 54: Chapter 3 Hardware, Utilities And Options

    Your computer is equipped with one processor and processor type varies depending on model. To check which type of processor is included in your model, open the TOSHIBA PC Diagnostic Tool Utility by clicking Start -> All Programs -> TOSHIBA -> Utilities -> PC Diagnostic Tool.
  • Page 55 Hardware, Utilities and Options Memory Memory slots 1 GB, 2 GB or 4 GB memory modules can be installed in the computer's two memory slots for a maximum of 8 GB system memory. This computer can be equipped with memory modules of a maximum size of 8 GB.
  • Page 56: Battery Life

    Drive varies depending on the model. Solid state drive To check which type of HDD/SSD is included in your model, open the TOSHIBA PC Diagnostic Tool Utility by clicking Start -> All Programs -> TOSHIBA -> Utilities -> PC Diagnostic Tool.
  • Page 57: Optical Disc Drive

    Hardware, Utilities and Options Optical disc drive Drive The following optical disc drives may be pre- installed in this computer. ■ DVD Super Multi drive ■ Blu-ray™ Combo drive ■ Blu-ray™ Writer drive 2.6GB and 5.2GB DVD-RAM media cannot be read from or written to. Display The computer's internal display panel supports high-resolution video graphics and can be set to a wide range of viewing angles for maximum...
  • Page 58 Hardware, Utilities and Options ™ Vari-Bright ® ™ Your model may include the AMD Vari-Bright feature that can save the computer's power consumption by optimizing picture contrast on the internal LCD. This feature can be used if the computer is: ■...
  • Page 59 You can use it for video chatting or video conferences using a communication tool such as Windows Live Messenger. TOSHIBA Web Camera Application will help you to add various video effects to your video or photograph.
  • Page 60: Special Features

    Some computers in this series are equipped with a Wireless WAN module. Special features The following features are either unique to TOSHIBA computers or are advanced features which make the computer more convenient to use. Access each function using the following procedures.
  • Page 61 Hardware, Utilities and Options Intelligent power A microprocessor in the computer's intelligent power supply detects the battery's charge, supply automatically calculates the remaining battery capacity and protects electronic components from abnormal conditions such as a voltage overload from the AC adaptor. This can be specified in the Power Options.
  • Page 62 USB port when your computer is in Sleep Mode, Hiberantion Mode or in the shutdown state. This function is worked by the TOSHIBA Sleep Utility. For more information, please refer to the Using the TOSHIBA Sleep Utility section in Chapter 4, Operating Basics.
  • Page 63: Utilities And Applications

    TOSHIBA Flash The TOSHIBA Flash Cards provide a quick way Cards to modify selected system functions. ■ Hot key function...
  • Page 64 TOSHIBA ConfigFree TOSHIBA ConfigFree is a suite of utilities that improve the ease and control of communication devices and network connections, help in the...
  • Page 65 Alert Utility the Disk Drive operating status and execute the system backup. To access the utility, click Start -> All Programs -> TOSHIBA -> Utilities -> HDD SSD Alert. TOSHIBA Service This application allows your computer to Station automatically search for TOSHIBA software...
  • Page 66 1. Launch Corel Label@Once (the operation varies depending on the models you purchased): ■ Click Start -> All Programs -> Corel Digital Studio for TOSHIBA -> Corel Digital Studio for TOSHIBA -> Create. Click Create Disc Label. 2. Click the General tab.
  • Page 67 You can track power savings by using eco mode continuously. To access this utility, click Start -> All Programs -> TOSHIBA -> Utilities -> eco Utility. TOSHIBA The plug-in lets you upconverts wmv and mp4 Resolution+ Plug-in videos on Windows Media Player.
  • Page 68: Optional Devices

    To access this utility, click Start -> All Programs -> TOSHIBA -> TOSHIBA Media Controller -> TOSHIBA Media Controller. For more information, please refer to the TOSHIBA Media Controller Help.
  • Page 69: Memory Media Slot

    Hardware, Utilities and Options Memory media slot The computer is equipped with a Memory media slot that can accommodate some kinds of memory media with various memory capacities so that you can easily transfer data from devices, such as digital cameras and Personal Digital Assistants.
  • Page 70: Memory Media

    Hardware, Utilities and Options Memory media This section provides the important safety precautions in order to handle your memory media. Points to note about the SD/SDHC/SDXC memory card SD/SDHC/SDXC memory cards comply with SDMI (Secure Digital Music Initiative), which is a technology adopted to prevent unlawful copy or playback of digital music.
  • Page 71: Memory Card Care

    Hardware, Utilities and Options Media care Observe the following precautions when handling the card. Card care ■ Do not twist or bend cards. ■ Do not expose cards to liquids or store in humid areas or lay media close to containers of liquid. ■...
  • Page 72: Removing A Memory Media

    Hardware, Utilities and Options 3. Press the memory media gently to ensure a firm connection is made. 1. Memory media slot 2. Memory media Figure 3-2 Inserting a memory media ■ Make sure memory media is oriented properly before you insert it. If you insert the media in wrong direction, you may not be able to remove ■...
  • Page 73: Additional Memory Module

    Hardware, Utilities and Options 3. Grasp the media and pull it out of the computer to remove it. 1. Memory media slot 2. Memory media Figure 3-3 Removing memory media ■ Make sure the Memory Media slot indicator is out before you remove the memory media or turn off the computer’s power.
  • Page 74: Installing A Memory Module

    Hardware, Utilities and Options ■ Use only memory modules approved by TOSHIBA. ■ Do not try to install or remove a memory module under the following conditions. a. The computer is turned on. b. The computer was shut down in either Sleep or Hibernation Mode.
  • Page 75 Hardware, Utilities and Options 6. Slide your fingernail or a thin object under the cover and lift it off. 1. Memory module cover 2. Screws Figure 3-4 Removing the memory module cover 7. Align the notch of the memory module with that of the memory slot and gently insert the module into the slot at about a 45 degree angle before holding it down until the latches on either side snap into place.
  • Page 76: Removing A Memory Module

    Hardware, Utilities and Options ■ The slot A is reserved for the first memory module. Use the slot B for expanded memory. If only one module is installed, use the slot A. ■ Align the grooves along the edges of the memory module with the locking tabs on the connector and insert the module into the connector firmly - if you find it difficult to install the memory module, gently prise the locking tabs outwards using the tip of your finger.
  • Page 77: External Monitor

    Hardware, Utilities and Options 5. Loosen the screw securing the memory module cover in place - please note that this screw is attached to the cover in order to prevent it from being lost. 6. Slide your fingernail or a thin object under the cover and lift it off. 7.
  • Page 78 Hardware, Utilities and Options Connecting the monitor cable 1. Turn the computer's power off. 2. Connect the monitor cable to the external monitor port. 1. External monitor port 2. Monitor cable Figure 3-8 Connecting the monitor cable to the external monitor port 3.
  • Page 79: Connecting The Hdmi Out Port

    Hardware, Utilities and Options As the port operation of all HDMI (High-Definition Multimedia Interface) monitors have not been confirmed, some HDMI monitors may not function properly. Connecting the HDMI out port 1. Plug one end of the HDMI cable into the HDMI in port of the HDMI device.
  • Page 80: Settings For Display Video On Hdmi

    Hardware, Utilities and Options Settings for display video on HDMI To view video on the HDMI device, be sure to configure the following settings otherwise you may find that nothing is displayed. ■ Be sure to use the FN + F5 HotKey to select the display device before starting to play video.
  • Page 81 Hardware, Utilities and Options ■ As not all 3D televisions' port operations have been fully tested yet, HDMI 1.4 3D Video feature may not be functional on some 3D television models. ■ Follow the steps as detailed below to setup HDMI 1.4 3D Video and don't execute other operation while running 3D Vision Setup.
  • Page 82: Optional Accessories

    For reference, the following list details some of the items that are available from your reseller or TOSHIBA dealer: DDR3-1066/1333 A 1 GB, 2 GB or 4 GB memory module (DDR3-...
  • Page 83 Hardware, Utilities and Options Battery Pack An additional battery pack can be purchased for use as either a spare or replacement. Please refer to Chapter 6, Power and Power-Up Modes for further information. High Capacity An additional battery pack can be purchased for Battery Pack use as either a spare or replacement.
  • Page 84: Chapter 4 Operating Basics

    Chapter 4 Operating Basics This chapter describes the basic operations of your computer, highlights the precautions that should be taken when using it. Using the Touch Pad To use the Touch Pad, simply touch and move your fingertip across it in the direction you want the on-screen pointer to go.
  • Page 85: Web Camera

    You can use it for video chatting or video conferences using a communication tool such as Windows Live Messenger. TOSHIBA Web Camera Application will help you to add various video effects to your video or photograph.
  • Page 86: Using The Toshiba Face Recognition

    Toshiba does not guarantee that the face recognition utility will accurately screen out unauthorized users at all times. Toshiba is not liable for any failure or damage that might arise out of the use of the face recognition software or utility.
  • Page 87 Take a picture for facial verification purposes, and register the data needed when you log in. To register the data needed when you log in, follow the steps as described below: 1. To launch this utility, click Start -> All Programs -> TOSHIBA -> Utilities -> Face Recognition. ■...
  • Page 88 Delete image data, account information, and personal record data created during registration. To delete the Face Recognition Data, follow the steps as described below: 1. To launch this utility, click Start -> All Programs -> TOSHIBA -> Utilities -> Face Recognition. The Management screen is displayed.
  • Page 89: Using Optical Disc Drives

    Operating Basics 5. Verification will be performed. If the authentication is successful, the image data taken in step 4 will be faded in and placed over one another. ■ If an error occurs during authentication, you will be returned to the Select Tiles screen.
  • Page 90 Operating Basics 1. Disc tray 2. Eject button Figure 4-3 Pressing the eject button and pulling the disc tray open 3. Lay the disc, label side up, in the disc tray. 1. Laser lens Figure 4-4 Inserting a disc When the disc tray is fully opened, the edge of the computer will extend slightly over the disc tray.
  • Page 91: Removing Discs

    Operating Basics 5. Push the center of the disc tray to close it. Press gently until it locks into place. If the disc is not seated properly when the disc tray is closed, the disc might be damaged. Also, the disc tray might not open fully when you press the eject button.
  • Page 92: Writing Cd/Dvd/Blu-Ray™ Discs

    Operating Basics 3. Push the center of the disc tray to close it. Press gently until it locks into place. How to remove discs when the disc tray will not open Pressing the eject button will not open the disc tray when the computer power is off.
  • Page 93: Important Message

    Operating Basics TOSHIBA Disc Creator and Corel Digital Studio are provided as writing software with this computer. Corel Digital Studio can be used to write files in video format. TOSHIBA Disc Creator can be used to write data. ■ Please refer to the...
  • Page 94 RAM, BD-R, BD-R (Dual Layer), BD-RE or BD-RE (Dual Layer) media, however, it must be noted that disc quality can affect write or rewrite success rates. Please also be aware that in no event does TOSHIBA guarantee the operation, quality or performance of any disc.
  • Page 95 RAM media, however, it must be noted that disc quality can affect write or rewrite success rates. Please also be aware that in no event does TOSHIBA guarantee the operation, quality or performance of any disc. CD-R: TAIYO YUDEN CO., Ltd.
  • Page 96 Operating Basics DVD-R: DVD Specifications for Recordable Disc for General Version 2.0 TAIYO YUDEN Co.,Ltd. (for 8x and 16x speed media) MITSUBISHI KAGAKU MEDIA CO.,LTD. (for 8x and 16x speed media) Hitachi Maxell,Ltd. (for 8x and 16x speed media) DVD-R (Dual Layer): MITSUBISHI KAGAKU MEDIA CO., LTD.
  • Page 97 Operating Basics ■ If the disc is poor in quality, or is dirty or damaged, writing or rewriting errors may be noted - ensure that you check all discs for dirt or damage before you use them. ■ The actual number of rewrites to CD-RW, DVD-RW, DVD+RW, DVD- RAM or BD-RE media will be affected by the quality of the disc itself and the way in which it is used.
  • Page 98: When Writing Or Rewriting

    CD/DVD - do not try to write from shared devices such as a server or any other network device. ■ Writing with software other than TOSHIBA Disc Creator has not been confirmed, therefore operation with other software applications cannot be guaranteed.
  • Page 99: Toshiba Disc Creator

    TOSHIBA Disc Creator cannot record in packet format. ■ You might not be able to use the "Disc Backup" function of TOSHIBA Disc Creator to back up a DVD-R, DVD-R (Dual Layer), DVD-RW, DVD+R, DVD+R (Double Layer) or DVD+RW disc that was made with other software on a different optical media recorder.
  • Page 100: Data Verification

    Simplified steps for making a Labelflash DVD: 1. Insert a Labelflash disc in optical disc drive. Set PRINTING SIDE for underside. 2. Click Start -> All Programs -> Corel Digital Studio for TOSHIBA -> Corel Digital Studio for TOSHIBA -> Create. 3. Click Create Disc Label.
  • Page 101: Important Information For Use

    Operating Basics 4. Click Burn -> Video Disc. 5. Select DVD or Blu-ray in Select disc. 6. Select DVD-Video or BDMV in Project format. 7. Input project name and select a style. 8. Click the Go to menu editing button. 9.
  • Page 102: Toshiba Video Player

    Some Blu-ray™ Combo drives for personal computers or other Blu- ray Disc™ players may not be able to read BD-R/RE discs. TOSHIBA VIDEO PLAYER Please be aware of the following limitations when you use the TOSHIBA VIDEO PLAYER: Notes on use ■...
  • Page 103 DVD-Video playback or television program recording errors. Please view DVD-Video during times when there is no recording pre- scheduled. ■ The resume function cannot be used with some discs on the "TOSHIBA VIDEO PLAYER". ■ It is recommended the AC adaptor be connected when playing DVD- Video.
  • Page 104 2D home video and other 2D contents you created, in 3D according to your personal preferences. ■ The “TOSHIBA VIDEO PLAYER” is set by default in the 2D format. By pressing the 2Dto3D conversion function button, you decide to activate the 2Dto3D conversion function and therefore decide to watch your 2D content in 3D.
  • Page 105 The protection of intellectual property rights is essential for Toshiba. In this respect, Toshiba underlines that the Player should not be used in a manner infringing such rights. It is your responsibility to...
  • Page 106 If this occurs, select Play DVD movie (using TOSHIBA VIDEO PLAYER) to launch the TOSHIBA VIDEO PLAYER. Figure 4-1 Application selection screen 2. Select Start -> All Programs -> TOSHIBA VIDEO PLAYER -> TOSHIBA VIDEO PLAYER to start "TOSHIBA VIDEO PLAYER". Operating TOSHIBA VIDEO PLAYER Notes on Using "TOSHIBA VIDEO PLAYER".
  • Page 107: Using Windvd Bd For Toshiba

    Please be aware of the following limitations when you use WinDVD BD for TOSHIBA: Notes on use ■ WinDVD BD for TOSHIBA is for Blu-ray Disc™ playback only. DVD playback is not supported. Please use "TOSHIBA VIDEO PLAYER" for DVD playback. ■...
  • Page 108 Do not change the display device while running the "WinDVD BD for TOSHIBA". 3D playback feature (Only Some models) WinDVD BD for TOSHIBA supports the playback of Blu-ray 3D™ discs on external 3D display/TV using HDMI 1.4. Before playback Blu-ray 3D™ discs, configure the 3D Playback. 1. Click Tools.
  • Page 109 Top Menu or Menu buttons, touch pad and mouse menu operations may not be able to be used. Open WinDVD BD for TOSHIBA HELP WinDVD BD for TOSHIBA features and instructions are also explained in detail in WinDVD Help. Use the following procedure to open WinDVD Help. ■...
  • Page 110: Media Care

    Operating Basics Media care This section provides tips on protecting data stored on your CDs, DVDs and Blu-ray™ discs. Handle your media with care. Following the simple precautions listed below will increase the lifetime of your media and protect the data stored on it. 1.
  • Page 111: Dolby Advanced Audio

    Operating Basics To launch the configuration dialog window for system sounds, follow the steps below. 1. Right-click the Speakers icon on the Taskbar. 2. Select Sounds from the menu. SmartAudio Your computer contains SmartAudio, a powerful program that allows you to configure your audio software to enhance and personalize your listening experience.
  • Page 112 Operating Basics To access Dolby Advanced Audio function, follow the steps as detailed below: 1. Right-click on the speaker icon on the Taskbar, and select Playback Devices from the sub menu. 2. Select Speakers, and click Properties. 3. Click the Dolby tab. Adjusting Microphone Level Follow the steps below to change the microphone recording level.
  • Page 113: Modem

    Operating Basics Modem This section describes how to connect and disconnect the internal modem to and from a telephone jack. ■ Connection to any communication line other than an analog phone line could cause a computer system failure. ■ Connect the built-in modem only to ordinary analog phone lines. ■...
  • Page 114 Operating Basics Connecting the modular cable To connect the modem's modular cable, follow the steps as detailed below: ■ Connection to any communication line other than an analog phone line could cause a computer system failure. ■ Connect the built-in modem only to ordinary analog phone lines. ■...
  • Page 115: Wireless Communications

    Operating Basics Disconnecting the modular cable To disconnect the modular cable, follow the steps as detailed below: 1. Pinch the lever on the plug in the telephone jack and pull it out from within the connector. 2. Pinch the lever on the plug in the computer's modem jack and pull it out from within the computer.
  • Page 116: Bluetooth Wireless Technology

    ■ TOSHIBA is not liable for the loss of data due to eavesdropping or illegal access through the wireless LAN and the damage thereof. Bluetooth wireless technology...
  • Page 117: Radio Links

    This Bluetooth Stack is based on the Bluetooth Version 1.1/1.2/2.0+EDR/2.1+EDR/3.0/3.0+HS specification. However, TOSHIBA cannot confirm the compatibility between any computing products and/or other electronic devices that use Bluetooth, other than TOSHIBA notebook computers. Release Notes related to the Bluetooth Stack for Windows by TOSHIBA 1.
  • Page 118: Lan

    Operating Basics Wireless communication Indicator The wireless communication indicator shows the status of the computer's wireless communication functions. Indicator status Indication Indicator off The wireless communication function is off - no wireless functionality is available. Indicator glows The wireless communication function is on. Except for the stopped device by the software switch, all the wireless-communications functions can output a radio wave.
  • Page 119: Connecting The Lan Cable

    Operating Basics If you are using Ethernet LAN (10 megabits per second, 10BASE-T), you can connect with a CAT3 or higher cable. Connecting the LAN cable To connect the LAN cable, follow the steps as detailed below: ■ Connect the AC adaptor before connecting the LAN cable. The AC adaptor must remain connected during LAN use.
  • Page 120: Computer Handling

    Operating Basics Computer Handling This section explains computer handling and maintenance. Cleaning the computer To help ensure long, trouble-free operation, keep the computer free of dust and dirt, and use care with all liquids around it. ■ Be careful not to spill liquids into the computer. If the computer does get wet, turn the power off immediately and let the computer dry completely - in these circumstance you should get the computer inspected by an authorized service provider in order to assess the scope of any...
  • Page 121: Using The Toshiba Sleep Utility

    Operating Basics ■ Do not carry your computer by holding any of its protruding elements. Using the TOSHIBA Sleep Utility The TOSHIBA Sleep Utility is used for changing settings of the following function: ■ Sleep and Charge It also displays the remaining battery capacity.
  • Page 122: Starting The Toshiba Sleep Utility

    USB ports. Do not allow USB ports to come into contact with metal products, for example when carrying the computer in your bag. Starting the TOSHIBA Sleep Utility To start the utility, click Start -> All Programs -> TOSHIBA -> Utilities -> Sleep Utility. Enabling Sleep and Charge This utility can be used to enable and disable the Sleep and Charge function.
  • Page 123: Heat Dispersal

    Operating Basics Power supply mode settings Your PC has multiple charging modes so that many different USB devices can be supported for Sleep and Charge function. Auto Mode (Default) is suitable for a wide range of digital audio players. However, determining which mode is suitable for your USB device is unknown without trying.
  • Page 124: Chapter 5 The Keyboard

    Chapter 5 The Keyboard The computer’s keyboard layouts are compatible with a 104/105-key enhanced keyboard - by pressing some keys in combination, all of the 104/105-key enhanced keyboard functions can be performed on the computer. The number of keys available on your keyboard will depend on which country/region your computer is configured for, with keyboards being available for numerous languages.
  • Page 125: Function Keys: F1

    Soft keys: FN key combinations The FN (function) is unique to TOSHIBA computers and is used in combination with other keys to form soft keys. Soft keys are key combinations that enable, disable or configure specific features.
  • Page 126: Hot Keys

    The Keyboard Hot keys Hot keys (pressing FN + a function or ESC key) let you enable or disable certain features of the computer. Mute: Pressing FN + ESC turns the sound on and off. Lock: Pressing FN + F1 enters ''Lock computer mode''. To restore your desktop, you need to log on again.
  • Page 127: Fn Sticky Key

    Volume up: Pressing FN + 4 increases the volume in increment. FN Sticky key You can use the TOSHIBA Accessibility Utility to make the FN key sticky, that is, you can press it once, release it, and then press an "F Number"...
  • Page 128: Windows Special Keys

    The Keyboard Windows special keys The keyboard provides two keys that have special functions in Windows, the Windows Start Button key activates the Start menu while the application key has the same function as the secondary (right) mouse button. This key activates the Windows Start menu. This key has the same function as the secondary (right) mouse button.
  • Page 129: Chapter 6 Power And Power-Up Modes

    Chapter 6 Power and Power-Up Modes The computer's power resources include the AC adaptor, battery pack and any internal batteries. This chapter provides details on making the most effective use of these resources, and includes information on charging and changing batteries, tips for saving battery power, and information on the different power-up modes.
  • Page 130: Monitoring Of Power Condition

    Power and Power-Up Modes Table 6-1 Power conditions continued Power on Power off (no operation) Battery charge • Operates adaptor is above low • LED: Battery off battery trigger DC IN off connected point Battery charge • Operates is below low •...
  • Page 131: Battery

    Power and Power-Up Modes DC IN indicator Check the DC IN indicator to determine the power status with the AC adaptor connected - the following indicator conditions should be noted: White Indicates the AC adaptor is connected and is correctly supplying power to the computer. Flashing amber Indicates a problem with the power supply.
  • Page 132 <F2> to setup You can change the Real Time Clock settings by turning the computer on while pressing the F2 key and then release the F2 key when the TOSHIBA Leading Innovation >>> screen appears. Please refer to Chapter 8 Troubleshooting for further information.
  • Page 133: Charging The Batteries

    ■ The computer's RTC battery is a Ni-MH battery and should be replaced only by your dealer or by a TOSHIBA service representative. The battery can explode if not properly replaced, used, handled or disposed. Dispose of the battery as required by local ordinances or regulations.
  • Page 134: Battery Charging Notice

    Power and Power-Up Modes Battery charging notice The battery may not begin charging immediately under the following conditions: ■ The battery is extremely hot or cold (if the battery is extremely hot, it might not charge at all). To ensure the battery charges to its full capacity, you should charge it at room temperature of between 5°...
  • Page 135: Maximizing Battery Operating Time

    Power and Power-Up Modes Maximizing battery operating time A battery's usefulness depends on how long it can supply power on a single charge, while how long the charge lasts in a battery depends on: ■ Processor speed ■ Screen brightness ■...
  • Page 136: Replacing The Battery Pack

    Power and Power-Up Modes 4. Connect the AC adaptor to the DC IN 19V jack of the computer, and to a wall outlet that is supplying power. The DC IN indicator should glow white, and the Battery indicator should glow amber to indicate that the battery pack is being charged, however, in the event that DC IN indicator does not glow this indicates that power is not being supplied - check the connections for the AC adaptor and the power...
  • Page 137: Installing The Battery Pack

    Power and Power-Up Modes 6. Slide and hold the battery release latch to disengage the battery pack and then remove it from the computer. 1. Battery pack 3. Battery release latch 2. Battery lock Figure 6-1 Releasing the battery pack Installing the battery pack To install a battery pack, follow the steps as detailed below: Do not touch the battery release latch while holding the computer or the...
  • Page 138: Password Utility

    Windows login password. User Password To start the utility, point to or click the following items: Start -> All Programs -> TOSHIBA -> Utilities -> TOSHIBA Assist -> SECURE -> User password ■ Registered Click to register a password of up to 8 characters. After a password is set, you will be prompted to enter it when you start the computer.
  • Page 139: Power-Up Modes

    Power and Power-Up Modes If you enter the password incorrectly three times in a row, the computer shuts off. In this case, you must turn the computer back on to retry password entry. Power-up modes The computer has three different power-up modes as follows: ■...
  • Page 140: Chapter 7 Hw Setup

    Accessing HW Setup To run the HW Setup program, click Start -> All Programs -> TOSHIBA -> Utilities -> HWSetup. HW Setup window The HW Setup window contains a number of tabs (General, Password, Display, Boot Setting, Keyboard, LAN, SATA and USB) to allow specific functions of the computer to be configured.
  • Page 141: User Password

    HW Setup Setup This field displays the installed BIOS version, date and EC version. Password This option allows you to set or reset the user password for power on. User Password Lets you register a new password or change/remove an existing password. Changes or remove the password.
  • Page 142: Boot Setting

    To change the boot drive, follow the steps below. 1. Hold down F12 and boot the computer. when the TOSHIBA Leading Innovation >>> screen appears, release the F12 key. 2. Use the up and down cursor keys to select the boot device you want and press ENTER.
  • Page 143: Boot Speed

    HW Setup If a Supervisor Password has been set, manual boot device selection functions may be restricted. The boot device selection methods described above will not change the boot priority settings that have been configured in HW Setup. In addition, if you press a key other than one of those listed, or if the selected device is not installed, the system will continue to boot according to the current and available settings in HW Setup.
  • Page 144 HW Setup ■ The Wake-up on LAN function consumes power even when the system is off. Leave the AC adaptor connected while using this feature. ■ Regarding Wake-up on LAN from sleep or hibernation, you must check the "Allow the device to wake the computer" check box within the LAN Device properties.
  • Page 145: Troubleshooting

    Chapter 8 Troubleshooting TOSHIBA have designed this computer for durability, however, should problems occur you are able to use the procedures detailed in this chapter to help determine the cause. All users should become familiar with this chapter as knowing what might go wrong can help prevent problems from occurring in the first place.
  • Page 146: Analyzing The Problem

    Troubleshooting ■ Before you attach an external device you should first turn the computer off, then when you turn the computer back on again it will recognize the new device. ■ Make sure all optional accessories are configured properly in the computer's setup program and that all required driver software has been loaded (please refer to the documentation included with the optional accessories for further information on its installation and...
  • Page 147: Hardware And System Checklist

    Before using a peripheral device or application software that is not an authorized Toshiba part or product, make sure the device or software can be used with your computer. Use of incompatible devices may cause injury or may damage your computer.
  • Page 148: Self Test

    This message remains on the screen for a few seconds. If the self test is successful, the computer tries to load the operating system according to how the Boot Priority option is set within the TOSHIBA HW Setup program. If any of the following conditions are present, the self test has failed: ■...
  • Page 149: Ac Power

    Troubleshooting If the computer has reached room temperature and it still does not start, or if it starts but shuts down quickly, contact your reseller, dealer or service provider. Computer shuts down This indicates a problem with the heat dispersal and its DC IN indicator system - you should contact your reseller, dealer is flashing white...
  • Page 150 Troubleshooting Problem Procedure Check whether the battery is hot or cold to the touch - if so, it will not charge properly and should be allowed to reach room temperature before you try again. Unplug the AC adaptor and remove the battery to make sure its connecting terminals are clean - if necessary wipe them with a soft dry cloth lightly dipped in alcohol.
  • Page 151: Real Time Clock

    BIOS setup application by using the following steps: 1. Turn on the computer while pressing the F2 key. 2. Release the F2 key when the TOSHIBA Leading Innovation >>> screen appears - the BIOS setup application will load.
  • Page 152: Hard Disk Drive

    Alternatively you may wish to run the TOSHIBA PC Diagnostic Tool to check the general operation of the computer. If you are still unable to resolve the problem, contact your reseller, dealer or service provider.
  • Page 153: Dvd Super Multi Drive

    Troubleshooting Problem Procedure Slow performance The files on the hard disk drive may be fragmented - in this instance you should run the disk Defragmentation utility to check the condition of your files and the hard disk drive. Please refer to the operating system's documentation or online Help File for further information on operating and using the Defragmentation utility.
  • Page 154 Troubleshooting Check the type of CD/DVD you are using. The drive supports: DVD-ROM: DVD-ROM, DVD-Video CD-ROM: CD-DA, CD-Text, Photo CD (single/multi-session), CD-ROM Mode 1, Mode 2, CD-ROM XA Mode 2 (Form1, Form2), Enhanced CD (CD-EXTRA), Addressing Method 2 Recordable DVD: DVD-R/-R DL, DVD+R/+R DL, DVD-RW, DVD+RW, DVD-RAM Check the region code on the DVD.
  • Page 155 Cannot write correctly If you have trouble in writing, make sure you have taken the following precautions: Use only media recommended by TOSHIBA. Do not use the mouse or keyboard while writing. Use only the software supplied with the computer for recording.
  • Page 156: Pointing Device

    Troubleshooting Memory Cards: SD/SDHC/SDXC Card, Memory Stick/Memory Stick PRO, MultiMediaCard For further information, please refer to Chapter 3, Hardware, Utilities and Options. Problem Procedure Memory Card error Remove the Memory Card from the computer occurs and then reinsert it in order to ensure it is firmly connected.
  • Page 157 Troubleshooting Problem Procedure Double-tapping does In this instance, you should initially try changing not work the double-click speed setting within the Mouse Control utility. 1. To access this utility, click Start -> Control Panel -> Hardware and Sound -> Mouse. 2.
  • Page 158: Usb Mouse

    Troubleshooting USB mouse Problem Procedure On-screen pointer does In this instance the system might be busy - Try not respond to mouse moving the mouse again after waiting a short operation while. Remove the mouse from the computer and then reconnect it to a free USB port it in order to ensure it is firmly attached.
  • Page 159 USB, you are still able to use a USB mouse and/or USB keyboard by setting the Legacy USB Support option within the TOSHIBA HW Setup utility to Enabled. If you are still unable to resolve the problem, contact your reseller, dealer or service provider.
  • Page 160 Troubleshooting Problem Procedure Check within the Windows Device Manager application to ensure the sound device is enabled and that the device is properly working. For further information, please refer to "Troubleshooting in Windows" section of Windows Help and Support. Annoying sound is In this instance you may be experiencing heard feedback from either the internal microphone or...
  • Page 161 Troubleshooting Problem Procedure When the display panel and an external monitor are set to clone mode and they are turned off by the timer, the display panel or the external monitor may not display when turned on again. If this occurs, press FN + F5 to re-set the display panel and external monitor to clone mode.
  • Page 162 Troubleshooting Problem Procedure Character display When transmitting data you should ensure that becomes garbled the parity bit and stop bit settings correspond during a with those of the remote computer - you should communication check the flow control and communication protocol settings within your communication application.
  • Page 163: Toshiba Support

    TOSHIBA support for assistance. TOSHIBA support If you require any additional help using your computer or if you are having problems operating the computer, you may need to contact TOSHIBA for additional technical assistance. Before you call User’s Manual...
  • Page 164 - they are your best resource for current information and support. Where to write If you are still unable to solve the problem and suspect that it is hardware related, write to TOSHIBA at the nearest location listed below: Outside of Europe In Europe Australia Germany &...
  • Page 165 California 92618 USA Business Park Addlestone Road Weybridge, Surrey KT15 2UL India The Rest of Europe TOSHIBA India Pvt Ltd. TOSHIBA Europe (I.E.) GmbH PC Division 6th Floor, DR Gopal Das Geschäftsbereich, Deutschland- Bhawan Barakhamba Road, Delhi- Österreich Hammfelddamm 8, D-...
  • Page 166: Specifications

    Appendix A Specifications This appendix summarizes the computer’s technical specifications. Physical Dimensions Size 380 (w) x 250 (d) x 27.7/37.5 (h) millimeters (not including parts that extend beyond the main body). Environmental Requirements Conditions Ambient temperature Relative humidity Operating 5°C (41°F) to 35°C (95°F) 20% to 80% (noncondensing) Non-operating...
  • Page 167: Power Requirements

    Specifications Power Requirements AC adaptor 100-240 volts AC 50 or 60 hertz (cycles per second) Computer 19V DC Built-in Modem This information is applicable to the models equipped with a built-in modem. Network control unit (NCU) Type of NCU Type of line Telephone line (analog only) Type of dialing Pulse...
  • Page 168 Specifications Communication Data transmission and reception speed 300/1200/2400/4800/7200/9600/12000/14400/16 800/19200/21600/24000/26400/28800/31200/33 600 bps Data reception only with V.90 28000/29333/30666/32000/33333/34666/36000/ 37333/38666/40000/41333/42666/44000/45333/ 46666/48000/49333/50666/52000/53333/54666/ 56000 bps 2400/4800/7200/9600/12000/14400 bps Transmitting level -10 dBm Receiving level -10 to -40 dBm Input/output 600 ohms ±30% impedance Error correcting MNP class 4 and ITU-T V.42 Data compression MNP class 5 and ITU-T V.42bis...
  • Page 169: Display Controller And Video Mode

    Appendix B Display Controller and Video mode Display controller The display controller interprets software commands into hardware commands that turn particular parts on the screen on or off. Due to the display panel's increased resolution, lines may appear broken in when displaying images in full-screen text mode.
  • Page 170: Information For Wireless Devices

    The “Wi-Fi CERTIFIED™” logo is a certification mark of the Wi-Fi ® Alliance Bluetooth wireless technology Interoperability Bluetooth™ Cards from TOSHIBA are designed to be interoperable with any product with Bluetooth wireless technology that is based on Frequency Hopping Spread Spectrum (FHSS) radio technology, and is compliant to: ■...
  • Page 171: Caution About Wireless Devices

    If you should experience any such problem, immediately turn off either one of your Bluetooth or Wireless LAN. Please visit http://www.pc.support.global.toshiba.com, if you have any questions about using Wireless LAN or Bluetooth Card from TOSHIBA. In Europe visit http://www.toshiba-europe.com/computers/tnt/bluetooth.htm Your Bluetooth product is based on Bluetooth Version 2.1+EDR specifications.
  • Page 172: Radio Regulatory Information

    Information for Wireless Devices Radio Regulatory Information The Wireless device is must be installed and used in strict accordance with the manufacturer’s instructions as described in the user documentation that comes with the product. This product complies with the following radio frequency and safety standards.
  • Page 173 Information for Wireless Devices Luxembourg: Implemented General authorization required for network and service supply. Russian Limited e.i.r.p 100mW. Permitted to use only Federation: for indoor applications, closed industrial and warehouse areas, and on board aircraft. 1. Permitted to use for local networks of aircraft crew service communications on board aircraft in area of the airport and at all...
  • Page 174 Information for Wireless Devices Canada - Industry Canada (IC) This device complies with RSS 210 of Industry Canada. Operation is subject to the following two conditions: (1) this device may not cause interference, and (2) this device must accept any interference, including interference that may cause undesired operation of this device.
  • Page 175 3. Contact an authorized TOSHIBA service provider if you have problems with interference caused by this product to Other Radio Stations. 2. Indication for Wireless LAN The indication shown below appears on this equipment.
  • Page 176: Radio Approvals For Wireless Devices

    Information for Wireless Devices This equipment uses a frequency bandwidth from 2,400 MHz to 2,483.5 MHz. It is impossible to avoid the band of mobile object identification systems. 4. About the JEITA 5GHz Wireless LAN supports W52/W53/W56 Channel. Device Authorization This device obtains the Technical Regulation Conformity Certification and it belongs to the device class of radio equipment of low-power data communication system radio station stipulated in the Telecommunications...
  • Page 177 Information for Wireless Devices Do not use this equipment in the countries/regions which are not listed in the table below. ■ Available channel of Peer-to-peer connection by ad-hoc mode is Ch1- Ch11. ■ Connection with an access point by the Infrastructure mode is Ch1- Ch13.
  • Page 178 Information for Wireless Devices Singapore Slovak Republic Slovenia South Africa South Korea Spain Sri Lanka Sweden Switzerland Taiwan Thailand Turkey Ukraine Uruguay Venezuela Vietnam Yemen Zimbabwe Approved Countries/Regions for the Realtek® RTL8188CE Wireless LAN 802.11n PCI-E NIC b/g/n Wireless LAN This equipment is approved to the radio standard by the countries/regions in the following table.
  • Page 179 Information for Wireless Devices Ireland Italy Japan Jordan Kazakhstan Kenya Kuwait Kyrgyzstan Latvia Lebanon Lesotho Liechtenstein Lithuania Luxembourg Macedonia Malaysia Malta Mexico Monaco Montenegro Mozambique Namibia Netherlands New Zealand Norway Oman Pakistan Panama Papua New Paraguay Peru Philippines Guinea Poland Portugal Puerto Rico Qatar...
  • Page 180 Information for Wireless Devices As of Oct.2010 Albania Algeria Angola Argentina Australia Austria Azerbaijan Bahrain Bangladesh Belarus Belgium Bolivia Bosnia and Botswana Brazil Bulgaria Herzegovina Burkina Faso Burundi Cambodia Cameroon Canada Central African Chile China Republic Colombia Comoros Costa Rica Croatia Cyprus Czech Republic...
  • Page 181 Information for Wireless Devices Paraguay Peru Philippines Poland Portugal Puerto Rico Qatar Republic of Chad Republic of Republic of The Reunion Romania Djibouti Gambia Rwanda Saudi Arabia Senegal Serbia Sierra Leone Singapore Slovak Republic Slovenia South Africa South Korea Spain Sri Lanka Swaziland Sweden...
  • Page 182: Ac Power Cord And Connectors

    Appendix D AC Power Cord and Connectors The power cord’s AC input plug must be compatible with the various international AC power outlets and the cord must meet the standards for the country/region in which it is used. All cords must meet the following specifications: Wire size: Minimum 0.75 mm...
  • Page 183 AC Power Cord and Connectors Finland: FIMKO Sweden: SEMKO France: LCIE Switzerland: Germany: United Kingdom: In Europe, two conductors power cord must be VDE type, H05VVH2-F or H03VVH2-F and for three conductors power cord must be VDE type, H05VV-F. For the United States and Canada, two pin plug configuration must be a 2- 15P (250V) or 1-15P (125V) and three pin plug configuration must be 6- 15P (250V) or 5-15P (125V) as designated in the U.S.
  • Page 184: Toshiba Pc Health Monitor

    Once enabled, you may disable the TOSHIBA PC Health Monitor at any time by uninstalling the software via Uninstall a program in the Control Panel. Doing so will automatically delete all collected information from the HDD.
  • Page 185: Starting The Toshiba Pc Health Monitor

    Starting the TOSHIBA PC Health Monitor The TOSHIBA PC Health Monitor can be started using the following methods: ■ Click Start -> All Programs -> TOSHIBA -> Utilities -> PC Health Monitor. ■ Click the icon ( ) in the notification area, then click the "Enable PC Health Monitor..."...
  • Page 186: Legal Footnotes

    Appendix F Legal Footnotes This chapter states the Legal Footnotes information applicable to TOSHIBA computers. Non-applicable Icons Certain computer chassis are designed to accommodate all possible configurations for an entire product series. Therefore, please be aware that your selected model may not have all the features and specifications corresponding to all of the icons or switches shown on the computer chassis.
  • Page 187: Memory (Main System

    86°F) or >25°C (77°F) at high altitude (all temperature references are approximate and may vary depending on the specific computer model - please refer to your computer documentation or visit the Toshiba website at www.pcsupport.toshiba.com for details). CPU performance may also vary from specifications due to design configuration.
  • Page 188: Battery Life

    Published battery life numbers are achieved on select models and configurations tested by Toshiba at the time of publication. Recharge time varies depending on usage. Battery may not charge while computer is consuming full power.
  • Page 189: Wireless Lan

    Legal Footnotes Wireless LAN The transmission speed over the wireless LAN and the distance over which wireless LAN can reach may vary depending on surrounding electromagnetic environment, obstacles, access point design and configuration, and client design and software/hardware configurations. The actual transmission speed will be lower than the theoretical maximum speed.
  • Page 190 Glossary The terms in this glossary cover topics related to this manual. Alternate naming is included for reference. Abbreviations AC: Alternating current ACPI: Advanced Configuration and Power Interface AMT: Intel Active Management Technology ASCII: American Standard Code for Information Interchange BD-R: Blu-ray Disc Recordable BD-RE: Blu-ray Disc Rewritable BIOS: basic input/output system...
  • Page 191 Glossary HDMI: High-Definition Multimedia Interface IDE: integrated drive electronics IEEE: Institute of Electrical and Electronics Engineers I/O: input/output IRQ: interrupt request KB: kilobyte LAN: local area network LCD: liquid crystal display LED: light emitting diode MB: megabyte MMC: multi media card OCR: optical character recognition (reader) PC: personal computer PCI: peripheral component interconnect...
  • Page 192 FN + F2 (Power Plan) 5-3 Cleaning the computer 4-37 FN + F3 (Sleep) 5-3 Cooling vents 2-2 FN + F4 (Hibernate) 5-3 Corel Digital Studio for TOSHIBA 3-13 FN + F5 (Output) 5-3 FN + F6 (Brightness Down) 5-3 User’s Manual Index-1...
  • Page 193 Satellite L750/L755/L750D/L755D/Satellite Pro L750/L750D FN + F7 (Brightness Up) 5-3 FN + F8 (Wireless) 5-4 Keyboard 5-1 FN + F9 (Touch Pad) 5-4 emulating enhanced keyboard 5-2 FN + space (Zoom) 5-4 FN Sticky key 5-4 Function keys 5-2 Function keys F1...F12 5-2...
  • Page 194 Recovery Media 8-19 Self test 8-4 USB device Sound system 8-15 problems 8-14 System start-up 8-3 Using WinDVD BD for TOSHIBA 4-24 TOSHIBA support 8-19 Utilities and Applications 3-10 Touch Pad 8-12 Wireless LAN 8-18 USB device 8-14 Video mode B-1...

Table of Contents