
Related Manuals for Ikan Cinemage 2000

Summary of Contents for Ikan Cinemage 2000
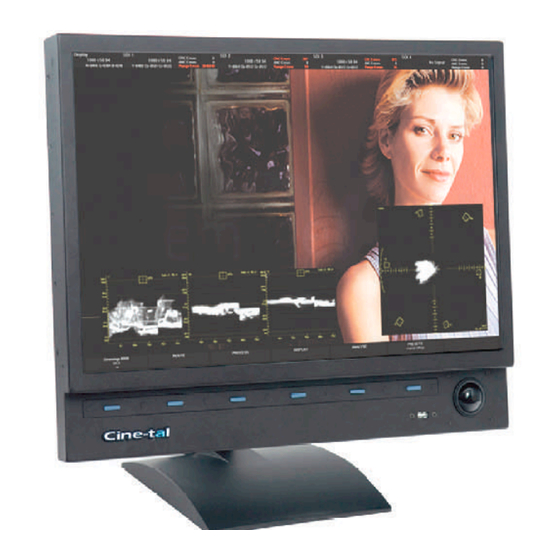
- Page 1 (2000, B420, B230, B190) User Manual Version 4.1.x Cine-tal Systems, Inc. 8651 Castle Park Drive Indianapolis, IN 46256...
-
Page 2: Fcc Notice
FCC Notice This device complies with Part 15 of the FCC Rules. To assure continued compliance follow the attached installation instructions and do not make any unauthorized modifications. This equipment has been tested and found To comply with the limits for a class A digital Device, pursuant to Part 15 of the FCC Class rules. - Page 3 Preface This User’s Guide includes instruction and reference information for the operation and use of all Cinemage models and all options available for the Cinemage line of products. Trademarks All brand and product names mentioned herein are used for information purposes only and may be trademarks or registered trademarks of their respective companies.
-
Page 4: Table Of Contents
Table of Contents Official Notices ....................v Limitation of Liability ....................v Section 1: Getting Started ................2 Chapter 1: Introduction ....................2 Chapter 2: Menu Overview..................9 Chapter 3: Remote Control Panel ................19 Chapter 4: Useful Operations ................... 30 Section 2: Setting Up Your System ............ -
Page 5: Official Notices
Official Notices Limitation of Liability CINE-TAL SYSTEMS INC SHALL NOT BE LIABLE FOR INDIRECT, SPECIAL, INCIDENTAL, OR CONSEQUENTIAL DAMAGES; FOR DAMAGES THAT DIRECTLY OR INDIRECTLY ARISE FROM YOUR USE OF, OR INABILITY TO USE, THE SYSTEM; FOR COMMERCIAL LOSS OF ANY KIND; FOR THE PROCUREMENT OF SUBSITIUTE GOODS—WHETHER ARISING IN TORT, CONTRACT OR ANY OTHER LEGAL THEORY, EVEN IF CINE-TAL SYSTEMS INC HAS BEEN ADVISED OF THE POSSIBILITY OF SUCH DAMAGES. - Page 6 responsible for any copyright infringement that is caused or incurred by your failure to abide by the terms of this Agreement. Subject to these restrictions, you may make a single backup copy of the Software. You may use the backup copy solely for your archival purposes and to reinstall the Software on the Product. You must reproduce and include any copyright notice on any copy.
- Page 7 II. Cine-tal Limited Hardware Warranty Cine-tal makes the following limited hardware warranties to the original buyer or, if purchased from an authorized Cine-tal dealer, the end user (collectively, the "Customer" or "you"): All new products, excluding Cinemage products (collectively, the "Cine-tal Products"), purchased by the Customer shall be free of defects in materials and workmanship for one year from the date of purchase;...
- Page 8 remainder of 2 years from the date of purchase. Cine-tal LCD Panel Warranty Defect Definitions and Standards, a separate document, is available upon request; and Following 1 year from the date of purchase Cine-tal shall provide to customers a special discount for replacement LCD panels that meet ISO 13406 -2 International Standard for ergonomic requirements for image quality of flat panel displays level I.
- Page 9 Attorney Fees. Cine-tal shall be entitled to its reasonable attorney's fees and costs associated with enforcing its rights under this Agreement. Governing Law. The laws of the State of Indiana in the United States of America shall govern this Agreement in all aspects, including interpretation, performance, and enforcement, without regard to principles of conflicts of law.
- Page 10 Telephone Support Hours of Operation: Monday-Friday 9:00am-17:30pm JST Tel: +81 03 3595 9101 Support e-mail: support@digix.imagica.co.jp EASTERN EUROPE: Janusz Rupik PVP Sp. z o.o. Ship to Address: Janusz Rupik PVP Sp. z o.o. Ul. Rumiana 3 c 02-956 Warszawa, POLAND Telephone Support Hours of Operation Monday-Friday 10:00 –...
- Page 11 AND ANY OTHER COMMUNICATIONS BETWEEN US. NO ORAL OR WRITTEN INFORMATION OR ADVICE GIVEN BY CINE-TAL, ITS AGENTS, OR ANY OTHER PERSON OR ENTITY SHALL CREATE OR ASSUME A LICENSE, WARRANTY, LIABILITY, OR OTHER OBLIGATION BY CINE-TAL DIFFERENT FROM THOSE PROVIDED HEREIN.
-
Page 12: Section 1: Getting Started
Section 1: Getting Started Chapter 1: Introduction Welcome! The Cinemage product family revolutionizes critical monitoring for digital cinema acquisition, post production and DI by combining Cine-tal’s leading edge IDS (Intelligent Display Server) technology and calibrated full resolution LCD display. Cinemage provides quantitative video analysis, colour pre-visualization, video signal quality assurance, real-time collaboration between acquisition and post production, and an integrated OmniTek™... - Page 13 Connections for the Cinemage Starting from the top down: DVI Output……….Connection to external monitor or projector 1920 x 1200 resolution at 48-60 Hz Video Out 1………………………………………..HD SDI Out 1 Video Out 2………………………………………..HD SDI Out 2 Video Out 1&2……………………………….….Dual Link Out 1 DVI Input………………………….Input from computer device 1920 x 1200 resolution at 48-60 Hz Reference Loop…………………………….Analog Reference...
- Page 14 Connections for Cinemage B Series B190, B230, and B420 Starting from Top to Bottom: DVI Output……….Connection to external monitor or projector 1920 x 1200 resolution at 48-60 Hz Video Out 1………………………………………..HD SDI Out 1 Video Out 2………………………………………..HD SDI Out 2 Video Out 1&2……………………………….….Dual Link Out 1 DVI Input………………………….Input from computer device 1920 x 1200 resolution at 48-60 Hz...
- Page 15 NOTE: The 4 HD SDI Inputs and the 2 HD SDI Outputs can be linked as 2 Dual Link Inputs and 1 Dual Link Output. Cinemage User Manual Version 4.1.x ©2010...
- Page 16 Front Panel for Cinemage There are 6 pushbuttons located on the Front Panel. These pushbuttons correspond to the soft menus located above each button. These pushbuttons allow for direct input to the various features of the Cinemage Monitor. The menus are located in the lower unused portion of the active video screen. The upper unused portion of the active video screen is used as a reference bar going from black to white across the top of the screen as well as heads up display with critical information about the inputs coming into your monitor.
- Page 17 Power Requirements for Cinemage Cinemage runs on 100 to 240V AC at 50 or 60 hertz. Nominal current is 2A. If you have the DC input option installed you may run the system on 22-30V DC [OPTION] input. Standard Anton Bauer 3 pin XLR connector is used. Pin 1 is ground, Pin 2 is positive and Pin 3 is unused.
- Page 18 4) Along the right side of the monitor, there are six screws that need to be removed (only the screws that are attached to the front housing, there is one screw that is not supporting the housing that can be left in.) 5) There are five additional screws along the bottom of the monitor that need to be removed to remove the bezel.
-
Page 19: Chapter 2: Menu Overview
Chapter 2: Menu Overview In reading this section note that location of menu options may change over product revisions. Furthermore, available menu choices will vary depending on model number and installed options. Functions that are dependent on installed options are marked as [Option]. - Page 20 Cinemage 2142 Indicates Cinemage model number. By pressing this button once you will navigate to the Lockout Menu. The Lockout Menu provides two functions; 1) to blackout the non-video portion of the display and 2) provides a key lock function such that the systems setting can’t be changed without an unlock key (see Lockout Menu in Chapter 2 for more information.) Operator Menus...
-
Page 21: Menu Navigation
Operator Menus To access the Operator Menus select “Operator Menus” from the Main Menu Main Menu Cinemage 2142 Operator Menus System Menus Setup Menus Display Control Presets Press for lockout menu original settings ↑ Menu Navigation Use the trackball to scroll through the Operator Menus, or Select the far right menu on the monitor with the mouse, and scroll through using either the wheel or up and down movement with the mouse. - Page 22 SDI 4 [Option] Routes SDI input 1 to the display. A highlighted button indicates the current source that is routed to the display. DVI INPUT [Option] Routes the DVI input to the Display. If your DVI signal is a 1920x1200, simply pressing this button will display a 1920x1080 center cut of this signal, at a maximum framerate of 30p.
- Page 23 Calibration Mode: Full Gamut Doesn’t change the Dual Link or Input Limiting settings, but allows you to select from the available Full Gamut calibration settings. NEXT Advances to the Video Modes 2 menu. *Operator Menus: Video Modes 1: Advanced Mode Operator Menus: Video Modes 1: Advanced Mode CALIBRATION TYPE: CURRENT CALIBRATION:...
- Page 24 Operator Menus: Presets Operator Menus: Presets Menu Save New Preset: Defaults Original Settings Unavailable More Presets Back By using the trackball or USB mouse in the Operator Menus you can navigate to the Presets menus. Each Preset menu page contains 4 presets starting with Defaults and Original Settings.
- Page 25 Operator Menus: 3D LUTs Operator Menus: 3D LUTs Select 3D LUT 3D LUTs 1 Operator Menu RESET 3D LUT 1 3D LUT 2 3D LUT 3 More 3D LUTs By using the trackball or USB mouse in the Operator Menus you can navigate to the 3D LUTs menus.
- Page 26 System Menus To access the System Menus select “System Menus” from the Main Menu Main Menu Cinemage 2142 Operator Menus System Menus Setup Menus Display Control Presets press for lockout menu original settings ↑ Upon pressing the System Menus button you will get the following menu: System menu Cinemage 2142 Route...
-
Page 27: Setup Menus
Setup Menus To access the Setup Menus select “Setup Menus” from the Main Menu Main Menu Operator Menus System Menus Setup Menus Display Controls Preset: Back Original Settings ↑ Upon pressing the Setup Menus button you will get the following menu: Setup Menus Back Unit... - Page 28 Lockout Menu To access the Lockout Menu the user must press the Main Menu’s first button “Model Number”. Main Menu Cinemage 2142 Operator Menus System Menus Setup Menus Display Controls Presets Original Settings Press to lockout menus ↑ Upon pressing the system model number button you will get the following menu: Blackout Lockout Blackout &...
-
Page 29: Chapter 3: Remote Control Panel
Chapter 3: Remote Control Panel [OPTION on Cinemage 2000] * Note: Pictures in this section use a Prototype of the Remote Control Panel. Actual Product and colors may vary slightly from what is shown below.* FCC Notice This device complies with Part 15 of the FCC Rules. - Page 30 Before using the Remote Control Panel, you must make sure your Cinemage is set up properly. First, from the Main Menu, enter the Setup Menus Cinemage Operator System Setup Display Presets 2142 Menus Menus Menus Control Original Settings ↑ Then enter the Preset & Preferences Menu Back Unit Video &...
-
Page 31: Input Buttons
The Remote Control Panel is available as an option for the Cinemage, but comes with all Cinemage B Series monitors. The Remote Control Panel works with monitors running software version 3.1 and higher. In order to use the Remote Control Panel, you must have the latest version of firmware on your monitor. - Page 32 FULLMODE, there may be some anomalies on your display due to the native resolution of the display. Function Buttons Dual Link [Option on Cinemage and Cinemage B Series monitors] By setting “Dual Link Mode” to one of the 4:4:4 colorspace modes, the inputs and outputs of the monitor will be configured as 2 dual link inputs and 1 dual link output.
- Page 33 This button causes the display to only output the Blue component of the video signal. Can be used to ensure proper monitor setup by viewing the Color Bars in blue only mode. R/G/Y This button causes the display to only output the Red, Green, Blue, Magenta, Yellow, Cyan and Black components of the video signal.
- Page 34 Display Setting Knobs Backlight This knob will adjust the setting on the backlight Contrast This knob will adjust the contrast setting of the display Saturation This knob will adjust the saturation setting of the display Brightness This knob will adjust the brightness setting of the display Manual This button resets all the changes made using the Display Setting Knobs to factory defaults...
- Page 35 Press right on the directional pad when Display Settings is selected to enter. When entering the Display Settings Menu you are given the following options: Split Screen, Markers, Misc Settings, and Back/Exit. In order to enter each menu, you must hit right on the directional pad, except for Back, which you will have to hit left on the directional pad.
- Page 36 Markers Enable – Upon entering this menu, you are given multiple options: Disabled, A Enabled, B Enabled, A & B Enabled, A Masked, B Masked, Centered Crosswire, and Back/Exit. For each option, once it is highlighted press right on the directional pad to choose the option.
- Page 37 B Setup – When entering this menu, you are given another set of menus including: Enable, Type, Scale, Position, Style, and Back/Exit. Enable – Options in this menu are Off, On, and Back/Exit. Press right on either Off or On to choose option.In order to go Back, press left when Back/Exit is selected, in order to Exit, press right.
- Page 38 Back, press left when Back/Exit is selected, in order to Exit, press right when the option you want to enter is highlighted. Mask Style – There are three options in this menu: Black, Darken, and Back/Exit. Black will make the masked area blacked out. Darken will make the masked area darker, but still transparent.
- Page 39 LCD Settings – When selecting this option you are given LCD Brightness, LCD Contrast, and Back/Exit options. In order to change the LCD Brightness, select the option and press right or left on the directional pad. In order to change the LCD Contrast, select the option and press right or left on the directional pad.
-
Page 40: Chapter 4: Useful Operations
Chapter 4: Useful Operations Cinemage Preferences Control: Setting Remote File Locations The Cinemage and Cinemage B Series monitors feature a remote file access capability that allows for storing and accessing media on remote file servers. This requires that the remote server host a standard readable and writable SMB (i.e. Samba or Windows) file share. - Page 41 XML Editor: Now insert the proper username, path, and password. Note that the password is stored in cleartext by design (so that this is possible). Text: <connection_info_stillsxsi:type="a1:connect_data"xmlns:a1="http://schemas.microsoft.com/c lr/nsassem/Philo/PhiloController%2C%20Version%3D1.0.2168.38160%2C%20Culture%3Dneutral%2C% 20PublicKeyToken%3Dnull"> <usernameid="ref-14">EXAMPLEDOMAIN\JSMITH</username> <pathid="ref-15">\\BIGSERVER\IMAGES</path> <passwordid="ref-16">asdjkfao**H</password> </connection_info_stills> XML Editor: Cinemage User Manual Version 4.1.x ©2010...
- Page 42 Step 3: Copy the preferences back to the Cinemage 1. Insert a USB memory key into the Cinemage. 2. From the Main Menu, Select “SETUP MENUS”. 3. Select “PRESET & PREFERENCES SETUP”. 4. Select “MANAGE PREFERENCES”. 5. Select “LOAD PREFERENCES FROM USB”. 6.
-
Page 43: Saving A Preset
Once you have adjusted your Preference settings (i.e. designated a Network Path), it may be useful to save that setting to a USB key for later recall to enable you to reset the machine to clear any sensitive information. To save or recall your preference settings, enter the Setup menu: Cinemage 2142 Operator Menus... - Page 44 Saving your presets allows you quick access to your desired workflow. Presets can be saved to and recalled from any of three locations: local memory, a USB datakey, or a remote server location. To change the location the Presets are saved to/ recalled from you must enter the Setup Menu: Cinemage 2142 Operator Menus...
- Page 45 While this may be a mildly involved process to save all of your workflow settings initially, once they are saved you have one button access to them from the Main System menu: Cinemage 2142 Route Process Display Analyse Select Preset Original Settings Press to lockout menus...
- Page 46 Once you have entered the USB Datakey Setup menu, you will be able to save/load your cloned system setup, allowing for easy access to your previous workflow settings. Go to the Clone To/From USB menu: Back Format & Prepare Clone To/From USB USB File Copy Setup Lockout with Updates...
- Page 47 Then press Network & USB Datakey Setup Back Unit Video & Display Preset & Network & USB Resets Information Setup Preferences Datakey Setup Setup ↑ Then press USB Datakey Setup Back WEB/FTP Setup Remote File File Sharing Wired / USB Datakey Setup Setup Wireless LAN...
- Page 48 Software Updates/Upgrades: Cine-tal is continually working towards product improvements to aid in the functionality of our monitors in your production process. As such, software updates will be released to improve the way Cinemage and Cinemage B Series monitors function. In addition to these software updates, you have the ability to purchase or operate on a limited trial basis upgrade licences, to “unlock”...
- Page 49 The unit will load the software update into internal memory. Power cycle the unit and the update will be loaded and ready for use. To perform a software upgrade, insert your USB key and press the Generate Licence Lock Code button: Back Update From USB Generate Licence...
- Page 50 Accessing a router: To take advantage of Cinemage or Cinemage B Series monitors’ etworking and file sharing capabilities, often it will be necessary to access the unit via a network router. Before connecting the Cinemage or Cinemage B Series monitor to your network always check with your network administrator.
- Page 51 (If your system is set for DHCP, skip this step.) If the system is set for Static IP setup the appropriate numbers for Wired Static DNS Address, Wired Static IP address, Subnet Mask, and IP Gateway (See Addendum A to edit this in the prefs.xml file): Back Wired IP Mode: Wired Static IP...
- Page 52 Enter the Setup Menu Cinemage 2142 Operator Menus System Menus Setup Menus Display Controls Presets Press to lockout menus ↑ Then enter the Unit Information menu: Back Unit Information Video and Presets and Network & USB Resets Display Setup Preferences Setup Datakey Setup ↑...
- Page 53 Then enter the Remote File Setup Menu: Back Web / FTP Setup Remote File Setup File Sharing Setup Wired / Wireless LAN USB Datakey Setup Setup ↑ The process is the same for setting up all four areas of the Remote File Setup. Listed are the steps for Stills, but they can be repeated for Presets, Input LUTs, and 3D LUTs.
- Page 54 Calibration: Before navigating the menus, plug the GretagMacbeth (GMB) calibration probe [option] into the USB port. From the main menu, press the Setup Menus button: Cinemage 2142 Operator Menus System Menus Setup Menus Display Controls Presets Press to lockout menus ↑...
- Page 55 Adjust the backlight to a comfortable setting for your ambient environment using the trackball. Press the Read CIE xyY button: Back Read CIE xy,Y Read CIE X,Y,Y Select Calibration Video Source Set Flat Backlight Brightness 20.0% Field Target: x=.314, y=.345 x=.314, y=.345, Y=115Cd X=.314, Y=.345, Y=115 Cd ↑...
- Page 56 Loading a 3D LUT when in Full Gamut Mode Use these steps to load and view a 3D LUT while in Full Gamut Calibration Mode: From the Top Level Menu, Select System Menus: Cinemage 2142 Operator Menus System Menus Setup Menus Display Controls Presets Press to lockout menus...
- Page 57 Set the 3D LUT Input to the Input you wish to apply a 3D LUT to: Back 3D LUT Input Display Source Browse 3D LUTs: Load 3D LUT Now: Reset 3D LUT Hold and release to setup SDI 1 SDI 1 ↑...
- Page 58 Then Select the Colour Grade Button: Back Framestore Colour Grade INPUT LUTs Pan & Zoom H&V Delay ↑ Press and Hold the Back button to enter the 3D LUT setup Menu: Back 3D LUT Source Display Source Browse 3D LUT Load 3D LUT Now Reset 3D LUT Hold and release to setup...
- Page 59 Then select the 3D LUT you wish to apply with the Browse 3D LUT button: Back 3D LUT Input Display Source Browse 3D LUTs: Load 3D LUT Now: Reset 3D LUT Hold and release to setup SDI 1 3D LUT Output ↑...
- Page 60 Loading an Input LUT Use the following steps to load an input LUT: From the Main Menu select System Menus: Cinemage 2142 Operator Menus System Menus Setup Menus Display Controls Presets Press to lockout menus ↑ Then select the Process button: Back Route Process...
- Page 61 Capturing, Loading, and Saving a Still Frame Use these steps to capture, load, or save a still frame: From the Main Menu select System Menus: Cinemage 2142 Operator Menus System Menus Setup Menus Display Controls Presets Press to lockout menus ↑...
- Page 62 To load a Still Frame that you have already saved, locate the file using the Browse File button: Back Framestore Mode Capture Frame Browse Files Load File Now More Current Framestore Hold and release to setup Live ↑ To load the selected file, simply press the Load File Now Button and the Framestore will automatically route to the display and your selected file will be loaded into the current Framestore Slot: Back...
-
Page 63: Section 2: Setting Up Your System
Section 2: Setting Up Your System Chapter 5: Setup Overview Setup Menus To access the Setup Menus select “Setup Menus” from the Main Menu Main Menu Cinemage 2142 Operator Menus System Menus Setup Menus Display Controls Presets Press to lockout menus ↑... -
Page 64: Chapter 6: Unit Information Menus
Chapter 6: Unit Information Menus To access the Unit Information Menus select “Unit Information” from the Setup Menus Setup Menus Back Unit Information Video & Display Preset &Preferences Network &USB Datakey Resets Setup Setup Setup ↑ Upon pressing the Unit Information button you will get the following menu: Unit Information Menus 1 Back Unit Information:... -
Page 65: Network Status
Unit Information Menus 2 Back Options: Diagnostics: Network Status: SerialNumber: More Display Calibration: Enabled None Network Startup Complete 0604-316023 Back Returns to the Unit Information Menu 1 Options Provides information on software options enabled. Pressing this button will update the screen with the next option and its status. Diagnostics For internal use only Network Status... -
Page 66: Chapter 7: Video & Display Setup
Chapter 7: Video & Display Setup Setup Menus Back Unit Information Video &Display Setup Preset Network &USB Datakey Reset &Preferences Setup Setup ↑ From the System Setup menu select Video & Display Setup and you will get the following menu: Main Menu: Setup Menus: Video &... - Page 67 Monitor Profiling Enters the menu that allows you to profile your monitor and control the number of points to sample, giving a more accurate profile if desired. Allows you to change profile options and manage profiles that are saved to the machine. This menu can also give you access to resetting the probe.
- Page 68 Sync Source This function sets the sync master for the entire unit. You may choose between Free run, Analog or SDI. If SDI is selected the SDI Timing Master Menu will appear in the menu bar. The user can then select from any of the HD SDI inputs or Automatic.
-
Page 69: Chapter 8: Full Gamut Mode
Chapter 8: Display Calibration: Full Gamut Mode From the Main Menu, select Setup Menu to receive the following menu: Main Menu: Setup Menus: Back Unit Information Video & Display Preset &Preferences Network &USB Reset Setup Setup Datakey Setup ↑ After selecting Video & Display Setup, you will get the following menu: Back Video Setup Calibration Setting:... - Page 70 By pressing Auto Profile Display, you can follow on screen directions to create a profile for your display and create a calibration LUT for the display. The Auto Profile Display is adjusted by “Change Sample Count” and “Profile Options” Main Menu: Setup Menu: Video & Display Setup: Monitor Profiling Back Auto Profile Change Sample...
- Page 71 Main Menu: Setup Menu: Video & Display Setup: Monitor Profiling Back Auto Profile Change Sample Profile Options Manage Profiles Reset Probe: Display: Count ↑ By pressing the Manage Profiles button you will be taken to the following menu: Main Menu: Setup Menu: Video & Display Setup: Monitor Profiling: Manage Profiles Back Revert to Backup Revert to Factory...
- Page 72 This menu allows you to manually adjust the display properties in a similar fashion to the conventional calibration found on CRT monitors. Adjustments made in this menu can be saved by overwriting one of the existing display profiles. For best results, Manual Calibration should be performed after an Auto Calibration to achieve your optimal monitor response curve.
- Page 73 Adjust Calibration Settings: Full Gamut: Main Menu: Setup Menu: Video & Display Setup: More Display Setup Menu Back Adjust Calibration Profiling Options Manual Calibration Blue Only Mode Measure Backlight Brightness: Settings Adjustments ↑ Pressing the Adjust Calibration Settings button will take you to the following menu: Setup Menu: Video &...
- Page 74 Main Menu: Setup Menu: Video & Display Setup: More Display Setup Menu: Adjust Calibration Settings Back Save Calibration Saturation Linear Segment Enable: White Point Gamma: Settings Hold and release for setup ↑ Pressing the Save Calibration Settings button will take you to the following menu: Main Menu: System Setup: Video &...
- Page 75 Main Menu: Setup Menu: Video & Display Setup: More Display Setup Menu: Adjust Calibration Settings: Back Save Calibration Saturation Linear Segment Enable: White Point Gamma: Settings Hold and release for setup ↑ Pressing the Saturation button will take you to the following menu: Back Reset: Saturation:...
- Page 76 Set White Point: Full Gamut: Main Menu: Setup Menu: Video & Display Setup: More Display Setup Menu: Adjust Calibration Settings Back Save Calibration Saturation Linear Segment Enable: White Point Gamma: Settings Hold and release for setup ↑ Pressing the White point button will bring you to the following menu: Main Menu: Setup Menu: Video &...
- Page 77 Profiling Options: Full Gamut: Main Menu: Setup Menu: Video & Display Setup: More Display Setup Menu Back Adjust Calibration Profiling Options Manual Calibration Adjustments Blue Only Mode Measure Backlight Brightness: Settings ↑ Pressing the Profile Options button will give you the following menu: Main Menu: System Setup: Video &...
- Page 78 Manual Calibration Adjustments: Full Gamut: Main Menu: Setup Menu: Video & Display Setup: More Display Setup Back Adjust Calibration Profiling Options Manual Calibration Blue Only Mode Measure Backlight Brightness: Settings Adjustments ↑ Selecting Manual Calibration from the Display Setup menu displays the following menu: Main Menu: Setup Menu: Video &...
- Page 79 Main Menu: Setup Menu: Video & Display Setup: More Display Setup: Manual Calibration Adjustments Back Brightness And Adjust x, y, R,G,B Adjust High, Mid, Low Adjust Detailed Calibration Reset Corrections Contrast Bias and Gain Points ↑ Pressing the Brightness and Contrast button will take you to the following menu: Main Menu: Setup Menus: Video &...
- Page 80 Main Menu: Setup Menu: Video & Display Setup: More Display Setup: Manual Calibration Adjustments Back Brightness And Adjust x, y, R,G,B Adjust High, Mid, Low Adjust Detailed Calibration Reset Corrections Contrast Bias and Gain Points ↑ Pressing the Adjust x, y, R, G, B Bias and Gain will give you the following menu: Main Menu: Setup Menus: Video &...
- Page 81 Main Menu: Setup Menu: Video & Display Setup: More Display Setup: Manual Calibration Adjustments: x,y,R,G,B Bias and Gain menu 1 Back Red Bias Green Bias Blue Bias More Flat Field Display Red Bias ↑ Pressing the More button will display the following menu: Main Menu: Setup Menu: Video &...
- Page 82 Main Menu: Setup Menu: Video & Display Setup: More Display Setup: Manual Calibration Adjustments Back Brightness And Adjust x,y, R,G,B Adjust High, Mid, Low Adjust Detailed Calibration Reset Corrections Contrast Bias and Gain Points ↑ Pressing the Adjust High, Mid, Low will give you the following menu: Main Menu: Setup Menu: Video &...
- Page 83 Main Menu: Setup Menu: Video & Display Setup: More Display Setup: Manual Calibration Adjustments: Adjust High, Mid, Low menu 1 Back Segment to Modify Adjust x Adjust y Adjust Y More Adjust x High ↑ Pressing the More button will display the following menu: Main Menu: Setup Menu: Video &...
- Page 84 Main Menu: Setup Menu: Video & Display Setup: More Display Setup: Manual Calibration Adjustments Back Brightness And Adjust x,y, R,G,B Adjust High, Mid, Low Adjust Detailed Calibration Reset Corrections Contrast Bias and Gain Points ↑ Pressing the Adjust Detailed Calibration Points will give you the following menu: Main Menu: Setup Menu: Video &...
- Page 85 Main Menu: Setup Menu: Video & Display Setup: More Display Setup: Manual Calibration Adjustments: Adjust Detailed Calibration Points menu 1 Back Point to Modify Adjust x Adjust y Adjust Y More Adjust x ↑ Pressing the More button will display the following menu: Main Menu: Setup Menu: Video &...
- Page 86 Measure: Full Gamut: [Option] This menu allows you to measure the response of the display. Main Menu: Setup Menus: Video & Display Setup: More Display Setup Back Adjust Calibration Profiling Options Manual Calibration Blue Only Mode Measure Backlight Brightness: Settings Adjustments ↑...
- Page 87 Steps to calibrate your display: Full Gamut [Option] Before navigating to the Display Setup menu plug the GretagMacbeth (GMB) calibration probe into the USB port. If the probe is not plugged in before navigating to this menu, the monitor will not be able to “see”...
-
Page 88: Chapter 9: Gamut Controlled Mode
Chapter 9: Display Calibration: Gamut Controlled Mode: **A Note about Gamut Controlled Calibration Mode: A new Gamut controlled calibration mode with integrated cineSpace 3D LUT calibration is now available. This is quite useful for newer revisions of Cinemage that feature a wide gamut (“WG”) panel. Customers without this feature may contact Cine-tal technical support for information about an upgrade. - Page 89 Auto Profile Display Will lead you through a set of on screen instructions to profile your display Change Sample Count Allows you to determine the number of sample points the Auto Profile uses when creating a new profile for your display Profile Options Allows you to determine the amount of oversampling the Auto Profile will perform as well as Sample space shape and profiler output format...
- Page 90 Reset Sample Count Resets the sample count to the default 18 USB Mouse/Trackball/Sample Count Adjusts the sample count to desired number Main Menu: Setup Menu: Video & Display Setup: Monitor Profiling Back Auto Profile Change Sample Profile Options Manage Profiles Reset Probe: Display: Count...
- Page 91 Regenerate Gamut Control Calibration LUTs: After selecting which profile you are using, this will create a new LUT to match the monitor to the desired colorspace. This utilizes the factory calibration in the monitor and creates a new Calibration LUT to match the factory calibration to the desired colorspace. Main Menu: System Setup Menu: Video &...
- Page 92 Adjust Calibration Settings: Gamut Controlled: Main Menu: Setup Menu: Video & Display Setup: More Display Setup Menu Back Adjust Calibration Profiling Options Manual Calibration Blue Only Mode Measure Backlight Brightness: Settings Adjustments ↑ Pressing the Adjust Calibration Settings button will take you to the following menu: Setup Menu: Video &...
- Page 93 Save Calibration Settings Enters the menu that enables you to save or overwrite existing calibration settings. For more information regarding this menu, please see the Manual Calibration Adjustment section of this manual. Saturation Allows you to use the USB mouse/trackball and adjust the Saturation on the screen.
- Page 94 Main Menu: Setup Menu: Video & Display Setup: More Display Setup Menu: Adjust Calibration Settings: Back Back Save Calibration Saturation Gamma: Settings ↑ Pressing the Saturation button will take you to the following menu: Main Menu: Setup Menu: Video & Display Setup: More Display Setup Menu: Adjust Calibration Settings: Back: Saturation Back Reset:...
- Page 95 Profiling Options: Gamut Controlled Main Menu: Setup Menu: Video & Display Setup: More Display Setup Menu Back Adjust Calibration Profiling Options Manual Calibration Adjustments Blue Only Mode Measure Backlight Brightness: Settings ↑ Pressing the Profile Options button will give you the following menu: Main Menu: System Setup: Video &...
- Page 96 Manual Calibration Adjustments: Gamut Controlled Mode: Main Menu: Setup Menu: Video & Display Setup: More Display Setup Back Adjust Calibration Profiling Options Manual Calibration Blue Only Mode Measure Backlight Brightness: Settings Adjustments ↑ Selecting Manual Calibration from the Display Setup menu displays the following menu: Main Menu: Setup Menu: Video &...
- Page 97 Reset Brightness Resets any adjustments made to the brightness setting back to their original position. Reset Contrast Resets any adjustments made to the contrast setting back to their original position. Brightness Selects the brightness setting for adjustment controlled by the USB Mouse/trackball to the right of the monitor Contrast Selects the contrast setting for adjustment controlled by the USB...
- Page 98 Green Bias Allows you adjust the monitor’s response curve upwards for the Green component by using the trackball located at the right of the monitor. Effects of the bias adjustment will be more visible towards the black end of the shading spectrum. Blue Bias Allows you to adjust the monitor’s response curve upwards for the Blue component by using the trackball located at the right of the monitor.
- Page 99 of the adjustment to gain settings will be more visible towards the white end of the shading spectrum. Blue Gain Adjusts the monitor’s response curve by adding a multiplier to the blue component curve by using the trackball to the right of the monitor. Effects of the adjustment to gain settings will be more visible towards the white end of the shading spectrum.
- Page 100 Measure [Option] This menu allows you to measure the response of the display. Main Menu: Setup Menus: Video & Display Setup: More Display Setup Back Adjust Calibration Profiling Options Manual Calibration Blue Only Mode Measure Backlight Brightness: Settings Adjustments ↑ Selecting Measure from the Display Setup Menu displays the following menu: Main Menu: Setup Menus: Video &...
- Page 101 Steps to calibrate your display [Option] Before navigating to the Display Setup menu plug the GretagMacbeth (GMB) calibration probe into the USB port. If the probe is not plugged in before navigating to this menu, the monitor will not be able to “see”...
-
Page 102: Chapter 10: Preset / Preferences Setup
Chapter 10: Preset / Preferences Setup From the System Setup menu select Preset & Preferences Setup Main Menu: Setup Menu Back Unit InformationVideo Preset &Preferences Setup Network &USB Reset & Display Setup Datakey Setup ↑ You will get the following Preset &Preferences Setup menus: Main Menu: Setup Menu: Preset &Preferences Setup Menu Back... - Page 103 preferences file on their local computer (copied to a USB key, edited on a Mac or PC then reloaded into the Cinemage system). Preferences are loaded into the system when upon power-up and when a user clones a USB key to the system. They are re-written when shutting down the system and when cloning the system to a USB key.
- Page 104 Main Menu: Setup Menu: Preset / Preferences Setup Menu: Manage Preferences 1 Back Reset Preferences to Load Preferences Save Preferences to USB Reload Preferences MORE Network Status Default from USB Network Startup Complete ↑ After selecting More, you will be given the following menu: Main Menu: Setup Menu: Preset / Preferences Setup Menu: Manage Preferences 2 Back...
- Page 105 Remote Control Panel Setup Main Menu: Setup Menu: Preset & Preferences Setup Menu: Manage Preferences 2 Back Save Preferences USB Control Panel Trackball Sensitivity Auto Blackout Time Setup ↑ After selecting the USB Control Panel Setup Selection, you will be given the following menu: Main Menu: Setup Menu: Preset &...
- Page 106 Manage Presets The Manage Presets menu provides management of the naming and storage locations of your presets. Up to 20 presets may be stored on the local system and an unlimited number of presets can be stored on network file servers or the USB datakey. From the Preset / Preferences Setupmenu select Manage Presets.
- Page 107 Startup Settings Main Menu: System Setup: Preset & Preferences Setup Menu Back Manage Preferences Manage Presets Save Current As Startup Clear Startup Settings: Adjust Date and Settings: Press to erase startup settings Time: Press to set current state as startup Save Current As Startup Settings: Sets the bootup state of the monitor as the settings that will be applied every time the monitor reboots, and will disable saving settings at power down.
-
Page 108: Chapter 11: Usb Datakey Setup
Chapter 11: USB Datakey Setup The USB Datakey Setup Menu provides the ability to format a USB datakey and transfer data between the system and the datakey. From the System Setup menu select Network &USB Datakey Setup. Main Menu: System Setup Menu Back Video Setup Display Setup... - Page 109 USB File Copy Menu: Selecting USB File Copy from the USB Datakey Setup menu will give you the following menu: Main Menu: System Setup: Network/USB Datakey Setup: USB Datakey Setup: USB File Copy Back Disable USB Copy Files From USB Copy Files to USB Storage Back...
- Page 110 Updates Menu: From the USB DataKey Setup menu, selecting Updates will give you the following menu: Back Update From USB GenerateLicence Lock Update Licence: Key: Code: Update From USB Key Installs software updates from a USB datakey. Generate Licence Lock Code Generates a lock code for use with software updates obtained from Cine-tal.
-
Page 111: Chapter 12: Network Setup
Chapter 12: Network Setup The Network Setup Menu provides setup and control functions for controlling WEB and FTP services, setting up a network file server location to store stills, LUTs, waveforms and presets. This menu also sets up the Cinemage system to share its locally stored information out to the network. - Page 112 Web Browser Menus The web server can be utilized to control the Cinemage unit from a remote location. The web server accesses the most common features of the Cinemage unit, but does not enable full functionality. The web server will not display hyperlinks to options that are not enabled on the monitor that you are accessing.
- Page 113 The “Route” hyperlink will take you to the following page, http://cinetal- ******/pda/Route.aspx: From this page you will be able to route any of the inputs or internal resources to the display or either of the HD-SDI outputs, as well as toggle between single and dual-link operation.
- Page 114 The “Process” hyperlink will take you to the following page,http://cinetal- ******/pda/Process.aspx: From this page you can access one of the three processing functions available through the web service; Framestore, Colorgrade, and Input LUT. Cinemage User Manual Version 4.1.x ©2010...
- Page 115 Following the “Framestore” hyperlink, you will be brought to the following page,http://cinetal-******/pda/framestore.aspx: From this page you are able to route any of the inputs or internal resources to the Framestore, set the volatile Framestore number to be utilized, toggle between live and still modes, set the Proxy Image Capture parameters, upload a still, or click in the frame grab pane to capture a preview image.
- Page 116 Following the “Colorgrade” hyperlink, you will be brought to the following page, http://cinetal-******/pda/colorgrade.aspx: From this page you are able to route any of the inputs or internal resources to the Framestore, to the Display, or to the 3D LUT processor. You are also able to set the FramestoreProxy Capture parameters, as well as click in the Frame Grab Pane to capture a reference still.
- Page 117 Following the “Input LUT” hyperlink will bring you to the following page, http://cinetal- ******/pda/input_lut.aspx From this page you will be able to upload input LUTs to any of the HD-SDI inputs, set the Framestore Proxy Capture parameters, or click in the Frame Grab Pane to capture a reference still.
- Page 118 Remote File Setup Remote file setup defines a network file server location for the system to store stills, Input LUTs, 3D LUTs and presets. From the Network / USB Datakey setup select Remote File Setup. Main Menu: Setup Menu: Network &USB Datakey Setup Menu Back WEB / FTP Setup Remote File Setup...
- Page 119 File Sharing File Sharing allows users on the network to have access to the local storage area on Cinemage. Users may access locally stored stills, LUTs, waveforms, and presets. From the Network / USB Datakey Setup Menu select File Sharing Setup. Main Menu: Setup Menu: Network &USB Datakey Setup Menu Back...
- Page 120 Wired/Wireless LAN Setup From the Network & USB Datakey Setup Menu select Wired/ Wireless LAN Setup. Setup Menu: Network & USB Datakey Setup: Main Menu: Back WEB / FTP Setup Remote File Setup File Sharing Setup Wired/ Wireless LAN USB Datakey Setup Setup ↑...
- Page 121 If the Change Wired Setup button is pressed, the following menu will appear Main Menu: Setup Menu: Network/USB Datakey Setup: Change Wired Setup Menu Back Wired IP Mode: Wired Static IP Address: Wired Static DNS Address: Wired Static IP Subnet Wired Static IP Garteway: DHCP Mode 192.168.1.2...
- Page 122 Steps to connect Cinemage to a network router. Before connecting the Cinemage unit to your network, always check with your network administrator. 1. Determine if your network will require the Cinemage unit to be set for static IP or dynamic IP (DHCP) addressing.
- Page 123 Steps to connect to a Cinemage on a wireless network While the Cinemage is not a Wireless Appliance, you can access the monitor wirelessly by connecting it to a wireless router. You can then access the monitor by using a Mac, PC, or Apple iPhone, or iPod Touch connected to the wireless network.
-
Page 124: Chapter 13: System Reset
Chapter 13: System Reset The Resets menu allows you to reset all system settings either to your power-up original settings or to the factory original settings. This will also provide a safe way to return to your last saved settings. Each time you power the system down information is stored as the original settings. -
Page 125: Section 3: Using Your System
Section 3: Using Your System Chapter 14: Routing The routing menu allows you to route the input video, input DVI, framestore, test patterns, and 3D LUT output to the display or video outputs in the system. Main Menu: System Menu Cinemage 2142 Route Process... - Page 126 Press and hold to enter Advanced options for Dual Link Mode: Main Menu: Route Menu: Dual Link Advanced Mode Back Calibration Type Current Calibration Dual-Link Mode Input Limiting Resizer Option: Mode Back Returns to the previous menu Calibration Type Changes between Full Gamut Mode, and Gamut Controlled Mode Current Calibration Allows you to choose the current monitor calibration Dual-Link Mode...
-
Page 127: Chapter 18: Pan And Zoom
Chapter 15: Process / Framestore [OPTION] The framestore provides immediate access for up to 30 frames of stills. You can capture any source into the framestore or load external still files from local, network or a USB Datakey. There are four menus for the framestore; menu 1, menu 2, still file management and setup. - Page 128 Load File Now Loads the file selected in the Browse Files Button. More Displays Framestore Menu 2. Current Framestore Use the USB Mouse/trackball to select which framestore you are viewing. In “Live Mode” the USB Mouse/trackball will select which framestore you will store a captured still frame.
- Page 129 Still File Management Navigates to the still file management menu. Framestore: Still File Management Menu The framestore still file management menu allows you to rename and delete files stored in the selected file location. To navigate the framestore still file management menu select Still File Management from framestore menu 2.
- Page 130 Framestore: Setup The framestore setup menu sets the file location and file extension for saved files captured with the framestore. To navigate the framestore setup menu select, hold and release the back button from any framestore menu. Main Menu: Process Menu: Framestore: Framestore Menu 2 Back Framestore Mode: Capture &...
- Page 131 File Save Options Main Menu: Process Menu: Framestore: Framestore Setup Back File Location: File Save Options File Load Options Local ↑ By hitting the File Save Options button, the following menu will be displayed: Main Menu: Process Menu: Framestore: Framestore Setup: File Save Options Back Save File Format: File Location:...
- Page 132 Frame Buffer Access Type Changes the buffer access type between By Image, By Pixel, or By Line Reset File Prefix Erases changes made to the Still File prefix. Set File Prefix Sets the file prefix for Still Frames Select next Character Selects the character you have selected with the character generator as the next character in your file prefix Character...
-
Page 133: Chapter 16: Colourgrade
Chapter 16: Process/Colourgrade [OPTION] The Process menu provides access to the Framestore, Colourgrade and Input LUT functions. System Menu Cinemage 2142 Route Process Display Analyse Presets ↑ To navigate the Colourgrade menus select Process from the main menu, the following menu will be displayed: System Menu: Process Menu Back... - Page 134 • IridasFrameCycler 3D cube • Iridas Speed Grade 2D LUT and 3D cube • Nucoda 2D LUT and 3D cube file • QuanteliQ 3D cube file • Pandora Pogle 3D cube file • Quantel 3D cube file. • Chrome matrix •...
-
Page 135: Chapter 17: Input Luts
Chapter 17: Process / Input LUTs Cinemage supports a variety of 2D LUTs, otherwise known as Input LUTs. This section of the menuing has been changed with the v2.2 software release to enable support of the new ASC-CDL Input LUT format. System Menu Cinemage 2142 Route... - Page 136 Input LUT Setup System Menu: Process Menu: Input LUTs Back Select Input Select LUT: Press to Load Now Reset Input Lut Current Loaded LUT: Hold and release for setup Blue_only.csv ↑ Pressing and holding the back button will take you to the following menu: System Menu: Process Menu: Input LUTs: Input LUTs Setup Back INPUT LUT Location...
- Page 137 Reset New Name Clears the Character Generator of all characters currently selected Rename File Now Resets the file name to the selected name displayed in the subscript Select Next Character Adds the currently selected character to the new file name Character Controlled by the USB Mouse/trackball, this allows you to select characters for renaming files...
- Page 138 Chapter 18: Process/Pan and Zoom [OPTION] System Menu: Process Menu Back Framestore Colourgrade Input LUTS Pan and Zoom H & V Delay ↑ From the Process menu, pressing the Pan and Zoom button will provide the following menu: System Menu: Process Menu: Pan and Zoom 1 Back Magnification Horizontal...
- Page 139 Process Menu: Pan and Zoom 1 Back Magnification Horizontal Vertical Freeze Frame More Magnification Magnification ↑ Pressing the More button will give the following menu: Process Menu: Pan and Zoom 1 Back Source Show Crosswire Browse Stills Load Still Now Display RGB Value Source Changes the input or internal source routed to the display that is to be magnified...
-
Page 140: Chapter 19: H&V Delay
Chapter 19: H&V Delay System Menu: Process Menu Back Framestore Colourgrade Input LUTS Pan and Zoom H & V Delay ↑ From the Process menu, pressing the H&V Delay button will provide the following menu: System Menu: Process Menu: H&V Delay Back H &... -
Page 141: Chapter 21: Heads Up Display
System Menu Cinemage 2142 Route Process Display Analyse Presets ↑ To navigate the Marker menus select Display from the main menu, the following menu will be displayed: System Menu: Display Menu Back Markers: Heads Up Display Split Screen: Scaler & Deinterlacer Test Pattern Generator Marker A Enabled Hold &... - Page 142 Marker Position Position the selected Marker on the display using the USB Mouse or trackball. The x,y indicator references the first pixel of the Marker in the upper left hand corner. Marker Style Choose between a Marker with a white border or a Marker with an inverted luminance border.
-
Page 143: Chapter 24: Test Pattern Generator
Chapter 21: Display/ Heads Up Display The Cinemage system provides a Heads Up Display for important data concerning your video signal. System Menu Cinemage 2142 Route Process Display Analyse Presets ↑ To navigate to the Heads Up Display setup menus select Display from the main menu. The following menu will be displayed: System Menu: Display Menu Back... - Page 144 Timecode Display a timecode overlay in the bottom center portion of the display. Timecode Mode can be set to LITC, VITC 1, VITC 2 or Off. When using multiple sources, if you route from a source displaying timecode to one that is not, the monitor will “hold”, and continue to display the last time code recieved from a source outputting valid timecode.
- Page 145 Split Screen Source 1 Select Source 1 for the split screen generator. Split Screen Source 2 Select Source 2 for the split screen generator. Display Source Select the display source. If you want to view the split screen output in this menu make sure this is set for “Split Screen Output”.
- Page 146 Resize Sharpness Allows you to look at the picture with either sharp or soft pixel sizes. This allows you to look at the natural video, or smoothes video without compensation Field Mode Toggles between Off and Single Field Mode. Allows you to view a single field of an interlaced video source at a time.
- Page 147 ↑ System Menu: Display Menu: Test Pattern Generator Back Segment Pattern Segment Size Control Flat Field Generator Full Screen Generator Control Hold & Release for Setup Segment Pattern Control Enters the Segment Pattern Control Menu, which allows you to assign up to 4 different Test Patterns to horizontal segments of the screen, as well as assign a separate pattern to the upper portion of the screen.
-
Page 148: Chapter 25: Pixel Data Analysis
Chapter 25: Analyse / Pixel Data Analysis [OPTION] Pixel data analysis provides a means of selecting any pixel on the displayed source getting the data values for Y, Cb, Cr or R, G, B if the system is in dual link RGB mode. System Menu Cinemage 2142 Route... -
Page 149: Chapter 26: Pixel Analysis / Pan And Zoom
System Menu: Analyse: Pixel Data Analysis (page 2) Back SDI1: SDI1: SDI1: SDI1: Display RGB Pixel: Pixel to read: Y=0340 Cb=0525 Y=0340 Cb=0525 Y=0340 Cb=0525 Y=0340 Cb=0525 R=256, G=230, B=110 1034,539 Cr=0496 Cr=0496 Cr=0496 Cr=0496 SDI 1 Displays the pixel value on SDI 1 input at the location selected by the USB Mouse or trackball. - Page 150 System Menu: Analyse: Pixel Data Analysis Back Pixel Analysis Pan and Zoom Display RGB Pixel Value: More Pixel to read: Crosswire: R=256, G=230, B=110 1034,539 ↑ From the Pixel Data Analysis menu select Pan and Zoom. The following menu will be displayed: System Menu: Analyse: Pixel Data Analysis: Pan and Zoom Back...
- Page 151 Browse Stills Look through stills saved to display Load Still Now Loads still to display and allows user magnification tools on still Display RGB Value Gives the R, G, and B values of selected pixel Pixel to Read Allows user to know what pixel the crosswire is selecting Chapter 27: Analyse / Waveform Monitor [OPTION] The OmniTek HD waveform monitor is integrated into the Cinemage monitor in one of...
-
Page 152: Chapter 29: Vectorscope Setup
System Menu: Analyse Menu Back Pixel Data Analysis Waveform/Vectorscope Measure Display Output Range and Gamut Input Status Violation Setup ↑ From the Analyse Menu select Waveform/Vectorscope. The following menu will be displayed: System Menu: Analyse: Waveform/Vectorscope Back Waveform Vectorscope Waveform Monitor: Vectorscope Mode: Line Mode Selected Line:... -
Page 153: Chapter 28: Waveform Setup
Chapter 28: Analyse / Waveform Setup [OPTION] The menu items in this manual will vary depending on the waveform option enabled on your system. System Menu Cinemage 2142 Route Process Display Analyse Presets ↑ To navigate to the Waveform/Vectorscope menus select Analyse from the main menu. The following menu will be displayed: System Menu: Analyse Menu Back... - Page 154 Full: Use this graticule in RGB mode and all YCbCr modes other than YCbCr mode with undershoot and overshoot limited. H Magnification Provides a 2x, 5x, or 10x magnification of the time base on the waveform monitor display. Use the USB Mouse/Trackball (horizontal movement) to control which part of the waveform trace is displayed within the graticule.
- Page 155 Chapter 29: Analyse / Vectorscope Setup [OPTION] System Menu Cinemage 2142 Route Process Display Analyse Presets ↑ To navigate to the Waveform/Vectorscope menus select Analyse from the main menu. The following menu will be displayed: System Menu: Analyse Menu Back Pixel Data Analysis Waveform / Measure Display Output...
-
Page 156: Chapter 30: Range And Gamut Violation
Chapter 30: Range and Gamut Violation [OPTION] System Menu: Analyze Menu Back Pixel Data Analysis Waveform/Vectorescope Measure Display Output Range and Gamut Violations Input Status ↑ Pressing the Range and Gamut Violations button will take you to the following menu: System Menu: Analyze Menu: Range and Gamut Violations Back Colour Input Range... - Page 157 Input Range Violations Thresholds [OPTION] System Menu: Analyze Menu: Range and Gamut Violations Back Colour Input Range Colour Display Gamut Input Range Violation Display Gamut Reset Violation Violations Violations Thresholds Thresholds Thresholds ↑ Pressing the Color Input Range Violation Thresholds button will take you to the following menu: System Menu: Analyze Menu: Range and Gamut Violations Back...
- Page 158 Display Gamut Thresholds [OPTION] System Menu: Analyze Menu: Range and Gamut Violations Back Colour Input Range Colour Display Gamut Input Range Violation Display Gamut Violation Reset Violation Violations Violations Thresholds Thresholds Thresholds ↑ Pressing the Display Gamut Violation Thresholds button will take you to the following menu: System Menu: Analyze Menu: Display Gamut Violations Back...
- Page 159 GMAX Error Threshold Selects the Green Channel Maximum Threshold to be controlled by the USB Mouse or trackball. The default value of this threshold is 1005, roughly 1.85% below the upper limit of the LCD panel’s capability. Any value falling below this value will flash red when the Colour Display Gamut Violations is set to on.
- Page 160 Field Service Bulletin: #061220 Title: DVI Input Release Notes Date: December 20, 2006 Summary: DVI is enabled on the Cinemage product line in two phases. The first phase is on software version 2.1. In this release the Cinemage supports a DVI-D or DVI-I input at a fixed 1920x1200 resolution with a refresh rate of 60Hz. The DVI input can not be routed to the HDSDI outputs, Framestore, or 3D LUT.
- Page 161 graphics adapter. The system uses this information for configuration purposes, so the monitor and computer system can work together. Cinemage systems shipped before December 1, 2006 did not have the EDID set in DVI input chipsets (see Setting EDID). If you are using an operating system in your computer that allows manual settings for monitor support you should set them to: Pixel Clk: V Active Lines:...
Need help?
Do you have a question about the Cinemage 2000 and is the answer not in the manual?
Questions and answers