Advertisement
Advertisement

Subscribe to Our Youtube Channel
Related Manuals for Grace Digital TAPE2USB GDI-T2USB200

Summary of Contents for Grace Digital TAPE2USB GDI-T2USB200
-
Page 2: Table Of Contents
Contents page Important Safety Instructions PART I: Tape Player Operation Unit Diagram & Component Names/ Functions Basic Operation Cassette Tape Use Listening to a Tape Recording to a Tape (RCA & Built-in Microphone) PART II: Record from Tape to PC or Mac Audacity Audacity Software &... -
Page 3: Important Safety Instructions
IMPORTANT SAFETY INSTRUCTIONS Read these instructions. Keep these instructions. Head all warnings. Follow all instructions. Do not use this apparatus near water. Clean only with a dry cloth. Do not block any ventilation opening(s), install in accordance with the manufacturer's instructions. Do not install near any heat source such as radiators, heat registers, stoves, or other apparatus (including amplifiers) that produce heat. -
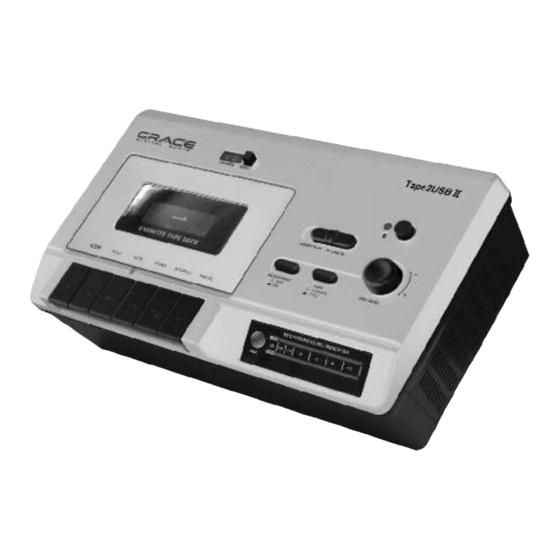
Page 4: Unit Diagram & Component Names/ Functions
Unit Diagram & Component Names / Functions 1. Cassette Tape Door 2. Counter (Tape Revolution) Display 3. Counter Reset Button 4. Power LED Indicator 5. Power Button 6. Line In/Cassette Selection Switch 7. Recording [REC LEVEL] Level +/- Knob 8. Recording [REC] Cr02 Button 9. -
Page 5: Cassette Tape Use
Cassette Tape Use Tape Handling Do not store tapes in the following places: 1. On top of heaters, exposed to direct sunlight or in any other places with high temperatures. 2. Near speakers, TV sets or amplifiers or where the unit may be exposed to strong magnetic fields. 3. -
Page 6: Listening To A Tape
Listening to a Tape Press the POWER button to switch on the unit. Use the CASSETTE / LINE IN switch on the top panel and select the CASSETTE position. 2. Plug the RCA Cable into the PLAY OUTPUT jack at the back of the unit, be sure that the red RCA Cable is inserted into the red jack and the white RCA Cable is inserted into the white jack. -
Page 7: Recording To A Tape (Rca & Built-In Microphone)
8. Stopping tape playback. To Stop the tape completely, Press the STOP/EJ button. Speaker Volume Knob Rotate the VOLUME knob on the back of the unit to adjust volume while listening to audio or monitoring your recordings. NOTE: The knob controls the Built-in Speaker volume only. - Page 8 5. Press COUNTER RESET button to zero the counter to count the tape’s revolutions. 6. Press the REC button to start recording. NOTE: IF the tape is a Cr02 version, select the REC Cr02 button first, then press REC PLAY button. When you press the REC button the PLAY ( ) button will also be pressed automatically.
- Page 9 2. Built-in MICROPHONE (Record to a Tape) Press the MICROPHONE button and select the ON position. NOTE: To turn OFF the MICROPHONE function, press the MICROPHONE button so that the button is up and the function is OFF. When the microphone is off, no sound is picked up from microphone and no audio will be recorded to your tape or your computer.
-
Page 10: Audacity
PART II: Audacity Software Audacity is the recording and editing software program included with your TAPE2USB II player. You must install Audacity (or an alternative recording software) on your computer to record audio from your TAPE2USB II to your computer. The Audacity disc includes software for use with PC (Audacity Version 1.2.6) and Mac (Audacity Version 1.3.7) computers. -
Page 11: Audacity For Pc
Audacity for PC Set Up Wizard: How to Set Up with PC To open the Set Up Wizard and install Audacity to your computer follow these steps: Insert the Audacity software disk that comes with your unit. Go to My Computer and double click the CD ROM Drive. NOTE: The CD may automatically launch the Set Up Wizard. -
Page 12: Installing Audacity Software On Your Pc
Double click the Audacity_for_WIN and audacity-win-1.2.6 will appear. double click the audacity-win-1.2.6 to open the Audacity software for PC installation. Installing Audacity Software on your PC 1. The Audacity Setup Wizard will appear, Click on Next > to begin the software install process. - Page 13 2. Click on “I accept the agreement” and click on Next. 3. Continue to click on the Next> buttons.
- Page 14 NOTE: be sure the box beside the Create a desktop icon is selected so that a shortcut to the Audacity program is saved on your Desktop.
- Page 15 Click on the Install button to start installation.
-
Page 16: Audacity Control Panel & Configuring Audacity Settings
Click on Finish to complete installation. You can now open the Audacity software and start recording your files using Audacity: NOTE: Once installed, you should NOT have to re-install the Audacity software again. For additional information regarding Audacity features & applications, please visit the Audacity website at: http://audacity.sourceforge.net Audacity Control Panel &... - Page 17 Audacity Control Panel (Recording Window) for PC The Control Buttons at the top of the screen are for the following functions: 1. Click the ( ) button to skip to start 2. Adjust the output volume 3. Click the ( ) button to play 4.
- Page 18 Configuring Settings for PC (Windows) You should be able to connect your TAPE2USB II to your computer with the USB cord, power on your player then open Audacity, press play on your play, record on the Audacity control panel and begin to record. However, in some instances you may have to configure the settings (Preferences).
- Page 19 The Audacity Preferences window will show several tabs: Audio I/O, Quality, File Formats, Spectrograms, Directories, Interface, Keyboard and Mouse. However, you should only be interested in the Audio I/O tab. Audio I/O Tab The Audio I/O tab has a Playback and Recording section and 2 feature options at the bottom. Under the Playback Section, Device: Click on “Device”...
- Page 20 Click “OK” Adjust the output and input volume. NOTE: Due to variations between different operation system (OS), input volume control feature may NOT work on some Windows versions. Windows Vista is recommended to ensure the input volume control operates properly.
-
Page 21: Recording To A Pc
Recording to a PC To record audio to your computer: 1. Place the tape in the cassette tape compartment & press the play button to begin the tape. 2. Click the Record button to start recording. The waves (top and bottom) will show on the interface. 3. -
Page 22: Export & Save Recordings (Files) As Wav
Export and Save Recordings (files) as WAV The easiest way to record your tapes is to play from start to finish on one side and record as a single track. IF you need to flip the tape over to side 2, press the PAUSE button on Audacity, until you are ready to continue recording. -
Page 23: Record To Cd
Click the “File” tab and select “Export Selection As WAV”. The window will pop up a dialog box for you to enter the name (“File name”) and where you want to save the file (“Save in”) on your computer as well as the file format (“Save as type”). RECOMMENDATION: select Export Selection As WAV for ALL recorded files and export to you r DESKTOP. -
Page 24: Audio Playback & Special Windows Set Up (Windows 7)
Audio Playback & Special Windows Set Up (Windows 7) In some instances audio may NOT be heard from your computer’s speakers during the recording process or during playback. NO AUDIO during PLAYBACK When the Cassette Tape Player is connected to your PC over the USB, the default playback d evice changes to the USB Audio CODEC while connected. - Page 25 Vista and Windows 7 Other Windows Versions NO AUDIO during RECORDING Audio may NOT be heard from the your computer speakers when recording (downloading) from your TAPE2USB II to your PC. Solution: Go to the Audacity Control Panel, click Edit and select “Preference”. Select the “Audio I/O”...
-
Page 27: Windows 7
Windows 7 (& random Vista systems): Recording Level Adjustments RECORDING: IF the fluctuant wave does not appear on the Audacity Control Panel, or if the audio is distorted when recording, adjust the recording level as follows: Click “Start” and select Control Panel In Classic View, double click the Sound icon... - Page 28 Or in Control Panel Home view, click “Hardware and Sound”. Then click “sound”. ...
- Page 29 In the Sound window, select the “Recording” tab. Select a recording device. RECOMMENDATION: select Microphone of USB Audio CODEC as shown in the example below and click “Properties”.
- Page 30 Select “Levels” and adjust the Volume Reading. The reading is from 0 to 100. Normally the level should be 3-8. However, you may indicate on the Input Level Indicator in the Audacity control panel that the level does not exceed 0. Then click “OK” on Microphone properties and sound interface.
-
Page 31: Audacity For Mac
Audacity for Mac Set Up Wizard: How to Set Up & Record to Mac Insert the Audacity software disk included with your unit. Click the Audacity disk on the Desktop. There are five folders in the Audacity disk. Double click Audacity_for_MAC for Macintosh system, and select Audacity_for_WIN for Windows system. -
Page 32: Audacity Software & Usb Connection
Double click on the setup file appropriate to your system. For instance, click on the “audacity.dmg” icon, and the software files will open in a folder. Select all the files in the folder and drag them into a suitable location on the hard drive (Applications, etc.). Double click on the Audacity icon to start the Audacity software program Once installed, the Audacity program should open automatically. - Page 33 Audacity Control Buttons & Settings The Audacity control panel is the interface to apply recording settings & operate recording controls. Use the File and Edit to save, export and modify setting preferences (View, Transport, Tracks, Generate, Effect, Analyze, Window, Help menus are advanced features to edit audio recordings). Audacity program control buttons at the top of the screen are for the following functions: 1.
- Page 34 Audacity Preferences 1. Click the “Audacity” on the Audacity Control Panel and select “Preferences”. The window will open up to Audacity Preferences. You can see the Audio I/O, Quality, Import/Export, Interface, Spectrograms, Directories, Smart Recording, Theme, Keyboard and Mouse.
- Page 35 2. Audio I/O tab Select the Recording Device: Core Audio (USB Audio CODEC) Click the “Audio I/O” in the Audacity Preferences window Under the Playback & Recording Sections: Click the “Device” and select “Core Audio (USB Audio CODEC)” Click the “Channels” and select 2 (stereo) Under the Playthrough Section Select the box beside Software Playthrough Play new track while recording it Select the box beside Hardware Playthrough Play new track while recording it...
-
Page 36: Export & Save Recordings (Files)
3. Under the Quality tab, set the Default Sample Format to 16 bit. Select OK to save your setting and close the preferences window. On the top of the Audacity window, to the right of the input and output level meters (labeled L and R), you will see the input and output volume. -
Page 37: Record To Cd
Click the File tab on the Audacity Control Panel. Select “Export” to save the file. The window below will appear. Click Export. The Format should default to the MP3 format, however you can select other audio formats such as WAV. Record to CD Record to CD by copying or dragging the recorded files from the saved location on your PC to Windows Media Player or iTunes platform. -
Page 38: Accessory Items Included
Accessories Items Included GDI-T2USB Unit Audacity Software CD Disc for PC&MAC RCA to RCA Out/In L/R cord, 3.5mm to RCA Out/in L/R cord 9V DC Power Adaptor USB Cable User Guide Specifications Power Requirements: Input 120V~60Hz; Output 9V Power Consumption: 5 W (approx.) Dimensions (L x W x H): 5.9”... -
Page 39: Troubleshooting
Trouble Shooting In case of trouble with the unit, please refer to the following problems to see if you can solve and address the issue. _______________________________________________________________________________ PROBLEM: NOT RECORDING from Turntable to PC SOLUTION: STEP 1. Confirm the USB cable is connected to PC & Turntable STEP 2. - Page 40 STEP 2. Close and re-open Audacity, click on Edit and select Preferences. The Audio I/O tab will open. Select Core Audio: USB Audio CODEC for the Playback and Recording Devices. respectively. IF the issue continues, select Microsoft Sound Mapper-Output and Microsoft Sound Mapper-Input from the same drop down menus.
- Page 41 • If you are not seeing the microphone slider, please go to the Preferences menu in Audacity, click on the Interface tab, and make sure that the Enable Mixer Toolbar and Enable Meter Toolbar options are checked. If they are not, please check them and then press OK. •...
-
Page 42: Warranty
Warranty • Your TAPE2USB II (GDI-T2USB200) is supported by a limited manufacturer’s warranty for product defects in material or workmanship that may be evident under normal use for 1 year from date of purchase from an authorized franchisee or dealer. •... - Page 43 Customer Service & Support For questions regarding your GDI-T2USBII please visit us at: www.gracedigitalaudio.com and click on Support 04_2010...
Need help?
Do you have a question about the TAPE2USB GDI-T2USB200 and is the answer not in the manual?
Questions and answers