McIntosh MEN220 Owner's Manual
Room correction system
Hide thumbs
Also See for MEN220:
- Connection diagram (2 pages) ,
- Manual (6 pages) ,
- Owner's manual (32 pages)
Table of Contents
Advertisement
Quick Links
Download this manual
See also:
Manual
McIntosh Laboratory, Inc. 2 Chambers Street Binghamton, New York 13903-2699 Phone: 607-723-3512 www.mcintoshlabs.com
MEN220
Manufactured under license from Lyngdorf Audio
A/S. ROOMPERFECT is a registered trademark and
Room Correction System
the ROOMPERFECT logo is a trademark of Lyn-
gdorf Audio A/S. (C) Lyngdorf Audio A/S 2009.
Owner's Manual
Advertisement
Chapters
Table of Contents

Related Manuals for McIntosh MEN220


Summary of Contents for McIntosh MEN220
- Page 1 McIntosh Laboratory, Inc. 2 Chambers Street Binghamton, New York 13903-2699 Phone: 607-723-3512 www.mcintoshlabs.com MEN220 Manufactured under license from Lyngdorf Audio A/S. ROOMPERFECT is a registered trademark and Room Correction System the ROOMPERFECT logo is a trademark of Lyn- gdorf Audio A/S. (C) Lyngdorf Audio A/S 2009.
-
Page 2: Safety Instructions
The lightning flash with arrowhead, within an equilateral The exclamation point within an equilateral triangle is triangle, is intended to alert the user to the presence of intended to alert the user to the presence of important uninsulated “dangerous voltage” within the product’s en- operating and maintenance (servicing) instructions in the closure that may be of sufficient magnitude to constitute literature accompanying the appliance. -
Page 3: Thank You And Please Take A Moment
You now have “The that may be part of your system. If you or your Dealer 2. The Main AC Power going to the MEN220 and any Best.” The McIntosh dedication to “Quality,” is as- wish additional help concerning a suspected problem,... -
Page 4: Table Of Contents
Below is the Pin configuration for the XLR Balanced 1. N/C 6. N/C Technical Assistance and Customer Service ..... 3 Output Connectors on the MEN220. Refer to the dia- 2. Data Out (TXD) 7. N/C General Information ..........3 grams for connections: 3. -
Page 5: Introduction
• Electronic Crossover setup and operational functions. The advanced two way electronic crossover built into the MEN220 provides the best way for adding true bi- • Power Control and Full Function Remote Control The Power Control Input connection provides conve- amplification to your audio system. -
Page 6: Dimensions
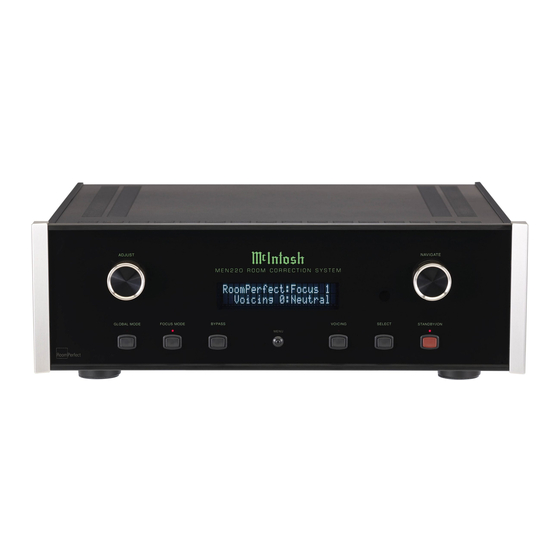
Dimensions Dimensions The following dimensions can assist in determining the best location for your MEN220. Front View of the MEN220 " 44.45cm " 6" RoomPerfect:Focus 1 13.69cm 15.24cm Voicing 0:Neutral Side View of the MEN220 " 40.32cm " " -1/2 36.83cm... -
Page 7: Installation
Installation Installation The MEN220 can be placed upright on a table or " 1/16 shelf, standing on its four feet. It also can be custom 43.34cm installed in a piece of furniture or cabinet of your choice. The four feet may be removed from the bottom... -
Page 8: Rear Panel Connections
Rear Panel Connections POWER CONTROL IN receives RS232 connector Unbalanced OUTPUT 1 signals from a McIntosh component for communica- (HIGH) supplies Full Range or (5-15 Volts ON, 0 Volts OFF). tions with an High Frequency audio signals POWER CONTROL OUT sends... -
Page 9: How To Connect The Men220
MEN220 BALanced AUDIO INPUT Connectors eration is possible from another room and/or when the to the Preamplifier or A/V Control Center Bal- MEN220 is located in a cabinet with the doors closed. anced Output Jacks. The connection instructions below, together with Notes: 1. - Page 10 Preamplifier or A/V Control Center MEN220, remote control operation is possible from Processor (Listen) TO Output Jacks. another room and/or when the MEN220 is located in a 8. Connect Audio Cables from the MEN220 UN- cabinet with the doors closed.
- Page 11 Crossover Settings outlined in the MEN220 IR IN Jack. or when the MEN220 is located in a cabinet with the Setup Section in this Owner’s Manual. Refer to pages Audio Connections: doors closed.
- Page 12 How to Connect the MEN220 with Subwoofer How to Connect the MEN220 with Sub- woofer The MEN220 can be used in a system with a Sub- 5. Connect any additional components in a similar Connector to Power Amplifier 2 Balanced Input woofer via the built-in Electronic Crossover Network manner, as outlined in steps 2 thru 3.
- Page 13 Notes...
-
Page 14: Remote Control
LED indicates when an IR (Infra Red) Mode Remote Control Command is being sent Press to activate the Global Press to Power the MEN220 ON Mode for Room Correction applied over a wide area in the room Press to Power the MEN220 OFF... -
Page 15: How To Use The Remote Control
RoomPerfect:Focus 1 Voicing 0:Neutral Voicing 3: Mellow Power On Figure 4 Note: In order for the MEN220 to provide room cor- To Switch ON the MEN220 press the (Power) Figure 7 rection, the Setup Mode “RoomPerfect” must be Push-button on the Remote Control. The Front Panel performed first. -
Page 16: Front Panel Displays, Controls And Push-Buttons
Room Correc- Setup Mode, step between six different the MEN220 ON or OFF all Room Correction tion through the Setup equalization variations (Standby) and resets the (RoomPerfect Focus... -
Page 17: Setup
MEN220 Setup Menu ing Room Correction and the Electronic Crossover, it MEN220 Default Settings Input Settings > will require using the MEN220 Setup Mode and going Function Name Setting Page no. through the options and functions. This is performed Figure 11... -
Page 18: Input Connection Settings
Input Settings > Figure 20 Figure 22 Figure 16 5. If the MEN220 is connected to the Processor Loop MEN220 Setup Menu 2. Press the SELECT Push-button and the “Input of the Preamplifier, rotate the ADJUST Control < Exit_Menu Settings, Input Connection” will appear on the or use the Directional ▲... -
Page 19: Output Settings
2. Rotate the NAVIGATE Control (or use the Direc- sary measurement equipment and knowledge to prop- Figure 26 tional ▲ ▼ Push-buttons on the Remote Control) erly set up the electronic crossover in the MEN220 for to select “Output Settings”. Refer to figure 24. your Loudspeakers. Out1(Hi): High-Pass 3. -
Page 20: Highpass Filter Type Butterworth 1 Ord
Output Settings, con’t 4. Press the SELECT Push-button and the default 10. Rotate the ADJUST Control (or use the Directional Notes: 1. 125Hz is one-half times the Loudspeaker Low Frequency/High Frequency passive Crossover Setting will appear. Refer to figure 26. ▲... -
Page 21: Inches
Notes: 1. 500Hz is two times the Loudspeaker Low Figure 41 to select “Output Settings, Delay Settings”. Refer Frequency/High Frequency passive cross- The MEN220 “Output Level” default setting for to figure 44. over point of 250Hz. both Output 1 and Output 2 is 0.0dB, no change in 2. -
Page 22: Advanced Settings
Control and Data Port Connections are made to the Figure 49 Audio Preamplifier or A/V Control Center. This al- lows the MEN220 to switch On or Off with the Audio Preamplifier or A/V Control Center. The commands coming from the Remote Control (supplied with... -
Page 23: Mcintosh Men220 Sw Version
To de- 5. Rotate the ADJUST Control to select the desired FACTORY RESET: activate the MEN220 Front Panel Sensor perform the Display Intensity. Refer to figure 56. 1. Press the MENU Push-button to enter the Setup following steps: Mode. -
Page 24: Roomperfect
5. Press the SELECT Push-button and the “Place mi- figure 74 appears or counterclockwise if figure 75 2. Make sure the MEN220 Voicing is set to “Neu- crophone in first focus position” will appear. Refer appears. - Page 25 Figure 78 to another place in the listening room and point it proceed to “How to Operate the MEN220” starting on Display indication might be similar to figure 83. in a different direction. Then press the SELECT Note: Once RoomPerfect has acheved a Room page 28.
- Page 26 If you would like to add additional Focus Positions at previous measurements and recalculate for the best centage is not an indication of performance of this time repeat steps 11 thru 16 . The MEN220 will room response. the MEN220 or Loudspeaker.
- Page 27 Then select the Bypass Mode and rotate the ADJUST Control (or use the Directional ▲ ▼ Push-buttons on the Remote Control) to closely match the volume level of the Global or Focus Modes. 28. Proceed to “How to Operate the MEN220” start- ing on page 28.
-
Page 28: How To Operate The Men220
How to Operate The MEN220 has built in the ability to improve the Focus Mode RoomPerfect:Focus 1 Press the FOCUS MODE Push-button to activate sound quality of your Audio System. However, it does Voicing 0:Neutral require the RoomPerfect portion of the Setup Mode the RoomPerfect Focus Setting. - Page 29 AC Power from the MEN220 for several New Voicing: minutes. This can be accomplished by disconnecting 1: Music1 the AC Power cord from the Rear Panel of MEN220 Figure 107 or removing the “Plug” end of the MEN220 AC Power Cord from the AC Outlet.
-
Page 30: Specifications
+0, -0.5dB from 20Hz to 20,000Hz 240V ~ 50/60Hz at 35 watts Standby, less than 1 watt Total Harmonic Distortion Note: Refer to the rear panel of the MEN220 for the 0.002% from 20Hz to 20,000Hz correct voltage. Maximum Input Voltage Overall Dimensions 4.5V Unbalanced and Balanced (Preamp-Power Amp) -
Page 31: Packing Instruction
If a shipping carton or any of the interior part(s) are ACCESSORY needed, please call or write Customer Service Depart- ment of McIntosh Laboratory. Refer to page 4. Please DIVIDER FOAM see the Part List for the correct part numbers. - Page 32 McIntosh Laboratory, Inc. 2 Chambers Street Binghamton, NY 13903 www.mcintoshlabs.com The continuous improvement of its products is the policy of McIntosh Laboratory Incorporated who reserve the right to improve design without notice. Printed in the U.S.A. McIntosh Part No. 04111000...
Need help?
Do you have a question about the MEN220 and is the answer not in the manual?
Questions and answers