Table of Contents
Advertisement
Quick Links
X7502890002
06/11
SHINDAIWA OWNER'S/OPERATOR'S MANUAL
ARTICULATED HEDGE
TRIMMER ATTACHMENT
78700
For Models: AH231, AH242, AHS231,
AHS242, PB230, T230, T231, T242,
T2510
Minimize the risk of injury to yourself and others!
Read this manual and familiarize yourself with the
contents. Always wear eye and hearing protection
when operating this unit.
WARNING!
Advertisement
Table of Contents

Related Manuals for Shindaiwa 78700


Summary of Contents for Shindaiwa 78700
- Page 1 SHINDAIWA OWNER’S/OPERATOR’S MANUAL ARTICULATED HEDGE TRIMMER ATTACHMENT 78700 For Models: AH231, AH242, AHS231, AHS242, PB230, T230, T231, T242, T2510 Minimize the risk of injury to yourself and others! Read this manual and familiarize yourself with the contents. Always wear eye and hearing protection when operating this unit.
-
Page 2: Table Of Contents
If you have questions regarding your Shindaiwa hand held power equipment, or if you do not understand something in this manual, contact your local Shindaiwa dealer for assistance. -
Page 3: Safety
Never modify or disable any of the hedge trimmer safety devices. Always use genuine Shindaiwa parts and accessories when repairing or maintaining this machine. When transporting the hedge trimmer in a vehicle, tie it down securely to prevent fuel spillage or damage to the ma- chine. -
Page 4: Safety Labels
Safety and Information Labels: Make sure all safety and information labels are undamaged, readable and up to date. Immediately replace damaged or missing labels. This Attachment comes with safety labels shipped loose in the box. Attach these safety labels. New labels are available through your local authorized Shindaiwa dealer. -
Page 5: Product Description
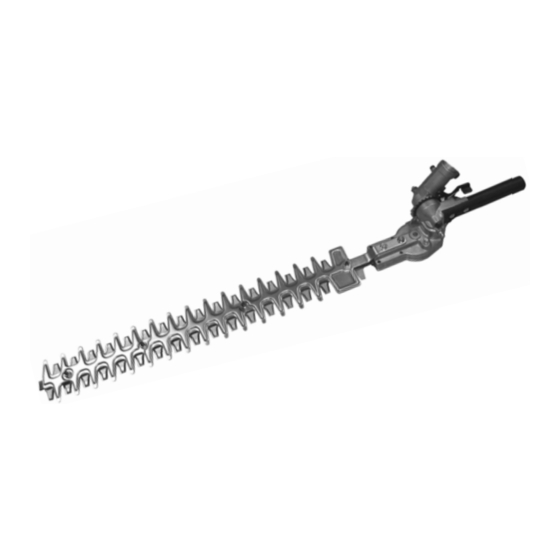
Product Description Using the illustration as a guide, famil- iarize yourself with your machine and its various components. Understanding your machine helps ensure top per- formance, long service life and safer operation. A - Adjustment lever B - Gear case C - Cutter assembly WARNING! Do not make unauthorized modifi-... -
Page 6: Assembly
Prior To Assembly IMPORTANT! Before assembling, make sure you have all The terms “left”, “left-hand”, and “LH”; the components required for a complete Hand protector w/screw & nut “right”, “right-hand”, and “RH”; “front” unit: and “rear” refer to directions as viewed ... - Page 7 Installing Throttle Grip WARNING! ■ Failure to replace the standard throttle grip with the provided interlock throttle grip could permit unintentional acceleration, which could cause serious injuries or death. 1. Place the T230 or PB230 outer tube assembly on a clean, flat surface. 2.
-
Page 8: Adjusting The Throttle Cable
Reconnecting the Throttle Cable, Switch Wires Connect The Throttle Cable. 1. Loop the ribbed cable assembly to the top left side of the engine. Confirm that the black ground wire (A) (with an eyelet on the end) is located between the two cable adjuster nuts (B). - Page 9 2. Adjust the throttle cable nuts until you achieve a free play on the throttle trigger of about 1/4 inch. IMPORTANT! Make sure the stop switch wires do not interfere with throttle functions. Reposition wires if necessary. 3. When 1/4-inch of free play is achieved, securely tighten the two 10mm throttle 1/4”...
- Page 10 Installing the Hand Protector 1. Measure 24-1/2 in. (622 mm) from the bottom end of the outer tube and make a mark on the tube. 2. Slide the hand protector/cutter rest (A) up the outer tube, making sure its pro- truding collar (B) faces toward the end of the tube and its clamp slot faces down.
-
Page 11: Blade Stiffener Removal
7. Shindaiwa recommends leaving the T230 or PB230 loop handle on the outer tube. However, for maximum comfort and control, it may require adjustment. Use the 4mm Allen wrench to loosen the handle’s four clamp screw. Move the handle along the tube to a point where the best comfort an control are observed. -
Page 12: Install Blade Stiffener
Install Blade Stiffener 1. Move stop switch to stop position. 2. Disconnect spark plug wire. WARNING Hedge clipper blades are very sharp. Touching them may lead to severe personal injury. Use a socket and extension when removing locknuts in order to keep hands at a safe distance from sharp blades. 3. - Page 13 Cutter Assembly Positions The cutter assembly can be adjusted 270° Gearcase rotated to the storage/ to eleven different positions ranging transportation position from 120° to 270° from the outer tube 120° as shown. Always make sure the latch lock is securely locked after each adjustment.
- Page 14 Horizontal Cut: Hold the cutting blade at an angle of 0° to 10° as you swing the hedge trimmer horizontally. Swing the blade in an arc towards the outside of the hedge so that the cuttings are swept on to the ground. Cut without standing directly in front of the hedge, e.g.
-
Page 15: Maintenance
If it has been lost or misplaced, make sure the engine and cutting cause damage and lead to personal contact Shindaiwa for a replacement. attachment are completely stopped. injury. Disconnect the spark plug wire... -
Page 16: Hour Maintenance
50-Hour Maintenance Every 50 hours of operation CAUTION! (more frequently in dusty or dirty Do not remove the D-shaped shim conditions): washer from the gearcase clamp! ■ The shim washer prevents damage Lubricate the gearcase. To from overtightening the gearcase perform this operation, first remove clamp screw. -
Page 17: Troubleshooting Guide
Bent main shaft/worn or damaged bushings. Inspect and reinstall as required. Shaft not installed in powerhead or gearcase. Broken shaft. Cutting attachment will not Consult with an authorized Shindaiwa servicing move. dealer. Damaged gearcase. Adjust idle. Check Specifi cations page for correct idle Engine idle too high. - Page 18 NOTES...
- Page 19 NOTES...
-
Page 20: Servicing Information
Genuine Shindaiwa Parts and Assemblies for your Shindaiwa products are available only from an Authorized Shindaiwa Dealer. When you do need to buy parts always have the Model Number, Type and Serial Number of the unit with you. You can find these numbers on the engine. For future reference, write them in the space provided below.
Need help?
Do you have a question about the 78700 and is the answer not in the manual?
Questions and answers