
Summary of Contents for Jeep 430N
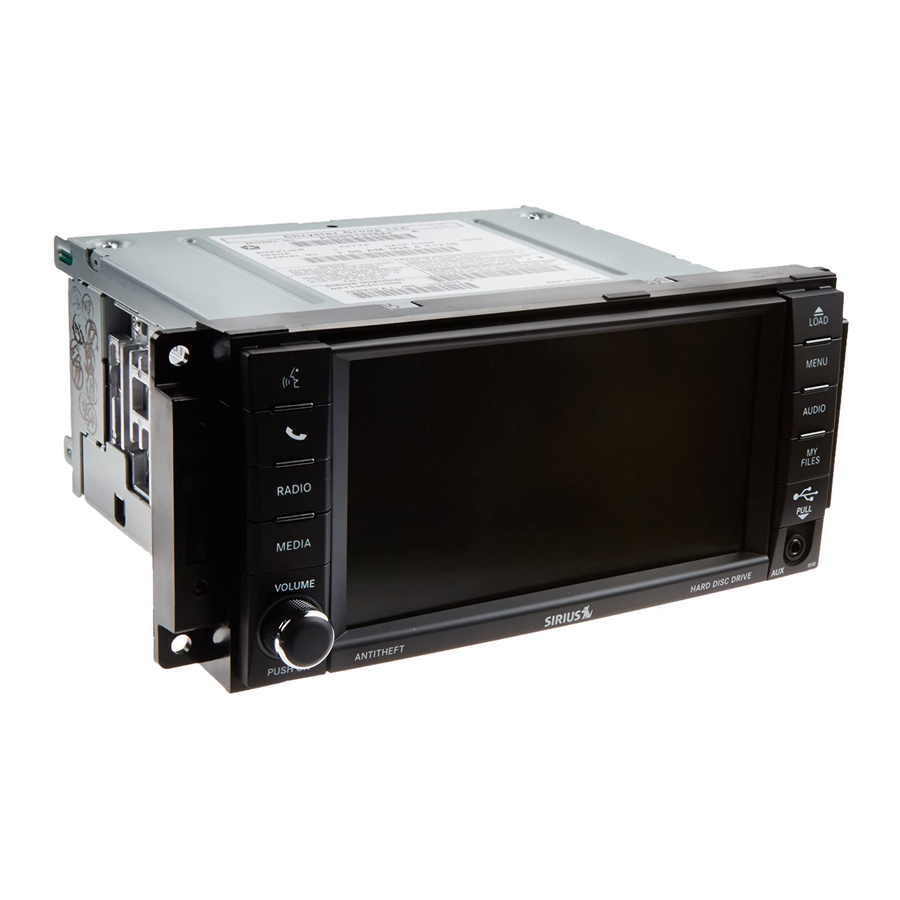
- Page 1 USER’S MANUAL USER’S MANUAL MEDIA CENTER 430N (RBZ/RHB) MEDIA CENTER 430N (RBZ/RHB)
-
Page 2: Table Of Contents
▫ System Care ......5 ▫ Set The Time – Media Center 430N ..16 General Handling . -
Page 3: Table Of Contents
▫ Audio Jack (AUX) Mode ....79 ▫ Sirius Travel Link (Media Center 430N ▫ Bluetooth Streaming Audio (BTSA) ..87... -
Page 4: Table Of Contents
▫ Appendix ......118 ▫ Radio ......129 ▫... -
Page 5: Safety Guidelines
• Make certain that the volume level of the system is set SAFETY GUIDELINES Ensure that all persons read this manual carefully before to a level that still allows you to hear outside traffic using the radio system. It contains instructions on how to and emergency vehicles. -
Page 6: Introduction
INTRODUCTION the radio system. When using this product, be aware of state/province-specific norms and guidelines. Warnings This manual contains WARNINGS against operating Visit http://www.chrysler.com/owners for updates, ad- procedures that could result in an accident or bodily ditional information, compatible phones, etc. injury. - Page 7 Permanent hearing loss may occur if you play your music Connections or the radio at loud volumes. Exercise caution when Never force any connector into the ports of your radio. setting the volume on your radio. Make sure your connectors are the correct shape and size before you connect.
- Page 8 If necessary, use a lint-free cloth dampened with a GPS Navigation Antenna – If Equipped cleaning solution, such as isopropyl alcohol, or an iso- The antenna for the navigation GPS system is mounted in propyl alcohol and water solution ratio of 50:50. Be sure various locations (depending on the vehicle model) to follow the solvent manufacturer’s precautions and within the dashboard.
- Page 9 Other Electronic Devices You may bring other electronic devices into your vehicle (e.g., PDA, iPod, laptop computer, etc.). Some of these devices may cause electromagnetic interference with the GPS. If a degradation in the navigation system is ob- served, turn the devices off, or keep them as far away from the GPS antenna as possible.
-
Page 10: General Handling
GENERAL HANDLING Soft-Keys Soft-keys are accessible on the touch screen. User Interface Elements Hard-Keys Hard-keys on the left and right side of the radio faceplate. (1) Voice Command (If Equipped) Press the Voice Command hard-key (1) and wait for the confirmation beep before you say a voice command. - Page 11 NOTE: If you are viewing the NAV screen (Media The radio software is always working when the ignition Center 430N only), pressing the RADIO hard-key will is switched ON, even if the radio is in standby mode. It is return you to the RADIO mode screen.
- Page 12 (7) MENU (11) AUX Connector Press the MENU hard-key (7) to access the system Connect an external audio device into the AUX Input (11) settings menu. (e.g., MP3 player, video-game) to play the device audio through the car audio system. NOTE: Press the MENU hard-key in an active mode in order to change mode specific settings.
- Page 13 The following describes general steering wheel function- 4. The SCROLL rocker switch, located on the left, ality: changes selections such as radio station, CD track, and satellite radio channel, depending upon the current 1. The VOLUME rocker switch, located on the right, mode.
-
Page 14: Audio Settings
Video Entertainment System™ Operation If equipped with a remote video player, this control will function the same way as in disc mode. SIRIUS Backseat TV™ Operation If equipped with a SIRIUS Backseat TV™, this control will function the same way as in SIRIUS Satellite Radio mode. - Page 15 Use either the arrow soft-keys or the sliders on the screen to adjust BASS, MID, and/or TREBLE.
-
Page 16: Getting Started
GETTING STARTED 2. Then press the System Setup soft-key to get to the System Setup menu. NOTE: The ignition switch must be in the ON or ACC position to operate the radio. If the unit is OFF, switch it ON by pushing the ON/OFF VOLUME rotary knob. -
Page 17: Set The Time – Media Center 430
4. Press the Daylight Savings soft-key to switch Daylight Savings on or off. Set the Time – Media Center 430N 1. Press the Time Display soft-key in the lower left corner of the screen. The time is automatically set by the GPS system for the time zone selected. - Page 18 2. It is possible to set the time manually (ahead or behind 3. Press the Daylight Savings soft-key to switch Daylight actual GPS time), by pressing the USER TIME soft-key. Savings on or off.
-
Page 19: Store Radio Presets
Store Radio Presets 3. Either press the SEEK up/down soft-keys, or touch the SCAN soft-key, DIRECT TUNE soft-key, or the left 1. Press the RADIO hard-key to display AM FM SAT. and right arrows to change the currently playing station. 4. -
Page 20: Uconnect™ Multimedia (Radio)
Uconnect™ Multimedia (RADIO) every NASCAR race, college sports and more. The big- gest and most compelling names in talk with Howard Radio Mode Stern and Martha Stewart, laugh-out-loud comedy with Overview Jamie Foxx’s The Foxxhole and Blue Collar Comedy, plus The radio is equipped with four different tuners: kids’... - Page 21 In order to receive satellite radio, the vehicle needs to be Station Presets outside with a clear view to the sky. If the screen shows There are 12 station presets available for storing the radio Acquiring Signal, you might have to change the vehicle stations in each tuner range.
- Page 22 Press the seek/tune up arrow soft-key to quickly Radio Broadcast Data System (RBDS) This radio system is capable of receiving RBDS signals in seek up to the next available station or channel. the FM band. RBDS is a technology used for transmitting Press and hold the seek/tune up arrow soft-key textual information about the music type, song and artist tune up until the soft-key is released.
- Page 23 Music Type (Program Type Filter) In SAT mode, the MUSIC BROWSE soft-key allows you to browse through all of the SIRIUS channels and genres. You can use the BACK soft-key to switch to the previous menu. RBDS (FM) Program Types Adult Hits, Classic Rock, Classical, College, Country, Information, Jazz, Language, News, Nostalgia, Oldies, Personality, Public, Religious Music, Religious Talk,...
- Page 24 Talk & News, NFL, More Sports, NBA, Financial News, When one of your favorite artists or songs begins playing US News, Public Radio, International News, Public Ra- on another SIRIUS channel, a message appears (depend- dio, Weather, Religion. ing on the Song Alerts setting) that allows you to tune to the station where your favorite is playing.
-
Page 25: Radio Settings
Replay Mode You can touch the on-screen controls to pause and rewind While you are in SAT mode, you can replay over 30 min- audio playback, touch the SCAN button to preview each utes of the current SIRIUS channel (when the channel is of the tracks stored in the buffer, or select a track from the changed, this audio buffer is erased). - Page 26 SAT MENU Favorites While in SAT Mode, press the MENU hard-key to display When Song Alerts is checked, you will be notified every the SAT Menu. time one of your favorite artists or songs begins playing. To turn off these notifications, turn off the Song Alerts checkmark.
- Page 27 When Game Alerts is checked, you will be notified every time one of your favorite teams begins playing a game being broadcast on SIRIUS and/or when the score of the game changes. The settings you make under Favorite Teams determine which alerts you receive. To disable all sports notifications, turn off the Game Alerts checkmark.
- Page 28 Favorite Teams ALERTS tab. Pressing the button next to the team To view which teams will create game or score alerts, changes the alert type between NONE (no alerts), GAME select the TEAMS tab. (alert when the game broadcast begins), SCORES (alert each time the game score is updated), or ALL (both game start and score alerts).
- Page 29 Write down the SIRIUS ID numbers for your receiver. To reactivate your service, either call the number listed on the screen or visit the provider online. NOTE: SIRIUS Travel Link is a separate subscription only available on the Media Center 430N Radio.
- Page 30 SIRIUS Backseat TV™ MENU (if equipped) will be necessary to access the information on the Sub- While in SIRIUS Backseat TV™ mode, press the MENU scription Information screen in order to re-subscribe. hard-key to display the TV Menu. Touch the Subscription soft-key to access the Subscrip- tion Information screen.
- Page 31 NOTE: SIRIUS Backseat TV™ is not currently available Select the Daytime Colors soft-key to switch to manual in Canada. daytime mode and to adjust the brightness of the display using daytime colors. Display Settings Press the MENU hard-key and touch the Display Setting Select the Nighttime Colors soft-key to switch to manual soft-key to access the Display Settings menu.
- Page 32 View Settings Press the MENU hard-key and touch the Default View soft-key to enable the default view mode, where the vehicle brand logo is displayed in the right half of the screen. Touch the Picture View soft-key to enable the picture view mode, where a picture can be displayed on the right half of the radio screen.
- Page 33 Parkview Rear Back Up Camera (if equipped) When equipped with Parkview , the radio display shows the rear view camera picture as soon as the shift lever is in the R position for vehicles with automatic transmission. In vehicles with manual transmission the reverse gear must be engaged.
-
Page 34: Uconnect™ Multimedia (Media)
Uconnect™ Multimedia (MEDIA) Disc Requirements Disc Mode CAUTION! Overview This disc player will accept 4 3/4 in (12 cm) discs only. The radio is equipped with a CD/DVD player. The use of other sized discs may damage the disc player mechanism. The radio is capable of playing compact discs (CD), recordable compact discs (CD-R and CD+R), rewritable compact discs (CD-RW and CD+RW), recordable DVD-R,... - Page 35 SACD (SACD layer), VCD DualDisc, SVCD, VCD format High definition content and media (e.g, HD-DVD, Blu- on DVD MPEG-4 are not supported. Ray) is not supported. A complete list of supported CD/DVD formats is avail- If the user does not remove an ejected CD within able at http://www.chrysler.com/owners.
- Page 36 NOTE: If the disc is not removed within approximately Select the STOP SCAN soft-key to stop the scan function. 10 seconds, the unit pulls it back into the slot (park Change a Track position). The disc may be ejected when the ignition is Press the forward arrows soft-key to select the next OFF.
- Page 37 Select Title from List Gracenote Music Recognition Technology Select TRACKS to display a list of the titles of the currently playing disc. Select the desired track you wish to play. Select TRACKS again to hide the list. Disc Info Select the INFO soft-key to display the cover This radio is equipped with the Gracenote Music Rec- art (if available) and track title.
- Page 38 Portions of the content is copyright ©Muze or its provid- Playing a MP3/WMA Disc ers. 1. Press the OPEN/CLOSE hard-key once. NOTE: Visit http://www.chrysler.com/owners for up- 2. With the printed side upwards, insert the disc into the date information. disc slot of the radio. The radio pulls the disc automati- Copy Disc to Hard-Drive cally and closes the flip screen.
- Page 39 automatic transmission. In vehicles with a manual trans- mission, the parking brake must be engaged. First insert a video DVD. 4. Touch the FOLDER UP soft-key to close a folder. Playing a Video DVD NOTE: Viewing a DVD video on the radio screen is not The playback starts automatically after the DVD video is available in all states, and the vehicle must be stopped, recognized by the disc drive.
- Page 40 Touch the CHAPTERS soft-key to display a list of avail- able chapters or tracks. Touch a chapter or track soft-key in the list to start playback from the selected section. Touch the VIEW VIDEO soft-key to view the video on the screen.
- Page 41 Touch the close soft-key to close the DVD MENU To stop playback, touch the Stop soft-key. Controls. Touch the Fast Reverse soft-key during playback to fast DVD Playback Controls reverse playback. In video playback mode, touch anywhere on the screen to Touch the Fast Forward soft-key during playback to fast show the DVD playback controls.
- Page 42 DVD Video Menu While in disc mode with inserted video DVD, press the MENU hard-key to access the DISC Menu. In the DVD Setup menu, you may select Menu Language, Audio Language, Subtitle, Camera Angle, Aspect Ratio, and Brightness settings by pressing the corresponding soft-key.
-
Page 43: Hard Disk Drive Mode (Hdd)
Disc Skipping Before using the HDD mode, you will need to copy tracks Skipping is typically caused by a damaged (scratched) to the internal hard drive. disc. This will result in a 10–second jump forward until The files will be stored on the internal hard disk drive the damaged area is passed. - Page 44 you change to another mode (radio, AUX, etc.) or turn the radio OFF (ignition ON), the copy process will continue in the background. 2. Touch the copy soft-key to copy music tracks of the inserted disc to the Hard Disk Drive. After a short pause, the copy process begins and the The copy progress is shown in the display.
- Page 45 NOTE: When copying CD-Audio to HDD, audio files It is recommended to sort music files into folders. are converted from CD-Audio to AAC. If available, the Example: artist name, album name, cover art, track names and genres are stored with the tracks on the HDD. DVD- Audio cannot be copied to the HDD.
- Page 46 • 03 Song.mp3 (Third song in playlist 2) Songs located in the root level (top level) of the disc or USB device are saved on the Hard Disk Drive in a root Copying Complete Disc folder. Songs that are stored in folders on the disc or USB You can copy a complete music disc using the devices are saved to the same folder name on the Hard following procedure:...
- Page 47 2. Touch the copy soft-key to copy music files of the inserted disc to the hard disk drive. The copy progress is shown in the display. You can continue listening to any audio source during the copy process. Selective Song Copying from Disc You can select specific songs on a WMA/MP3 disc using the following procedure: 1.
- Page 48 3. Touch the Add Music Files to HDD soft-key. 5. Select the folders or titles you would like to copy. 4. Touch the From DISC soft-key in the next screen. A red check mark indicates the selected songs and/or folders. Touch the check ALL soft-key to select all files and folders at once.
- Page 49 The copy process is shown on the display. It is possible to listen to radio modes during this process. If you unplug or eject the media before the copying process is finished, the process will be interrupted. You may restart the copying process by repeating the steps above.
- Page 50 3. Touch the Import Music Files soft-key. 5. Select the folders or titles you would like to copy. 4. Touch the From USB soft-key in the next screen. A red check mark indicates the selected songs and/or folders. Touch the ALL soft-key to select all files and folders at once.
- Page 51 Playing Audio Files from the Hard Disk Drive You can play songs directly from the internal hard disk drive. 2. The radio can sort the files by artist, album, song title, genre or folder name. You can also create links to your favorite songs, artists, albums, genres or folders.
- Page 52 4. Touch the soft-key for the desired artist to list all songs 5. Touch the LIST soft-key to toggle the list contents by the artist. Touch the ALL soft-key to play all songs between all songs by the artist and the albums that feature the artist.
- Page 53 Change a Track To view the Favorite Songs list, touch the BROWSE Press the forward arrows soft-key to select the next soft-key, then touch the FAVORITES soft-key, next touch the Favorite Songs soft-key. track on the disc. To begin playback, touch a particular song in the list to Press and hold the forward arrows soft-key to fast begin playback from that song or touch the...
- Page 54 A red check mark indicates the random play function is active. Repeat Track The repeat track function repeats the currently played track. Touch the Rpt. TRK soft-key to switch the repeat track function on or off. A red check mark indicates the repeat track function is active.
- Page 55 2. Touch the Favorites soft-key to display a list of favorite 3. Touch one of the ADD FAVORITE soft-keys. playlists.
- Page 56 4. Select the type of favorite (Artist, Album, Genre or A link to the selected playlist is now saved in the Favorite Folder). Playlists list. NOTE: Depending on the type of Favorite you define, the contents of the favorite playlist may change as you add tracks to and remove tracks from the Hard Disk Drive.
- Page 57 You may now edit the list by touching the EDIT soft-key, To edit an item press the CHANGE or ORDER button or exit the list by touching the EXIT soft-key. next to the tag item you want to edit. To enter new data for the tag, select an item from the list or press the NEW Editing Track Info on the Hard Disk Drive button to type in a new name.
- Page 58 If you change tag information that affects how your HDD playback is sorted, playback may pause briefly and restart from the top of the list. Editing Folder Names on the Hard Disk Drive 1. Touch the MY FILES hard-key. 3. Touch the Rename HDD Folders soft-key. 2.
- Page 59 Deleting Tracks from the Hard Disk Drive 1. Press the MENU hard-key. 4. Touch the folder you want to rename. 5. Spell the name of the folder, then touch the SAVE soft-key. 2. Touch the MY MUSIC soft-key.
- Page 60 3. Touch the Delete Music Files from HDD soft-key. 5. Select the tracks you want to delete by pressing the track to turn on the red checkmark. If you want to delete 4. Select the folder from which you want to delete tracks. all tracks from the folder, the check ALL soft-key.
- Page 61 Deleting All Files from the Hard Disk Drive 1. Press the MENU hard-key on the right side of the radio. 2. Touch the System Setup soft-key to access the System Setup menu. 3. Touch the Manage HDD soft-key to access the Manage HDD menu.
- Page 62 NOTE: USB devices (e.g., camera memory USB adap- tors, etc.) must comply with the MSD (Mass Storage Device) standard. This USB terminal can provide power to the inserted device. The device’s current limitation must be less or equal to 500mA. 1.
- Page 63 2. Insert either a CD or a USB Stick containing your 4. Touch the ADD soft-key to view the pictures stored on pictures. the CD or USB memory stick. 3. Touch the My Pictures soft-key to get an overview of NOTE: Depending on the file size of each picture on the the images currently stored on the Hard Disk Drive.
- Page 64 6. Use the PAGE soft-keys to page through a list of 8. Touch the SAVE soft-key to copy the selected pictures to the Hard Disk Drive. pictures and press the picture you would like to import. 7. Select which pictures you want to copy. The red checkmark indicates a picture file to copy.
- Page 65 Touch the DELETE soft-key to delete the picture from the The picture is now displayed on the right half of the hard disk drive. screen. 10. Press the MENU hard-key twice and then touch the Picture View soft-key to enable the picture view.
-
Page 66: Uconnect™ Multimedia (Remote Devices)
Uconnect™ Multimedia (REMOTE DEVICES) to those at least 18 years of age in the 48 contiguous United States, D.C., & PR. © 2009 Viacom International SIRIUS Backseat TV™ (If Equipped) Inc. All rights reserved. Nickelodeon and all related titles, Tired of constantly looking for new DVDs to keep your logos and characters are trademarks of Viacom Interna- family occupied? Try SIRIUS Backseat TV™, a pioneering tional Inc. - Page 67 screen shows Acquiring Signal, you might have to View SIRIUS Backseat TV™ on the Radio Screen change the vehicle position in order to receive a signal. In NOTE: In certain states, to view SIRIUS Backseat TV™ most cases, the satellite radio does not receive a signal in on the radio screen, the vehicle must be stopped, and the underground parking garages or tunnels.
-
Page 68: Video Entertainment System (Ves)
Change a Channel Press the seek up or the seek down soft-keys to play the next or previous available channel. NOTE: Changing a channel on the Backseat TV receiver takes longer than changing the channel on the radio receiver. Select the SCAN soft-key for a five-second preview of each available channel. - Page 69 Receiving Audio/Video from the VES™ The VES tab becomes available after the VES™ system You can play audio from the VES™ through the vehicle’s (DVD player if equipped or AUX input present) is turned speaker system. If you have a VES™ with a video player, on.
- Page 70 Availability of the DVD Player soft-key, the Rear AUX 1 To access the rear VES™, press the MENU hard-key on soft-key, and the Rear AUX 2 is based on the type of the right side of the radio. VES™ in the vehicle. Touch the Rear VES soft-key to display the Rear VES DVD Player is not available if there is no DVD player in Controls.
- Page 71 NOTE: Press the HIDE LIST soft-key and/or the CLOSE INFO soft-key, if you cannot see the Rear VES Controls. The first column controls VES on/off and the headset audio channels 1 or 2. A VES™ headset can listen to either audio Channel 1 or audio Channel 2.
- Page 72 Touch the 2 soft-key tab to set the desired audio Touch the TRACKS soft-key to display the selected source for the second VES™ audio channel. In source details. this example Channel 2 plays MEDIA from the In this case, the songs within the selected folder are HDD.
- Page 73 Touch the on/off soft-key tab to show the VES Touch the Turn Rear VES ON soft-key to turn the VES™ ON/OFF display. You may turn the VES™ system on or off. VES™ LOCK Press the LOCK soft-key to disable the controls on the VES™...
- Page 74 The playback starts automatically after the DVD video is If there is no external DVD player installed in the vehicle, recognized by the disc drive. make sure the rear VES video screen is down so it will turn on automatically and begin playing the video. If the 2.
- Page 75 3. Touch the Rear VES soft-key to display the Rear VES 6. The video will begin playback automatically. Controls. To view SIRIUS Backseat TV™ on the rear VES™ 4. Touch the 1 soft-key tab to select audio screen Channel 1. 1.
-
Page 76: License Agreements
2. Touch the Rear VES soft-key to display the Rear VES 5. Use the to change the channel, or press Controls the LIST soft-key to view the available channels. 3. Touch the 1 soft-key tab to select audio Channel 1. License Agreements Dolby Digital License Agreement Manufactured under license from Dolby Laboratories. -
Page 77: Usb Connector
USB Connector MP3 player devices cannot be controlled through the It is possible to copy audio files or pictures files to the USB connector. Some player devices save music files in radio Hard Disk Drive, or play audio files directly from other formats, which cannot be played in this radio. - Page 78 How to Open the Cover 2. Pull forward. 1. Place your finger under the pull arrow. NOTE: The flap is attached and should not be removed! Do not pull off of the frame. Do not use a tool (e.g., screw-driver, nail file, etc.) to open the flap, as this could cause damage to the face of the radio.
- Page 79 How to Close the Cover 2. Hook the top hooks (1) into the frame first. 1. Using your thumb and index finger, grasp the flap. Notice the hooks (1), which must first be inserted into the frame.
-
Page 80: Audio Jack (Aux) Mode
CAUTION! Never force any connector into the ports of your radio. Make sure your connectors are the identical shape, size and orientation before you connect. Audio Jack (AUX) Mode The Audio Jack connector allows you to connect the headset output of an audio device (e.g., MP3 player) to the radio. - Page 81 The display will switch automatically to the AUX mode when a 3.5 mm stereo mini-jack cable has been connected. The radio screen will revert back to the last tuner mode when the cable is unplugged. To change radio modes while the cable is connected to the unit, press the MEDIA hard-key to display the AUX tab.
- Page 82 USB Port (If Equipped) manufacturer’s website updates: The USB Port gives you access to the audio files on the http://www.apple.com/support/ipod/. external iPod or USB device through the AUX Mode. It Playing Audio Files from the Audio Device functions as a remote control for the currently connected You can play songs directly from the iPod or external audio devices mobile digital device, and you can play USB device.
- Page 83 Touch the soft-key with the desired list item to select and play the item. Touch the INFO soft-key to hide the list. Touch the BROWSE soft-key to browse by categories. Select an iPod or external USB Category The radio can sort the files by playlists, by song names, Touch the Artists soft-key for this example.
- Page 84 Touch the PAGE UP or PAGE DOWN soft-key to navi- gate through the list of artists. Using Voice Command You can list Artists, Playlists, Albums, Songs, Podcasts, Genres, Composers and Audio Books in the main page by using Voice Command. To list categories, press the Voice Command hard key and wait for the confirmation beep and say list...
- Page 85 For this example, we entered the first letter of the desired Touch a soft-key with the desired artist’s name to play artist. songs from this artist. Touch the GO soft-key to jump to the desired artist.
- Page 86 Change a Track Displaying the Elapsed Title Time Press the forward arrows soft-key to select the next The elapsed title time of the currently playing track is displayed on the left side of the screen. track on the disc. Scan Search Press and hold the forward arrows soft-key to fast Touch the SCAN soft-key.
- Page 87 AUX Menu Random Playback While in AUX mode, press the MENU hard-key to access The random playback function plays random tracks from the AUX Menu. the audio device. Touch the Random soft-key to switch the random play function on or off. A red check mark indicates the random play function is active.
-
Page 88: Bluetooth Streaming Audio (Btsa)
Repeat Track Play Mode The repeat track function repeats the currently played When switching to BTSA mode, some audio devices will track. Touch the Rpt. TRK soft-key to switch the repeat start playing music directly through the vehicles sound track function on or off. system. -
Page 89: Uconnect™ Phone (If Equipped)
You can also select a different audio device in the Select Uconnect™ Phone (If Equipped) AUX Device screen. Touch the icon (insert graphic) to Uconnect™ Phone is a voice-activated, hands- enter the Select AUX Device screen. The currently play- free, in-vehicle communications system. ing device is highlighted, you can touch and select a different device. -
Page 90: Voice Command (If Equipped)
The Uconnect™ system is fully integrated with the Voice Command (If Equipped) vehicle’s audio system. The radio display will be used for For vehicles equipped with VES™, refer to the visual prompts from the Uconnect™ system such as Uconnect™ Multimedia/Voice Command sec- phone battery status, signal strength, caller ID, and call tion of the Uconnect™... -
Page 91: Navigation (Media Center 430N Only)
• Mounting and wiring this product requires skills and NAVIGATION (Media Center 430N Only) experience. The mounting and wiring should be done Safety Precautions and Important Information by professionals. Read this information carefully before starting to operate the navigation system and follow the instructions in this Failure to avoid the following potentially hazardous manual. - Page 92 system controls while driving. Stop your vehicle in a safe CAUTIONS and legal manner before attempting such operations. Failure to avoid the following potentially hazardous Keep the system volume at a low enough level to be able situations may result in injury or property damage. to hear outside noises while driving.
- Page 93 Although the navigation system is a precision navigation inaccurate or incomplete data. In some countries, com- device, any navigation device can be misused or misin- plete and accurate map information is either not available terpreted and, therefore, become unsafe. or is prohibitively expensive. IMPORTANT INFORMATION Getting Started Vehicle Battery Preservation...
- Page 94 Help When You Need It The first time you use your navigation system, you need to set up your system. The Help menu provides addi- tional information Touch Tools then Help to get more information about using your navigation system. Touch a category to view information about a topic.
- Page 95 2. To search the Help topics for a keyword, touch Search. Finding a Point of Interest 1. Touch Where To?. Find It and Go! The Where To? page provides several different categories for you to use when searching for addresses, cities, and other locations.
- Page 96 2. Select a category. 3. Select a subcategory.
- Page 97 4. Select a destination. 5. Select a place.
- Page 98 6. Touch Go! , or touch Press for More to see the Review distance to your next maneuver. If you depart from the page. original route, your navigation system recalculates the route and provides new directions. Following Your Route Your route is marked with a magenta line. As you travel, Your route is marked with a magenta line.
- Page 99 Follow the arrows. A checkered flag marks your destination. Adding a Via Point You can add a stop (Via Point) to your route. The navigation system gives you directions to the stop and to your final destination.
- Page 100 1. With a route active, touch (back icon) and then Stopping the Route touch Where To?. 1. With a route active, touch 2. Search for the extra stop. 2. Touch Stop. 3. Touch Go!. Custom POIs (Points of Interest) 4. Touch Add As a Via Point to add this stop before your You can manually load custom points of interest (POI) destination.
-
Page 101: Where To
After downloading your POI database, use the Garmin Deleting Custom POIs POI Loader to install the POIs onto a DVD. Use the DVD To delete all custom POIs from your navigation system: to load the POIs. The POI Loader is available at 1. - Page 102 2. Select an option: Go! Page Options Touch an item in the search results list to view the Go! • Where I Am Now — search near your current page. location. • A Different City — search near the city you enter. •...
- Page 103 4. Touch Press for More to view more information about Finding an Address the location. The steps to find an address can vary depending on the maps that are loaded on your navigation system. Not all map data provides postal-code searching. 1.
- Page 104 Finding a Place by Spelling the Name If you know the name of the location you are looking for, you can spell it using the on-screen keyboard. You can also enter letters contained in the name to narrow the search. 1.
-
Page 105: Favorites
• Touch to change the keyboard language mode. Favorites You can save all of your favorites places in Favorites. You • Touch to enter special characters. can also save your home location in Favorites. Finding Places in a Different Area Saving Places You Find You can search for locations in a different area, such as a 1. - Page 106 2. Touch OK. The place is saved in Favorites. 3. Touch Save Location to save your current location. Saving Your Current Location Setting a Home Location You can set a Home Location for the place you return to 1. Touch View Map. most often.
- Page 107 2. Select an option. Editing Saved Places • Enter My Address – enter an address for the 1. Touch Where To? , then touch Favorites. location using the on-screen keyboard. 2. Touch the location you want to edit. • Use my current location – sets your current location 3.
-
Page 108: The Main
Deleting a Favorite 1. Distance to the next turn. Touch to view and hear next turn details. Lane assistance also displays in this area. 1. Touch Tools , then touch My Data. 2. While navigating a route, touch the text bar to open 2. - Page 109 • The speed limit icon function is for information only and does not replace the driver’s responsibility to abide by all posted speed limits and to use safe driving judgment at all times. Chrysler Group LLC and Garmin shall not be responsible for any traffic fines or citations that the user may receive for failing to follow all applicable traffic laws.
- Page 110 Turn List Next Turn Page When you are navigating a route, the Turn List displays When you are navigating a route, the Next Turn page turn-by-turn instructions for your entire route and the shows the turn on the map and the distance and time left distance between turns.
- Page 111 Lane Assist Page GPS Info Page When available, the Lane Assist page may display a view From the Nav Menu page, touch in the upper left corner of the upcoming junction and in which lane you should to view the GPS Info page. be driving.
-
Page 112: Creating And Editing Routes
The sky view shows the satellites you are receiving. The 7. Find a location for your ending point, and touch satellite signal-strength bars indicate the strength of each Select. satellite you are receiving. A solid bar indicates that the 8. Touch + to add another location to your route. Touch GPS satellite is ready for use. - Page 113 • Manually Reorder Points – change the order of 6. Touch Save. points along your route. Navigating a Saved Route • Optimally Reorder Points – automatically order the 1. Touch Where To? (or Tools) , then touch Routes. points. 2. Touch the route you want to navigate, and touch Go!. •...
-
Page 114: Customizing The Settings
Adding a Detour to a Route 3. Touch the button above the setting name to change it. If a road on your route is closed or congested with traffic, Changing the System Settings you can take a detour. Touch Settings , then touch System. 1. - Page 115 • Vehicle – touch Change to change the icon used to Changing the Navigation Settings display your position on the map. Touch the icon you Touch Settings , then touch Navigation. want to use, and touch OK. • Route Preference – select a preference for calculating •...
- Page 116 Updating the Time Settings SIRIUS Travel Link (Media Center 430N Only) Touch Settings , then touch Time. Now, in addition to delivering over 130 channels of the best sports, entertainment, talk and 100% commercial- • Time Format – select a 12–hour, 24–hour or UTC time free music, SIRIUS now offers premium infotainment format.
- Page 117 • Store a favorite location for quick access to weather SIRIUS Travel Link brings a wealth of useful information into your vehicle and right to your fingertips: conditions and forecasts. Ski Info • View ski and snowboarding conditions at ski resorts. •...
- Page 118 Movie Listings CAUTION! • Check which movies are playing at theaters near your Neither SIRIUS nor Chrysler Group LLC is respon- current location. sible for any errors in accuracies in the SIRIUS data • Sort the list of theaters by distance or alphabetically. services or its use in vehicles.
-
Page 119: Appendix
Appendix Updating the Map Data This appendix provides additional information about The navigation system will provide periodic notification your navigation system, such as how to update the at startup when the preloaded maps are considered out software and map data. of date. - Page 120 Garmin grants you a limited license to use the software NAVTEQ End-user License Agreement embedded in this device (the “Software”) in binary The software embedded in your Garmin product (the executable form in the normal operation of the product. “Software”) is owned by Garmin Ltd. or its subsidiaries Title, ownership rights, and intellectual property rights in (“Garmin”).
- Page 121 HAVE READ THIS LICENSE AND AGREE TO ITS printed materials (together called the “Product” for pur- TERMS. IF YOU DO NOT AGREE, RETURN THE COM- poses of this License Agreement), and grants you a PLETE PRODUCT WITHIN 10 DAYS OF THE DATE limited, non-exclusive license to use the Product in YOU ACQUIRED IT (IF PURCHASED NEW) FOR A accordance with the terms of this Agreement.
- Page 122 Restrictions. Except where you have been specifically otherwise, including but not limited to, content, quality, licensed to do so by Garmin, and without limiting the accuracy, completeness, effectiveness, reliability, mer- preceding paragraph, you may not use this Data with chantability, fitness for a particular purpose, usefulness, any products, systems, or applications installed or other- use or results to be obtained from the Product, or that the wise connected to or in communication with vehicles,...
- Page 123 CONDITION OF THIS AGREEMENT. Some States, Ter- WHETHER IN AN ACTION IN CONTRACT OR TORT ritories and Countries do not allow certain warranty OR BASED ON A WARRANTY, EVEN IF Garmin OR ITS exclusions, so to that extent the above exclusion may not LICENSORS HAVE BEEN ADVISED OF THE POSSIBIL- apply to you.
- Page 124 NAVTEQ ON BOARD trademarks and logos, and other Entire Agreement. These terms and conditions constitute trademarks and trade names owned by NAVTEQ North the entire agreement between Garmin (and its licensors, America LLC may not be used in any commercial man- including their licensors and suppliers) and you pertain- ner without the prior written consent of NAVTEQ.
- Page 125 (i) its conflict of laws provisions, or (ii) the United agency technical data and noncommercial computer soft- Nations Convention for Contracts for the International ware clause); and/or FAR 12.211 and FAR 12.212 (com- Sale of Goods, which is explicitly excluded. You agree to mercial item acquisitions), as applicable.
- Page 126 end user, and DMTI Spatial, Inc. BY LOADING THE You acknowledge that the Licensed Product(s) belong PRODUCT(S) WITH THIS AGREEMENT YOU ARE to DMTI Spatial and its third party supplier, and that AGREEING TO BE BOUND BY THE TERMS OF THIS the Licensed Product(s) are copyrighted.
- Page 127 for internal use in your business, decompile, disas- You shall indemnify and hold DMTI Spatial, its third semble, reverseengineer the Licensed Product(s), or party supplier(s) and their officers, employees and use the Licensed Product to create any derived product agents, harmless from and against any claim, demand for any of these prohibited purposes.
- Page 128 MERCHANTABILITY OR FITNESS FOR A PARTICU- License Agreement. Upon termination, you shall destroy LAR PURPOSE. THE ENTIRE RISK AS TO THE QUAL- or return the Licensed Product(s) including any written ITY AND PERFORMANCE OF THE LICENSED PROD- materials and all copies of the Licensed Product(s) and UCT(S) IS WITH YOU, THE END USER.
-
Page 129: System Information
SYSTEM INFORMATION User Data Backup Press the MENU hard-key on the right side of the radio, Visit http://www.chrysler.com/owners for information and touch the System Setup soft-key to access the System on how to backup or transfer your user data, such as Setup menu. -
Page 130: Troubleshooting
TROUBLESHOOTING Q.: The radio is playing songs from the HDD, it jumps to Radio the first song in the list. Why does it do that? Q.: I cannot find my favorite radio station that I was always able to receive before. What can I do? A.: After the radio is done copying or ripping music to the HDD, it needs to rebuild the current playlist. -
Page 131: Glossary Of Terms
GLOSSARY OF TERMS Compression scheme used to transfer MPEG-1 Au- audio files via the Internet and store in Advance Audio Coding dio Layer-3. portable players and digital audio serv- Compact Disc ers. Compact Disc Changer The.M4A format is actually the audio CDDB A technology company founded in layer of (non-video) MPEG 4 movies. - Page 132 Chrysler Group LLC 11RBZ-526-AB First Edition Printed in U.S.A.
Need help?
Do you have a question about the 430N and is the answer not in the manual?
Questions and answers