Table of Contents
Advertisement
Advertisement
Table of Contents

Subscribe to Our Youtube Channel
Related Manuals for Pullman Holt Gloss Boss


Summary of Contents for Pullman Holt Gloss Boss
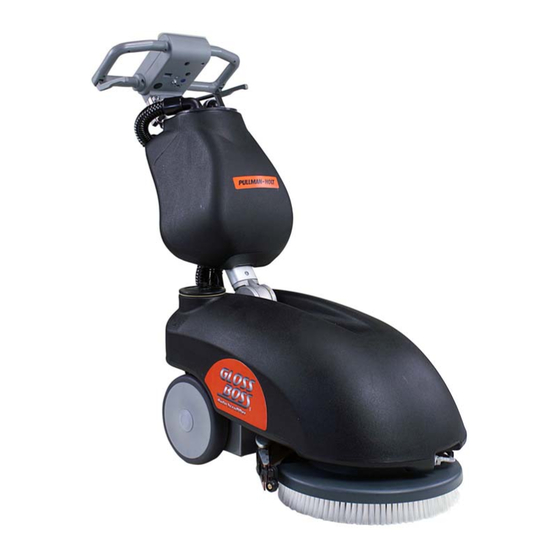
- Page 1 Operation & Care Instructions Save for Future Reference...
-
Page 2: Table Of Contents
TABLE OF CONTENTS RECEIVING THE MACHINE ................................4 FOREWORD ....................................4 TECHNICAL DESCRIPTION................................5 SYMBOLS USED ON THE MACHINE ............................6 GENERAL SAFETY REGULATIONS ............................7 PREPARING THE MACHINE................................. 8 1. HANDLING THE PACKAGED MACHINE..........................8 2. HOW TO UNPACK THE MACHINE............................8 3. -
Page 3: Receiving The Machine
Receiving the machine Immediately check, when receiving the machine, that all the materials indicated on delivery documents have been received and also that the machine has not been damaged in transit. If it has been damaged, this damage must be immediately reported to the shipper and also to our customer’s service department. -
Page 4: Technical Description
TECHNICAL DESCRIPTION GB14 Rated power Working width inches Rear squeegee width inches Brushes (diameter or length) inches Brush revolutions Pressure on the brushes Lbs. Solution tank PE Gal. Recovery tank PE Gal. Weight of complete machine (included batteries) Lbs. Length of folded machine (without recovery tank) inches Height of folded machine (without recovery tank) inches... -
Page 5: Symbols Used On The Machine
SYMBOLS USED ON THE MACHINE Cock symbol Used to indicate the solenoid valve switch Brush symbol Used to indicate the brush motor switch Brush symbol (SWEEPING VERSION) Used to indicate the brush motor switch Suction motor symbol Used to indicate the suction motor switch Battery symbol Battery charge gauge Maximum detergent solution temperature gauge... -
Page 6: General Safety Regulations
GENERAL SAFETY REGULATIONS Follow these regulations carefully to avoid harm to the operator and damage to the machine. Read the labels on the machine with attention. Never cover them for any reason and always immediately replace them if they are damaged. ... -
Page 7: Preparing The Machine
PREPARING THE MACHINE 1. HOW TO UNPACK THE MACHINE 1. Open the packing on the side indicated 2. Remove the machine from the packing 3. Pull out the recovery tank 2. BATTERY INSTALLATION/CONNECTION The machine is supplied with battery charger and sealed gel batteries. In case of using different batteries from those supplied with the machine, use only batteries 12V 6A AGM or Gel and proceed as follows: The batteries must be housed in the battery compartment located under the solution... -
Page 8: Connector Connecton
PREPARING THE MACHINE 3. CONNECTOR CONNECTON 6. Connect the battery connector to the machine connector 7. Re-assemble everything ATTENTION: This procedure must be done by qualified personnel. Mistaken or imperfect connection of cables to the connector can cause severe damage to persons and property. 4. -
Page 9: Fastening The Handlebar
PREPARING THE MACHINE 6. FASTENING THE HANDLEBAR For packing purposes the handlebar is supplied folded and must be put into its working position. Proceed as follows to do this: Lift the handlebar, pulling up the lever indicated by the arrow Position the machine in its working position Mount the recovery tank on the handlebar tube using the two hooks Insert the tubes into the fittings that exit from the ring of the recovery tank... -
Page 10: Solution Tank
PREPARING THE MACHINE 9. SOLUTION TANK Check that the plug is properly inserted in its seat (A). Check that the valve is properly engaged (B). -
Page 11: Operation
OPERATION 1. PREPARING TO WORK The followings procedures must be done before installing the tanks: 1. Open the two rear hinges on the battery compartment 2. Connect the connector to the batteries 3. Close the battery compartment Now install the tanks 4. -
Page 12: Forward Movement
OPERATION 3. FORWARD MOVEMENT Forward movement by these machines is done using the brush. When the brush is slightly inclined it pulls the machine forward. ATTENTION: Always make sure that squeegee is lifted when moving backwards, even for short distances. -
Page 13: After Work Is Terminated
AFTER WORK IS TERMINATED Proceed as follows at the end of the work cycle and before you perform any type of maintenance: 1. Turn off the solenoid valve switch (3) 2. Lift the squeegee 3. Turn off the aspiration switch (2) 4. -
Page 14: Daily Maintenance
DAILY MAINTENANCE 1. CLEANING THE RECOVERY TANK Grasp the tube at the rear of the machine Remove the bayonet plug to open the tank Clean the filter under running water Rinse out the tank and clean with a jet of water ATTENTION: Always wear gloves when doing this operation to protect yourself from contact with hazardous solutions... -
Page 15: Replacing The Squeegee Rubbers
DAILY MAINTENANCE 3. REPLACING THE SQUEEGEE RUBBERS Check the condition of the squeegee rubbers. Replace as necessary. To replace the rubbers: 1. Lift the squeegee 2. Remove the two knobs 3. Detach the squeegee from the support 4. Remove the tube from the squeegee opening to permit the squeegee to be removed 5. -
Page 16: Scheduled Maintenance
SCHEDULED MAINTENANCE 1. CLEANING THE SQUEEGEE TUBE Check the squeegee tube for clogging if the suction is insufficient or at periodic intervals. To clean the tube proceed as follows: 1. remove the tube from the sleeve on the squeegee 2. Remove the other end from the recovery tank 3. -
Page 17: Checking Operation
CHECKING OPERATION 1. ELECTRIC SYSTEM SAFETY The machine has two amperometric safety switches installed in the electric system (below the solution tank). These cut off power to the brush motor and to the suction motor when a preset load is exceeded. The restoration of the motors happen automatically after you switch off the machine and wait around 40 seconds for the cooling of the protection inserted in the electric card. -
Page 18: Brush Selection And Use
BRUSH SELECTION AND USE POLYPROPYLENE BRUSHES (PPL) These are used on all types of floors and offer goods resistance to wear and to hot water (not more than 140°F). PPL is not hygroscopic and consequently preserves its characteristics even when wet. DRIVE DISKS Drive disks are recommended for cleaning polished surfaces. - Page 19 LIMITED WARRANTY This scrubber is warranted for 1 year from the date of purchase as shown on your distributor’s invoice. Parts not Covered under warranty are power cords, filters, motor brushes and squeegee blades. The warranty covers only Failure due to defective parts or workmanship and will be invalidated by improper application and use. Item excluded from warranty coverage, unless found and reported defective immediately upon removal from the Original shipping container and before being used by the original purchaser, include: power cords, floor brushes, and motor brushes.
Need help?
Do you have a question about the Gloss Boss and is the answer not in the manual?
Questions and answers