Advertisement
Quick Links
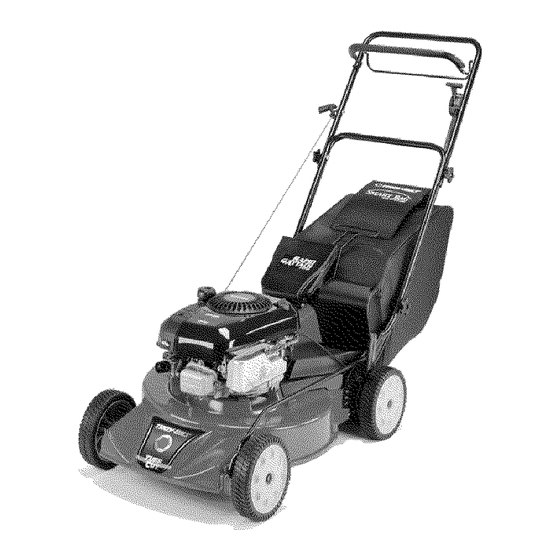
TRnV BILT
Operator's Manual
Model
909J--Tuff-Cut e
IMPORTANT:READ
SAFETY
RULES AND INSTRUCTIONS
CAREFULLY
Warning:
This unit is equipped with an internal combustion engine and should not be used on or near any unimproved
forest-covered,
brush-
covered or grass-covered
land unless the engine's exhaust system is equipped with a spark arrester meeting applicable local or state laws (if any).
If a spark arrester is used, it should be maintained
in effective working order by the operator. In the State of California the above is required by law
(Section 4442 of the California Public Resources Code). Other states may have similar laws. Federal laws apply on federal lands. A spark arrester
for the muffler is available by contacting the service department at Troy-Bilt LLC, P.O. Box 361131 Cleveland, Ohio 44136-0019.
TROY-BILT
LLC, P.O. BOX 361131, CLEVELAND,
OH 44136-0019
PRINTED
IN USA
FORM NO. 770-10601A
(01/2002)
Advertisement

Subscribe to Our Youtube Channel
Related Manuals for Troy-Bilt 909J Tuff-Cut


Summary of Contents for Troy-Bilt 909J Tuff-Cut
- Page 1 (Section 4442 of the California Public Resources Code). Other states may have similar laws. Federal laws apply on federal lands. A spark arrester for the muffler is available by contacting the service department at Troy-Bilt LLC, P.O. Box 361131 Cleveland, Ohio 44136-0019.
- Page 2 For future reference, please copy the model number and the serial number of the equipment in the space below Copy Model Number Here Copy Serial Number Here O BILT. TROY-BILT P. O. BOX 361131 www.troybilt.com CLEVELAND, OH 44136 330-558-7220 •...
- Page 3 Safety This machine meets voluntary safety standard B71.1 - 1998, which is sponsored by the Outdoor Power Equipment Institute, Inc., and is published by the American Safety Alert Symbol National Standards Institute. manual and on the unit to alert you to potential This is a safety alert symbol.
- Page 4 Section 1: Safety II. OPERATING ON A SLOPE Neverallow children to operate the After striking an object, stop the mower. engine and disconnect the spark plug Slopes are a major factor related to slip wire. Inspect the mower and repair, if Use extra care when approaching and fail accidentswhich can resultin necessary, before restarting.
- Page 5 Section 1: Safety SAFETY DECALS Foryour safety and the safety of others, various safety decals are located on your unit (below - size not to scale). Keepthe decals clean and legible at all times. Contact your local service dealer or the Factoryfor replacements if any decals are damaged or missing.
- Page 6 Before operating your machine, carefully read and understand all safety, controls and operating instruc- tions in this Manual, the separate Engine Owner's Manual, and on the decals on the machine. Figure2-2: Attachments Failure to follow these instructionscan ASSEMBLING NEW UNITS 5.
- Page 7 Section 2: Assembly Figure2-5: Unfoldingthe handlebar. Step 3: Adjust Handlebar Height 1. Loosen one of the lower handlebar adjustment knobs (K, Figure 2-6) and give the knob a tap inward to free the square shaft on the screw (N, Figure 2-7) from the keyed slot (0) in the handlebar strut.
- Page 8 Failure to follow these instructionscan ments. the bag is full. See Bagging Mode in result in serious personalinjury. Section 4 for detailed information. A unique feature, the TROY-BILT®Rapid Attach System, is incorporated into the Mulching Plug Attachment design of the attachments. This system...
- Page 9 Section 3: Features a ndControls MOWER CONTROLS ENGINECONTROLS Wheel Speed Control Thefollowinginformationidentifies a nd The Wheel Speed Control (B, Figure3-1) Throttle describes the controlsfor all mower provides three different wheel speeds. models. Models 909J has an engine that is Selectionsare: equipped with a fixed throttle speed for •...
- Page 10 Make sure the bag door modes and how to implement them. seats squarely onto the tab and covers TROY-BILT ® the tab completely. Bagging Mode RAPIDATTACH SYSTEM The mower is set up for bagging mode...
- Page 11 Section 4: Operation Figure 4-3: SmartBag indicates when bagis full(F)andnotfull(G), Figure 4-5: Adjustinghandlebarheight. 2. With the engine and blade stopped, 2. Graspthe Mulching Plug's hand-grip hold open the discharge outlet guard (C, with one hand and pull back until the plug b.
- Page 12 Section 4: Operation b. While pulling the leveraway from Starting the Engine the mower, move the lever towards the 1. Openthe fuel shut-off valve, if so If the Blade Control System does not back of the mower (B, Figure 4-6) for a equipped.
- Page 13 Section 4: Operation Clean Mower Frequently Cleanthe mowing housing frequently to To avoid injuryor propertydamage: remove any grass build-up. Referto the cleaning instructions in Section 5. • Maximum safe operatingangle is t5 o. • Exceeding maximum safe operating Vary Cutting Pattern angle may cause tipping or loss of Vary the cutting footing.
- Page 14 Maintenance connectsparkplug wire and move wire away from spark plug. Before inspecting,cleaning or servicingthe machine, shot off engine, wait for moving partsto stop, dis- Failureto follow these instructionscan result in serious personalinjury or propertydamage. REMOVING AND REQUIRED MAINTENANCE SCHEDULE REPLACING THE BELT COVER Before Every 10 Every 25 PROCEDURE...
- Page 15 Section 5: Maintenance efore inspecting,cleaning or servicingthe machine, shutoff engine, wait for moving partsto stop, dis- connectspark plug wire and move wire away from spark plug. Failureto follow these instructionscan result in serious personalinjury or propertydamage. 2. When servicing the underside of the The governor controls the maximum safe mower, the mower should be tipped only operating speed and protects the engine...
- Page 16 Section 5: Maintenance connectsparkplug wire and move wire away from spark plug. Before inspecting,cleaning or servicingthe machine, shot off engine, wait for moving partsto stop, dis- Failureto follow these instructionscan result in serious personalinjury or propertydamage. Curved end down Curved end down Mower Deck Mower blade is sharp.
- Page 17 Section 5: Maintenance efore inspecting,cleaning or servicingthe machine, shutoff engine, wait for moving partsto stop, dis- connectspark plug wire and move wire away from spark plug. Failureto follow these instructionscan result in serious personalinjury or propertydamage. Figure 5-7: Pressdown onpoint "A"to Figure 5-8: Remove or installbeltaround blade.
- Page 18 Section 5: Maintenance efore inspecting,cleaning or servicingthe machine, shutoff engine, wait for moving partsto stop, dis- connectspark plug wire and move wire away from spark plug. Failureto follow these instructionscan result in serious personalinjury or propertydamage. 5. Measure again, as in steps 2, 3 and 4 2.
- Page 19 Section 5: Maintenance efore inspecting,cleaning or servicingthe machine, shutoff engine, wait for moving partsto stop, dis- connectspark plug wire and move wire away from spark plug. Failureto follow these instructionscan result in serious personalinjury or propertydamage. Figure 5-17: Dislodginghand/ebarstruts. 2. Foldthe top section of the assembly backward (2, Figure 5-16).
- Page 20 PartsList Modo_ 909J...
- Page 21 Mode 909J PartsList Ref. # Description Qty. Part # Description Qty. Ref. # Part # 1917018 1917000 Mower Deck........... HandleSupport Bracket, Right-Hand..1723037 Engine ............ Hex Hd. FlangeScrew, 3/8-16 x 3/4, Self-Thrd ..........1917072 Support Bracket ........1917014 1917045 Torsion Spring ........RearAxle Bearing........
- Page 22 PartsList Mode 9o9J Ref. # Part # Description Qty. Ref. # Part# Description Qty. 1917021 1917053 Lower Handlebar ........Operator PresenceControl Bail ....1917026 1917085 Wheel Drive Bail........Upper Handlebar ........1917036 1917081 Handlebar Support Strut ......Operator PresenceControl Cable ... 1763767 1918161 Handlebar Adjustment Knob....
- Page 23 Mod_ 909J Notes...
- Page 24 Troy- Bilt LLC's authorized channels of export distribution. Troy-Bilt LLC warrants this product against defects for a period Parts that are not genuine Troy-Bilt parts are not covered by of two (2) years commencing on the date of original purchase this warranty.
Need help?
Do you have a question about the 909J Tuff-Cut and is the answer not in the manual?
Questions and answers