Table of Contents
Advertisement
Quick Links
Safety Instructions & Operator's Manual for
73" FINISHING MOWER
CA TA GORY ONE
3 POINT HITCH
MODEL
FM7300
Thank you for buying a SNAPPER Product!
Before operating your finishing
mower, read this manual carefully
and pay particular attention to the "IMPORTANT
SAFETY INSTRUCTIONS"
on Pages 2 & 3. The "IMPORTANT
SAFETY INSTRUCTIONS"
on pages 2 & 3 of this manual provide general safe operating practices and warnings
for operating powered lawn mowers. You must refer to your tractor manual for specific operating instructions
and warnings for your tractor. Remember that all power equipment can be dangerous if used improperly.
Also
keep in mind that SAFETY requires careful use in accordance
with the operating instructions
and common
sense!
SNAPPER, McDonough,
GA., 30253
U.S.A.
COPYRIGHT
© 1998
SNAPPER
iNC.
ALL RIGHTS RESERVED
MANUAL No. 7-2074 (I.R. 11/16/98)
Advertisement
Chapters
Table of Contents

Related Manuals for Snapper FM7300


Summary of Contents for Snapper FM7300
- Page 1 73" FINISHING MOWER CA TA GORY ONE 3 POINT HITCH MODEL FM7300 Thank you for buying a SNAPPER Product! Before operating your finishing mower, read this manual carefully and pay particular attention to the "IMPORTANT SAFETY INSTRUCTIONS" on Pages 2 & 3. The "IMPORTANT SAFETY INSTRUCTIONS"...
- Page 2 If you have any questions pertaining to the finishing mower which your dealer cannot answer to your satisfaction, call or write the Customer Service Department SNAPPER, McDonough, Georgia 30253. Phone: (1-800-935-2967). Follow SAFETY instructions...
- Page 3 CAUTION when handling them. blade in highest position when mowing over Have mower serviced by an authorized SNAPPER rough ground. dealer at least once a year and have the dealer Keep hands and feet away from rotating blade install any new safety devices.
-
Page 4: Table Of Contents
TABLE OF CONTENTS IMPORTANT SAFETY INSTRUCTIONS ..........TABLE OF CONTENTS ................SECTION 1 - FAMILIARIZATION ............. SECTION 2 - SET-UP INSTRUCTIONS ..........SECTION 3 -OPERATING INSTRUCTIONS ......... Mower Preparation ......................Tractor Preparation ....................... Mower Attachment ......................Setting Cutting Height ....................Starting &... -
Page 5: Section 1 - Familiarization
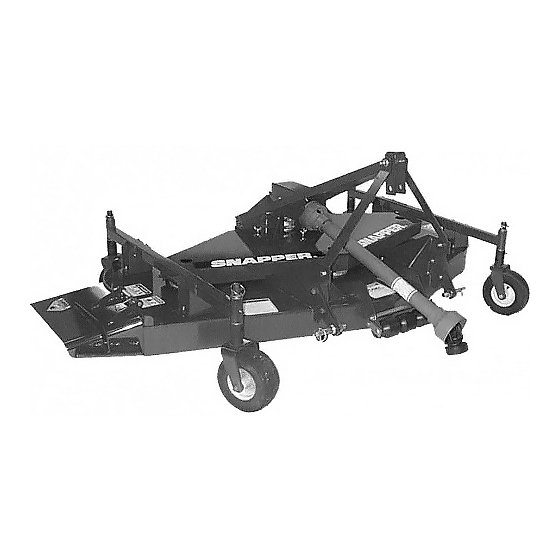
The nomenclature information above, shows specific SNAPPER 73" Finishing Mower. Its purpose, aside components of the SNAPPER 73" Finishing Mower. It is from recommending standard operating procedures and recommended that all operators of this equipment routine service requirements, is to promote SAFETY... -
Page 6: Section 2 - Set-Up Instructions
REMOVE BREATHER/FILLER Set-Up Instructions TO CHECK FLUID LEVEL The following instructions cover the initial set up of the SNAPPER 73" Finishing Mower. Read and follow each step carefully. Read entire manual before attempting to set up or operate this mower. -
Page 7: Set-Up Instructions
SECTION 2 - SET-UP INSTRUCTIONS FOR SNAPPER 73" FINISHING MOWER D. Caster Bushings & Wheel Bearings. Locate GEARBOX the four caster bushing grease fittings. Add 1 to 3 shots of grease as needed from the grease gun. Locate grease fittings in hub of caster wheels. Add 1 to 3 shots of grease as needed from the grease gun. -
Page 8: Section 3 -Operating Instructions
SECTION 3- OPERATING INSTRUCTIONS The operator must be familiar with the contents of this 2.3.3. Attach lower tractor hitch arms to the pins manual before attempting to attach or operate this on the mower pivoting hitch. Secure with Lynch mower. There may be specific operating and safety pins. - Page 9 SECTION 3- OPERATING INSTRUCTIONS C. Push up on caster to remove slack between spacers. Install washer and Lynch pin. D. Reverse procedure to lower cutting height. NOTE: All casters should have the same number of spacers installed below the caster tube when the cutting height adjustment completed.
-
Page 10: Service - After First 5 Hours
SNAPPER 3.2.5.2. Mower Caster Bushings. Apply 1 to 2 Dealer annually for inspection and addition of any shots at each of the four locations. -
Page 11: Mower Belt Replacement
SECTION 5 - ADJUSTMENTS & REPAIR 4.2.2 Blade Sharpening. Inspect blades. If the blade has not been DO NOT attempt any maintenance, adjustments, orl damaged and it has not worn beyond the wear service with the engine or blades running. STOP I limit it may be sharpened. -
Page 12: Driveline Repair
7. Insert spindle shaft up through the bottom replacement, SNAPPER Field Serviceable Spindles have been designed so that no special bearing. Slide spacer down over spindle shaft. tools or presses are required. 8. Install new top bearing. Install the top bearing 1. - Page 13 Replace with genuine SNAPPER replacement parts. 4. Apply liberal amount of grease to the shield bearing and place in groove on yoke. 5. Slide plastic tube over drive shaft. Align slots in plastic tube with tabs on plastic bearing.
-
Page 14: Warranty
For one (1) year from purchase date for the original purchaser's commercial or other non-residential use, SNAPPER, through any SNAPPER dealer will replace, free of charge (except for taxes where applicable), any part or parts found upon examination by the factory at McDonough, Georgia, to be defective in material or workmanship or both. - Page 15 CATEGORY 3 POINT HITCH WARNING: of California to cause cancer, birth defects or other reproductive harm. The engine exhaust from this product contains chemicals known to the State SNAPPER, McDonough, GA., 30253 U.S.A. COPYRIGHT © 1998 SNAPPER INC. ALL RIGHTS RESERVED...
- Page 16 73" FINISHING MOWER CA TA GORY ONE 3 POINT HITCH MODEL FM7300 Thank you for buying a SNAPPER Product! Before operating your finishing mower, read this manual carefully and pay particular attention to the "IMPORTANT SAFETY INSTRUCTIONS" on Pages 2 & 3. The "IMPORTANT SAFETY INSTRUCTIONS"...
-
Page 17: Mower Attachment
If you have any questions pertaining to the finishing mower which your dealer cannot answer to your satisfaction, call or write the Customer Service Department SNAPPER, McDonough, Georgia 30253. Phone: (1-800-935-2967). Follow SAFETY instructions... - Page 18 CAUTION when handling them. blade in highest position when mowing over Have mower serviced by an authorized SNAPPER rough ground. dealer at least once a year and have the dealer Keep hands and feet away from rotating blade install any new safety devices.
-
Page 19: Starting & Stopping Mower
TABLE OF CONTENTS IMPORTANT SAFETY INSTRUCTIONS ..........TABLE OF CONTENTS ................SECTION 1 - FAMILIARIZATION ............. SECTION 2 - SET-UP INSTRUCTIONS ..........SECTION 3 -OPERATING INSTRUCTIONS ......... Mower Preparation ......................Tractor Preparation ....................... Mower Attachment ......................Setting Cutting Height ....................Starting &... -
Page 20: Familiarization
The nomenclature information above, shows specific SNAPPER 73" Finishing Mower. Its purpose, aside components of the SNAPPER 73" Finishing Mower. It is from recommending standard operating procedures and recommended that all operators of this equipment routine service requirements, is to promote SAFETY... -
Page 21: Set-Up Instructions
REMOVE BREATHER/FILLER Set-Up Instructions TO CHECK FLUID LEVEL The following instructions cover the initial set up of the SNAPPER 73" Finishing Mower. Read and follow each step carefully. Read entire manual before attempting to set up or operate this mower. - Page 22 SECTION 2 - SET-UP INSTRUCTIONS FOR SNAPPER 73" FINISHING MOWER D. Caster Bushings & Wheel Bearings. Locate GEARBOX the four caster bushing grease fittings. Add 1 to 3 shots of grease as needed from the grease gun. Locate grease fittings in hub of caster wheels. Add 1 to 3 shots of grease as needed from the grease gun.
-
Page 23: Section 3 -Operating Instructions
SECTION 3- OPERATING INSTRUCTIONS The operator must be familiar with the contents of this 2.3.3. Attach lower tractor hitch arms to the pins manual before attempting to attach or operate this on the mower pivoting hitch. Secure with Lynch mower. There may be specific operating and safety pins. - Page 24 SECTION 3- OPERATING INSTRUCTIONS C. Push up on caster to remove slack between spacers. Install washer and Lynch pin. D. Reverse procedure to lower cutting height. NOTE: All casters should have the same number of spacers installed below the caster tube when the cutting height adjustment completed.
-
Page 25: Service - After First 5 Hours
SNAPPER 3.2.5.2. Mower Caster Bushings. Apply 1 to 2 Dealer annually for inspection and addition of any shots at each of the four locations. -
Page 26: Mower Belt Replacement
SECTION 5 - ADJUSTMENTS & REPAIR 4.2.2 Blade Sharpening. Inspect blades. If the blade has not been DO NOT attempt any maintenance, adjustments, orl damaged and it has not worn beyond the wear service with the engine or blades running. STOP I limit it may be sharpened. -
Page 27: Driveline Repair
7. Insert spindle shaft up through the bottom replacement, SNAPPER Field Serviceable Spindles have been designed so that no special bearing. Slide spacer down over spindle shaft. tools or presses are required. 8. Install new top bearing. Install the top bearing 1. - Page 28 Replace with genuine SNAPPER replacement parts. 4. Apply liberal amount of grease to the shield bearing and place in groove on yoke. 5. Slide plastic tube over drive shaft. Align slots in plastic tube with tabs on plastic bearing.
- Page 29 For one (1) year from purchase date for the original purchaser's commercial or other non-residential use, SNAPPER, through any SNAPPER dealer will replace, free of charge (except for taxes where applicable), any part or parts found upon examination by the factory at McDonough, Georgia, to be defective in material or workmanship or both.
- Page 30 CATEGORY 3 POINT HITCH WARNING: of California to cause cancer, birth defects or other reproductive harm. The engine exhaust from this product contains chemicals known to the State SNAPPER, McDonough, GA., 30253 U.S.A. COPYRIGHT © 1998 SNAPPER INC. ALL RIGHTS RESERVED...
Need help?
Do you have a question about the FM7300 and is the answer not in the manual?
Questions and answers