Samsung SH100 User Manual
Hide thumbs
Also See for SH100:
- User manual (165 pages) ,
- Firmware upgrade manual (4 pages) ,
- User manual (51 pages)
Advertisement
Quick Links
Download this manual
See also:
User Manual
_1 ii_ H S({F I1r/i_bl i_i ir_c:b<il
i d
<ql({<J l i9 ig }
il8i!u,:tion
f<:'l'y:}Ur c_11/(}1
_
PiE _( 1(8i(7
thi,% rYi 7btlsT[ thoroI
i{I I',_,'
{}C2£_£ a topk}
Basic troubleshoot
ng
Quck reference
Cor_tents
Basic funct ons
..........
ns
.........
P!ay!!ac}{E!
!n!! .......................
.......................................................................
s
Append
xes
h/dex
Advertisement

Related Manuals for Samsung SH100


Summary of Contents for Samsung SH100
- Page 1 _1 ii_ H S({F I1r/i_bl i_i ir_c:b<il <ql({<J l i9 ig } il8i!u,:tion f<:'l'y:}Ur c_11/(}1 PiE _( 1(8i(7 thi,% rYi 7btlsT[ thoroI i{I I',_,' {}C2£_£ a topk} Basic troubleshoot Quck reference Cor_tents Basic funct ons ....P!ay!!ac}{E! !n!! .....................
- Page 2 This may resut n eec_r c snoc_ disconnect all power sources, such as the battery or charger. and then contact a Samsung service center. Prevent damage to subjects' eyesight, Do not use the flash n c ose prox rr/lly (clc set mar 1 rrV3 ff tc r ec ole or animals.
- Page 3 }an cause oaser/es to exD oae. aarnage y tar camera }r cause x_mea_a_e]}aria contact the manufacturer _f the oacemaKer or _jury meaica[ devc@ tor guiaance, , Samsung is not respons be for darnages c -m aries causea unau_nor/zea oa_Ter/es 3nargers. Cables or accessories...
- Page 4 Use the battery only for i ts intended purpose. Do not force the camera's parts or apply pressure to the Misusir _ the oa_er, _la_ cause at[r÷ o r e[ectr csnoc_ camera. iS rosy CF_o_ yOUr Cac@@rQ rY/RIfurictlorl Do not touch the f lash while itfires. The f iasn isvery hot when tired and m _ y burn your sK Exercise caution when you connect cables or adapters and install batteries and memory cards.
- Page 5 OF vehicles, ConsJt manutactur÷rs }f _our e_ect_ono oevices TOSOlVeany Rterfer@noe prob eros you experience, Tc orevenT unwantea interference only Samsung approved devices or aecessc Use _our camera in the normal position, avoa contact N_tnyour carneras _rxernalanger na...
- Page 6 .... (3El Copyright information _earn aDOU] your calneras @jot [. icons basic • Microsoft Windows and the Windows logo are Tunotlor $ fc Bnootng. registered trademarks at the Microsoft Corporation. • Mac is a registered trademark of the Apple Corporation. L;[_L;O IU[_L40{k_ •...
- Page 7 £aa tlona stormat on 9atety warn rigs and F "eoautons Camera buttons. For exar pie, [Shutter] represents the snuser button Page nurnber of teated ntorrnatDr The order ot c xlons or rnenus you rnust select [c Dertc _m a 3teD: tor examDJe Touch Z _ Photo Size...
- Page 8 e amount s I it that erliers yuur earners oetermlnes ex©ostJre, You can aief ¸ine ex } )sure wltrl snulter sDeec • Press [Shutter[: p -ess tne snsser alJthe way oc wn aperture _ sue. and ISO sensWty, By altenng tne exposure jou_ )NOIOS w...
- Page 9 Basictroubleshooting Learn to solve common problems by setting shooting options, Red eye is caused by the eyes reflecting light from the camera flash. Tile s_bject s eyes * Set the flash option to _ Red-eye or q_ Red-eye Fix. (p, 57) #:@pea_ _ed * If the photo has already been captured, select Red-eye Fix inthe edit menu, (p.
- Page 10 quick reference people p[_o[os O/ _(_×t [f}S6'C[S vle'6qfl/j u_o L caleg( bit 8¢LalOk _ 84 • BeautyShot mode _ 39 o vie U_)les n 3© view _ 88 • tied c/e'Re / eyeFix fLopu,x nt or _erect red _ye ,,os_ dp Kiodo _" "...
- Page 11 Basic fur_cfions Exlended l_nc_ior_s Using shooting modes ..........Unpacking J_-,i_(A the ,csna,t Abt_; modre ..... Camera layout Jsing the 5}*npe Shet mode ........blserting the battery and memory card Jsing the Scene mode ........Charging the battery and turning on your camera Jsi_g tr_c CoS_ Ur_ mede ...........
- Page 12 Shoc,_ing o pqbns Adjusting bnghtness and color /\u,ust,'_f/he exrx:c,,,_ ma u,y (;V_ ....68 Sebeting a r'e.soLition and quaB:y ....... CompensaLng _orr_a(_ightr_fd(,!\C}B)......Se ecting a "esolut on ..........ChF/ngl,g he mete" _,,q or£en ........ S_eeUng image ouaty ..........So rx; "if/a if/hi so¢)'¢;<s ( V',_I t o r)_a'/¢se!......Using f/he timer' .
- Page 13 F'layl;>ack/Edi_in{# WiK_less r-_#rt'v_/(_Kk ..........Viewing photos orvideos inPlayback mode ..81 Connecting to a WLAN and configuring network StarJng P aybnnk mode ..........settings ..........Vewng photos ............Conr_octr_glu _ \,_',,/ /\q ........Playng avd_o .S<:_t ng "_olv_,or< e ptcx,s ....................
- Page 14 C0iii_ilts Viewing photos or videos on AlIShare devices View'ng pholcs or videos on a FV scy_een View'ng photos or videos on anc£herdevice (mndere0 Sending or receiving photos or videos with another' camera .... Sending ik_ctcs cr videos to anotl'_ercamera ....Receiving photos or videos r,-<;m ar/oU'!ercansera ..
- Page 15 Learn _Dout your camera's )yout. icons, ana basic functions for shooting. Unpacking Using the Home screen Camera layout P,cce_s_n( [ne Home Soiree[ Inserting the battery and memory card _. 1_ cons on _r_em_me sc_e_ ,earra_j_nq icon_ Charging the battery and turning on your Capturing photos camera Jn_g_nf_ me Dalte_y...
- Page 16 The f ollowing items are included inyour product box, Optional accessories Carnera AO adapter/USB cable 3arTlel _ ©ase _ ca©i@ Rechargeable battery Strap Battery onarger Memory card/Memory carc aas Ke[ User Manual GD ROM Touch pen Quick Start Manual Basicfunctions 15...
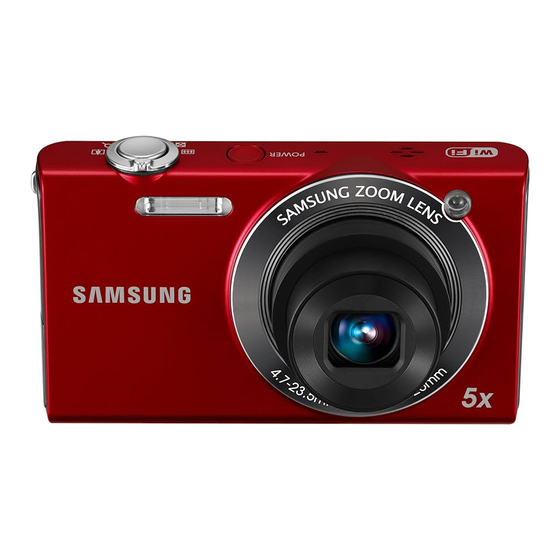
- Page 17 Cameralayost Before you start, familiarize yourself with your camera% parts and their functions, Zoom button • In Shooting mode: Zoom in orout Shutter button • In Playback mode: Zoom in on part of a photo or view files as thumbnails Flash .....
- Page 18 POWER button being read by acomputer or p rinter, or o ut ot t oous, Touch screen connecting to aWLAN, or s ending aphoto •Steady: When the c amera is connecting to a Home button computer or i n focus Basic functions...
- Page 19 Slide the lock up to release _<_' the battery. Insert the battery with the Samsung logo facing down [_{_?_ You oa-_use fl!e internaJ memerJ tot temporarystorage if a memerYcard !e Rechargeable battery not Jnse_ed, Basicfunctions 18...
- Page 20 Chargingthe baServandturning on 70urcamera Charging the batten/ Turning on your camera Before you use the camera for the first time, you must charge the Press [POWER] to turn your camera on or off. battery. Attach the USB cable to the AQ adapter, and then plug •...
- Page 21 Pe erming the initial setup When the initialsetup screen appears,fdlow the steps below to configurethe camera'sbasicsel_ings, Touch Language _:S Touch Home, and then touch _ or _, to select a time zone, • When you travel to another country, touch Visit, and then select a new time zone, Select a language, and then touch 0K ::;...
- Page 22 /7 Touch the up or down arrows to set the date 'O Touch Touch Calibration Touch the target on the screen with your touch pen _i/ Touch _, and then set the time, '_ Touch OK to save settings • Tosetdaylightsavingtime,touch -_. !}_ Touch OK to save.
- Page 23 Learningicons The icons the camera displays on the screen change according to the mode you select or the options you set, 10:00AM Current time Memory card inserted • _J_J: Fullycharged F3,3 Aperture vaJue • 4_JC_J: Partially charged 1/45S Shutter speed "...
- Page 24 Usingthe teuch screen Learn how to use the touch screen. Use the supplied touch pen to touch or drag on the screen. Touch an icon to select a rnenu or option. Gently flick the touch pen across the screen. Smart Auto Program Smart movie Settings...
- Page 25 i.Jsiii{il iiie i0(icii 3cix}_sii '(4_ • The touch screen may no_recogn ze your inputs t you touon mu_u e • Drag the o ption list up or d own until you f ind t he d esired option. terns at the same time Touch the o ption, and t hen touch OK.
- Page 26 ng the touch screenand sound Learn how to change the screen display type and the SouNd settings. Setting the display type for the touch screen Setting the sound You car/select frorn three screen display types. Each displays Set your carnera to ernit or laotto emit a sound when you perform functions.
- Page 27 Usingthe Homescreen You car/select a shooting mode or access the settings menu by touchir/g the icons on the Home screen, Icons o_'1 the Home sc_een Accessing the Home sc_een Its Shooting or Playback mode, press [HOME]. Press [HOME] again to return to the previous mode. Smart Auto: Capture a photo by letting the camera select _;i_ a scene mode automatically, (p, 36)
- Page 28 ANShare: Connect your camera toan AIIShare enabled Simple Shot: Capture aphoto with simple adjustments device via a wireless network and view your files on the brightness and color. (p. 37) connected device, (p. 1 18) Object Highlight: Capture a photo with the subject's Movie: Record a video, (p.
- Page 29 i.Jsiii{il iiie iqoiYi(!_ 3ci(}_i!_Yi Reu_anging icons _ii!' Drag it to a new location. • To move an icon to another page, drag it to the left or nght You can rearrange the icons on the Home screen in any order. edge of the screen.
- Page 30 Captunngphotos Learn how to capture photos easily and quickly in Smart Auto mode. {_ Half-press [Shutter] to focus. On the Home screen, touch _, • A green frame means the subject is in focus, • A red frame means the subject is out of focus, Smart/<"",, Smart movie...
- Page 31 (}8pt_iiiii{il pix£0s If the zoom indicator is in the digital range, your camera is usir_g You car/capture close up photos by adjusting the zoom, Your the Digital zoom, By using both the Optical zoom and Digital camera has a 5X Optical zoom, 2X Intelli zoom, and 5X Digital zoom, you can zoom in up to 25 times, zoom, The Intelli zoom and Digital zoom cannot be used at the same time,...
- Page 32 (i}8pt_iiiii{ilpii0t0s If the zoom indicator is in the Intelli range, your camera is using In Shooting mode, touch the Intelli zoorn, Photo resolution vanes according to the zoom rate if you use the Intelli zoom, By tieing both the Optical zoom Touch the setting button next to Intelli Zoom and Intelli zoom, you can zoom in up to 10 times.
- Page 33 (}8pt_iiiii{il pix£0s Reducing came_a shake (DIS} Reduce camera shake digitally in Shooting mode, Ifthe camera is hit Or dropped, the display will be blurry, If this occurs, tuns off the camera, and then turn it on again, Before correction After correction In Shooting mode, touch _.
- Page 34 Tips for getting a clearer photo J_%_'_-- _--'i-m Ensure nothwg is Bet the Dig ta image Stab lizatDn ODT m IO re@uce samera snake. (s. 32/ bockinc the ens Half-press [Shutter] to aqUST me focus The camera a@jJStS me TOCUS ant exoosure au_omatloa Jy.
- Page 35 tmay be dffcut to get your subject in focus 4/hen Nhen you capture photos in ow -inere is UITle contrast De_een tne S uDJeOI arl@ c_CKg[oun@ Turn on the rash (fe[ exarnBe, when '}/our8uojeot s wea qg( }trllllg Tnat s 81r'rar o 57/ coIc I0 trle OaCKg[©un@ - tne gnt source oen n@ the suoJest _stoo or gnt...
- Page 36 Learn now _c caD_u e a Dnotc record a video, and recc _aa voice memo Dy selecting a mode, Using shooting modes Using effect modes Jsing 1he Smar[ Aulo mode . L46 e JDjec/HEgnl_gn_:_o_....;sing the Magic Frame Shol mode ..
- Page 37 Usingshootingmodes Capture photos or record videos by selecting the best shooting mode for the conditions. Using the Smart Auto mode In Smart Auto mode, your camera automatically chooses the Portraits at night ap_}ro_}rlate camera settings based on the ty_}e of scene it Landscapes with backlighting detects, The Smart Auto mode is helpful if you are not tarniliar with the camera settings Norvarious scenes.
- Page 38 i.hi;iii{il s ix££iii{il iy_odes Using the Simple Shot mode _ Half-press [Shutter] to focus • Inseveralscenes,the cameraautomatically c apturesa photo In Simple Shot mode, you can capture photos with simple whenyou halfpress [Shutter]. adjustments to brightness and color, _ Press [Shutter] to capture the photo. "/ On the Home screen, touch Drag the sliders to adjust Brightness and Color.
- Page 39 i.Jsiii{ilSiXiOtiii{il i lXicieS Using the Scene mode Using the Close Up mode In Scene mode, you car/capture a photo with options that are In ©lose Up mode, you can capture close up photos of subjects, such as flowers or insects. preset for a specific scene.
- Page 40 i.Jsiii{ilSiXiOtiii{il i lXicieS Using the Night Shot mode Using the Beauty Shot mode In NightShot mode,you can use a slow shutterspeed to extend In BeautyShot mode,you can capturea portraitwith optionsto the time the shutterstaysopen, Increasethe aperturevak_e to hide facialimperfections, preventoverexposure. On the Home screen, touch On the Home screen, touch _ii! _ Drag the sliders to adjust Face Tone and Face...
- Page 41 i.Jsiii{ilStiOOtiii{il ilXii:]eS Using the Program mode In Program mode, you can add shortcuts for your favorite options In Programmode, you can set most options, exceptthe shutter to the left side of the screen. speed and aperturevalue,which the camerasets automatically. In Shooting mode, touch [] _ My screen _ OK On the Home screen, touch Touch and hold any icon, except one of the icons in the...
- Page 42 i.Jsiii{ilsix£>tiii{iliy_ocies Using the Movie mode Drag the icon into a desired box on the left. • Toremoveshortcuts,dragan iconto the right. In Moviemode, you can record high definitionvideos of up to 20 minutesin length,The camerasaves recordedvideos as MP4 (H.264)files. _ H.26_ (MPEG 4 pard O/AVO)is a high:compression video format established bY the interr_atbnal standard organizatbns ISO IE©...
- Page 43 Usiii{il six££iii{il iy_0cies Using the Smart movie mode The c amera allows you t o temporarily pause avideo while In Smart movie mode, your camera automatically chooses the recording, With this f unction, you c an r ecord separate scenes appropriate camera settings based on the scene it has detected.
- Page 44 _ Press [Shutter] or touch 0 to start recording _ Press [Shutter] again or touch ! to stop recording. * The camera may not se!ect Ihe correct scene depending on the shooting conditions, such as £amera shake, !!ghting,at!d distance to the subject, * 8mart _lter effects are noI availabJeirl Smart Movie mode, Extended functions...
- Page 45 Usingeffect modes Capture photos or record videos with vanous effects, Using the Obiect Highlight mode ._S Half-press [Shutter] to focus, • When the camera can apply the Object Highlight effect, _¢ Tl_e Object Highlight mode makes the subject more discernible will appear.
- Page 46 i.Jsiii{l (}_iiei}t rix£ie3 Using the Magic Frame Shot mode Using the Photo Filter mode In Magic Frame Shot mode, you car/apply various frame effects In Photo Filter mode, you car/apply various filter effects to your to your photos, The shape and the fed otthe photos will change photos, according to the frame you select, On the Home screen, touch _,...
- Page 47 i.Jsiii{i <}i{ectrixii:ios Defog Make image clearer. Classic Apply a black and white effect, Retro Apply a sepia tone effect, Negative Apply a negative film effect, {_ Align your subject in the frame, and then half-press [Shutter] to focus. Miniature Apply a tilt shift effect to make the subject appear in miniature, ,,<_Press [Shutter] to capture the photo.
- Page 48 i.hi;iii{l (l_ifei}t rix£ie3 ..Using the Movie Filter mode Classic Apply a black and white effect, In Movie Filter mode, you can record videos with vanous filter effects, Retro Apply a sepia tone effect. Negative Apply a negativefilm effect, On the Home screen, touch _, Touch a desired filter {_ Press [Shutteq or touch •...
- Page 49 i.Jsii_g eiiect i_odes _:SAlign your subject in the frame, and then half-press Using the Vignetting mode [Shutter] to focus. In Vignetting mode, you can capture a photo or record a video with a vignetting effecL {_ Press [Shutter] to capture the photo, On the Home screen, touch _.
- Page 50 i.Jsiii{l (}_iiei}t rix£ie3 Using the Palette Effect mode Create a vivid look with sharp contrast and a In Palel_e Effect mode, you can record a video with effects to Palette Effect 1 red color. make specific colors stand ouL Make scenes clean and clear by applying a Palette Effect 2 On the Home screen, touch _, soft blue tone,...
- Page 51 Bec0rdingvoicememos Learn how to record a voice memo that you can play back later, You car/also add a voice memo to a photo to remind you of shooting conditions, _,{yPress [Shutter] again or touch I! to stop recording. Recording a voice memo On the Home screen, touch _, Press [Shutter] or touch •...
- Page 52 i:i(_i}oiciiii{il voico iii(!_r_i0s _:SRecord a short voice memo (I0 seconds maximum), Adding a voice memo to a photo • Press[Shutter]to stop recording a voicememobeforethe ItsProgrammode, you can add a voicememoto a captured 10secondsareup. photo. On the Home screen, touch YouCa-,not add Vo!_ memos t° photos in 1hebu_st mode: Touch I_, and then touch the setting button next to Memo.
- Page 53 Shooting Learn OD[IOn8 moae Selecting a resolution and quality .... 0,': ing Smart Face Recogru[ 3electi , a reso_u:_c ., 05 HegEslenngTaees as • _urlavonte Sebr:ti g _mage quaiit} .._qyo_ar Using the timer_ ,_£ Adjusting bnghtness and color ..Shooting in the dark F_%usungthe exF .>sureman_!ally iF\...
- Page 54 Selectinga resolutionand quality Learn how to change the image resolution and quality settings. _,}electmga resolution As you increase the resolution, your photo or video will include 4320 x 3240: Print on A1 paper. more pixels, so it car/be printed on larger paper or displayed on a larger screen, When you use a high resolution, the file size will 4320 X 2880: Print on A1 paper in wide ratio (3:2), also increase.
- Page 55 {i_eiei}tiii{il 8188oi(iiioii 8y_ili {iiisiity Selecting image quality Set the photo and video quality settings. Higher image quality In Shooting mode, touch _ Movie Size settings will result in larger file sizes. Select an option, and then touch OK. The camera compresses and saves the photos you capture in the JPEG fom-_at.
- Page 56 Seiecti_i_8 issoiiiiioii 8ixi qiJsiity The camera compresses and saves the videos you record in the MP4 (H,264) tormat, In Shooting mode, touch _ Frame Rate. Select an option, and then touch • As the frame rate increases, action appears more natural, but the file size also increases, 00:05 ¢...
- Page 57 Usingthe timer Learn how to set the timer to delay shooting. In Shooting mode, touch _ Timer. {_ Press [Shutter] to start the timer ° The AF assist light/timer lamp blinks. The camera will Select an option, and then touch automatically capture a photo at the specified time.
- Page 58 Shootingin the dark Learn how to capture photos at night or in low light conditions. Preventing red eye Using the flash If the flash fires when you capture a photo of a person its the dark, Use the flash when you capture photos its the dark or when you a red glow may appear itsthe person's eyes, To prevent this, need more light on your photos, select Red-eye or Red-eye...
- Page 59 Red-eye: • The flash will fire t wice when the s ubject Make sure that your subjects are withh tr-lerecemmended distance background is dark toreduce the r ed e ye effect. from the flash, (p, 146) , There is an interval between the 2 bursts of t he f lash.
- Page 60 Sixi0iiyi{iliri tiie <££k Adjusting the ISO sensitivity The ISO sensitivity is the measure of a film's sensitivity to light as defined by the Ir/ternational Organization for Standardization (ISO). The higher the ISO sensitivity you select, the more sensitive to light your camera becomes, With a higher ISO sensitivity, you can get a better photo without rising the flash.
- Page 61 Changing the camera'sfocus Learn how to adjust the camera's focus to suit the subject and the shooting conditions. Using macro Use macro to capture dose Lip photos of subjects, such as In Shooting mode, touch _ Focus flowers or insects. Select Macro, and then touch...
- Page 62 Cix_ii!i_iii{il ib!!_ ceiYi(!_i8_8 ice(is Using Smut/ouch focus Smart Touch AF allows you to track and auto focus on your • Trac_Jrlga suejeot may tail subject, even when you are moving. the subjec_ moves excess ve In Shooting mode, touch _ _Focus Area the subjec_ is DaOKIJ[ Of yOUare snoo_ng n a aarb )]ace colors or pa_erns on _ne SL}jec_ aria the DaoKgrourle are _ 9 same...
- Page 63 Cix_ii!i_iii{il ib!!_ c8iYi(!_18_8 i0c(is Using one touch shooting Adiusting the focus a_ea You car/tocus on a subject and capture a photo with the touch You can get clearer photos by selecting an appropriate focus of your fingeL area according to your subject's location in the scene. In Shooting mode, touch _ Focus...
- Page 64 Usingface detectbn If you use Face Detection options your camera can autornatically detect a human face. When you focus on a human face, the camera adjusts the exposure automatically. Use Blink Detection to detect closed eyes or Smile Shot to capture a smiling face.
- Page 65 i.Jsiii{il i8(}(!_ cisii£}tioii Capturing a self port_ait shot Captunng a smile shot Take photos of yourself, The focus distance will be set to dose The camera automatically releases the shutter when it detects a up and your camera will emit a beep. smiling race.
- Page 66 i.Jsiii{il i8(}(!_ cisii£}tioii Detecting eye blinking Using Smart Face Recognition If your camera detects closed eyes, it will automatically capture The camera automatically registers faces that you frequently 2 photos in succession. photograph, The Smart Face Recognition feature will automatically pHoritizethe focus on those faces and on favorite In Shooting mode, touch _ Face Detection...
- Page 67 Registering faces as your favorites (My Sta_ j) You can register your favorite faces to prioritize the focus and whether or n ot th9 s ubject is wearing g!asses, exposure on those faces. This feature is available only when *The camera can 8utomatica4Jy register to 14 f aces,...
- Page 68 _:STouch _ when the face list appears. • Yourfavorite facesare indbatedwitha "k on theface list. Ifyou register th© same face t_vice, you can delete one of the faces in the face list, in Shooting mode, touch _ _Smart FR Edit. _' Select Face List, and then touch 8K.
- Page 69 Adiustingbrightnessand color Learn how to adjust the brightness and color for better image quality, Adiusting the exposure manually (EV) Depending on the intensity of the ambient light, your photos may be too bright or dark. In these cases, you car/adjust the If you caerlot decide on an app/opnate exposure, select AEB exposure to get a better photo, Exposure Bracket).
- Page 70 "_,<iii_isiiii{il i'ii!iliii_i(!_ss8iid c0i0i ¸ Compensating for backlighting (ACB) • The AO B feature ie abvaye en in Smart AU!0, So@ne{Beach & snow) modes, When the light source is behind your subject or there is high The ACB feature is not avail6ble when you set Continuous, Motion contrast between your subject and the background, your subject Capture, orAEB options,...
- Page 71 "_,<iii_isiiii{il i'ii!iliii_i(!_ss8iid c0i0i ¸ Selecting a light source (White balance} Multi: The color ot your photo depends on the type and quality of the • Your camera divides the frame into several areas, light souree. If you want the color ot your photo to be realistic, and then measures the light intensity of each area.
- Page 72 "_,_:ii_i_iiii!il i'ii!iliii_i_!_% _!!_iid _0i0i¸ In Shooting mode, touch _ White Balance. You can customize the White Balance by capturing a photo of Select an option, and then touch OK. a white surface, such as a piece of paper, under the lighting conditions in which you intend to capture a photo.
- Page 73 Usingburst modes It carl be difficcflt to capture photos of fast moving subjects or capture natural facial expressions and gestures of your subjects its photos, In these cases, select one of the burst modes to rapidly capture multiple photos. Single Capture a single pnotc Continuous: vnle you are pressn{ [Shutter] tne camera conI...
- Page 74 Applyingeffects/Adiustingimages Applying Smart Filter effects Available filters in Program mode Apply various filter effects to your photos and videos to create unique images. Normal: No effect Miniature: Apply a tilt shift effect to make the subject appear in miniature. Vignetting: Apply the retro looking colors, high contrast, and strong vignette effect of Lomo cameras.
- Page 75 i,:i:7{{'>{_ <i',: • ..Retro: Apply a sepia tone effect. Miniature: Apply a tilt shift effect to make the subject appear in miniature, Negative: Apply a negativefilm effect. Vignetting: Apply the retro looking colors, high contrast, Custom RGB: Customize a color value. and strong vignette effect of Lomo cameras, Half Tone Dot: Apply a halftone effect.
- Page 76 i,:i:7{?>{_ <i',: • Ityou 3elect Miniature when you are reoormng avlaeo me soeea of Tnevaeo wlJlincrease In Shooting mode, touch m _Smart Filter. , it/ou select Miniature when you are recorc ng a vlaeo, tne car _r_ no_ reoc ] scone _ii _ Select Custom RGB, and then touch OK.
- Page 77 i,:i:Y{{'}{_ <i',:i >i{' Adjusting your photos {_ Touch OK to save your changes. _;_ _£_ ..Adjust the sharpness, saturation, or contrast of your photos. Soften the edges on your photos (suitablefor In Shooting mode, touch m _Image Adjust. editing the photos on your computer), Sharpen the edges to improve the clarity of your Drag up or down to adjust each value.
- Page 78 Be@cingthe zeemsesnd When you use the zoom while recording videos, the camera can record the sound of the zoom in the videos. Use the Soclnd Alive function to reduce the zoom noise, In Shooting mode, touch _ Voice Select an option, and then touch OK. OO:05 Sound Alive On: Turn on the Sound Alivefunction.
- Page 79 Availableshootingoptionsby shootingmode For details about shooting oF}dons, refer to "Shooting optionsL Resolution Quality Timer Flash IS0 sensitivity Macro Focus area Face detection Metering White balance Drive Smart filter £ Image adjust Sound Alive Digital zoom Intelli zoom Voice memo 0 All options are available.
- Page 80 Resolution Quality T_mer Flash ISO sensitivity Macro Focus Area Face detection Metering White balance Drive Smart filter & & Image adjust Sound Alive Digital zoom Intelli zoom Voice memo O All options are available. /x In these modes, some options are limited or a certain option is set by default, Shooting options...
- Page 81 ( 0678¢1 Please refer to the warranty that came with your product or visit our website www.samsung.com/for after-sales service or inquiries.
Need help?
Do you have a question about the SH100 and is the answer not in the manual?
Questions and answers