Table of Contents
Advertisement
Advertisement
Table of Contents

Subscribe to Our Youtube Channel
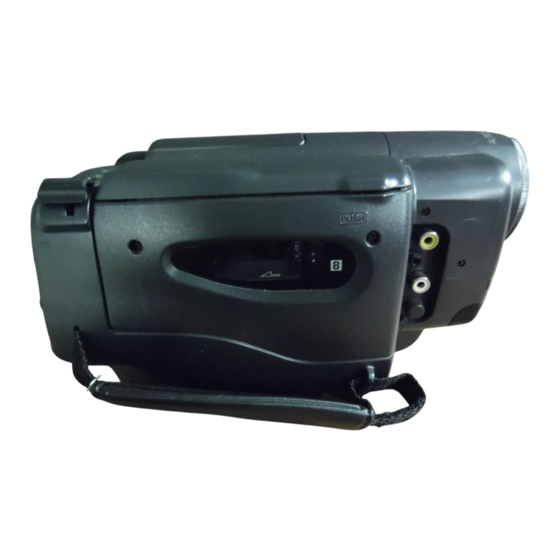
Related Manuals for RCA Pro852


Summary of Contents for RCA Pro852
- Page 1 camcorder user's guide Pro852/Pro854...
-
Page 2: Important Safety Information
Important Safety Information Be sure to read all the safety information before you begin to use this product. I WARNING: camcorder or AC adapter to rain or moisture. To reduce the risk of fire or shock hazard, do not expose This symbol indicates "dangerous... - Page 3 We want to make sure you enjoy your new camcorder.If you have any questions, call: Camcorder Exchange Warranty ..800-283-6503 (Pages 54-55) Customer Service ........800-336-1900 (Page 53) Accessories ......... 800-338-0376 (Pages 38-43) • Microphone ........Safety Information ........ • DISPLAY Button ......
- Page 4 This sectiondescribesonly the basic stepsnecessaryto setup your camcorder to record. Refer to the other sectionsfor detailed operation and feature options. Assistance The toll-free numbers are available to help you with any problem you may encounter. Camcorder Exchange Warranty ..800-283-6503 Customer Service ....
-
Page 5: Attach Lens Cap Cord And Adjust Handstrap
Attach lens cap cord and Attach shoulder strap. adjust handstrap. A. Unfasten one end of the shoulder strap from the buckle. Make sure you leave the buckle on the strap. A. Press in on the tabs on both sides of the lens cap to remove Thread one end of the shoulder... -
Page 6: Supply Power To The Camcorder
4. Supply power to the camcorder. Attach the AC Adapter Since the battery must be charged before it can be used the first time, attach the adapter to the camcorder. To AC 100- 240V, 50/60 Hz DC IN Jack PUSH button - press here to open and close the battery Adapter... -
Page 7: Play Back What You Have Recorded
PLA Y(VCR)/CAM Indicators and Button REW Button, PLAY Button, STOP Butt{ EJECT Butt_ POWER Switch Eyepiece Focus Thumb Control Trigger 5. Turn on the camcorder. Start and stop recording. • Press and release the REC START/ Slide the POWER switch upward turn the camcorder STOP button (thumb trigger) to... - Page 8 Review the camcorder's controls. Zoom Control "W" - Wide Angle Lens "T" - Telephoto Eyepiece Focus Control A (Audio), V (Video), and RF Out Jacks Viewfinder DC IN 9/6.5V Jack or DC IN 9V Jack Remote (Located Inside Battery Compartment) 'y Compartment Microphone Remote Holder...
- Page 9 Using the AC Adapter to Power Your Camcorder The adapter lets you power your camcorder directly from standard household power. It operates on 100-240 volts, 50/60 Hz. so it can be used virtually anywhere in the world to power the camcorder. Caution: Do not use this adapter for any purpose other than supplying...
-
Page 10: Using The Rechargeable
Using the Rechargeable Battery to Power Your Camcorder The battery must be charged as described on the next page before it can be used the first time. Initial charging will take approximately 12 hours for the battery. When fully charged, the battery should supply about 60 minutes of operating... - Page 11 Using the Rechargeable Battery to Power Your Camcorder The battery must be installed as described on the previous page before it can be charged. [C._RGE P'A¥ Battery Installed To AC 100- 240V, 50/60 Hz DC IN Jack Adapter Charge the Battery When the CHARGE indicator starts...
-
Page 12: Battery Level Indicator
Battery Level Indicator • When there is approximately five The battery level indicator appears in the minutes of battery power left in the viewfinder when approximately half the battery, appears in the battery power is left. This indicator viewfinder. The camcorder will turn shows you the amount... -
Page 13: Safety Precautions
Using Optional Alkaline "AA" Batteries can power the camcorder with six alkaline dry-cell "AA" batteries. Install the Alkaline Batteries Notes: The camcorder may not operate 1. Press the PUSH button to open the properly in cold temperatures below 50°F battery compartment. - Page 14 Using the Optional AC Adapter/Charger The optional CPS801C AC adapter/charger shown ol7 page 39 will power the camcorder and charge your rechargeable nickel cadmium battery. To AC Wall Outlet 100-240 Volts, 50/60 Hz. Caution: When a battery is attached to the adapter/ Battery Pack -- charger, do not...
- Page 15 Power the Camcorder The optional CPS801C AC adapter/charger and optional DCC 100 DC cable let you power your camcorder directly from standard household power. operates on 100-240 volts, 50/60 Hz, so it can be used virtually anywhere in the world to power the camcorder or recharge your battery...
- Page 16 Powering Lithium Cell Installation Install it as follows: The remote's lithium cell is packed separately. Pencil Here Insert Lithium Cell Cell Holder I. Turn remote over, insert a pencil 3. Replace cell holder in remote until it paper clip in the small hole, and slide clicks into place.
-
Page 17: Remote Sensor
Remote Sensor The remote operates the camcorder by infrared light, so it is protected from electrical and sound interference. However, the remote must be aimed directly at the camcorder's remote sensor. There cannot be any obstructions between them. Remote Control Sensor Note: The camcorder may not respond to the remote if its sensor is exposed to direct... - Page 18 A brief description of the remote button's functions is given here. Many of the buttons perform the same functions as the corresponding controls on the camcorder. battery must be installed as shown on page DISPLAY STOP PLAY -Q®- F FWD -®...
- Page 19 ® REC (Record) Button REW (Rewind) Button When the camcorder is in CAM Camcorder is in CAM (camera) (camera) mode, press REC to start mode: and stop recording. • When the camcorder is in record pause, press and hold REW to ®...
-
Page 20: Video Cassettes
Recording Video Cassettes We recommend that our cassettes be used with your camcorder. Use of poor quality or damaged tapes can contaminate the video heads. Head cleaning is not covered under warranty and is considered normal maintenance. Inserting or Removing Cassettes .. - Page 21 Making a Recording The steps below tell you how to make a recording and suggest using some of the recording features. Each feature is described in detail on the following pages. Eyepiece Focus Control Zoom Control (Camera) Indicator REW Butt_ Switch Thumb Trigger EJECT Button...
-
Page 22: Focus Lock
Viewfinder Displays AE:100 M 0:00 FOCUSLOCK BEEP ON r c:l PM 8:30:00 11.18.1996 causes the camcorder to beep 10 Status Displays times. Details are on page 22. • The REC indicator appears when • TAPE appears during recording the camcorder is recording. - Page 23 Tape Time Remaining Indicator Elapsed Time-Counter This indicator shows the • The time counter appears during approximate amount of tape recording and playback. remaining in the cassette. • An "M" appears in front of the time • Details on page 23. counter when memory-stop is on.
- Page 24 Viewfinder The camcorder's viewfinder is a miniature monitor that displays the picture seen by the camcorder when recording. Adjust Viewfinder for Convenient Viewing For convenient viewing, you can rotate the viewfinder up and down. Viewfinder Cautions Do not force the viewfinder to rotate completely around.
- Page 25 DISPLAY Button DISPLAY Microphone Button Tape Time Remaining Display Flying Erase Head The camcorder will automatically A separate erase head is mounted on calculate the tape time remaining on the the spinning headwheel (hence the term cassette in the camcorder during "flying").
- Page 26 PLA Y/CAM Button and Indicators -REC CO_VER o Y©T Button BLANK ,F FWD REW-- Button Button Button Thumb Trigger Blank Search Quick Review Feature Press and quickly release REW when the With the press of a button, the camcorder camcorder is in record pause to review advances through...
- Page 27 Zooming You can zoom in and out for close ups or wide-angle shots just: by sliding the zoom control on the camcorder or pressing the button on the remote. The camcorder automatically focus when you zoom at most distances. ZOOM T and W Control Butt°nx COIINTER...
- Page 28 Focusing Under normal conditions, the camcorder can adjust focus automatically on the object located in the center area of the viewfinder. Under certain conditions, you may want to use the focus lock feature. PLA Y(VCR)/CAM Button Indicators FOCUS LOCK Button Conditions Requiring Focus...
-
Page 29: Install The Clock Lithium Cell
Install the Clock Lithium Cell The clock cell indicator 88:88 will flash for a few seconds in the viewfinder when you turn on the camcorder if the cell has not been installed or needs to be replaced. Clock Cell Holder Install Cell Remove... -
Page 30: Set The Date And Time
Set the Date and Time The date and time must be set before it can be displayed and recorded on your tapes. The clock cell must be installed as shown on page 27 before the date can be set and recorded. - Page 31 Recording Date or Date and Time on Your Tape The date or date and time can be recorded on your tape. Whenever one of the displays appears in the viewfinder, it will be recorded. The camcorder also has an AUTO DATE feature.
-
Page 32: Time Counter
Time Counter The time-counter display shows the actual time elapsed when recording or playing back a segment of tape. During playback, the memory-stop feature helps locate a certain point on the tape. When memory stop is on, the tape will stop automatically during rewind or fast forward when the time counter reaches M 0:00:00. -
Page 33: Traveling Tips
Recording Tips In case of fire or theft, make a video Be aware of video and audio recording of your home and contents backgrounds. Background details store in a safe place. barely noticed while you are taping may show up as visual "clutter" Try to make sure indoor scenes are your recording. -
Page 34: Viewfinder Playback
Viewfinder Playback and Features Viewfinder playback is the simplest way to watch tapes using the camcorder. VCR(PLA Y)/CAM Button and Indicators DISPLAY BLANK O® REW_.___. Button PLA Y/ Button STOP / Button EJECT Button Viewfinder Playback . -.. :.,.-:_-,=.-:d -(.t %< 1. -
Page 35: Playback Features
DISPLAY COUNTER STOP PLAY Button -- --Button - F FWD Button -- Button PAUSE-- Button Remote Playback Features Visual Searching Tape Positioning • To visually search forward on the tape 1. Slide the POWER switch upward turn on the camcorder. during playback or play pause, press and hold F FWD. -
Page 36: Playback On Tv (Or Vcr) With Audio/Video
Playback on TV (or VCR) with AUDIO/VIDEO IN Jacks To connect your camcorder to a TV monitor (or VCR) with AUDIO/VIDEO IN jacks, you will need the supplied audio/video cable. If your TV is already connected to a VCR, you can attach the camcorder to the VCR and watch what the camcorder recording or playing... - Page 37 Playback Operation and How to Copy Tapes on the VCR 4. Press PLAY 1. A. Camcorder connected directly to TV: Turn on the TV and tune it to • During playback, use the playback the video input channel. features on page 33. B.
-
Page 38: Playback On A Tv Without Audio/Video Inputs
Playback on a TV Without Audio/Video Inputs To connect your camcorder to a TV without audio/video inputs, you will need an optional CRF800 output adapter and an optional coaxial RF cable, such as VH82 or VH90 shown on pages 38-39. If your TV has AUDIO and VIDEO 1N jacks (or is... - Page 39 Playback Operation Set the CHANNEL 4CH/3CH switch 5. Press PLA Y(VCR)/CAM button to ° on the RF output adapter place the camcorder in the CHANNEL 4CH or 3CH. PLAY(VCR) mode. The green PLAY(VCR) indicator will light. Turn on the TV, and tune it to the 6.
- Page 40 We invite you to take a look at somegreat ideas for sparking creativity and adding to the fun of using your compact VHS camcorder. The following pageshave a selection of accessoriesto help make your memorablemoments look and soundeven better. These accessoriesare designedto make the processof recording and watching your videos more enjoyable: order accessories, contact...
- Page 41 CPS801C AC Adapter/Charger CRF800 RF Output Adapter This adapter is used with a coaxial cable to connect your camcorder to a standard TV (one without audio/video). This adapter/charger and the optional DCC100 DC cable enable you to operate VH54 Cable Transformer your camcorder directly...
- Page 42 Using the Optional AC088 Tripod Mounting the camcorder on a tripod, such as AC088, will keep the camcorder steady and produce excellent video results. This tripod's fluid-effect head provides smooth camera pan and tilt. The quick-release mount makes it easy to attach or remove the camcorder.
- Page 43 Order Form for Camcorder Models Pro852/854 Description Part No. Price Total IQty. AC088 Super Lightweight Tripod $ 39.95 Soft Camcorder Case AC201A $ 39.95 AH25 1.95 Y-Adapter DCC 100 $ 12.95 DC Cable for AC Adapter/Charger CRF800 $ 59.95 RF Output Adapter 75-300 Cable Transformer...
- Page 44 Charge your order on your VISA,MasterCard, or Discover Card by filling in below YOUR CREDIT CARD IMPORTANT: Copy complete account number from your VISA card I lll IIII II--V]-7I---I--_ Expirationdate:[--_r--"_ IMPORTANT: Copy complete account number from your MasterCard IIII I[-T-T-_ [-VT_ I I I I I Copy Number above your name on MasterCard...
- Page 45 To order accessories, contact your local Dealer. If a dealer is not nearby, you can also follow the directions below to order by telephone or direct-by-mail. United States and Canada Orders To place your order by phone, have your Visa, MasterCard, or Discover card ready and call the toll-free...
-
Page 46: Cleaning The Camcorder's
Cleaning the Camcorder To clean the camcorder's exterior, remove any power source connected the camcorder and gently wipe it with a alcohol or benzine, may damage clean soft cloth. the camcorder. Cleaning the Camcorder's Lens :v: :=,'.::_::: -_'_ _ __::_ To clean the camcorder's lens, blow it with a blower brush, and then... -
Page 47: Proper Care And Storage
Proper Care and Storage • The camcorder can be damaged • Keep dust and grit from entering camcorder's cassette door. Dust and improper storage or handling. Do not subject the camcorder to swinging, grit are abrasive and will cause excessive wear to both the camcorder's shaking, or dropping. - Page 48 Before you call or take your camcorder to an Authorized RCA Camcorder Servicenter, look below for the type of trouble you are experiencing. Then perform the simple checks and adjustments listed for that trouble.
- Page 49 Camcorder does not • Aim remote at camcorder's remote control sensor. respond to remote • Remote's lithium cell battery may be installed incorrectly. control See page 14. • Remote control's lithium cell battery may need replacing. • Remote control sensor on camcorder exposed to direct sunlight...
- Page 50 Date and/or time Displays will be recordedon tape wheneverthey appearin the viewfinder. Removethem from viewfinder when were recordedon recording. tape See page 29. Date and/or time are • When AUTO DATE is selected, display will automatically incorrect be recorded when you begin recording or change cassette.
- Page 51 Thomson provides a toll-free telephone You canreach Thomson atthe number to help you with any problems followingnumber: you may encounter with your camcorder. 800-283-6503 Many can be diagnosed over the phone, and if necessary, a replacement unit can (Toll free inside U.S.A.) be shipped to you.
- Page 52 2. The exchange location will notify you What your warranty covers: of its arrival. • Any defect in materials or workmanship. 3. Take your unit, excluding For how long after your purchase: accessories, and your evidence • 90 days for labor charges. purchase date, such as a bill of sale, to •...
- Page 53 To have your Camcorder repaired insure your shipment in case of an Authorized RCA Camcorder damage or loss. Servicenter: Include with the shipment: • Check with your dealer or call 1-800- • Evidence of purchase date, such as 336-1900 for the Authorized...
- Page 54 Camcorder NTSC, Television system: Rotating 2-head, helical-scan system Video recording system: Audio recording system: Rotating head FM system 8 mm video cassette tape Cassette type: SP mode - Approx. 14.345 mm/sec. Tape speed: 120 minutes (P6-120 cassette) Maximum recording time: Fast forward/Rewind time: Approximately...
- Page 55 This equipment hasbeen testedand interferenceby one or more of the following measures: found to comply with the limits for a ClassB digital device and RF lighting • Reorient or relocate the receiving device, pursuant to Part 15 and Part 18of antenna.
- Page 56 CAM/VCR(PLAY) Button and Indicators A/V (Audio/Video) Jacks ....6,34,36 ..5,6,19,24,26,30,32,33,35,37 Accessories, Included ..2,41-43 Camcorder, Cleaning ..... Camcorder Controls ....Accessories, Optional ..41-43 Camcorder, Turning On .... Accessory, Order Form ..41-43 Camcorder, Unpacking .... Adapter, Using ....Camera Edit ....
- Page 57 Date andTime, Setting ... DA TE/TIME Button ..6,28,29 DC IN Jack ....4,6,7,9 Handstrap ....3,6,19 Design Specifications .... Handstrap, Adjusting ....Dew Indicator ( [-/]) ....DISPLAY Button ..6,16,23,35,37 Displays, Viewfinder ..20,21 mE-- Important Safety Information ....
- Page 58 REC (Record) Button, Remote ... 16,17 Operation, First-Time .... REC Indicator ....19,20 Optional Accessories ..38-43 REC START/STOP Button ...5,6,19,24 Optional Plug Adapter ..7,13 Rechargeable Nickel Cadmium Order Form, Accessory ..41-43 Battery ....8-10 Recording Features .... 22-31 Recording, First...
- Page 59 Sensor, Remote ....Set the Time and Date .... Shoulder Strap ....Unpacking the Camcorder ..Shoulder Strap Holders ... Using "AA" Batteries ... 4,11 Shutter Speed Control, Automatic...25 Using Optional AC Adapter/ Solving Problems ..... 46-48 Charger ....12,13,39 SP Speed ......
- Page 60 Need Assistance.9 We want to help! U.S. Consumers: Camcorder Exchange Warranty ..800-283-6503 Customer Service ....800-336-1900 Accessories ..... 800-338-0376 Canadian Consumers: English ......800-522-0338 French ......800- 522-0445 If your camcorder needs service, please contact your dealer or the nearest Servicenter from the yellow pages.
Need help?
Do you have a question about the Pro852 and is the answer not in the manual?
Questions and answers