MTD 420 Operator's Manual
Hide thumbs
Also See for 420:
- Operator's manual (25 pages) ,
- Owner's manual (12 pages) ,
- Operator's manual (24 pages)
Table of Contents
Advertisement
Quick Links
OPERATOR'S
MANUAL
Model Series
410 thru 429
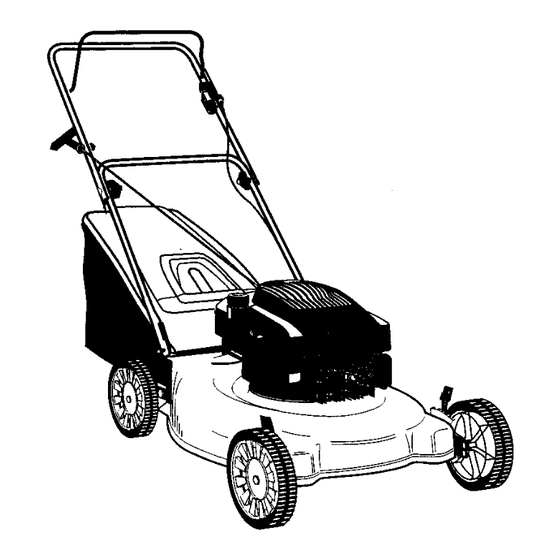
Model 428C Shown
IMPORTANT:
READ SAFETY
RULES AND INSTRUCTIONS
CAREFULLY
Warning:
This unit is equipped with an intemal combus_on engine and should not be used on or near any unimproved forest-
covered, brush-covered or grass-covered land unless the engine's exhaust system is equipped with a spark an'ester meeting
applicable local or state laws (if any). If a spark an'ester is used, it should be maintained in effecfiye working order by the operator.
In the State of California the above is required by law (Section 4442 of the California Public Resources Code). Other states may have
similar laws. Federal laws apply on federal lands. A spark arrester for the muffler is available through your nearest engine authodzed
service dealer or contest the service department, P.O. Box 368022 Cleveland, Ohio 44136-9722.
MTD PRODUCTS
INC. P.O. BOX 368022 CLEVELAND,
OHIO 44136-9722
PRINTED IN U.S.A.
FORM NO. 770-1026B
(9970909)
Advertisement
Table of Contents

Related Manuals for MTD 420


Summary of Contents for MTD 420
- Page 1 Federal laws apply on federal lands. A spark arrester for the muffler is available through your nearest engine authodzed service dealer or contest the service department, P.O. Box 368022 Cleveland, Ohio 44136-9722. MTD PRODUCTS INC. P.O. BOX 368022 CLEVELAND, OHIO 44136-9722 PRINTED IN U.S.A.
-
Page 2: Safe Operation
SECTION 1: IMPORTANT SAFE OPERATION PRACTICES FOLLOWED, COULD ENDANGER THE PERSONAL SAFETY AND/OR PROPERTY WARNING: THIS SYMBOL POINTS OUT IMPORTANT SAFETY INSTRUCTIONS WHICH, YOURSELF OTHERS. READ AND FOLLOW INSTRUCTIONS IN THIS MANUAL BEFORE A'I-I'EMPTING TO OPERATE YOUR_ LAWN MOWER. FAILURE TO COMPLY WITH THESE... -
Page 3: Slope Operation
• Do not engage the self-propelled mechanism on • Atways be sure of your footing. A slip and fall can units so equipped while starting engine. cause serious personal injury. If you feel you are losing your balance release the blade control •... - Page 4 • To reduce fire hazard, keep mower free of grass, After stdking a foreign object, stop the engine, leaves, or other debris build-up. Clean up oil or remove the wire from the spark plug, and fuel spillage. Allow mower to cool at least 5 thoroughly inspect the mower for any damage.
-
Page 5: Section 2: Finding Your Model Number
Operator's Manual. The information on the model plate is very important if you need help from your dealer or the MTD customer support department. • Every walk behind has a model plate. You can locate it by standing behind the unit in the operating position and looking down at the rear of the deck. - Page 6 USE THIS PAGE AS A GUIDE TO DETERMINE SLOPES WHERE YOU MAY NOT OPERATE SAFELY. SIGHT AND HOLD THIS LEVEL WITH A VERTICAL TREE A POWER POLE A CORNER OF A BUILDING OR A FENCE POST ¢) ¢) lb wARNING Do not mow on inclineswith a slope in excess of 15 degrees (a rise of approximately2-1/2 feet every 10 feet).
- Page 7 SECTION 4" UNPACKING TO REMOVE UNIT FROM CARTON Remove staples, break glue on top flaps, or cut Brigg..s&.Stratton tape at carton end and peel along top flap to open _ng,nes carton. v.s,ot. Remove loose parts if included with unit (i.e., owner's manual, etc.).
-
Page 8: Grass Catcher Assembly
SOFT GRASS SECTION 5" SET-UP (Models410 thru 418) INSTRUCTIONS Parts for Soft Grass Bag: Front Frame This owner's guide covers various models of Rear Frame mowers. Follow only those instructions which pertain to your unit. Assemble soft grass bag as follows: IMPORTANT: This unit is shipped WITHOUT 1. - Page 9 Assemble hardtop grass bag as follows: Insert one end of the rear frame into the slit in Handle the cloth channel on the edge of the grass bag (slits are approximately 6 inches from end of the bag). See Figure 6A. Feed all the material on one side of the frame before...
- Page 10 To attach the grass catcher: Lift the rear discharge door on the mower. Rear NOTE: Make certain cables routed to the Discharge Door outside of the handle so they are not in the way when attaching the grass catcher. Place the hooks on the grass catcher into the slots in the handle bracket assemblies.
-
Page 11: Section 7: Operation
The blade control handle is located on the upper SECTION 6" CONTROLS handle of the mower. See Figure 14. The blade control handle must be depressed in order to operate the unit. Release the blade control handle to stop the engine and blade. Blade Control Throttle Handle... - Page 12 6. Afterenginestarts,movethrottlecontrol t o cause you to slip and fall. New grass, thick grass or desired e ngine speed. (Mower i s designed tobe wet grass may require a narrower cut. Blade speed operated atfullthrottle.) shouldbe adjusted to the conditionof the lawn. For •...
-
Page 13: Control Adjustment
Push the throttle control lever on the handle all HANDLE HEIGHT ADJUSTMENT the way forward as far as it will go, then back it Your mower is shipped with the handle in the higher off one "click." Make certain the throttle control height position. -
Page 14: Carburetor Adjustments
CARBURETORADJUSTMENTS Minor carburetor adjustments may be required compensate differences fuel, WARNING: if any adjustments are temperature, altitude load. adjust made to the engine while the engine is carburetor, refer to the separate engine manual running (e.g. carburetor), keep clear of all packed with your mower. -
Page 15: Section 11: Off-Season
SINGLE BOLT BLADE MOUNTING The deck may be cleaned by tilting the mower and scraping clean with a suitable tool (make certain the install the blade adapter on the crankshaft with the spark plug wire is disconnected). "star" away from the engine. Refer to Figure 21. Place the blade with the side marked bottom (or ENGINE with part number) facing away from the adapter. - Page 16 SECTION 12" TROUBLE SHOOTING GUIDE Trouble iPossible Cause(s) Corrective Actions Engine fails to Blade control handle disengaged. Engage blade control handle. start Spark plug wire disconnected. Connect wire to spark plug. Dirty aimleaner. Refer t0i tile engine manual packe!d with your unit. Primer button not depressed.
- Page 17 Shroud Chart Part No. Color Part No. !Color IPart No. Color Part No. Color 751B281439 Dark Red 731-1395A IRed 731-1587A Black 731-1561 Black 751B281440 Black 731-1396A Black 731-1603A Yellow 751B281443 Bright Red 1731-1397A Gray 731-1610A Pewter 731-1620A Gray IHardware: Hardware: Hardware: Hardware: 710o1256 (Screw)
- Page 18 Models 410 thru 429 WHEEL CHART Wheels w/o Bearings Wheels with Bearings Brg. Part No. 741-0484 Bar Tread Unk Tread 734-1781 Grey, Slot Hub 734-1819 Grey 734-1841 Grey, Aero 634-0020 Grey, Disc Hub...
- Page 19 Models 410 thru 429 REF. REF. DESCRIPTION PART NO. PART NO. DESCRIPTION 747-0824 753-0588 Control Handle (Std.) Blade Adapter Kit 647-0004 Control Handle Ass'y. (Deluxe) (Incl. Ref. 33 & 34) 747-0615 Control Handle 710-1044 Hex Bolt 3/8-24 x 1.5" Lg. 736-0524A (11A-428-02?J722) Blade Bell Support...
- Page 20 MANUFACTURER'S LIMITED WARRANTY For TWO YEARS from the date of retail purchase States of America, its possessions and territories, within the United States of Amedca, its possessions except those sold through the manufacturer's and territories, the manufacturer will, at its option, authorizedchannels ofexport distribution.
Need help?
Do you have a question about the 420 and is the answer not in the manual?
Questions and answers