Table of Contents
Advertisement
Advertisement
Table of Contents

Summary of Contents for Magnavox CVT325AV01
- Page 1 VHS C AM COROER OWHER'S MAHUAL...
- Page 2 MAGNAVOX product. Sincerely, Robert Minkhorst President and Chief Executive Officer P.S. Remember, to get the mast from your MAGNAVOX product, you must return your Warranty Registration Card within days, So please mail it to us right naw!
-
Page 3: Introduction
Introduction Features : Welcome to your camcorder owner's ! manual. This manual was designed for • High Speed Shutter i you. When looking through it, it will • Power Zoom Function i help you to keep several things in mind. •... -
Page 4: Table Of Contents
Table of Contents Getting Started Introduction ..........................Table of Contents ........................Quick Use Guide ........................Before Using the Camcorder ....................Description of Controls Front View of Camcorder ....................... Rear View of Camcorder ......................Underside View of Camcorder ....................AC Adapter/Charger ........................ -
Page 5: Quick Use Guide
Quick Use Guide Slide the CAM(era)/OFF/VCR Rec°rding ] switch to CAM position. The cam- corder will enter Record/Pause mode. Insert a cassette with its record tab intact, then push on the PUSH HERE mark to close the cassette Press the EJECT compartment door. -
Page 6: Before Using The Camcorder
Before Using the Camcorder..charge the battery. Plug the AC adapter/charger Plug the AC adapter/charger power Insert the battery. into an AC outlet. plug into an AC outlet. The POWER light will come on. Place the three grooves on the side of the battery into the slots on the AC adapter/charger so the battery rests flat on the AC adapter/charger,... -
Page 7: Before Using The Camcorder
Before Using the Camcorder... (cont'd) •..attach the battery. Inserting a Tape Align the arrow on the side of the bat- Press the EJECT button to open and close tery with the arrow on the right side of the cassette compartment door (other side the back of the camcorder camcorder so of camcorder). -
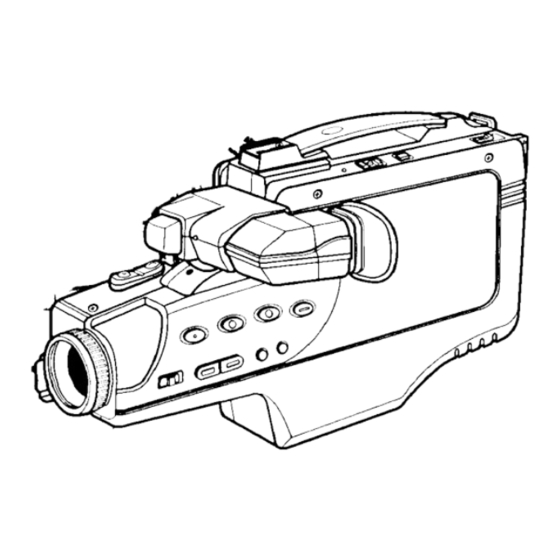
Page 8: Front View Of Camcorder
Front View of Camcorder CAM(era)/OFF/VCR Switch Place the switch in CAM position to Power Light record. Place the switch in VCR posi- This light appears when the camcorder is on. tion to play or edit a tape. Place the switch in OFF position when you are not using the camcorder. - Page 9 Front View of Camcorder (cont'd) FF and DATE/TIME PLAY/STILL and FADE Button 'ress when the camcorder is When the camcord.er is in play a tape (see page VCR position, press for a still picture (see page fast forward visual search vhen the camcorder is in (see page 23for details).
-
Page 10: Rear View Of Camcorder
Rear View of Camcorder Power Zoom Strap Attachment Rings Button Attach the shoulder strap to these rings. See page 29for details. Use to zoom in or out when recording. page 20for details. Battery Compartment Hand Strap insert a battery pack here to use it as the This adjustable hand power supply. -
Page 11: Underside View Of Camcorder
Underside View of Camcorder e•e ••o•ooe•,e eoeelo • _o_i_oo_ooooo_oooIooeoeo_o'i•eeeiiIoo•eeo•••eo•e•oo_ieI•oeeoe•oQ•e•oIo_ee•e•e••o•o•e •e•t Clock Battery Compartment Inse_ the clock battery here. See page 15for details. Focus Control Insert a screwdriver in this hole and twist gently to adjust the focus of the EVF. Note: Under normal circumstances,... -
Page 12: Ac Adapter/Charger
A C Adapter/Charger AC Power Cord Plug into a household AC out- POWER Light let to charge the camcorder Appears when the AC adapter/charger battery or to supply power to is connected to an AC outlet. the camcorder. Battery Charging Compartment Place the battery here to charge it (see page 6 for details). -
Page 13: Evf Display
EVF Display • • °teOoo_ooeooo_o'eoooo_ooojIoo**o*IaQoIo_oIoteoooioeeIooItoIIooIooooo*ooIoeoeooooeeeoeeeoIweo oe***ee**oe Fhe following information (or similar information) will appear in the EVF when you press the DISPLAY but- ton. The information will change with each press of the DISPLAY button, and when you change from VCR to CAM position. -
Page 14: Evf Display
EVF Display (cont'd) • • oo • • Qoo • • eo • oooo oo oo • oo ee Qo ee oolio oo • • ooet • • oo * • * oo oo oao • • Io • •eol •... -
Page 15: Setting The Clock
Setting the Clock The camcorder has a clock that keeps track of the date and time (including leap year) even when the camcorder is Turn the camcorder off. Before the clock will work, you off, then turn it must install the clock battery and set the date and time. -
Page 16: Setting The Clock
Setting the Clock (cont'd) Next, set the date and time. Press the DATE/TIME button Slide the CAM(era)/OFF/VCR to activate the date and time. switch to CAM. Press the DATE/TIME button Press and release the DATE/ to remove the date and time TIME button. -
Page 17: Recording
Recording Follow the steps below to record with the camcorder. Place the CAM(era)/OFF/VCR switch in CAM position. Slide the CAM(era)/OFF/VCR switch to Insert a tape CAM position. (other side of camcorder). Slide the CAM(era)/OFFNCR • Place a tape in the camcorder, if necessary. : See page 7for details. -
Page 18: Fading In And Out
Fading In and Out This feature lets you add a professional To do this..• touch to your recordings by fading in Fading and out of scenes. When you fade into a scene, the recording will start with a [ lB1 blank screen and the picture will appear gradually. -
Page 19: Focusing
Focusing : Your camcorder will focus automatical- i ly on the subject in the center of the : EVF (even when you are zooming in • and out) when the FOCUS AUTO/ • MANUAL switch is set to AUTO. : However, we recommend that you : focus the camcorder manually under i certain conditions - specifically, when ! filming:... -
Page 20: Zooming In And Out
Zooming In and Out This feature allows you to zoom in for close-up shots and zoom out for dis- tance shots. Press and hold the W (wide angle) side of Aim your camcorder at the scene to be the Power recorded. -
Page 21: Using The Tape Counter
Using the Tape Counter • eoeeeeee*eeooeeeo*eeeeee*eeo .ole,e**e,**ooeooeee,eoeooeo*laoeoo*e,oeoee**loeee*Jloeeee**eleQoeoe*eeoeeee*e eooeeee : You can easily have the camcorder • "memorize" an important tape location so that you can easily return to it later. Insert a tape in the camcorder • Just follow the steps below. place the CAM(era)/OFF/VCR switch in CAM or VCR position. -
Page 22: Shutter Speeds
Shutter Speeds Your camcorder is equipped with a high speed shutter to prevent blurring when you record fast movements. To return to normal - 1/60 - Normal shutter speed is 1/60 of a sec- shutter speed, press the H.S. ond, but it can be changed to a faster speed, up to 1/10,000 of a second. -
Page 23: Evf Playback
EVF Playback Follow the steps below to watch a recording in the camcorder's EVF. Press the EJECT button to eject the tape. With a tape in the camcorder, slide the CAM(era)/OFF/VCR switch to VCR position. Slide the CAM(era)/OFF/VCR _,itch to VCR position. Press the PLAY/STILL button. -
Page 24: Playing (Or Monitoring A Recording) On A Tv
Playing (or Monitoring a Recording) on a TV • ** • eeee e• e• eeieee• •e *eeoe eleeeoe eeeoeeeo• eoiee *e ee ooeee •* •co*, • *eeee oeeee o• •ee •, ••, • e• • * • You can monitor camcorder recordings on a TV while you make them. You can play recordings you made with your camcorder on a TV. - Page 25 Playing (or Monitoring.a Recording) on a TV (cont'd) Hookup C: Using an Antenna Selector Unit UHF Antenna Back of TV Camcorder Antenna Adapter RF Converter Unit 75/300-ohm 300-ohm is 75-ohm) (optional; part number vg0148BK01) Combination Adapter (if needed) AUDIO/VIDEO OUT(put) Jacks 75-ohm Coaxial Cabl I Antenna Selector Unit With Antenna Adapter...
-
Page 26: Rerecording
Rerecording , e*ee coo*•,ode* • Q***e*** e***e t.*o do*** do .. * °.** o... *o.°.. ° • • ° t* o..* .do*..0 •. ,oo.° °° .o.o* ,..*.e, o..do°..*.. ° Follow the steps below to copy a tape. 3Slide "__ CAM(era)/OFF/ Make the connections shown at right. -
Page 27: Alternate Power Supply
Alternate Power Supply On pages 6 and 7 we described how to use the battery that came with the cam- corder to supply power to the cam- Connect the other end corder. You can also use the AC of the DC cord to the adapter/charger and the DC power cord that came with the camcorder to supply DC OUTPUT... -
Page 28: Color Enhancement Light
Color Enhancement Light (Optional) Front Case Replacement You can attach an optional color enhancement light if you want to improve recordings made in dark places. Attaching a Color Enhancement Light To remove the front case, press and hold the tab, then slide off the front case. -
Page 29: Shoulder Strap
Shoulder Strap Pinch together the tabs on the sides of Pinch together the clasp, then raise the clasp. the tabs on the sides of the clasp (A), then ,._, raise the clasp Unhook the strap from the buckle catches. (B). Unhook the strap from the buckle catches. -
Page 30: Notes On Operations
Notes On Operations (cont'd) *eoee ioeoo oo oooolee eoeeoooee oeeoeoo oleol eeoe Jlaee • • * o•. • • • • • • * • •• • * • • • • • • • • o • • • • • • • • • • * • • • • • • • ° •. Your camcorder is designed for normal scenic illumination of 150 footcandles (1500 lux). -
Page 31: Before Requesting Service
Before Requesting Service • IlleeQleeeoetoo eeooo• o.°°°,° o**oooo o• oo,l= aoooo.o**oo o• ooo=ooooo* Jo*= ••o.o•••• oooeol• Jo•oeooo• •col•e•••* • • e•Q criodic maintenance is required in order to maintain the camcorder's continued excellent performance. After period of time, the video heads will require cleaning or replacement. If cleaning or replacement of the video eads is required, this service should be performed by an authorized service center. -
Page 32: Specifications
Specifications Power Source: This equipment has been tested an • VHS camcorder: DC 9.6V found to comply with the limits for Cla_ • AC adapter: 110/120/220/240V AC, 50/60 Hz B digital devices, pursuant to part 15 Power Consumption: the FCC rules. These limits are designe •... -
Page 33: Warranty
(ZAMCOItDER Days Free Labor t)x_e Year Free Service Partb i i lib product must carried in for rel,)air. MAKE SURE KEI_,P... _V110 COVEIC, LI)z Please keep your sales receipt or other do_,ttmcnt showing ptot,l /OU must have proof of purchase to receive warranty service. -
Page 35: Index
Index c adapter/charger indications ......13-14 light, camcorder ....... 8 diagram ........location ........supply ......6-7, 27 using ......... playback ......... 23 switch ........c power cord ........ 6 zoom button ......10 erase protection ......7 ccessories ........record indications ...... -
Page 36: Accessories _ Arke_I_Ept
Supplied Accessories Check to be sure the following items are packed with your camcorde_ These accessories are provided to help you use or set up your camcordef. 1. ACAdapter/ Charger 2, Battery P ack 3. ShouldefStrap: _' ,: ,__ ' -' 1.V80'157BKO1 2.V80146BK01 3.48354983702... - Page 37 QUALITY SERVICEIS AS CLOSEAS YOUR TELEPHONE! SIMPLY LOOK OVER THE LIST BELOW FOR THE NUMBER OF A FACTORYSERVICE CENTER 1100 NEAR YOU. WHEN YOU CALL, A SERVICEREPRESENTATIVE WILL GLADLYDIRECTYOU TO ONE OF OVER DROP-OFF SITES LOCATED NATIONWIDE. YOUR PRODUCTWILL RECEIVEEFFICIENTAND EXPEDIENTCARRY-IN, MAIL-IN, OR IN-HOME SERVICE, AND YOU WILL RECEIVEPEACEOF MIND, KNOWING YOUR PRODUCTIS BEING GIVEN THE EXPERT A'rIENTION OF PHILIPS' FACTORY SERVICE.
- Page 38 Philips Consumer Electronics Company Factory Service Center Locations See Reverse Side for More Details. Detroit/Toledo Rockford • Cleveland/N Ohlo • San Franclsco/Metro Area • Boston/S Maine/ Milwaukee Columbus/D_on/Cincinnati =rtford/Rhode Island Charlotte Diego York/Metro New Jersey • Phoenix/Metro Area • p_hlladelphla/S New Jersey Atlanta/N Georgia...
- Page 39 IMPORTANT SAFEGUARDS ANDPRECAUTIONS 11. Grounding or Polarization - This video unit may be 1. Read Instructions - All the safety and operating equipped with either a polarized 2-wire AC (Alternating instructions should be read before the unit is operated. Current) line plug (a plug having one blade wider than 2.
- Page 40 IMPORTANT SAFEGUARDS A NDPRECAUTIONS Damage Requiring Service - Unplug this video unit 14. Lightning For added, protection ol this video unit from the wall outlet and refer servicing to qualified receiver during a lightning storm, or when it is left service personnel under the following conditions: unattended and unused...
Need help?
Do you have a question about the CVT325AV01 and is the answer not in the manual?
Questions and answers