
Subscribe to Our Youtube Channel
Related Manuals for Pfaff Creative 7510 A


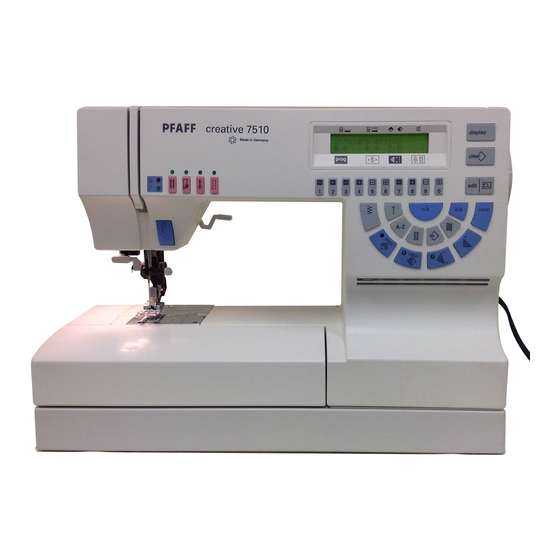
Summary of Contents for Pfaff Creative 7510 A
- Page 3 .‘...
- Page 5 “...
- Page 6 — — — —...
- Page 8 Index A—Z key 121 —133 Accessories and needles Accessory compartment 1 1, 47, 106 Alphabets 99—1 1 9 Decorative stitches and traditional embroidery techniques Appliqué 1 28 Appliqué foot Automatic darning 45 62 76 Balance Bartack Basting stitch 1 31 Bias tape binder Blind stitch Bobbin case...
- Page 10 Index Patching Pattern density Pattern mirror Pattern length 41,42 Pattern selection Pattern selection key 48—53 Pattern sequence Pattern start Pattern width 83—97 Practical sewing Pulling up the bobbin thread Pullover stitch 118,119 Quilting Reverse key 11 2 Richelieu Roll hemming Round buttonhole 59, 1 27 Round hole needle plate...
- Page 11 ching ieedle 38, 87, 104 stitch programs 8—10 stitches 55—81 stitch...
- Page 12 Utility stitch programs Program Vidth up Description Application to mm Straight stitch with For all straight stitch and decorative — 1 9 needle positions topstitching jobs up to 6 mm wide. — Stretch triple straight stitch For highly durable seams where great strength —...
- Page 13 programs stitch Ull1lllflhl Imiij >IlI I>IlIHJ Mdth up Description Application to mm Elastic stitch For sewing on elastic, darning tears and 1 stitch point inserting patches. For appliqué work Purl stitch For joining corsetry parts. Provides a decorative Fagoting stitch hemstitching effect For overstitching two different fabric plies Fancy elastic stitch...
- Page 19 Contents Electrical connection Pages 16—17 Detachable work support Page 18 Winding the bobbin Pages 19—21 Bobbin case Page 22 Bobbin thread tension Page 23 Threading the needle thread Page 24 Needle threader Page 25 Sewing foot lifter Page 26 Pulling up the bobbin thread Page 26 Thread trimmer Page 26...
- Page 20 PFAFF creative 7510 1717 Carrying case Top cover Place the enclosed mains cord, foot control and the Open the folding cover (52) upwards. instruction manual in the compartment of the carrying case. ‘ ‘ Programs Electrical connection The programs of the sewing machine are illustrated...
- Page 22 Detachable work support Accessory compartment Swing out the detachable work support (29) to the Open the accessory compartment (29). left Sorting the accessories Removing the detachable work support (free-arm) The enclosed accessories are numbered. Sort them into the corresponding compartments of the In order to sew with the free-arm, swing the accessory box.
- Page 24 1..TEh I lU IitIiIl 11 JIjLIHjiJJIJJIiiHJJ1 s/fr Winding the bobbin from the spooi holder Place the sewing thread on the spool holder (39). To guarantee free movement of the thread and to give additional hold to the thread spool, fit an unwinding disk corresponding to the size of the thread spool.
- Page 25 ___ ___ ___ ___...
- Page 26 Lift i.e.
- Page 27 Inserting the bobbin Insert the full bobbin in the bobbin case. When doing so, pull the thread sideways through slot A and then under tension spring B so that it rests in the opening (see arrow>. Checlc When you pull the thread, the bobbin must turn clockwise.
- Page 29 ‘ I...
- Page 34 i L l Changing the sewing lamp Switch off the on/off switch To remove: Lower the sewing toot and set the needle at its highest point Now loosen the fixing screw (28) and pull the needle downwards. To attach: The flat side A of the needle must face to the rear.
- Page 35 pFAF Setting the needle thread tension Set the required needle thread tension (34) with the help of the marking B. The normal setting for sewing is 4 to 5. For embroidering and buttonhole sewing it is between 2 and 3. Dropping the feed dog For certain sewing work.
- Page 40 e in...
- Page 41 cii [AI Language selection Press and hold numbered key 1” and switch on the sewing machine. A choice of four languages appears in the display. L<>1 cii By pressing the “display” key, the next four langua You have the choice of the following languages: ges are displayed.
- Page 42 Made in Germany...
- Page 43 1 —O —. b>...
- Page 44 — — — — — — I . . i.e. a) If...
- Page 45 Summary of the options for program selection You have various options to select a program on the Creative 7510. a) Selection using the program keys: As soon as you switch the machine on, the straight stitch (prog. 00) in center needle posi tion appears automatically.
- Page 46 I<ii 21 314 Enter the desired pattern number using the b) Numerical program selection numbered keys “1 —0” (7) and press “oiC (1 3). You can also call up a program by entering the The display shows the selected program. If the program number.
- Page 47 ‘- —*‘...
- Page 49 Balance Reverse stitch correction Embroidery patterns can vary on different fabric heavy material is fed differently than fine types — • silk The Creative has a correction system which lets you sew optimum embroidery stitches: the balance. With this system the reverse feed can be adjusted.
- Page 50 jI4JI5I61 71l-8JJJ jJ — Pattern mirror (x) (axial mirror image) (mirroring Sewing help is possible when an x appears in the display) With the “display” key, you can call up the help file Pattern mirror (x) (lateral mirror image) (mirro for any pattern.
- Page 51 Li>1 cii i1 **HHHH By pressing the pattern selection key “A—Z” (21). Alphabets the script alphabet is selected. The letter “A’s There are two types of alphabet to choose from: appears and can be sewn immediately. script letters in upper case (aA) and These alphabets can be sewn in a width up to block letters in upper case (bA) 9 mm and they can be saved as word sequences...
- Page 52 key, the message appears After pressing the Creating a pattern sequence “m in the display: In order to create a pattern sequence, several Pattern sequence patterns or letters must be combined. Up to 80 patterns can be programmed in each memory. P stands for pattern sequence and appears in the Now press the “editN’r...
- Page 55 flm)”...
- Page 57 “...
- Page 58 _____ creative 7510 8 creat1e 7510 pEAFF n manual lnstructio...
- Page 61 Straight stitch Basting stitch Program 00 is the basic straight stitch center With program 07 you can baste a garment before needle position. The stitch length can be increased trying it on. When you press the foot control the up to 6 mm as required. machine will only make one stitch.
- Page 62 ‘E— — it is...
- Page 63 Zigzag stitch For serging thin and difficult materials, blind stitch foot No. 3 is very suitable. When sewing, the With zigzag stitch 02. all edges can be serged thread goes over bar C thus preventing the edge easily. Make sure that while serging an edge the from curling.
- Page 64 (1/2...
- Page 65 11111111 ‘II...
- Page 66 Sewing on buttons Sewing on buttons with thread shanks With program 09 you can sew on two- or four-hole • Attach sewing foot No. 2A. buttons without any problems. • Place a match between the holes of the button • Remove the sewing foot and lower the bottom and sew it on as described on the left feed.
- Page 67 Eyelets If you wish to stitch eyelets on a belt or linens, select program 08. • Place the fabric under the sewing foot • Press the “sngIe pattern” key during the sewing operation. The machine now only sews one eyelet and tacks at the end. •...
- Page 68 TIP: If you wish to topstitch a collar edge with this Stretch triple straight stitch program, extend the stitch length to the desired Program 01 is used for sewing all seams where length up to 4—6 mm. Use the functions “needle great strength is needed, e.g.
- Page 69 Single stem stitch Stretch triple zigzag stitch Due to the zigzag appearance of this stitch, pro The stretch triple zigzag stitch, Prog. 23. produces gram 21 is particularly suitable for seams on two- a highly elastic and decorative seam which is very way elastic materials such as leggings and sports suitable for hems on T-shirts and underwear.
- Page 70 Closed overlock stitch with edge thread What is an overlock stitch? For knit and other stretch materials, the Creative Prog. 06 offers a selection of overlock stitches. These join If you wish to sew a material that frays easily, select layers of fabric and serge them in one opera program 06.
- Page 71 Fagoting stitch What are flatlock seams? — Where seam allowances and serged edges are Prog.17 — inconvenient flatlock seams are used. These seams With the fagoting stitch you can make very elastic are extremely flat they Join butted fabric layers and seams with a hemstitching effect for example on serge them at the same time.
- Page 72 Light-knit mending stitch ross stitch Prog. 28 rog. 19 The light-knit mending stitch is a stretchable )wing to its high elasticity, the cross stitch is very covering stitch. It is very suitable for overstitching uitable for decorative hems, e.g. on T-shirts and cuffs in stretch materials, e.g.
- Page 73 With the following tips you will sew perfect Buttonholes buttonholes even on the most difficult fabrics: — The Creative 7510 offers you the perfect button • Buttonholes which are sewn close to an edge hole for all types of materials and garments. cannot be fed optimally using the buttonhole Whether you are sewing jackets, trousers, blouses foot.
- Page 74 If you wish to create perfect buttonholes of a uniform size, even on the most difficult materials, we recommend you use the buttonhole guide. Attach the buttonhole foot No. 5A. If you are working with thick materials such as overcoats, we recommend using foot 1A and the Dual Feed together with the buttonhole guide.
- Page 75 You can choose from the following buttonho les: 1 Standard buttonho le No. 30 blouses, shirts, dresses etc.) • fully automatic • semi automatic (for 2. Stretch buttonho le No. 31 highly elastic materials and heavy knit fabrics. • fully automatic •...
- Page 76 With key No. (19) you can directly select the buttonhole programs. In the display you will see the buttonhole program 30. With the numbered keys 3 and 4 you can call up all further buttonhole programs. Standard buttonhole No. 30 Fully automatic with the buttonhole guide 1 0 and the numbered keys 5 and 6.
- Page 77 - - . —...
- Page 78 cii [1 Self defining the second bartack Important: The self definition of the second bartack (semi automatic) with “finish manually” must be carried out for each buttonhole separately. With difficult fabrics such as velvet it can happen that the machine feeds the fabric unevenly and that TIP: You can stop the slow sewing at the end of the buttonhole beads are therefore not the same the reverse bead by removing your foot from the...
- Page 80 Buttonholes with gimp thread • Push the runner forwards up to the second Buttonholes which are sewn with a gimp thread are more durable and neater. Use pearl cotton or a marking. regular gimp thread as available at your sewing •...
- Page 81 Stretch buttonholes/Cross stitch buttonholes Stretch buttonhole No. 31 and cross stitch button These buttonholes are particularly suitable for stretch fabrics such as jogging suits. They can, hole No. 32 can be sewn fully automatically or semi automatically (see standard buttonhole). however, also be used as decorative buttonholes.
- Page 82 lunlun ound buttonhole mportant! The round buttonhole should be placed • Select buttonhole No. 33. vith the round end facing the edge. The sewing of • The pre-programmed buttonhole length of 22 he buttonhole, however, begins at the bartack mm appears in the display. If you wish, you can Jways sew the buttonholes from the inside alter this length with the numbered keys 7 and 8.
- Page 83 JHIHII Keyhole buttonholes • Select buttonhole No. 34. Important! The keyhole buttonhole should be placed with the round end facing the edge. The • The pre-programmed buttonhole length of 22 sewing of the buttonhole, however, starts at the mm appears in the display. If you wish, you can bartack Mark the buttonhole length on the fabric alter this length with the numbered keys 7 and 8.
- Page 84 (eyhole buttonhole with gimp thread Push the runner forwards up to the second red • mark ‘lace the gimp thread over the front ridge. Pull the • Before you start sewing, press the “needle hread ends taut backwards under the sewing foot Dlamp them right and left of the back ridge respec down”...
- Page 86 Pages 83-97...
- Page 88 Contents General sewing help Page 86 Hems with the twin needle Page 87 Page 88, 89 Gathering Page 90 Smocking Page 91,92 Darning Pages 93, 94 Sewing in zippers Page 95 Roll hemming Page 96 Lace Page 97 Shell edging...
- Page 91 Gathering with the straight stitch It you wish to gather sleeves, skirts, cuffs or valan • Gather the fabric by pulling the bobbin threads of ces, this technique is the easiest and most com the seams. You determine the amount of gather monly used.
- Page 92 Gathering with elastic threads This kind of gathering is particularly suitable for • You determine the amount of gather by the visible, elastic gathering on blouse sleeves, waist amount you pull the threads as you sew. seams or neck cutouts. •...
- Page 94 Darning with the straight stitch Prog. 00 Attach the darning foot Set the needle at its highest position and push the pin of the darning foot fully into the hole C of the sewing foot holder. When doing this, the guide fork G should position itself around the presser bar.
- Page 96 Sewing in zippers Inserting zippers concealed on both sides Prog. 00 • Attach the zipper foot on the right side. There are different ways to sew in zippers. For skirts • Baste the zipper on and place it under the we recommend the zipper concealed on both sewing foot so that the teeth run at the side of sides, for ladies’...
- Page 98 Roll hemming With hemmer No. 7 and Prog. 00 you can hem blouses, silk scarves and vallances quickly and easily without having to pre-iron the edges. Hemming secures the edges against fraying, in a tidy and durable way. • Fold the beginning of the fabric edge twice (each time approx.
- Page 105 Contents Page 102 General embroidery tips Page 103 Borders Page 104 Twin needle sewing Page 105 Embroidering large motifs Page 105 Leather embroidery Page 106 Alphabets Page 107 Monograms Pages 108—109 Cross stitch Page 110 Appliqué Page 111 Linen embroidery Page 112 Richelieu Pages 113—115...
- Page 113 Mark each memory with a number and arrows Embroidering cross stitch motifs with • for the respective sewing direction. programs 52-54 You can combine the individual cross stitch • Press the key for pattern sequence. “m)” programs using your imagination to achieve large •...
- Page 115 Linen embroidery For the petals select pattern No. 67. Press the • key “single pattern” (1 6). linen embroidering is a very well known and well- Pattern length: 35 mm loved technique. For this special white-on-white Stitch width: 6 mm embroidery, filled in embroidery designs are most suitable to make the embroidery more prominent •...
- Page 117 —...
- Page 118 — • :..:.. a’ • a’ • 4 • :;‘:, ‘aa Hemstitching patterns • Program No. 59. For these programs use wing needle 1 30/705 H Wing, size 100, without pulling threads. Careful: When using the wing needle, the stitch width must not be any larger than 8 mm.
- Page 119 Making a hem with a hemstitch seam Traditional hemstitching • Programs No. 55 and 58. This seam provides a perfect edge finish to hem- stitching work on table cloths, napkins or towels. • Using “single pattern”, sew the program onto a •...
- Page 121 And here is how it is done: • Cut one or two fabric threads and push the • Remove the sewing foot fabric over the pin in the eyelet plate. The fabric must fit tightly around the pin. • Place the eyelet plate onto the needle plate •...
- Page 124 ¾...
- Page 130 Roll hemmer foot No. 7 Part No.: 96-694 818-00 Edge guide No. 3 Part No.: 98-802-422-00 Seam ripper Part No.: 99-053 016-91 Soft brush Part No.: 93-847 979-91 Oil tube Part No.: 93-035 91 0-91...
- Page 131 (special accessories) he special accessories allow you to do special sewing work he listed sewing feet are available at your PFAFF dealer Accessory Part No. Sewing work Appliqué foot 93-042 941 -91 For appliqué work Open appliqué foot for 9 mm width 93-036 933-9 1 For appliqué...
- Page 132 Felling foot Appliqué foot Lap-felled seams are particularly durable and Appliqués are quickly done and always produce a therefore well known as the typical denim seam. beautiful effect By using different materials and They are also suitable for sportswear, children’s patterns you can create countless new designs.
- Page 133 Fringe foot Cording foot With this special foot for loop embroidery you can The classical sewing technique of pin tucking can produce fantastic effects in no time. be used perfectly well on many fabrics such as cottons and light woollens. •...
- Page 134 Shirring foot Single needle cording foot Cording is a technique in which pearl cotton or a Beautiful gathering effects on, for example, child ren’s wear or curtains, can be achieved quickly and fine cord is overstitched to produce a purl seam. With this technique you can obtain a similar effect easily with the shirring foot to braiding, Appliqués can also be made more...
- Page 136 — — — — — — — ._.._ __ —...
- Page 137 Needle chart Suitable for System and No. Stitch length Stitch width Needle spacing Normal cording 130/705 H-ZWI 2.5 mm 1.6 mm — 2.5 mm 2.0 mm Normal cording Thickness: 80 — 130/705 H-ZWI 2.5 mm Wide cording Thickness: 80 2.5 mm —...
- Page 138 Cleaning and lubricati ng Changin g the needle plate Switch off the on/off switch Switch off the on/off switch • Remove the needle plate and lower the feed dog. • Clean the feed dog and hook area with the brush. Removal •...
- Page 142 PFAFF G. M. Pfaff AktiengesellsChaft Werk Karisruhe-Durlach GritznerstraBe 11 76227 Karlsruhe Printed in Germany Rohr Druck GmbH Mainzer StraBe 1 05 67657 Kaiserslautern Subject to technical modifications Nr. 29629 995-76/000 RD 7/94 oiigl. 2iW...
Need help?
Do you have a question about the Creative 7510 A and is the answer not in the manual?
Questions and answers