Table of Contents
Advertisement
Available languages
Available languages
Quick Links
Advertisement
Table of Contents

Related Manuals for Husqvarna 917.384519


Summary of Contents for Husqvarna 917.384519
- Page 1 LAWN 149cc Kohler Engine 21" Multi-Cut Model No. 917.384519 Product No. 6021 P • EspaSol, p. 21 • CAUTION'. Read and follow all Safety Rules and instructions before operating this equipment U.S.A. Husqvarna, Charlotte, NC 28269 Visit our website: www.husqvarna.com...
-
Page 2: General Operation
Maintenance Schedule ......Safety Rules .......... Maintenance ........14-16 Warranty ..........Service and Adjustments ......Product Specifications ......Storage ..........18-19 Assembly / Pre-Operation ......Troubleshooting ......... 19-20 Operation ........... 10-13 Repair Parts ........40-47 In the state of California the above is re- IMPORTANT: This cutting machine is capable of amputating... -
Page 3: Safe Handling
• Stop the engine (motor) whenever • Never allow children to operate the machine. leave the equipment, before cleaning the mower or unclogging the chute. • Use extra care when approaching blind • Shut the engine (motor) off and wait until corners, shrubs, trees, or other objects the blade comes to complete stop before that may obscure vision. -
Page 4: General Service
These accessories were available when this lawn mower was produced. They are not shipped with your mower. They are also available at most Husqvarna retailers and service centers. Some of these accessories may not apply to your lawn mower. - Page 5 Except where otherwise indicated on Exhibit A, all Engines and Attachments are not covered by this Limited Warranty. In most cases, these items are NOT manufactured by Husqvarna in which case they may be covered separately by their respective manufacturer's warranties if one is provided and included with the product at the time of purchase.
- Page 6 In order to obtain warranty coverage it is your responsibility your expense) to deliver or ship your Husqvarna unit to an authorized Husqvarna Servicing Dealer/Center and arrange for pick-up or return of your unit after the repairs have been made. If you do not know the location of your nearest authorized Husqvarna Servicing Dealer, call Husqvarna, at 1-800-487-5951 during the hours of 8:00 AM to 8:00 PM Eastern Standard Time, or visit ww_.husqvarna.com.
- Page 7 Product/Component ........Rent@! U_e/ ........IFrame, Chassis, Front Axle IEngine* ITransmission (if made by Husqvarna/Peerless) 3 Years No Warranty No Warranty ITransmission (if third party) _ IXLS Models only - stamped deck shell. Armor IProtected...
- Page 8 RZ - Two (2) Year Consumer warranty, parts & labor, with Hydro-Gear Distributor network. EZ - One (1) Year Commercial warranty, parts & labor, with Husqvarna. Two (2) Year Consumer warranty, parts & labor, with Hydro-Gear Distributor network. MZ - Two (2) Year Commercial warranty, parts &...
-
Page 9: To Assemble Grass Catcher
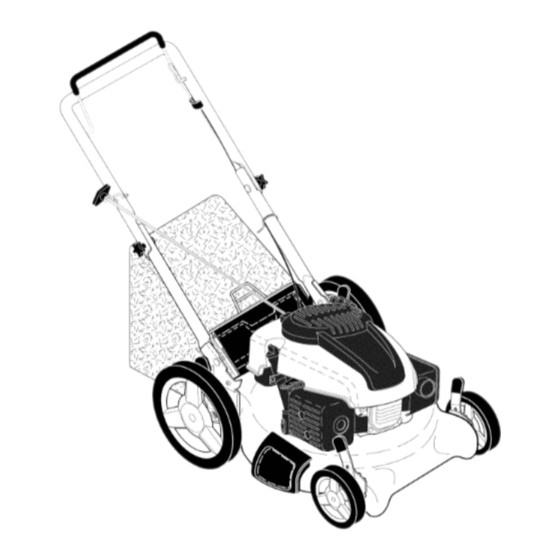
Read these instructions and this manual in Operator MOWING POSITION its entirety before you attempt to assemble control bar or operate your new lawn mower. IMPORTANT: This lawn mower is shipped /////! WITHOUT OIL OR GASOLINE in the //// iii I engine. - Page 10 KNOW YOUR LAWN MOWER READ THIS OWNER'S MANUAL AND ALL SAFETY RULES BEFORE OPERATING YOUR LAWN MOWER. Compare the illustrations with your lawn mower to familiarize yourself with the location of various controls and adjustments. Save this manual for future reference. These symbols may appear on your lawn mower or in literature supplied with the...
- Page 11 • To convert to mulching or discharging The operation of any lawn operation, remove grass catcher and SAFETY GLASSES m ower can result in foreign close rear door. objects thrown into the eyes, which can result in severe eye Pivot pins Rear Grass damage.
-
Page 12: To Empty Grass Catcher
IMPORTANT: • Check oil level before each use. Add oil if needed. Fill to full line on dipstick. • Change the oil after every 25 hours of operation or each season. You may need to change the oil more often under dusty, dirty conditions. -
Page 13: To Stop Engine
MULCHING MOWING TiPS TO STOP ENGINE • To stop engine, release operator pres- IMPORTANT: For best performance, ence control bar. keep mower housing free of built-up grass and trash. See "CLEANING" in the Maintenance section of this manual. TO START ENGINE •... -
Page 14: General Recommendations
MAINTENANCE BEFORE A FTER EVERY EVERY EVERY BEFORE EACH EACH 25 HOURS SCHEDULE USE USE HOURS OR SEASON HOURS STORAGE Check for Loose Fasteners _ Clean / Inspect Grass Catcher * Check Tires _ Check Drive Wheels Clean Lawn Mower ..M Clean under Drive Cover *** O Check Drive Belt / Pulleys *** Check / Sharpen / Replace Blade... - Page 15 IMPORTANT: Blade bolt is heat treated. LAWN MOWER If bolt needs replacing, replace only with Always observe safety rules when per- approved bolt shown in the Repair Parts forming any maintenance. section of this manual. TIRES TO SHARPEN BLADE * Keep tires free of gasoline, oil, or insect NOTE: We do not recommend sharp- control chemicals which can harm rubber.
- Page 16 1. Disconnectspark plug wire from spark ,_CAUTION: Petroleum solvents, such plug and place wire where it cannot as kerosene, are not to be used to clean come in contact with plug. cartridge. They may cause deterioration 2. Remove engine oil cap; lay aside on a of the cartridge.
- Page 17 6. Squeeze lower handle in and position your lawn mower to a Husqvarna or other holes onto mounting pins on handle qualified service center for repair and/or bracket. adjustment.
- Page 18 Immediately prepare your lawn mower for Operator MOWING storage at the end of the season or if the POSITION control bar unit will not be used for 30 days or more. LAWN MOWER When lawn mower is to be stored for a FOLD ,/,/ X period of time, clean it thoroughly,...
-
Page 19: Troubleshooting
Allow the engine to cool before to another. storing in any enclosure. TROUBLESHOOTING - See appropriate section in manual unless directed to a Husqvarna or other qualified Service Center. PROBLEM CAUSE CORRECTION Does not start 1. Dirty air filter. 1. Clean/replace air filter. - Page 20 Excessive Worn, bent or loose blade. 1. Replace blade. Tighten vibration blade bolt. Bent engine crankshaft. 2. Contact a Husqvarna other qualified service center. Starter rope Engine flywheel brake is on 1. Depress control bar to when control bar is released.
- Page 21 Reglas de Seguridad ........ 21-23 Programa de Mantenimiento ......Mantenimiento .......... 33-35 Especificaciones del Producto ....... Garanfia ............ 24-27 Servicio y Adjustes ........AImacenamiento ........37-38 Montaje / Pre-Operaci6n ....... Operaci6n ..........29-32 Identificaci6n de problemas ...... 38-39 Partes de repuesto ........
- Page 22 • Nunca operela maquina cuandola hierba manejados pot personas de al menos 12 aflos est_mojada. A segOrese siempre detener de edad, mientras que los cortac_sped de con- buenatracci6n en suspies;mantenga el ductor montado sean operados pot personas mango firmemente ycamine;nuncacorra. de al menos 16 aflos de edad.
-
Page 23: Mantenimiento
No son facilitados junto al cortacesped. Tambi_n estb.n disponibles en la mayor[a de las tiendas de Husqvarna yen los centros de servicio. AIgunos de estos accesorios tal vez no se apliquen a su segadora. RENDIMIENTO... - Page 24 Briggs & Stratton, Honda, Kawasaki o Kohler (excepto modelos equipados con motores LCT). Husqvarna no asume ninguna obligacidn de garantia, derivada de esta garantia limitada, relativa a los motores de otros fabricantes. TratTsmis'iot_es. Excepto...
- Page 25 30 dias para las piezas y mano de obra de uso no comercial. Los productos solo se reacondician en la ffibrica Husqvarna. bajo 7. Responsabilidades del propietario. Si desea conservar sus derechos...
- Page 26 Husqvarna autorizado mils cercano, llame a Husqvarna al 1-800-487-5951 de 8:00 a.m. a 8:00 p.m., Hora Estfindar del Este, o visite www.husqvarna.com. En caso de requerir asistencia o si tiene preguntas con respecto a esta Garantia limitada, puede comunicarse...
- Page 27 Motores LCT en quitanieves y arados especificos, garantia traves de Husqvarna. ** Consulte la referencia 1 (b) de la declaracion de garantia. RZ - Dos (2) aSos de garantia al consumidor, piezas y mano de obra, con red de distribuidores Hydro-Gear.
- Page 28 Lea estas instrucciones y este manual comple- Barra de POSICION tamente antes de tratar de montar u operar su que sxige la PARA segadora nueva. presencia det SEGAR IMPORTANTE: Este cortac_sped viene SIN operador ACEITE O GASOLINA en el motor. Su segadora nueva ha sido montada en la LEVAN-...
- Page 29 FAMILIARICESE CON SU SEGADORA LEA ESTE MANUAL DEL DUENO Y LAS REGLAS DE SEGURIDADANTES DE OPARAR SU SEGADORA. Compare las ilustraciones con su segadora para familiarizarse con la ubicaci6n de los diversos controles y ajustes. Guarde este manual para referencia en el futuro. Estos simbolos pueden apareser sobre su segadora o en la literatura...
- Page 30 • Para pasar a la operaci6n de acolchamiento, La operaci6n de cualquier remover ia recolectora de hierba y cerrar la segadora puede hacer que puerta trasera. salten objetos extrahos dentro de sus ojos, Io que puede producir Pasador del Mango det dahos graves en 6stos.
- Page 31 PASOS SIMPLES DE RECORDAR AVlSO: El terrapl_n inicial del aceite requiere solamente 18 onzas debido al aceite residual CUANDO CONViERTA SU SEGADORA en el motor de la prueba de calidad de 100% PARA ACOLCHAMIENTO del fabricante. AI cambiar el aceite puede La plancha acolchadora trasera instalada.
- Page 32 PARA PARAR EL MOTOR CONSEJOS PARA SEGAR Y ACOL- • Para parar el motor, suelte la barra de con- CHAR troles que exigen la presencia del operador. IMPORTANTE: Para obtener el mejor rendimiento mantenga la caja de la segadora PARA HACER ARRANCAR EL MOTOR sin acumulacion de cesped y basura.
- Page 33 PROGRAMA ANTES DESPUES CADA CADA CADA ANTES DEL DE CADA DE CADA 25 HORAS O ALMACE- MANTEN|M| NTO HORAS TEMPORADA HORAS NAMIENTO Revisar si hay Sujetadores Sueltos Limpiar/Inspeccionar el Recogedor de Cesped Controlar los Neumaticos Controlar las Ruedas Motrices Limpiar la Segadora ..
- Page 34 SEGADORA IMPORTANTE: El perno de la cuchilla es tratado a calo. Si es necesario sustituir los pernos, Siempre observe las reglas de seguridad cu- sustituirlos s61o con pernos aprobados mostrados ando haga el mantenimiento. en la secci6n Partes de Reparaci6n de este manual. LLANTAS PARA AFILAR LA CUCHILLA •...
- Page 35 Desconecte el alambre de la bujfa y _IkPRECAUCl0N: Los solventes de petr61eo, p6ngalo de modo que no pueda entrar en tales como el keroseno, no se deben usar para contacto con _sta. limpiar el cartucho. Pueden producir el deteri- Remueva la tapa del dep6sito del aceite; oro de _ste.
- Page 36 Si cree que la velocidad alta regulada del motor necesita ajuste,contacto su centro de servicio Husqvarna, el que cuenta con el equipo adecuado y la experiencia para hacer los ajustes necesarios.
- Page 37 Barra de control POSICION Inmediatamente prepare su segadora para el que exige PARA almacenamiento al final de cada temporada o si presencia det SEGAR la unidad no se va a usar pot 30 d[as o m_.s. operador -,_, SEGADORA Cuando se va a guardar la segadora pot cierto DOBLAR perfodo de tiempo, Ifmpiela cuidadosamente, HACIA...
- Page 38 SOLUCION DE PROBLEiVIAS = Yea ia seccisn apropiada en el manual amenos este dirigido a un centro de servico Husqvarna. CAUSA CORRECClON PROBLEMA No arranca Filtro de aire sucio. Limpie/cambie el filtro de aire. Sin combustible.
- Page 39 Ciguehal del motor doblado. P6ngase en contacto con su centro de servicio Husqvarna o con un otto centro de servicio cualificado. iCord6n El freno del volante del motor Presione la barra de control arrancador estb.
- Page 40 HUSQVARNA ROTARY LAWN MOWER - - MODEL NUMBER 917,384519 (PRODUCT NUMBER 6021 P) ....39 /' 21 "34 73 47 I 37 58 ..4 8...
- Page 41 HUSQVARNA ROTARY LAWN MOWER - - MODEL NUMBER 917,384519 (PRODUCT NUMBER 6021 P) PART PART PART DESCRiPTiON DESCRiPTiON DESCRIPTION 581497402 Control Bar 701037 Selector Knob - - - Engine, Kohler, Model 427615X498 Number XT650-2017 Upper Handle 401176X004 Axle Arm Assembly, Rear, LH...
- Page 42 KOHLER 4=CYCLE ENGINE MODEL NUMBER XT650-2017 CRANKSHAFT BLOWER HOUSING AND BAFFLES ....EXHAUST STARTING SYSTEM...
- Page 43 KOHLER 4=CYCLE ENGINE MODEL NUMBER XT650-2017 CRANKSHAFT EXHAUST PART PART QTY. DESCRIPTION QTY. DESCRIPTION 14 014 133-s 1 Crankshaft Assembly 14 068 15-s Screw, Shoulder 14 340 01-s Key, Woodruff 14 068 15-s Kit, Muffler Assembly BLOWER HOUSING & BAFFLES FUEL SYSTEM PART...
- Page 44 KOHLER 4=CYCLE ENGINE MODEL NUMBER XT650-2017 HEAD / VALVE / BREATHER DECALS A WARNING CRANKCASE...
- Page 45 KOHLER 4-CYCLE ENGINE MODEL NUMBER XT650-2017 HEAD / VALVE / BREATHER DECALS PART PART QTY. DESCRIPTION QTY. DESCRIPTION 14 016 04-s Valve, Exhaust 1411357-s Decal, Warning 14 841 15-s Kit, Head Gasket 14 411 03-s Rod, Push CRANKCASE 14 146 06-s Plate, Pushrod Guide 14 186 02-s Arm, Rocker...
-
Page 46: Engine Controls
KOHLER 4=CYCLE ENGINE MODEL NUMBER XT650-2017 iGNiTiON / ENGINE CONTROLS ELECTRICAL 13 J f OIL PAN / LUBRICATION ,° i J" .... ° ¢li_.+._JJ_/ I +"' ... '+,,... - Page 47 KOHLER 4=CYCLE ENGINE MODEL NUMBER XT650-2017 iGNiTiON / ELECTRICAL ENGINE CONTROLS PART PART QTY. DESCRIPTION QTY. DESCRIPTION 1407212-s Stud 14 079 20-s Linkage, Governor 14 100 10-s Nut, Flywheel (Auto Choke) (with Serrations) 14 100 08-s Nut, Hex Flange (M6) 14 109 04-s Cup, Starter Drive 14 126 53-s...
- Page 48 ai_liii iiiiiii Jii_Hl! Your Home For repair - in your home - of all major brand appliances, lawn and garden equipment, or heating and cooling systems, no matter who made it, no matter who sold it! For the replacement parts, accessories owner's manuals that you need to do-it-yourself.
Need help?
Do you have a question about the 917.384519 and is the answer not in the manual?
Questions and answers