Table of Contents
Advertisement
Advertisement
Table of Contents

Related Manuals for Haier HSW02


Summary of Contents for Haier HSW02
- Page 1 Haier What World Comes Home To "_ User Manual° Mo_l# ParaModelo de...
-
Page 2: Safety Precautions
SAFETY PRECAUTIONS Read instructions before using this appliance. When using this appliance, always exercise basic safety precautions, including following: Use this appliance only for its intended purpose as described in this use and care guide. 2) This refrigerator must be properly installed in accordance with... - Page 3 iiiiiiiiiiiiiiiiiiiiiiiiiiiiiiiiiiiiiiiiiiiiiiiiiii ii ii ii ii ii ii ii ii ii ii ii i 10) This refrigerator should not be recessed or built-in an enclosed cabinet. is designed for freestanding installation only. 1 1) Do not operate your refrigerator in the presence of explosive fumes, SAVETHESE INSTRUCTIONS...
-
Page 4: Table Of Contents
PAGE Safety Precautions ................Parts And Features ................Installing Your Refrigerator ............Unpacking Your Refrigerator ..............Leveling Your Refrigerator ..............Proper Air Circulation ................Electrical Requirements ................Door Alignment ..................Door Reversal ..................Refrigerator Features And Use ............General Features .................. Refrigerator Interior Shelves .............. -
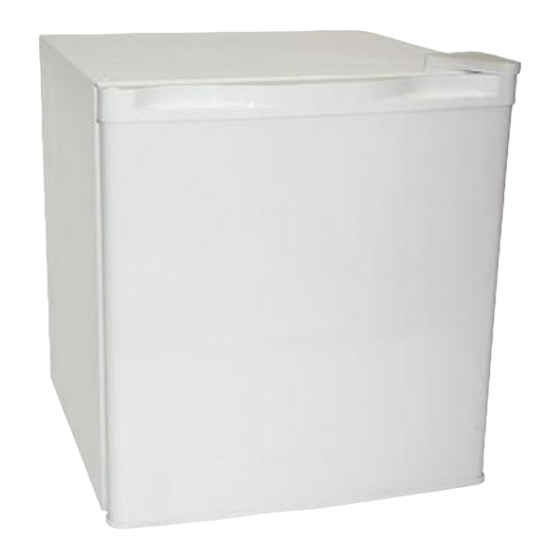
Page 5: Parts And Features
Ice Cube Tray Full Width Refrigerator Shelf Fixed Door Shelf Adjustable Temperature Control Freezer Compartment... -
Page 6: Installing Your Refrigerator
Unpacking Your Refrigerator 1, Remove all packaging material. This includes the foam base and all adhesive tape holding the refrigerator accessories inside and outside, 2. Inspect and remove any remains of packing, tape or printed materials before powering on the refrigeraton Proper Air Circulation •... -
Page 7: Electrical Requirements
iiiiiiiiiiiiiiiiiiiiiiiiiiiiiiiiiiiiiiiiiiiiiiiiiiU Emectrica_ Requirement • Make sure there is a suitable power Outlet (115 volts, 15 amps outlet) with proper grounding to power the refrigerator. • Avoid the use of three plug adapters or cutting off the third grounding order to accommodate a two plug outlet, This is a dangerous practice since it provides... -
Page 8: Door Alignment
(see f_g. # 1) Door AIign_ent 1. Remove hinge cover screw. 2. Remove the top hinge cover. 3, Loosen the top hinge screws using a phillips head screwdriver. 4, Adjust the door or put a spacer in between and then tighten the screws, 5. -
Page 9: Door Reversal
Reversing Hinge Door 1, Remove the top hinge cover screw and then remove the top hinge cover. (see fig. # 1) 2, Using a Phillips Head Screwdriver, loosen and remove the screws holding the top hinge in place, (see fig. # 1) 3. - Page 10 iiiiiiiiiiiiiiiiiiiiiiiiiiiiiiiiiiiiiiiiiiiiiiiiiiiiii i i !i !i !i !i !i !i !i !i !i !i !i !i !i !i !i !i !i !i 9. Align the pin of the top hinge with top hole on the left side of the door and push into place. Replace the screws in the upper hinge bracket but do not tighten all the way.
-
Page 11: Refrigerator Features And Use
General Seatures Adjustable temperature dial: (Note: If the refrigerator Your refrigerator will automatically been placed in a horizontal maintain the temperature level you tilted position period select. The temperature control dial has of time wait hours before 7 settings plus off, 1 is the warmest. 7 is plugging unit... -
Page 12: Defrosting
D÷frosting Your Refrigerator (see Fig,# 6) • For maximum energy efficiency, defrost freezer section whenever frost accumulates to a thickness of 1/4" or more on freezer walls. Note that frost tends to accumulate more during the summer months. • To defrost, remove the food and ice cube tray from the freezer section. -
Page 13: Food Storage Information
Food Storage Information Fresh Food • When storing fresh food, which is not prepackaged, be sure to wrap store food in airtight and moisture proof material unless otherwise noted. This will ensure proper shelf life and prevent the transfer odors and tastes. •... -
Page 14: Proper Refrigerator Care And Cleaning
CMeaning Maintenance Warning: To avoid electric shock always unplug your refrigerator before cleaning, Ignoring this warning may result in death or injury. Caution: Before using cleaning products, always read and follow manufacturer's instructions and warnings avoid personal injury or product damage. -
Page 15: Power Interruptions
Power Interruptions • Occasionally there may be power interruptions due to thunderstorms other causes. Remove the power cord from AC outlet when a power outage occurs. When power has been restored, replug power cord to AC outlet. If outage is for a prolonged period, inspect and discard spoiled... -
Page 16: Troubleshooting
Refrigerator Does Not Operate • Check if thermostat control is not in the "OFF" position, • Check if refrigerator is plugged • Check if there is power at the ac outlet, by checking the circuit breaker. Food temperature appears warm •... - Page 17 What is covered only parts are covered in the long? remaining warranty. Labor is not provided and must be paid by This warranty covers all defects in the customer. workmanship or materials for a period 3. Contact your nearest authorized service center.
- Page 18 INSTRUCCIONES PRECAUTORIAS Lea todas las instrucciones antes de utilizar este aparato. Cuando utilice este aparato, siempre ejerza las precauciones de seguridad basicas, incluyendo las siguientes: Utilice este aparato exclusivamente para su uso especificado, segt]n describe en esta guia de uso y cuidados. 2) Este refrigerador debe ser instalado...
- Page 19 "...Carnes rnolidas, aves, o pescados descongelados que despidan olor extrano o rnuestren decoloracion no deben volver a congelarse y no deben consurnirse. El helado descongelado debe desecharse, Si el olor o color cierto alirnento es deficiente o cuestionable, desechelo. Tal alirnento podria resultar peligroso...
- Page 20 De acuerdo a UL 250 Estandardes Oracias por utilizar nuestro producto Haier. Este sencillo Numero de Modeto manual le orientara con respecto al mejor uso que puede darle a Numero de 5erie su refrigerador, Fecha de Compra...
- Page 21 PAGINA Instrucciones Precautorias ..............Piezas y Caracteristicas ..............Instalacion de sur Refrigerador ............Desempaque del RefrJgerador ..............Nivelacion del Refrigerador ................ Circulacion Apropiada del Aire ..............Requisitos Electricos .................. Alineacion de la Puerta ................Colocacion de la Puerta en el Lado Opuesto ..........
- Page 22 Bandeja de Cubos de Hielo Anaquele De Ancho Completo Control de Temperatura Ajustable Repisas Fijas en la Puerta Compartimiento del Congelador...
- Page 23 IDesempaqu÷ d÷[ Refrigerador 1. Retire todo el material de embalaje. Esto incluye la base de espuma y toda la cinta adhesiva que sostiene los accesorios del refrigerador en el interior y exterior. 2, Inspeccione y retire cualesquier restos del embalaje, la cinta adhesiva o los materiales...
- Page 24 R÷quisitos E_ec_ricos • Asegurese de que haya un tomacorrienteapropiado (115 V, 15 Amp.) con una conexion a tierra apropiada para hacer funcionar elrefrigerador. • Eviteeluso de adaptadores de trespatas o el cortarla tercer pata de conexion a tierrapara poder conectar en un tomacorriente bifasico.
- Page 25 A_in@acion _@ _a _u@r_a (Vea Fig. # 1) 1.Quite eltornillo d elacubierta delabisagra. 2.Quite lacubierta delabisagra s uperior. 3,Afloje lostornillos delabisagra s uperior usando undestornillador punta d ecruz. 4,Ajuste l apuerta o coloque unespaciador entremedio yluego vuelva a apretar los tornillos, 5.Vuelva a colocar lacubierta delabisagra s uperior, fig.# 1...
- Page 26 Colocaei6n Gozne Puelrta ILado Opuesto 1, Remueva el tornillo de la cubierta del gozne superior luego remueva la cubierta del gozne superior. (Vea fig, # 1) 2, Con un destornillador de cabeza Phillips, afloje y remueva los tornillos que sujetan en su lugar el gozne superior. (Vea fig.
- Page 27 9.Alinee e lperno d el g ozne s uperior con elagujero dearriba enellado izquierdo delapuerta y presionelo hasta que quede ensu lugar. Vuelva a colocar los tornillos del s oporte del g ozne s uperior pero nolosapriete c ompletamente, todavia. (Vea fig.# 2) 10.Verifique que lapuerta cierra facilmente y que sella hermeticamente elrefrigerador.
- Page 28 Sun¢iones Generales Dial de Temperatura Ajustable Su refrigerador mantendr,5 (Nota: Si el refrigerador ha sido automaticamente el nivel de colocado en una posicion temperatura que seleccione. El dial de horizontal o inclinada durante control de temperatura tiene 7 ajustes alg,,n periodo de tiempo, adem,Ss del ajuste "off"...
- Page 29 Re o¢i6n Escarcha deM Refrigerador (vea Fig, # 6) Para el uso md_s eficiente de la energia electrica, remueva la escarcha de la seccion de congelacion cuando esta se acumule en las paredes del congelador hasta pot Io menos un espesor de 1/4" (0,6 cm).
- Page 30 nformaci6n sebr÷ A macenamiento de A imentos Alimentos Frescos • Cuando almacene alimentos frescos que no esten preempacados, asegflrese de envolver o almacenar los alimentos en un material hermetico y a prueba de humedad a menos que se indique de otra manera.
- Page 31 Ruidos de Operaci6n Nor_ales qu÷ Pueda Escuchar • Agua hirviendo, ruidos gorgoteantes o ligeras vibraciones que son el resultado del gas refrigerante circulando a traves del serpentin de enfriamiento. • La commande de thermostat cliquettera quand elle fair un cycle en marche et en arret...
- Page 32 del Refrigerador Li pieza y Mantenimiento Advertencia: Para evitar una descarga electrica siempre desenchufe su refrigerador antes de limpiarlo. El ignorar esta advertencia puede causar esiones o la muerte. Precau¢ion: Antes de usar productos de limpieza, siempre lea y siga las instrucciones y advertencias del fabricante para evitar lesiones personales...
- Page 33 nterrupciones de Energia • Pueden ocurrir ocasionalmente interrupciones de energia debido tormentas electricas u otras causas, Desenchufe el cable electrico tomacorriente de corriente alterna cuando ocurra una interrupciOn en el sistema electrico. Cuando la electricidad haya regresado, vuelva conectar el cable electrico a un tomacorriente de corriente alterna.
- Page 34 El Refrigerador no Funciona: • Revise que el control del termostato no este en la posicion de "OFF" (apagado). • Revise que el refrigerador este conectado, • Revise que haya corriente electrica en el tomacorriente corriente alterna, revisando el interruptor de circuito, La temperatura de los alimentos...
- Page 35 Acumulacion de humedad en el interior o exterior del refrigerador: • Esto es normal durante periodos de alta humedad, • Apertura constante o prolongada de la puerta, • Revise que los empaques de la puerta esten bien sellados. El refrigerador despide un olor: •...
- Page 36 La mano de obra otros derechos, los cuales varian estado a estado. no esta provista y debe ser cubierta por el cliente. Haier America 3, Localice su centro de servicio autorizado mas cercano. New York, NY 10018...
- Page 37 (Valido solo E,U.A). NECESITA PRUEBA DE COMPRA FECHADA PARA EL SERVICIO DE LA GARANTIA 115V, Made in China Hecho en China Haier What World Comes Home Haier America York, 10018 HSW02-2 Issued: Feb -02 P_rt # RF-9999-103 Printed in China...
Need help?
Do you have a question about the HSW02 and is the answer not in the manual?
Questions and answers