Amana GAS RANGE Installation Instructions Manual
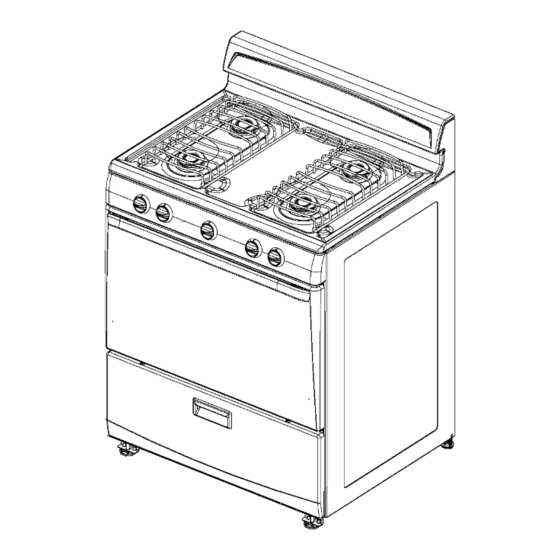
30" (76.2cm) freestanding gas range with standard clean oven
Hide thumbs
Also See for GAS RANGE:
- Installation instructions manual (6 pages) ,
- User instructions (12 pages)
Advertisement
Quick Links
Download this manual
See also:
Instructions for Using
3(}ww
INSTALLATION INSTRUCTIONS
(76.2CM)FREESTANDINGGASRANGE
with standard clean oven
Table of Contents ..................................................
2
To the installer: Please leave this instruction book with the unit.
To the consumer: Please read and keep this book for future reference.
W10130752A
Advertisement

Related Manuals for Amana GAS RANGE


Summary of Contents for Amana GAS RANGE
- Page 1 INSTALLATION INSTRUCTIONS (76.2CM)FREESTANDINGGASRANGE 3(}ww with standard clean oven Table of Contents ..........To the installer: Please leave this instruction book with the unit. To the consumer: Please read and keep this book for future reference. W10130752A...
- Page 2 TABLEOF CONTENTS RANGE SAFETY ................iNSTALLATiON REQUIREMENTS ..........Tools and Parts ................Location Requirements .............. Electrical Requirements ............Gas Supply Requirements ............iNSTALLATiON iNSTRUCTiONS ..........Unpack Range ................Install Anti-Tip Bracket .............. Verify Anti-Tip Bracket Location ..........9 Level Range ................Make Gas Connection ..............
- Page 3 WARNING: If the information in this manual is not followed exactly, a fire or explosion may result causing property damage, personal injury or death. = Do not store or use gasoline or other flammable vapors and liquids in the vicinity of this or any other appliance.
- Page 4 INSTALLATION REQUIREMENTS Gather the required tools and parts before starting installation. IMPORTANT." Observe all governing codes and ordinances. Read and follow the instructions provided with any tools listed not obstruct flow of combustion and ventilation air. here. It is the installer's responsibility to comply with installation...
- Page 5 Product Dimensions installation Clearances Cabinet opening dimensions shown are for 25" (64 cm) counter- top depth, 24" (61 cm) base cabinet depth and 36" (91.4 cm) countertop height. If the cabinet depth is greater than 24" (61 cm), the oven frame must extend beyond cabinet fronts by 1/=,, ( 13 mm) minimum.
- Page 6 ii!!!il i_!_,0i i:i_:_!ii ii !!_i!!_q il_ i:i_:_ _ii_i! _!!!% i:_!ii_ ¸ Electrical Shock Hazard Explosion Hazard Plug into a grounded 3 prong outlet. Use a new CSA International approved gas supply line. Do not remove ground prong. install a shut=off valve. Do not use an adapter.
- Page 7 Flexible m etal a ppliance connector: Burner input Requirements [] Iflocal c odes p ermit, anew CSA design-certified, 4-5ft (122-152.4 cm)long, 1 /2" (1.3 cm) o r3/4" (1.9 cm) I .D., f lexible Input ratings shown on the model/serial rating plate are for eleva- metal appliance connector may beused forconnecting range tions up to 2,000 ft (609.6 m).
- Page 8 INSTALLATION INSTRUCTIONS Contact a qualified floor covering installer for the best procedure for drilling mounting holes through your type floor covering. Before moving range, slide range onto shipping base, cardboard or hardboard. Excessive Weight Hazard Remove template from the anti-tip bracket kit (found inside the oven cavity).
- Page 9 3.Ifrange i snotlevel, pull r ange f orward u ntil r ear l eveling legis 8. Move therange c lose totheopening. Remove theshipping removed from theanti-tip bracket. Use s/8" drive ratchet and base, cardboard orhardboard from under therange. slip-joint pliers t oadjust leveling legs upordown until r ange i s 9.Open thebroiler door.Use a 3/8"drive ratchet tolower t he level.
- Page 10 Complete Connection 1. Locate gas pressure regulator in the broiler. Electronic ignition System Cooktop and oven burners use electronic ignitors in place of standing pilots. When a cooktop control knob is turned to the "LITE" position, the system creates a spark to light the burner. This sparking continues until the control knob is turned to the desired setting.
- Page 11 5. Turn the oven back on and check for proper flame. If the CheckOperation of Oven/Broil Burner flame is still not properly adjusted, turn the oven off, wait for the oven burner to cool down and repeat step 4 until flame is Open broiler door.
- Page 12 GASCONVERSIONS 2. Unplug or disconnect power. 3. Open broiler door and remove broiler pan. The gas pressure regulator is located in the back right hand corner of the broiler compartment. Explosion Hazard Use a new CSA International approved gas supply line.
- Page 13 2. Locate LP gas orifice spuds for top burners in the bag con- To Convert Oven Burner taining literature included with the range. Three LP gas spuds are stamped "88" and one "96." Open oven door and remove oven racks, oven tray, flame 3.
- Page 14 Turn the cap over so that N or NAT is visible. 5° A. Cap 6. Reinstall the cap. Tip Over Hazard A child or adult can tip the range and be killed. To Convert Surface Burners Connect anti-tip bracket to rear range foot. Remove burner grates, burner caps, and burners.
- Page 15 Install natural gasorifice s puds. 4. Use a 3/8" combination wrench a ndremove theLPgasorifice NOTE: Depending onmodel, therange c ooktop m ay be spud. equipped with4standard burners or3 standard burners and 1power burner. Spud size/location remain t hesame. A. Natural gas oven orifice spud stamped with "47" Std burner 149 Std burner 149 5.
- Page 16 W10130752A Printed in Mexico @2007 Whirlpool Corporation 03/2007 All rights reserved.
Need help?
Do you have a question about the GAS RANGE and is the answer not in the manual?
Questions and answers