Table of Contents
Advertisement
Advertisement
Table of Contents

Subscribe to Our Youtube Channel
Related Manuals for Kogan KGNDRVBA


Summary of Contents for Kogan KGNDRVBA
-
Page 2: Safety Information
Safety Information 9. Do not defeat the safety purpose of the polarized or grounding - type plug. a polarized plug has two blades with one wider than the other. A grounding type plug has two blades and a third grounding prong. -
Page 3: Table Of Contents
Contents Package Content Internet Radio Quick start Guide What you need before you can use your Internet Radio ............3 Unit Top and Back Overview ....................4 Unit Front Overview ......................5 Setup Wizard ........................6 Select a Station through Podcasts ..................16 Get Access Code ........................ -
Page 4: Package Content
Package Content Main unit Remote... -
Page 5: Internet Radio Quick Start Guide
Internet Radio Quick start Guide What you need before you can use your Internet Radio LAN Setting: Spare Ethernet port on your modem router (an ADSL or Cable broadband internet connection is highly recommended). Wireless LAN Setting: A wireless access point (Wi-Fi) connected to your broadband Internet connection. ... -
Page 6: Unit Top And Back Overview
Unit Top and Back Overview Unit Top Overview Unit Back Overview... -
Page 7: Unit Front Overview
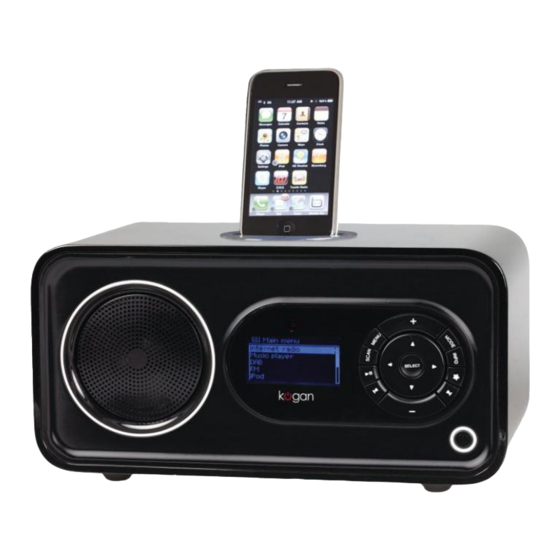
Unit Front Overview keys mode Press to turn Radio on/off. (Or when alarm is coming, press to cut it off.) Press to adjust volume level. Press to access main menu and other options. DAB and FM mode use only: press to scan stations. Music player and iPod mode use only: Press to change tracks, Press... -
Page 8: Setup Wizard
Setup Wizard Step 1 - Power up 1. Connect to your Internet Radio to a power point and ensure the power LED is lighting up. Extend the antenna. 2. When connected to power, device can be switched on or off by pressing . - Page 9 to your local „WLAN region‟, and then press 3. Press to confirm. to your preferred network „SSID‟, press 4. Press to confirm. Radio will save this WiFi access point in memory. Note: In some cases radio may find more than one network. Press to your favourite one, press confirm.
- Page 10 Press to cycle through the alphanumeric character list, press to select an appointed character. Note: WEP/WPA pass codes are case-sensitive. If you make a mistake while entering your password, select „ ‟ to delete a character. Note: a.>...
-
Page 11: Access Wireless Network
Access wireless network 1. After you have successfully completed the „setup wizard‟, a menu will be shown as below. Press to enter „Internet radio‟ mode. repeatedly until ‘Internet radio’ shows up, then stop pressing to enter. Note: Or, you may also press Later, it will show: 2. -
Page 12: Local Stations
Local stations Note: a. Ensure your radio already connected to network. b. If a wrong operation is reached, press to goes back. 1. While cursor point to < Station list >, and then press to confirm. 2. Press to < Local China >, and then press to confirm. -
Page 13: Choose A Station
Choose a station Note: a. Ensure your radio has already connected to network. b. If an incorrect option is selected, press to go back. 1. While < Station list > is selected, press to confirm. 2. Press to select < Stations >, then press to confirm. - Page 14 Genre’ enables you to choose radio stations according to their content, for example Classic Rock, Sport, News, etc. a. Press to < Genre >, press to confirm. b. Press to select genre, then press to confirm. c. Press to select station, then press to confirm.
-
Page 15: Shift To Wired Network
Shift to wired network Step 1 – Choose LAN Setting Note: a. Ensure LAN cable connecting to LAN socket already. to „Main menu‟, press 1. Press , and then press to confirm. 2. Press to < System settings >, press to confirm. - Page 16 If successful, the display will show: The LAN setup is complete! Step 2 – Enter Internet Radio mode 1. Press repeatedly to go back to the main menu, and then press to enter < Internet Radio >. Or, press repeatedly until <...
-
Page 17: Shift To Wireless Network
Shift to Wireless Network Note: It is also possible to change to Wi-Fi by performing a ‘Factory Reset’ and proceeding with the setup wizard again. 1. Refer „choose LAN setting‟ (page 13). Press to < Wireless >, press to confirm. 2. -
Page 18: Select A Station Through Podcasts
Select a Station through Podcasts 1. After your radio connects to the network, press to < Podcasts >. 2. Press to confirm, and then press to select an option. 3. Press to confirm, and then select the desired program. Get Access Code (for internet portal use) 1. -
Page 19: Add Station To 'My Favourites
Add Station to „My Favourites‟ 1. Visit website: http://www.wifiradio-frontier.com 2. Click on the register link. 3. To create an account, you need an Access Code for the radio. Please refer to page 16. 4. You now be able to take advatage of the various additional features and services offered by the Frontier Internet Radio Portal. -
Page 20: Add Station To 'My Added Stations
Add Station to „My Added Stations‟ 1. Visit website: http://www.wifiradio-frontier.com 2. Login with the details you used to register. 3. You will able to take advatage of the various additional features and services offered by the Frontier internet Radio Portal. ... -
Page 21: Changing The Station Information
Changing the Station Information It is possible to view information about a program that is shown on the second line of the display when listening to an Internet stream. To view more information, you can press to cycle through. Station Description This is scrolling text information supplied by the Internet station. -
Page 22: Music Player Mode
Music Player Mode Note: To utilize this option, please read the appendix. You will find it at Page41-43 of this instructional manual. A. Play shared media 1. Press repeatedly until < Music player > is selected. Note: Or, enter < Main menu >, then press to <... -
Page 23: Dab Mode
DAB Mode Press repeatedly until < DAB radio > is shows up. For initial use, it will perform a full scan and store station list in memory, Note: a. Alternatively press to enter < Main menu >, and then press to <... -
Page 24: Manual Tune
Manual Tune: 1. Press , and then press to select < Manual tune >, press to confirm. 2. Press to step between the channels and press to select the current channel. Note: If there is a multiplex corresponding to this channel and frequency, then the display will show a tuning meter with the signal strength and the multiplex name after a few seconds. -
Page 25: To Change Station Order
DRC (Dynamic Range Control) You can set the level of the compression of stations to eliminate the differences in dynamic range or sound level between radio stations. Note: a. Set DRC to off indicates no compression. b. set DRC to low indicates little compression. c. -
Page 26: Fm Mode
FM Mode A. General operation Press repeatedly until < FM Radio > is selected. For initial use, it will start at the beginning of the FM frequency range (87.50MHz). Otherwise, the last listened FM station will be selected. Note: or enter < Main menu >, and then press to select <... -
Page 27: Setting Station Presets
Setting Station Presets Your radio can store 10 Internet, 10 DAB and 10 FM stations preset. To store the current station: 1. Press and hold , and then press to desired preset. 2. Press to confirm. Radio will then return to its normal operation, and preset icon will appear on display. -
Page 28: Ipod Mode
iPod Mode Note: You can play music files stored on your iPod through the speakers. Docking your iPod 1. Insert your iPod into the iPod dock, the Dock will begin to charge your iPod if necessary. Charging will stop when the iPod is fully charged (check the iPod screen). repeatedly until ‘iPod’... -
Page 29: Aux In Mode
AUX IN Mode 1. Press repeatedly until < AUX in > is displayed. Note: Or enter ‘Main menu’, and then press to select < AUX in >, press to confirm. 2. Through a cable connection, your radio can be transformed into a high quality digital audio speaker system. -
Page 30: Sleep Function
Sleep Function 1. The Sleep Function can be activated from < Main menu > < Sleep >, press to confirm. repeatedly to define the sleep period. This can be between 0 – 60 minutes. 2. Press 3. When desired period is chosen, stop pressing buttons. -
Page 31: Setting Clock
Setting Clock Manually setting the Time/Date 1. Clock settings can be accessed from < Main menu > < System settings > < Time/Date >, press to confirm. 2. While cursor points to < Set Time/Date >, press , and then press to set the date. -
Page 32: Daylight Savings
Set hour format Press to select < Set format >, press to confirm. 2. Press to select desired format, press to confirm. Set timezone 1. Press to select < Set timezone >, press to confirm. 2. Press to select location timezone, press to confirm. -
Page 33: Setting Alarm
Setting Alarm Note: When setting the Alarm, make sure the Time is set correctly first. 1. Alarm setting can be accessed from < Main menu > < Alarms >, press to confirm. 2. Press to select alarm, press to confirm. - Page 34 8. Press to < Mode: Internet radio > press to confirm, and then press to desires alarm sound mode. Note: Alternatively, you may also press to < Preset: Last listened > to choice alarm sound. 9. Press to confirm, and then press to <...
- Page 35 To turn off Alarm or Postpone it a. When alarm is coming, you can either press to turn it off, or press to activate snooze function, repeatedly press to postpone it, in which the interval time will be 5/10/15/30 minutes. ...
-
Page 36: General Operation
General Operation Return to Main Menu Press , and then press to < Main menu >. Or, you can move back to radio‟s top-line < Main menu >, at any time by pressing repeatedly. Adjust Volume Level Adjust the volume level by pressing repeatedly. -
Page 37: System Settings
System settings Equaliser to select „Main Menu‟, press 1. Press , and then press to confirm. 2. Press to select < System settings >, press to confirm. 3. Press to select desired sound setting, press to confirm. Network setup Note: Familiarity with this will allow you: ... -
Page 38: Contrast (Setting Backlight Level)
1. Network settings can be accessed from < Main menu > < System settings > < Network >, press to confirm. 2. Press desired setting, press to confirm. Contrast (Set Backlight Level) Contrast settings can be accessed from < Main menu > < System settings > < Contrast >, and then press to confirm. -
Page 39: Language
B. Setting Standby Level 1. As above, press to select < Standby >, press to confirm. to confirm. The „low‟ settings is 2. Press to select desired contrast setting, press recommended. Language 1. Language settings can be accessed from < Main menu > < System settings > < Language>, press to confirm. -
Page 40: Factory Reset
Factory Reset Note: Performing a factory reset will completely erase your radio’s memory. This includes all WEP/WPA codes and other user settings. It will not reset the stations saved in the favorites via the Frontier Radio internet portal 1. Factory reset can be accessed from < Main menu > < System settings > < Factory reset >. -
Page 41: Software Updates
Software Updates Software Update menu can be accessed from < Main menu > < System settings > < Software update >, press to confirm. 2. While cursor points to < Auto- check setting >, press to confirm. 3. Press to select <... -
Page 42: Enter Setup Wizard
Enter Setup Wizard Setup Wizard can be accessed from < Main menu > < System settings > < Setup wizard >, press to confirm. 2. Follow the prompts on the display to complete the setup wizard. SW Version and Radio ID 1. -
Page 43: Appendix
Appendix Step 1: Set Up Media Sharing in WMP 11 Note: After you download and install Windows Media Player 11 for Windows and connect your Radio to the network, you need to set up media sharing so that you can share music with your Radio. The following steps describe how to set up media sharing in Windows Media Player 11. -
Page 44: Step 2: Play Music On The Internet Radio
3. Check the “share my media to” box. In the list, click your Radio *, click Allow, the selected device will now show a green tick and then click OK. If your device does not appear in the list of devices, perform the following steps; a. -
Page 45: Set Up Media Sharing In Mac Os
Set Up Media Sharing in MAC OS Using the Radio with a MAC will require Windows File Sharing. MAC OS 9 and earlier versions of the OS will need extra software to use Windows File Sharing, but MAC OS X 10.2 and later versions have Windows File Sharing built into the OS. -
Page 46: Troubleshooting
Troubleshooting If you experience any trouble with your wireless Internet Radio, then you may find it useful to visit the help section on our webpage: http://www.wifiRadio-frontier.com If you have trouble connecting the Radio to your wireless network, these steps may help to resolve the problem: 1. -
Page 47: Specification
Specification ITEMS DESCRIPTION Specifications: DAB/FM/Internet Radio with Docking for iPod® Earphone Output: 150mVrms (FM) 87.50 – 108.00 MHz Frequency Ranges: (DAB+,DAB) 174 - 240 MHz LCD Display: High resolution full dot display AC Power Input: 100-240VAC, 50-60HZ Power Requirements: (for use, please refer rear panel silk-screen) Line out socket 47Kohm impedance:...
Need help?
Do you have a question about the KGNDRVBA and is the answer not in the manual?
Questions and answers