Table of Contents
Advertisement
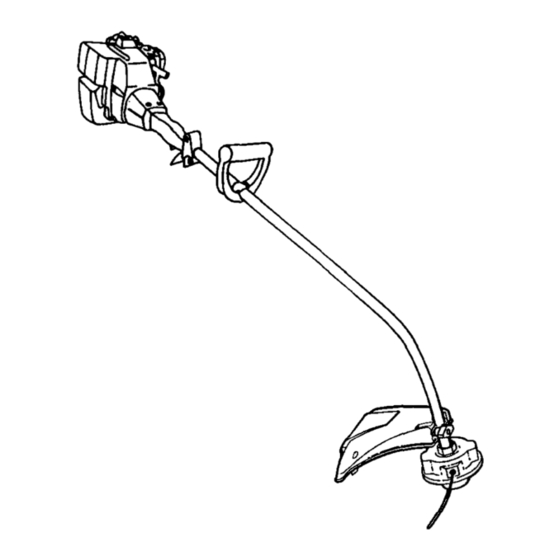
IMPORTANT MANUAL
Do Not Throw Away
Operator's
Manual
Model No.
358.798420
CUSTOMER
ASSISTANCE
1-800-235-5878
_IL
WARNING:
READ THE OPERATOR'S
MANUAL
AND
FOLLOW
ALL
WARNINGS
AND
SAFETY
INSTRUCTIONS.
FAILURE TO DO SO CAN
RESULT
IN
SERIOUS
INJURY.
Always Wear Eye Protection
CRAIq'$MAN ®
cc/1.3 cu. in. 2-CYCLE ENGINE
16 Inch Semi-Automatic Head®
GAS WEEDWACKER ®
• Assembly
• Operation
• Customer
Responsibilities
• Service and Adjustments
• Repair Parts
Sears, Roebuck and Co., Hoffman Estates, IL 60179 U.S.A.
530-083344-1-08/04/95
Advertisement
Table of Contents

Related Manuals for Craftsman weedwacker 358.798420


Summary of Contents for Craftsman weedwacker 358.798420
- Page 1 IMPORTANT MANUAL Do Not Throw Away Operator's Manual Model No. 358.798420 Always Wear Eye Protection CUSTOMER CRAIq'$MAN ® ASSISTANCE 1-800-235-5878 cc/1.3 cu. in. 2-CYCLE ENGINE 16 Inch Semi-Automatic Head® GAS WEEDWACKER ® • Assembly • Operation WARNING: • Customer Responsibilities READ THE OPERATOR'S •...
-
Page 2: Safety Rules
SAFETY RULES CAUTION: ALWAYS DISCONNECT SPARK PLUG WIRE AND PLACE WIRE WHERE IT CANNOT CON- I TACT SPARK PLUG TO PREVENT ACCIDENTAL STARTING WHEN SETTING UP, TRANSPORTING, ADJUSTING OR MAKING REPAIRS. OPERATOR SAFETY • Do not smoke or allow smoking near fuel or the unit or while using the unit. - Page 3 SAFETY RULES DANGER THIS POWER UNIT CAN BE DANGEROUSI THIS UNIT CAN CAUSE SERIOUS INJURY BLINDNESS TO THE OPERATOR AND OTHERS. THE WARNINGS AND SAFETY INSTRUCTIONS THIS MANUAL MUST BE FOLLOWED TO PROVIDE REASONABLE SAFETY AND EFRCIENCY USING THIS UNr_. THE OPERATOR IS RESPONSIBLE FOR FOLLOWING THE WARNINGS AND INSTRUCTIONS IN THIS MANUAL AND ON THE UNrl:.
- Page 4 GAS-POWERED WEEDWACKER ° LINE TRIMMER For one year from the date of purchase, when this Craftsman Gas-Powered WeedwackeP Line Trimmer is maintained, lubricated and tuned up according to the operating and maintenance instructions in the Operator's Manual, Sears will repair, free of charge, any defect in materials or workmanship.
- Page 5 TABLE OF CONTENTS Safety Rules ..............Customer Responsibilities ..........Product Specifications............. Service and Adjustments..........Warranty ................Storage ................Accessories ..............Trouble Shooting ............Assembly ................. Repair Parts ..............Operation ................ Repair Parts Ordering/Service ....... Back Cover INDEX Accessories ..............Know YourWeedwacker ..........Adjustments Assist Handle .............
-
Page 6: Assembly
CARTON CONTENTS Hardware shown full size (1) Debris Shield Knob Parts bag contents not shown full size Long Hex Key Parts packed separately in carton Plastic Debris Shield Operator's Manual Engine Oil ASSEMBLY TOOLS REQUIRED FOR ASSEMBLY NOTE: Model 358.798420 is partially assembled. •... -
Page 7: Assist Handle
ASSEMBLY HOW TO ASSEMBLE YOUR • Insert the debds shield bracket, attached to the tube, into the slot in the debds shield. WEEDWACKER • Turn debris shield while aligning and inserting debds shield screw into hole located in debris shield bracket. •... -
Page 8: Operation
OPERATION KNow YOUR WEEDWACKER (Fig. 4) READ THIS OPERATOR'S MANUAL AND SAFETY RULES BEFORE OPERATING YOUR WEEDWACKER. Compare the illustrations with your unit to familiarize yourself with the location of the vadous controls and adjustments. Save this manual for future reference. ..l!fI. - Page 9 OPERATION - SAFETY LINE TRIMMER SAFETY WARNING: THE RAPIDLY MOVING UNE CAUSES OBJECTS TO BE THROWN VIOLENTLY. THE DEBRIS SHIELD WILL NOT PROVIDE COMPLETE PROTECllON TO THE OPERATOR OR OTHERS. THE OPERATOR MUST WEAR A SAFETY FACE SHIELD OR GOGGLES. ALWAYS WEAR HEAVY, LONG PANTS AND BOOTS.
- Page 10 OPERATION HOW TO USE YOUR WEEDWACKER Assist Handle STOPPING YOUR ENGINE • Move momentary switch to the =Off" position. Do not release until the engine has completely stopped. Safety • If engine does not stop, move the choke lever to the Label =Full Choke"...
- Page 11 BEFORE YOU BEGIN. up to 5 times longer) and reduced smoke. IF YOU DO NOT UNDERSTAND THE FUEL If CRAFTSMAN 2-cycle engine oil (AIR-COOLED) is not SAFETY SECTION DO NOT AI"rEMPT TO available, use a good quality 2-cyoie engine oil (AIR- FUEL YOUR UNIT;...
-
Page 12: Fueling
OPERATION STOPPING YOUR ENGINE NOTE: If the engine has not started after 6 pulls (at half choke), check to make sure the choke lever is in the proper • Move the momentary switch to the OFF position.Do not position.Then, move the choke lever to the full choke posi- release until the engine has completely stopped. - Page 13 OPERATION UNE TRIMMER TIPS (Fig. 10) TECHNIOUES (Flg.11, 12, 13 &14) • TRIMMING - Allow only the tip of the line to make contact. Do not force trimmer line into work area. WARNING TRIMMING REMEMBER MINIMUM SPEED DO NOT CROWD LINE WHEN CUTTING...
-
Page 14: Customer Responsibilities
CUSTOMER RESPONSIBILITIES MAINTENANCE SCHEDULE Fill in dates as you complete regular service Yearly Service Dates Before After Every Every 5 Hrs, 25 Hra v" Check for damaged or worn parts v" Check for loose fasteners & parts Clean unit & labels v"... -
Page 15: Air Filter
CUSTOMER RESPONSIBILITIES EVERY 5 HOURS DRIVE SHAFT LUBRICATION (Fig. 17) • Loosen the nose cone screws. CLEAN FILTER (Fig. 15) • Remove the tube from the nose cone. A dirty air filter decreases thelife and performance of the • Remove the drive shaft from the tube. engine and increases fuel consumption and harmful •... -
Page 16: Fuel Filter
CUSTOMER RESPONSIBILITIES (Fig. REPLACE FUEL FILTER 19 & The fuel filter should be replaced after each season. Never operate your unit without a fuel filter. Be careful not BENT WIRE to damage fue/line while removing the fuel filter. Run fuel tank dry of fuel before proceeding with this step. -
Page 17: Service And Adjustments
SERVICE AND ADJUSTMENTS LINE REPLACEMENT NOTE: If tap button gets knocked out of the hub, reassemble parts as follows: WARNING: • ' Remove the cover and spool. TRIMMER HEAD PARTS THAT • Place the spring in the hub cylinder. CHIPPED, CRACKED, BROKEN, OR DAM- •... - Page 18 SERVICE AND ADJUSTMENTS TAP BUTTON Figure 25 Figure 23 CATCH Figure 26 Figure 24 -18-...
-
Page 19: Carburetor
SERVICE AND ADJUSTMENTS Carburetor adjustment is critical and If done Improper- MIXTURE SCREW (WITH LIMNER CAP) ly can permanently damage the engine as well as the carburetor. Please read all Instructions and consult the Troubleshooting sactlon of this manual before begin- nlng this process. -
Page 20: Product Specifications
Sears oil, you can add a fuel stabitizer (such as • Open semi-automatic head assembly CRAFTSMAN No. 33500) to your fuel tank. clean any dirt, grass or debris that has collected. INTERNAL ENGINE • Inspect the cutting line. Old cutting line may be chalky •... -
Page 21: Trouble Shooting
TROUBLE SHOOTING POINTS TROUBLE SHOOTING CHART SYMPTOM CAUSE CORRECTION Engine will not 1. Fill tank with correct fuel mixture. 1. Fuel tank empty. start or will run only 2. Engine flooded. 2. See =Starting Instructions" for a few seconds 3. Spark plug not fidng. 3. -
Page 22: Repair Parts
REPAIR PARTS SEARS WEEDWACKER - MODEL 358.798420 WARNING repelrs, adjustments end melntenence not de- lmrlbed In the Operator's Manual must be performed by quellfied service per- sonnel. 13._ Ref. Part No. Ref. Pert No. Description Descdpt|on 530-095176 Ddve Shaft-48" 530-015966 Screw 530-036514 Throltfe Hsg. - Page 23 REPAIR PARTS SEARS WEEDWACKER - MODEL 358.798420 Ref, Part No. Ref. Part No. _s_pff_ Des_iptlon Ref. Pert No. Description 530-036578 530-029395 Fuel Line-Pfimer/Carb , Starter Spdog Muffler Body 530-069216 530-036577 Muffler Cover 536-069247 Fuel Une-Carb/Tank 530-015496 i Screw-Pulley ; Retainer 530-036802 Muffler Baffle-Exit 530-014347...
- Page 24 REPAIR PARTS SEARS WEEDWACKER - MODEL 358.798420 Ref. Part No. Descdp.on 530-035014 Metedng Diaphragm 53O-O35001 Metedng Diaphragm Gasket 530-035164 Pump Gasket 530-035166 Pump Diaphragm 530-035028 Metedng Lever Pin 530-035031 Metering Lever 530-035178 Fuel Inlet Screen 530-035008 Inlet Needle Valve 530-037330 Metedng Lever Spring 530-035016 Metedng Lever Pin Screw...
- Page 25 NOTES...
-
Page 26: Model Number
SEARS CRAFT.SNAIl" 21 cc/1.3 cu. in. 2-CYCLE ENGINE Operator's 16 Inch Semi-Automatic Head® Manual GAS WEEDWACKER ® Model No. 358.798420 Each Gas Weedwacke_ has its own model number. The model IF YOU NEED REPAIR number for your unit will be found on a decal attached to the unit. SERVICE OR PARTS:- All parts listed herein may be ordered from any Sears, Roebuck and Co.