Table of Contents
Advertisement
Quick Links
S_AR$
OFTgHnN°
MODEL NUMBER 917.251490
• Assembly
• Operation
• Customer Responsibilities
• Service and Adjustments
• Repair Parts
OWNER'S MANUAL
_UTION:
Read and follow all safety rules and instructions
before operating
this equipment.
FOR CONSUMER ASSISTANCE HOT LINE, CALL THIS TOLL FREE NUMBER: 1-800-659-5917
Advertisement
Table of Contents

Related Manuals for Craftsman EZ3 917.251490


Summary of Contents for Craftsman EZ3 917.251490
- Page 1 S_AR$ OFTgHnN° MODEL NUMBER 917.251490 OWNER'S MANUAL • Assembly • Operation • Customer Responsibilities • Service and Adjustments • Repair Parts _UTION: Read and follow all safety rules and instructions before operating this equipment. FOR CONSUMER ASSISTANCE HOT LINE, CALL THIS TOLL FREE NUMBER: 1-800-659-5917...
- Page 2 SAFETY RULES Safe Operation Practices for Ride-On Mowers & IMPORTANT: THIS CUTTING MACHINE IS CAPABLE OF AMPUTATING HANDS AND FEET AND THROWING OBJECTS. FAILURE TO OBSERVE THE FOLLOWING SAFETY INSTRUCTIONS COULD RESULT tN SERIOUS _NJURY OR DEATH. GENERAL OPERATION III. CHILDREN Read, understand, and follow all instructions in the manual Tragic accidents...
- Page 3 RIDING EQUIPMENT For two (2) years from the date of purchase, if this Craftsman Riding Equipment is maintained, lubricated and tuned up according to the instructions in the owner's manual, Sears will repair or replace, free of charge, any parts found to be defective in material...
- Page 4 TABLE OF CONTENTS SAFETY RULES ............MAINTENANCE SCHEDULE ........PRODUCT SPECIFICATIONS ........SERVICE AND ADJUSTMENTS ......21-27 CUSTOMER RESPONSIBILITIES ..... 3, 17-20 STORAGE ..............WARRANTY ..............TROUBLESHOOTING ........... 29-30 TRACTOR ACCESSORIES .......... REPAIR PARTS - TRACTOR ........ 32-47 ASSEMBLY ............. 7-10 REPAIR PARTS - ENGINE ........
- Page 5 ACCESSORIES AND ATTACHMENTS These accessories and attachments were available through most Sears retail outlets and service centers when the tractor was purchased. Most Sears stores can order these items for you when you provide the model number of your tractor. ENGINE MAINTENANCE SPARK PLUG...
- Page 6 CONTENTS OF HARDWARE PACK Parts Bag contents shown full size Parts packed separately in carton (1) Shoulder Bolt 5/16-18 Seat (1) Knob © Video Mulcher Steering Plate Wheel Cassette (1) Washer 17/32 x 1-3/16 x 12 Gauge (2) Screws #10 x 5/8 (2) Lock Washers Manual Parts Bag...
- Page 7 ASSEMBLY Your new tractor has been assembled at the factory with exception of those parts left unassembled for shipping purposes. To ensure safe and proper operation of your tractor all parts and hardware you assemble must be tightened securely. Use the correct tools as necessary to insure proper tightness.
- Page 8 ASSEMBLY HOW TO SET UP YOUR TRACTOR (See Fig. 3) INSTALL SEAT Adjust seat before tightening adjustment knob. CONNECT BA'n'ERY (See Fig. 2) • Remove cardboard packing on seat pan, • Place seat on seat pan and assemble shoulder bolt. CAUTION: Do not short battery termi- nals.
- Page 9 ASSEMBLY Place the R.H. suspension arm on inward pointing INSTALL MOWER DRIVE BELT (See deck pin. If necessary, rock and raise front of mower Figs. 4 and to align deck pin with the hole in suspension arm. Be sure tractor is on level surface and mower suspension •...
- Page 10 ASSEMBLY (See Figs. INSTALL MULCHER PLATE 5 and DEFLECTOR SHIELD • Install two latch hooks to mulcher plate using screw, washer, lock washer, and weed nut as shown. NOTE: Pre-assemble weld nut to latch hook by inserting weld nut from the top with hook pointing down. •...
- Page 11 OPERATION These symbols may appear on your tractor or in literature supplied with the product. Leam and understand they meaning. I- ;I BA'I-I'ERY CAUTION OR REVERSE FORWARD FAST SLOW WARNING ENGINE ON ENGINE OFF OIL PRESSURE CLUTCH LIGHTS ON LIGHTS OFF FUEL CHOKE MOWER HEIGHT...
- Page 12 OPERATION KNOW YOUR TRACTOR READ THIS OWNER'S MANUAL AND SAFETY RULES BEFORE OPERATING YOUR TRACTOR. Compare the illustrations with your tractor to familiarize yourself with the location of various controls and adjustments. Save this manual for future reference. THROTTLE CONTROL AMMETER ATTACHMENT CLUTCH SWITCH...
- Page 13 OPERATION The operation of any tractor can result in foreign objects thrown into the eyes, which can result 3A_IY in severe eye damage. Always wear safety glasses or eye shields while operating your tractor or performing any adjustments or repairs. We recommend a wide vision safety mask over the spectacles or standard safety glasses.
- Page 14 OPERATION TO ADJUST GAUGE WHEELS (See Fig. 9) TO OPERATE ON HILLS Adjust gauge wheels with tractor on a flat level surface. • Adjust mower to desired cutting height (See 'qO AD- JUST MOWER CUFFING HEIGHT" in the Operation hills with slopes greater than 15 ° and CAUTION: Do not drive up or down section of this manual).
- Page 15 OPERATION BEFORE STARTING THE ENGINE (See Fig. 8) TO START ENGINE When starting engine for the first time or if engine has run CHECK ENGINE OIL LEVEL (See Fig. 12) out of fuel, itwill take extra cranking time to move fuel from the tank to the engine.
- Page 16 OPERATION NOTE: During this procedure there will be no movement of drive wheels. The air is being removed from hydraulic drive system. • Move motion control lever to neutral (N) position. Shut- off engine and set parking brake. • Engage transmission by placing freewheel control in driving position (See "TO TRANSPORT"...
- Page 17 CUSTOMER RESPONSIBILITIES MAI.TENANCE SC.EDULE FILL IN DATES O.eo O.eOoer.,o. CheckTire Pressure 1" Checkfor LooseFasteners Sharpen/Replace MowerBlades Lubrication Chart Check BatteryLeveVRecharge Clean Batteryand Terminals CheckTransaxleCooling AdjustBlade Belt(s)Tension Adjust MotionDriveBelt(s)Tension Check EngineOil Level Change EngineOil Ik1. _1.2._ Clean Air Filter Clean AirScreen InspectMuffler/Spark Arrester ReplaceOil Filter(If equipped) 1_1.2...
- Page 18 CUSTOMER RESPONSIBILITIES TRACTOR TO SHARPEN BLADE (See Fig. 16) Care should be taken to keep the blade balanced. Always observe safety rules when performing any mainte- unbalanced blade will cause excessive vibration and even- nance. tual damage to mower and engine. BRAKE OPERATION •...
- Page 19 CUSTOMER RESPONSIBILITIES TRANSAXLE COOLING TO CHANGE ENGINE OIL (See Fig.17) Determine temperature range expected before oil change. The fan and cooling fins of transmission should be kept All oil must meet API service classification SF or SG. clean to assure proper cooling. •...
- Page 20 CUSTOMER RESPONSIBILITIES ENGINE COOLING FINS (See Fig. 18) Remove any dust, dirt or oil from engine cooling fins to __""'-- WING NUT COVER prevent engine damage from overheating. Engine blower housing must be removed. Remove side panels and hood CARTRIDGE __ (See"TO REMOVE HOOD AN D GRILL ASSEMBLY"...
- Page 21 SERVICE AND ADJUSTMENTS CAUTION: BEFORE PERFORMING ANY SERVICE OR ADJUSTMENTS: Place motion control lever in neutral (N) position. Depress clutch/brake Place attachment clutch in "DISENGAGED" pedal fully and set parking brake. position. Turn ignition key "OFF" and remove key. • Make sure the blades and all moving parts have completely stopped.
- Page 22 SERVICE AND ADJUSTMENTS TO REPLACE MOWER DRIVE BELT FRONT-TO-BACK ADJUSTMENT (See Figs. 23 and 24) IMPORTANT: DECK MUST BE LEVEL SIDE-TO-SIDE. MOWER DRIVE BELT REMOVAL (See Fig. 25) THE FOLLOWING FRONT-TO-BACK ADJUSTMENT • Park tractor on a level surface. Engage parking brake. NECESSARY, BE SURE TO ADJUST BOTH FRONT LINKS EQUALLY SO MOWER WILL STAY LEVEL SIDE-TO-SIDE.
- Page 23 SERVICE AND ADJUSTMENTS TO REPLACE MOWER BLADE DRIVE BELT NOTE: After installing a new electric clutch, run tractor at full throttle and engage and disengage electdc clutch 10 (See Fig. 26) cycles to wear in clutch plate. Park the tractor on level surface. Engage parking brake. •...
- Page 24 SERVICE AND ADJUSTMENTS TO REPLACE MOTION DRIVE BELT TO ADJUST MOTION CONTROL LEVER (See Fig. 30) (See Fig. 29) Park the tractor on level surface. Engage parking brake. The motion control lever has been preset at the factory and For ease ofservice there is a belt installationguide decal on adjustment should not be necessary.
- Page 25 SERVICE AND ADJUSTMENTS FRONT WHEEL TOE-IN ADJUSTMENT Front wheel toe-in is required for proper steering operation, Toe-in was set at the factory and adjustment should not be necessary. If parts in the front axle or steering mechanism have been replaced or damaged, check toe-in and adjust if necessary.
- Page 26 SERVICE AND ADJUSTMENTS TO REPLACE HEADLIGHT BULB • Raise hood. ADJUSTMENT SPRING BUSHING • Pull bulb holder out of the hole in the backside of the gdll. • Replace bulb in holder and push bulb holder securely back into the hole in the backside of the grill. •...
- Page 27 SERVICE AND ADJUSTMENTS ENGINE ACCELERATION TEST- • Move throttle control lever from slow (,ab) to fast (,_) TO ADJUST THROTTLE CONTROL CABLE position. If engine hesitates or dies, turn idle mixture screw out (counterclockwise) 1/8 turn. Repeat test and (See Figs. 37 & 38) continue to adjust, if necessary, until engine acceler- The throttle control has been preset at the factory and ates smoothly.
- Page 28 STORAGE ENGINE Immediately prepare your tractor for storage at the end of the season or if the tractor will not be used for 30 days or more. FUEL SYSTEM IMPORTANT: IT IS IMPORTANT PREVENT CAUTION: Never store the tractor with DEPOSITS FROM FORMING...
- Page 29 TROUBLESHOOTING POINTS CAUSE CORRECTION PROBLEM Will not start Out of fuel. Fi!l fuel tank. Engine not"CHOKED" properly. See "TO START ENGINE _ in Operation secfion. Engine flooded. Wait several minutes before attempting to start. Bad spark plug. Replace spark plug. Dirty air filter.
- Page 30 TROUBLESHOOTING POINTS PROBLEM CAUSE CORRECTION Faulty operator-safety presence control system. Check widng, switches and connections. If not Engine continues to run corrected, contact an authorized service center/ when operator leaves seat with attachment clutch department. engaged Poor cut - uneven Worn, bent or loose blade.
- Page 31 TRACTOR - - MODEL NUMBER 917.251490 SCHEMATIC BATrERY ELLOW 28 VOLTS AC @ 3600 RPM (REGULATOR DISCONNECTED) ORANGE HEADLIGHT BROWN SWITCH (OFF) HEADLIGHTS © NON-REMOVABLE REMOVABLE CONNECTIONS CONNECTIONS "BD1 IGNITION SWITCH WIRING INSULATED CLIPS POSITION CIRCUIT NOTE: IF WIRING INSULATED PTO SWITCH CLIPS WERE REMOVED FOR M + G...
- Page 32 REPAIR PARTS TRACTOR - - MODEL NUMBER 917.251490 ELECTRICAL i.."_\//...
- Page 33 REPAIR PARTS - - MODEL NUMBER 917.251490 TRACTOR ELECTRICAL PART DESCRIPTION 146140 Battery 74760412 Bolt Hex Head 1/4-20 x 3/4 STD551125 Washer, Lock 1/4 STD551025 Washer 9/32 x 5/8 x 16 Ga STD541025 Nut Fin Hex 1/4-20 7697J Tube Plastic 7603J Tray, Battery 109596X...
- Page 34 REPAIR PARTS TRACTOR - - MODEL NUMBER 917.251490 CHASSIS AND ENCLOSURES 68 103 63 60...
- Page 35 REPAIR PARTS TRACTOR - - MODEL NUMBER 917.251490 CHASSIS AND ENCLOSURES PART PART DESCRIPTION DESCRIPTION 150253 Rail, Frame RH 136939 Bracket, Spnsn Front Lh 140506 Drawbar, Gt 136940 Bracket, Spnsn Front Rh 136671X558 Panel Asm., Side LH 138460 Bracket Asm., Susp Chassis Rh Screw Thdrol 3/8-16 x 1/2 73800700 Nut, Lock Hex 7/16 Unc...
- Page 36 REPAIR PARTS TRACTOR - - MODEL NUMBER 917.251490 GROUND DRIVE...
- Page 37 REPAIR PARTS TRACTOR - - MODEL NUMBER 917.251490 GROUND DRIVE PART PART DESCRIPTION DESCRIPTION 7070E Key 1/4 x 2.5 123800X Washer 7563R Washer Thrust Axle Harden 139989 Console Hydro Fender 73680600 Nut Crownlock 3/8-16 140927 Plate Console Shift 76020412 Pin Cotter 1/8 x 3/4 73800500 Locknut Hex W/Washer Insert 140507...
- Page 38 REPAIR PARTS TRACTOR - - MODEL NUMBER 917.251490 STEERING ASSEMBLY 1313 33" /"...
- Page 39 REPAIR PARTS TRACTOR - - MODEL NUMBER 917,251490 STEERING ASSEMBLY PART DESCRIP_ON 121472X Wheel, Steering 137094 Axle Asm., Front 6855M Fitting, Grease 136960 Spindle Asm, LH 136959 Spindle Asm., RH 6266H Bearing, Race Thrust Harden 121748X Washer 25/32 x 1-5/8 x 16 Ga. 12000029 Ring, Klip #T5304-75 121232X...
- Page 41 REPAIR PARTS TRACTOR - - MODEL NUMBER 917.251490 ENGINE PART DESCRIPTION 141948 Engine Kohler 18 HP Model MV18S-58560 144110 Muffler Asm Kohler VGT (Inc. Key No. 34) Elbow Street 3/8 NPT 13240300 13280328 Nipple Pipe 3/8NPT X 3 - 1/2 13200300 Elbow STD 90 Degree 3/8 - 18 NPT 138129...
- Page 42 REPAIR PARTS TRACTOR - - MODEL NUMBER 917.251490 46" MOWER DECK 103102 104105 15___ 101"_ _102...
- Page 43 REPAIR PARTS TRACTOR - - MODEL NUMBER 917.251490 46" MOWER DECK PART PART DESCRIPTION DESCRIPTION 145008 Deck Asm., Mower 46" 137554 Keeper, Belt, Idler 138457 Bracket Asm., Sway Bar 144917 Pulley, Idler, Driven 4939M Retainer Spring 137273 Spring, Secondary 44/46/50 Vent 130832 Arm, Suspension, Rear (Sway Bar) 17490620...
- Page 44 REPAIR PARTS TRACTOR -- MODEL NUMBER 917.251490 SEAT ASSEMBLY PART PART DESCRIPTION DESCRIPTION 140124 Seat 121249X Spacer, Split 140551 Bracket, Pivot Seat 123740X Spring, Cprsn 140675 Strap, Fender 123976X Nut, Lock 1/4 Lge Fig Gr. 5 127018X Bolt, Shoulder 5/16-18 X .62 19171912 Washer 17/32 X 1-3/16 X 12 Ga.
- Page 45 REPAIR PARTS TRACTOR - - MODEL NUMBER 917.251490 DECALS 7 15 PART PART DESCRIPTION DESCRIPTION 52-113-50 138955 Decal, Eng Craftsman Koh Decal, Operating Instruction 146710 149516 Decal, Insert Strg Decal, Battery DNGR/PSN/Acme 138047 146705 Decal, Hood, Craftsman, RH Decal, Battery 146706...
- Page 46 REPAIR PARTS TRACTOR -- MODEL NUMBER 917.251490 LIFT ASSEMBLY 35 17 42 43 25 26...
- Page 47 REPAIR PARTS TRACTOR - - MODEL NUMBER 917.251490 LIFT ASSEMBLY PART PART DESCRIPTION DESCRIPTION 121006X Rod Asm., Lever 73350800 Nut, Jam Hex 1/2-13 Unc Trunnion 145542 Shaft Asm., Lift Vgt 130171 121002X Lever Asm., Lift Rh 73800800 Nut, LockW/Wsh 1/2-13 Unc 12000022 E-Ring Truarc #5133-87 12000037...
- Page 48 REPAIR PARTS TRACTOR - - MODEL NUMBER 917.251490 HYDRO GEAR TRANSAXLE - - MODEL NUMBER 210-3010 38 3940 _"...
- Page 49 REPAIR PARTS TRACTOR - - MODEL NUMBER 917.251490 HYDRO GEAR TRANSAXLE - - MODEL NUMBER 210-3010 KEY PART KEY PART NO. NO. DESCRIPTION NO. NO. DESCRIPTION Locknut, Hex 5/16-18 142874 Assembly, Housing, LH 142903 Bolt, Hex 5/16-18 x 1-1/2 142875 Assembly, Housing, RH 142904 142876...
- Page 50 REPAIR PARTS TRACTOR - - MODEL NUMBER 917.251490 HYDRO GEAR PUMP - MODEL NUMBER BU-10L-118 KEY PART PART DESCRIPTION NO. NO. DESCRIPTION 127148X Swashplate, Variable 144569 Shaft, Pump 142938 Block Assembly 122716× Ring, Retaining 122786X Pin, Stainless, Headless 122745X Bearing, Ball 122718X Gasket, Center Section 122715X...
- Page 51 REPAIR PARTS TRACTOR - - MODEL NUMBER 917.251490 KOHLER ENGINE - MODEL NUMBER MV18S, TYPE NUMBER 58560 AIR INTAKE BAFFLES AND SHROUD BREATHER AND VENT I --11 _--12 .. 14 15...
- Page 52 REPAIR PARTS TRACTOR - - MODEL NUMBER 917.251490 KOHLER ENGINE - MODEL NUMBER MV18S, TYPE NUMBER 58560 BAFFLES & SHROUD AIR INTAKE KEY PART DESCRIPTION KEY PART DESCRIPTION NO. NO. NO. NO. X-276-7 Wing Nut 1/4-20 52 063 41 Baffle, #2 Cylinder Head 52 755 83 Kit, Cover and Tube 52 313 05...
- Page 53 REPAIR PARTS TRACTOR - - MODEL NUMBER 917.251490 KOHLER ENGINE - MODEL NUMBER MV18S, TYPE NUMBER 58560 CRANKCASE 1D-- CARBURETOR _--- •...
- Page 54 REPAIR PARTS TRACTOR - - MODEL NUMBER 917.251490 KOHLER ENGINE - MODEL NUMBER MV18S, TYPE NUMBER 58560 CARBURETOR CRANKCASE KEY PART DESCRIPTION KEY PART DESCRIPTION NO. NO. NO. NO. X-82-2 Nut, Hex 5/16-18 (12) 52 041 09 Gasket, Intake (2) 52 468 12 Kit, Manifold Washer, Flat 5/16 (12)
- Page 55 REPAIR PARTS TRACTOR - - MODEL NUMBER 917.251490 KOHLER ENGINE - MODEL NUMBER MV18S, TYPE NUMBER 58560 DIPSTICK CYLINDER HEAD CRANKSHAFT ELECTRIC STARTER EXHAUST...
- Page 56 REPAIR PARTS TRACTOR - - MODEL NUMBER 917.251490 KOHLER ENGINE - MODEL NUMBER MV18S, TYPE NUMBER 58560 ELECTRIC STARTER CRANKSHAFT DESCRIPTION KEY PART DESCRIFRON KEY PART NO. NO. NO. NO. 5209812 Starter Assembly Crankshaft 52 014 93 (Includes Key Numbers 4 thru 9) 52 468 03 Washer, Thrust .119/.122 (A.R.) X-20-1...
- Page 57 REPAIR PARTS TRACTOR - - MODEL NUMBER 917.251490 KOHLER ENGINE - MODEL NUMBER MV18S, TYPE NUMBER 58560 GOVERNOR FUEL PUMP IGNITION FLYWHEEL e)--...
- Page 58 REPAIR PARTS TRACTOR -- MODEL NUMBER 917.251490 KOHLER ENGINE - MODEL NUMBER MV18S, TYPE NUMBER 58560 FLYWHEEL FUEL PUMP KEY PART DESCRIPTION KEY PART DESCRIPTION NO. NO. NO. NO. 47 086 08 25 162 01 Screen, Grass Screw, Pozidriv, Truss Head 25 086 21 Screw, Hex Washer Head 1/4-20 x 5/8 (2)
- Page 59 REPAIR PARTS TRACTOR - - MODEL NUMBER 917.251490 KOHLER ENGINE - MODEL NUMBER MV18S, TYPE NUMBER 58560 OIL FILTER O,LPAN OIL SWITCH I PISTON AND ROD OIL PUMP CAMSHAFT AND VALVES...
- Page 60 REPAIR PARTS TRACTOR - - MODEL NUMBER 917.251490 KOHLER ENGINE - MODEL NUMBER MV18S, TYPE NUMBER 58560 OIL PAN LOW OIL PRESSURE SWITCH KEY PART DESCRIPTION KEY PART DESCRIPTION NO. NO. NO. NO. X-67-64 Screw, Hex Washer Head X-75-23 Plug, Pipe 1/8 N.P.T.F. #10-32 x 7/16 (2) 52 050 03 Filter, Oil Pickup...
- Page 61 SERVICE NOTES...
- Page 62 SERVICE NOTES...
- Page 63 SUGGESTED GUIDE FOR SIGHTING SLOPES FOR SAFE OPERATION ONLY RIDE UP AND DOWN HILL, NOT ACROSS HILL SIGHTING SIGHT AND HOLD THIS LEVEL WITH SKY LINE OR TREE. Operate your Tractor up and down the face of slopes (not greater than 15°), never across the face. Make turns gradu- ally to prevent tipping or loss of control.
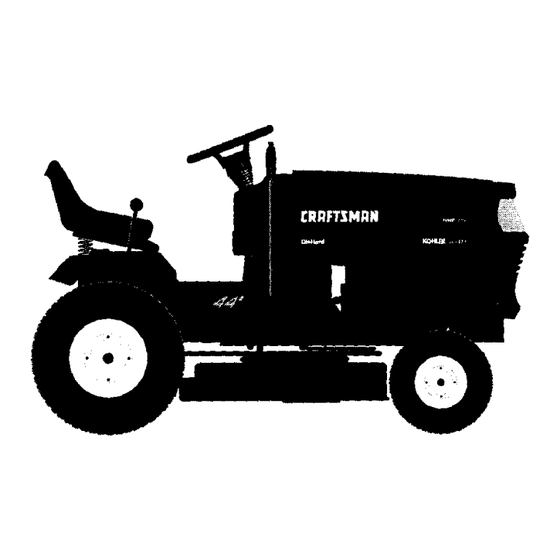
- Page 64 CRAFTS OWNER'S 18.5 HP TWIN CYLINDER MANUAL ELECTRIC START 46" MOWER HYDROSTATIC (AUTOMATIC) GARDEN TRACTOR MODEL NO. Each tractor has its own model number. Each engine has its own model number. 917.251490 The model number for your tractor will be found on the model plate located under the seat.
Need help?
Do you have a question about the EZ3 917.251490 and is the answer not in the manual?
Questions and answers