Advertisement
Quick Links
Operator's Manual
CRRFTSMRN
31 cc/2-Cycle/210 MPH
GAS POWEREDBLOWER/VAC
Model No,
316.797210
• Safety
• Assembly
• Operation
• Maintenance
• Parts List
• Espa6ol
_
ARNING:
Before using this product,
read this manual and follow
all its Safety Rules and Operating
Instructions.
Save this manual
for future reference.
Sears, Roebuck, and Co., Hoffman Estates, IL 60179 USA
OPERATOR'SMANUAL PARTNO. 1B2522
Rev. B
PRINTED IN U.S.A.
9/99 17431)
Advertisement

Related Manuals for Craftsman 316.797210


Summary of Contents for Craftsman 316.797210
- Page 1 Operator's Manual CRRFTSMRN 31 cc/2-Cycle/210 MPH GAS POWEREDBLOWER/VAC Model No, 316.797210 • Safety • Assembly • Operation • Maintenance • Parts List • Espa6ol Save this manual Before using this product, ARNING: for future reference. read this manual and follow all its Safety Rules and Operating Instructions.
- Page 2 ® GAS-POWERED BLOWER For two (2) years from the date of purchase, when this Craftsman Gas-Powered Slower or BlowerNac is maintained, lubricated and tuned up according to the operating and maintenance instructionsin the operator's manual, Sears will repair, free of charge, any defect in materials or workmanship, This warranty excludes blower tubes, spark plug, and air filter, which are expendable parts and become worn during normal use.
- Page 3 WARNING: Failure to obey a safety warning safety precautions should be observed, can result in serious injury to yourself or to WARNING: To guard against injury, basic including the following rules for safe operation: others. Always follow the safety precautions to reduce the risk of fire, electric shock, and personal injury.
- Page 4 Clean after each use, see Cleaning and Storage instructions. • Use only genuine Craftsman ® replacement parts when servicing this unit. These parts are available from • Keep these instructions. Refer to them often and use your authorized service dealer.
- Page 5 SAFETY INTERNATIONAL SYMBOLS This operator's manual describes safety and international symbols and pictographs that may appear on this product. Read the operator's manual for complete safety, assembly, operating and maintenance and repair information. SYMBOL MEANING • SAFETY ALERT SYMBOL Indicates danger, warning, or caution. May be used with other symbols. •...
- Page 6 WARNING: Do not use parts, accessories or comes with your unit. attachments not authorized by Craftsman® for this unit. Doing so could lead to serious injury to Be sure to read and follow all safety, assembly and the user, or damage to the unit, and void your operating instructions outlined in this operator's manual.
- Page 7 Notch Tabs Upper Vac Tube Fig. 2 Fig. 1 ASSEMBLING UNIT AS A VACUUM Vacuum Tube Assembly stop the engine and allow the impeller to stop ARNING: To prevent serious personal injury, before installing or changing tubes. Tab Button WARNING: To prevent serious personal injury or damage to the unit, always install vacuum Fig.
- Page 8 Install the vacuum bag tube over the blower outlet and push on until both tabs snap into place (Fig. 6). Position so the elbow inside the bag slants upwards. Removing 1. Remove the vacuum bag by pressing both tabs on the vacuum bag elbow at the same time and pulling off the blower (Fig.
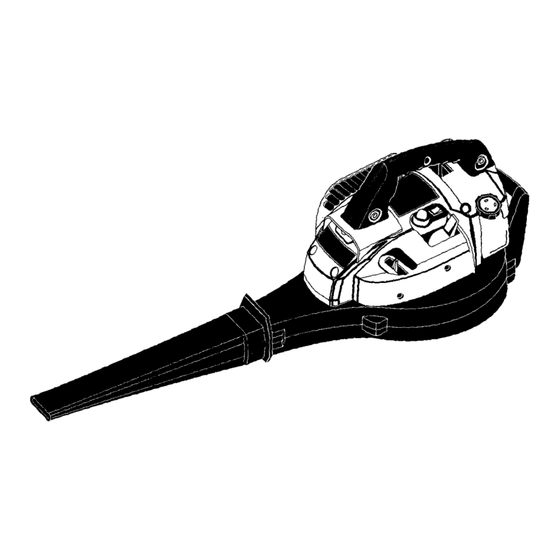
- Page 9 KNOWYOUR BLOWER or BLOWER/VACUUM READ THIS OPERATOR'S MANUAL AND SAFETY RULES BEFORE OPERATING YOUR UNIT. Compare the illustrations with your unit to familiarize yourself with the location of various controls and adjustments. Save this manual for future reference. Throttle Control On/Off Stop Control Primer Bulb Starter Rope Grip...
- Page 10 Use of Fuel Stabilizer A 3.2 oz. (0.094 liter) bottle of Craftsman engine oil, If using a brand of oil other than Craftsman, use of fuel containing fuel stabilizer, is included with your product. stabilizer will inhibit corrosion and minimize the formation Craftsman brand oil is recommended for this outdoor power tool.
- Page 11 IMPORTANT If the engine fails to start, repeat steps 1-6. If the engine stillfails to start,perform the flooded engine starting Experience indicatesthat alcohol blended fuels (called procedure in the following note. gasohol or using ethanol or methanol) can attract moisture NOTE: If the engine floods while tryingto start, place the which leads to separation and formation of acids during choke controlin the RUN (IH C) position.Move the throttle...
- Page 12 HOLDING THE BLOWER WARNING: To prevent serious personal injury to yourself or others, or damage to the unit, make sure all tubes and guards are in place before operating your unit. Check for the following before operating the unit: • Operator is wearing proper clothing, such as boots, safety glasses or goggles, ear/hearing protection, gloves, long pants and long sleeve shirt.
- Page 13 Emptying the Vacuum Bag OPERATING AS A VACUUM WARNING: To avoid serious personal injury, WARNING: TO prevent serious personal injury turn off the unit and allow the impeller to stop or damage to the unit, always install vacuum before opening vacuum door or installing tubes, vacuum bag and make sure the vacuum or removing vacuum bag, bag is completely zipped closed when operating...
- Page 14 MAINTENANCE SCHEDULE FREQUENCY MAINTENANCE REQUIRED Before each use Check for loose or damaged parts. Before each use Check for loose fasteners and parts. Between each use Clean units and labels. Every 10 hours Clean and re-oil air filter Every 50 hours Check spark plug condition and gap.
- Page 15 TO REPLACE SPARK PLUG Use a Champion DJ7Y spark plug (or equivalent). Correct air gap is 0.020 in. (0.50 mm). Remove plug after every 50 hours of operation and check its condition (Fig. 22). 1. Stop the engine and remove the air filter cover. See Air Filter Maintenance.
- Page 16 CLEANING THE VACUUM 3. Wash the bag once a year or more often if needed as follows: 1. Empty the bag after each use to avoid deterioration a. Remove the vacuum bag. and obstructing air flow, which will reduce the performance of the vacuum.
- Page 17 If you do not use this To avoid engine problems, the fuel system should Craftsman oil, you can add a fuel stabilizer to your be emptied before storage of 30 days or longer. fuel. NEVER add fuel stabilizer directly to the unit's fuel tank.
- Page 18 CAUSE TROUBLE REMEDY Fill fuel tank Empty fuel tank Engine will not start Primer bulb wasn't pushed enough Press primer bulb fully and slowly 5-7 times, Fuel should be visible in the bulb Fouled spark plug Clean or replace spark plug; re-gap. Engine flooded Use starting procedure WITHOUT USING CHOKE...
- Page 19 182441 On/Of Stop Control Switch with Wire 182439 Switch and Coil Replacement Wires 182524 Primer Bulb (includes 4) Return Lines 182442 182443 Crankcase Plug (includes 6) 180221 Crankcase Plug Screws 182444 Crankcase Plug Gasket 181866 Power Shaft Assembly 182445 Crankcase Assembly (includes 6, 8 & 10) Tinnerman Nut 181064 182446...
- Page 20 Vacuum Bag Adapter 182480 Vacuum Tube Assembly (includes Upper Vacuum Tube, Lower Vacuum Tube & Knob Assembly) 182479 Upper Vacuum Tube 182517 Lower Vacuum Tube 182481 Knob Assembly 182522 Operator's Manual 71-36549 Craftsman 2-Cycle Oil Not Shown - 20 -...
- Page 21 - 21-...
- Page 22 For in-home major brand repair service: Call 24 hours a day, 7 days a week 1-800-4-MY-HOME s" (1-800-469-4663) Para pedir servicio de reparacion a domicilio - 1-800-676-5811 In Canada for all your service and parts needs call Au Canada pour tout le service ou les pi_ces - 1-800-665-4455 For the repair or replacement parts you need: Call 7 am - 7 pm, 7 days a week...
Need help?
Do you have a question about the 316.797210 and is the answer not in the manual?
Questions and answers