Advertisement
Available languages
Available languages
Quick Links
Owner's Manual
I CRIIFTSMIIN" IMOWE R
ROTARY LAWN
6.5 Horsepower
Power-Propelled
21" Multi-Cut
Model No.
917.377060
• EspaSol, p. 20
CAUTION:
Read and follow all
Safety Rules and Instructions
before operating this equipment
Sears, Roebuck and Co., Hoffman Estates, IL 60179 U.S.A.
Visit our Craftsman website:www,sears.com/craftsman
Advertisement

Subscribe to Our Youtube Channel
Related Manuals for Craftsman 917.377060


Summary of Contents for Craftsman 917.377060
- Page 1 ROTARY LAWN 6.5 Horsepower Power-Propelled 21" Multi-Cut Model No. 917.377060 • EspaSol, p. 20 CAUTION: Read and follow all Safety Rules and Instructions before operating this equipment Sears, Roebuck and Co., Hoffman Estates, IL 60179 U.S.A. Visit our Craftsman website:www,sears.com/craftsman...
-
Page 2: Table Of Contents
Sears Service ......Back Cover LIMITED TWO YEAR WARRANTY ON CRAFTSMAN POWER MOWER For two years from date of purchase, when this Craftsman Lawn Mower is maintained, lubricated, and tuned up according to the operating and maintenance instructions in the owner's manual, Sears will repair free of charge any defect in material or workmanship. - Page 3 I. GENERAL OPERATION • Always wear safety goggles or safety glasses with side shields when oper- • Read, understand, and follow all instructions on the machine and in the ating mower. manual(s) before starting. Be thoroughly II. SLOPE OPERATION familiar with the controls and the proper Slopes are a major factor related to slip &...
- Page 4 • Neverfill containersinside a vehicle,on • Keep nuts and bolts, especially blade a truck or trailerbed with a plastic liner. attachment bolts, tight and keep equip- Always place containers on the ground ment in good condition. away from your vehicle before filling. •...
- Page 5 • Fast help by phone- phone support chase. Your new Craftsman® product is from a Sears technician on products designed and manufactured for years of requiring in-home repair, plus conve- dependable operation. But like all prod- nient repair scheduling.
- Page 6 Read these instructions and this manual in its entirety before you attempt to assemble or operate your new lawn mower. IMPORTANT: This lawn mower is shipped WITHOUT OIL OR GASOLINE in the engine. Your new lawn mower has been assembled at the factory with the exception of those parts left unassembled for shipping purposes.
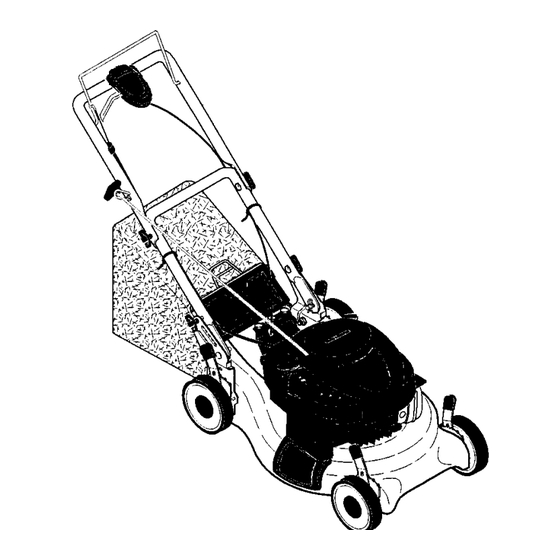
- Page 7 KNOWYOUR LAWN MOWER READ THIS OWNER'S MANUAL AND ALL SAFETY RULES BEFORE OPERATINGYOUR LAWN MOWER. Compare the illustrations with your lawn mower to familiarize yourself with the location of various controls and adjustments. Save this manual for future reference. These symbols may appear on your lawn mower or in literature supplied with the product. Learn and understand their meaning.
- Page 8 4. If condition fails to improve after the The operation of any lawn above steps (forward speed remains mower can result in foreign the same), your drive belt is worn and objects thrown into the should be replaced. eyes, which can result in severe eye damage.
-
Page 9: Operation
TO EMPTY GRASS CATCHER • To convert to mulching or bagging operation, discharge deflector must be 1. Lift up on grass catcher using the removed and mulcher door closed. frame handle. Remove grass catcher with clippings from under lawn mower handle. Empty clippings from bag. - Page 10 2. Grasp the white peel tab and pull to _kCAUTION: Do not run your lawn remove the entire seal. mower without mulcher plug or approved 3. Screw fuel cap onto fuel tank after fill- grass catcher in place. Never attempt to ing tank with gasoline.
- Page 11 MULCHING MOWING TIPS MOWING TIPS IMPORTANT: For best performance, CAUTION: Do not use de-thatcher keep mower housing free of built-up blade attachments on your mower. Such grass and trash. See _CLEANING" in the attachments are hazardous, will damage Maintenance section of this manual. your mower and could void your warranty.
-
Page 12: Maintenance Schedule
MAINTENANCE BEFORE AFTER EVERY EVERY EVERY I BEFORE EACH EACH 25HOURS SCHEDULE HOURS OR SEASON HOURS I STORAGE Check for Loose Fasteners L Clean / Inspect Grass Catcher * Check Tires NWCheck Drive Wheels Clean Lawn Mower ..M Clean under Drive Cover *** O Check Drive Belt / Pulleys *** EW Check / Sharpen / Replace Blade... - Page 13 LAWN MOWER 5. Use block of wood between blade and lawn mower housing and tighten the Always observe safety rules when per- blade bolt, turning clockwise. forming any maintenance. • The recommended tightening torque is TIRES 35-40 ft. Ibs. / 47-54 N-m. •...
- Page 14 • If lubricant is required, use onlyTexaco 5. Slowly pour oil down the oil fill spout, Starplex Premium 1 Grease, Part No. stopping every few ounces to check 750369. Do not substitute. the oil level with the dipstick. 6. Stop adding oil when you reach the ENGINE FULL mark on the dipstick.
- Page 15 • Keep finished surfaces and wheels free CLEANING of all gasoline, oil, etc. IMPORTANT: For best performance, keep • We do not recommend using a garden mower housing free of built-up grass and hose to clean lawn mower unless the trash, Clean the underside of your mower electrical system,...
- Page 16 TO REPLACE DRIVE BELT 2. While holding handle assembly, remove knob and carriage bolt from opposite side, 1. Place new drive belt on engine pulley. 2. Route the other end of the new drive align hole in handle with desired hole in handle bracket and reassemble bolt and belt through hole in housing.
-
Page 17: Storage
HANDLE Alcohol blended fuels (called gasohol or You can fold your mower handle for storage. using ethanol or methanol) can attract 1. Loosen the two (2) handle knobs on moisture which leads to separation and sides of the upper handle and allow formation of acids during storage. -
Page 18: Troubleshooting
TROUBLESHOOTING - See appropriate section in manual unless directed to a Sears Parts & Repair Center. PROBLEM CAUSE CORRECTION Does not start 1. Dirtyair filter. 1. Clean/replaceair filter. Fill fuel tank. 2. Out of fuel. 3. Stale fuel. Empty fuel tank and refill tank with fresh, clean gasoline. - Page 19 TROUBLESHOOTING - See appropriate section in manual unless directed to a Sears Parts & Repair Center. CAUSE PROBLEM CORRECTION 1. Rear of lawn mower Loss of power 1. Raise cutting height. housing or cutting blade dragging in heavy grass. 2. Cutting too much grass. 2.
- Page 20 GARANT[A LIMITADA DE DOS ANOS PARA LA SEGADORA A MOTOR CRAFTSMAN Por dos (2) aSos, a partir de la fecha de compra, cuando esta Segadora Craftsman se mantenga, lubrique y afine seg6n las instrucciones para la operaci6n y el mantenimiento en el manual del dueSo, Sears reparar_ gratis todo defecto en el material y la mano de obra.
- Page 21 • Permita que solamente las personas ra- • Renueva todos los objetos extraSos, tales sponsables que est_n familiarizadas con las como guijarros, ramas, etc. instrucciones operan la m_.quina. • Debe prestar atenci6n a hoyos, baches o • Despejeel_readeobjetostalescomopiedras, protuberancias. Recuerde que la hierba alta juguetes, alambres, huesos, palos, etc.
- Page 22 V. SERVIClO • Pare e inspeccione el equipo si le pega a un objeto. Repdrelo, si es necesario, antes de • Nunca haga funcionar una mdquina dentro hacerlo arrancar. de un drea cerrada. • En ningdn caso hay que regular la altura de •...
- Page 23 Acuerdos de Protecci6n para la Reparaci6n Congratulaciones por su buena compra. Su • Ayuda rdpida por teldfono - soporte tele- nuevo producto Craftsman® estd diseSado f6nico por parte de un t_cnico Sears sobre y fabricado para funcionar de modo fiable pot productos que requieren un arreglo en casa, muchos aSos.
- Page 24 Lea estas instrucciones y el manualcompletamenteantes de tratar de montar u operar su segadora nueva. IMPORTANTE: Este cortacesped viene SIN ACEITE O GASOLINA en el motor. Su segadora nueva ha sido montada en la fdbrica con la excepci6n de aquellas partes que se dejaron sin montar por razones de envfo.Todas las partes como las tuercas, las arandelas, los per- nos, etc., que son necesarias para completar el montaje han sido colocadas en la bolsa de partes.
- Page 25 FAMILIARICESE CON SU SEGADORA LEA ESTE MANUAL DEL DUEllO Y LAS REGLAS DE SEGURIDAD ANTES DE OPERAR SU SEGADORA. Compare las ilustraciones con su segadora para familiarizarse con la ubicaci6n de los diversos controles y ajustes. Guarde este manual para referencia en el futuro. Estos sfmbolos pueden apareser sobre su segadora o en la literatura proporclonada con el producto.
- Page 26 Barrade contml que segadora puede hacer que salten objetos extrafios dentro de La operacion de cualquier sus ojos, Io que puede producir dafios graves en 6stos. Siempre use anteojos de seguridad o protecci6n para Contmlde los ojos mientras opera su segadora o cuando laimpulsi6n haga ajustes o reparaciones.
- Page 27 PARA VACIAR EL RECOGEDOR • Para convertir a la operaci6n de ensacado CF:SPED o de descarga, el desviador de la descarga debe ser removido y la protecci6n contra la 1. Levante el recogedor de c6sped usando el descarga debe estar cerrada. mango del bastidor.
- Page 28 2. Agarrar la etiqueta blanca removible y tirar _1_PRECAUCI6N: No haga funcionar su para quitar el entero precinto. segadora sin la placa de la acolchadora o sin Enrocar el tap6n del carburante en el el recogedor c_sped aprobados en su lugar. dep6sito del carburante despues de Ilenar Nunca trate de operar la segadora cuando se el dep6sito con gasolina.
- Page 29 CONSEJOS PARA SEGARY ACOLCHAR _I_ONSEJOS PARA SEGAR RECAUClON: No utilizar dispositivos anti- IMPORTANTE: Para obtener el mejor paja de la hoja en la segadora ya que estos rendimiento mantenga la caja de la segadora accesorios son peligrosos, pueden dafiar su sin acumulacion de cesped y basura.
- Page 30 PROGRAMA ANTES DESPUES CADA CADA CADA ANTES DEL DE CADA DE CADA 25 HORAS ALMACE- MANTENIMIENTO HORAS ITEMPORADA HORAS NAMIENTO Soelto, SE LJmpi_.r/Inspeccionarel Recogedor deC_sped * Contrelar los Neurn_i.'_cos AG Contrelar las Ruedas Mortices *" Umpiar la Segadora ..Ump_ar debajo la Cubierta de la Transmisi6n *** Revisar las Correas y las Poleas ]mpulsadas **"...
- Page 31 SEGADORA Use un bloque de madera entre la cuchilla y la caja de la segadora y apriete el perno Siempre observe las reglas de seguridad cu- de la cuchilla gir_.ndoloen el sentido en que ando haga el mantenimiento. giran las manillas del reloj. LLANTAS •...
- Page 32 • La caja de engranajes se Ilena con lubricante Limpie todo el aceite derramado en la sega- hasta el nivel adecuado en la fdbrica. La dora yen el {ado del motor. _nica vez que el lubricante necesita atenci6n Echar aceite despacio en el conducto del es cuando se le ha prestado servicio a la aceite, par_.ndosea intervalos regulares para contrelar el nivel del aceite con la varilla.
- Page 33 LIMPIEZA • No recomendamos el uso de una manguera de jard{n para limpiar la segedora a menos IMPORTANTE: Para obtenerel mejor rendimiento, que el sistema el_ctrico, el silenciador, el mantenga la caja de la segadora sin acumulacion filtro de aire y el carburador est6n tapados de cesped y basura.
- Page 34 PARA CAMBIAR LA CORREA DE IMPULSI6N 2. AI mismo tiempo que sujeta el conjunto del 1. Colocar la nueva correa de polea del motor. mango, remueva la manilla y el perno porta- Colcoar la otra extremidad de la nueva dor del lado opuesto, alinee el agujero en el correa de mando a trav6s del orificio en el mango con el agujere deseado en el puntal bastidor.
- Page 35 Inmediatamente prepare su segadora para el almacenamiento al final de cada temporada o si Soporte la unidad no se va a usar por 30 dfas o rods. de mango SEGADORA Cuando se va a guardar la segadora per cierto perfodo de tiempo, limpiela cuidadosamente, remueva toda la mugre, la grasa, las hojas, etc.
- Page 36 ACEITE DEL MOTOR • Si es posible, guarde su unidad en un recinto Drene el aceite (con el motor caliente) y cerrado y ct_bralapara protegerla contra el cdmbielo con aceite de motor limpio. (Vea "MO- poIvo y la mugre. TOR" en la secci6n de Mantenimiento de este •...
- Page 37 SOLUCION DE PROBLEMAS -Vea la secci6n apropiada en el manual amenos que estd dirigido a un centro de servico Sears. PROBLEMA CAUSA CORRECCION Mal corte- 1. Cuchilla desgastada, doblada 1. Cambie la cuchilla, Apriete el perno o suelta. de la cuchilla. dispare|o Altura de las ruedas dispareja.
- Page 38 CRAFTSMAN ROTARY LAWN MOWER - - MODEL NUMBER 917.377060...
- Page 39 CRAFTSMAN ROTARY LAWN MOWER - - MODEL NUMBER 917.377060 KEY PART KEY PART NO. NO. DESCRIPTION NO. NO. DESCRIPTION 194579X479 Handle, Upper 851084 Bolt, Hex Head 193664X479 Handle, Lower 188786 Debris Shield 186053 Spring, Rear Door, RH 192325 Bolt 179585...
- Page 40 CRAFTSMAN ROTARY LAWN MOWER - - MODEL NUMBER 917.377060 \ 1'...
- Page 41 CRAFTSMAN ROTARY LAWN MOWER - - MODEL NUMBER 917.377060 KEY PART KEY PART NO. NO. DESCRIPTION NO. NO. DESCRIPTION 195989 Drive Contrel Assembly (Includes Cable) 12000058 E-Ring 7/16 195745 Cover, Top 189403 Cover, Dust, Wheel 187353 Pulley 73800400 Nut, Hex...
- Page 42 BRIGGS & STRATTON 4-CYCLE ENGINE MODEL NUMBER 123K02-0479-E1 684_ 718_ 27C, I 1019 LABEL KI'I] I 133o REPAIR MANUAq...
- Page 43 BRIGGS & STRATTON 4-CYCLE ENGINE MODEL NUMBER 123K02-0479-E1 GASKET SET 977 CARBURETOR ] 633_ 633A 8 276_ 121 CARBURETOR OVERHAUL KIT 358 ENGINE GASKET SET 842_ 524'1_ 2o j...
- Page 44 BRIGGS & STRA'n'ON 4-CYCLE ENGINE MODEL NUMBER 123K02-0479-E1 +s y 592_) 689 _ 60 _._ 5976 1036 EMISSIONS LABEL I KEY PART KEY PART DESCRIPTION DESCRIPTION Spring-Valve (intake) 697322 Cylinder Assembly 691270 Spring-Valve (Exhaust) Kit-Bushing/Seal 691270 399269 Guard-Flywheel Seal-Oil (Magneto Side) 694086 299819"...
- Page 45 BRIGGS & STRATTON 4-CYCLE ENGINE MODEL NUMBER 123K02-0479-E1 KEY PART KEY PART DESCRIPTION DESCRIPTION 696564 Valve-Throttle 270344 Ha:I: SeaI-O Ring 398187 Float-Carburetor (Intake Manifold) 398188 _ Valve-Needle/Seat 692310 Switch-Stop 693981 O:1: Gasket-Float Bowl SeaI-ThmtUe Shaft 691321Q_ 691753 Bracket-Air Cleaner Primer Seal-Throttle Shaft 633A 693867_ 66538...
- Page 46 SERVICE NOTES...
- Page 47 SERVICE NOTES...
- Page 48 ours! Your Home For repair - in your home - of all major brand appliances, lawn and garden equipment, or heating and cooling systems, no matter who made it, no matter who sold it! For the replacement parts, accessories and owner's manuals that you need to do-it-yourself.
Need help?
Do you have a question about the 917.377060 and is the answer not in the manual?
Questions and answers