Table of Contents
Advertisement
Available languages
Available languages
Quick Links
Owner's Manual
ICRAFT.TMAWI
6.0 HORSEPOWER
22 INCH CUT
WHEELED
WEEDTRIMMER
Model No.
917.773702
•
Safety
•
Assembly
•
Operation
•
Maintenance
•
EspaSol
•
Repair Parts
,_CAUTION:
Read and follow all
Safety Rules and Instructions
before operating
this equipment.
Sears, Roebuck and Co., Hoffman Estates, IL 60179
Visit our Craftsman
website:
www.sears.com/craftsman
Advertisement
Table of Contents

Related Manuals for Craftsman 917.773702


Summary of Contents for Craftsman 917.773702
- Page 1 917.773702 • Safety • Assembly • Operation • Maintenance • EspaSol • Repair Parts ,_CAUTION: Read and follow all Safety Rules and Instructions before operating this equipment. Sears, Roebuck and Co., Hoffman Estates, IL 60179 Visit our Craftsman website: www.sears.com/craftsman...
-
Page 2: Warranty
If this Craftsman Weedtrimmer is used for commercial or rental purposes, this warrant applies for only 90 days from the date of purchase. This Warranty does not cover: •... -
Page 3: General Operation
The operation of any trimmer can result in foreign objects being thrown into the eyes, which can result in severe eye damage. Always wear safety glasses or eye shields while operating your trimmer or perform- ing any adjustments or repairs. We recommend a wide vision safety mask over spectacles or standard safety glasses. -
Page 4: Slope Operation
Move away from fueling site before II. SLOPE OPERATION starting engine. Slopes are a major factor related to slip • Never run a machine inside a closed and fall accidents which can result in area. severe injury. All slopes require extra •... - Page 5 Readthese instructions andthis manualin its TO REMOVE TRIMMER FROM CARTON entiretybeforeyouattemptto assembleor 1. Remove loose parts included with operateyournewtrimmer. trimmer. IMPORTANT:Thistrimmeris shipped 2. Cut down two end corners of carton WITHOUTOILORGASOLINEin the engine. and lay end panel down flat. Yournewtrimmerhas beenassembledat the 3.
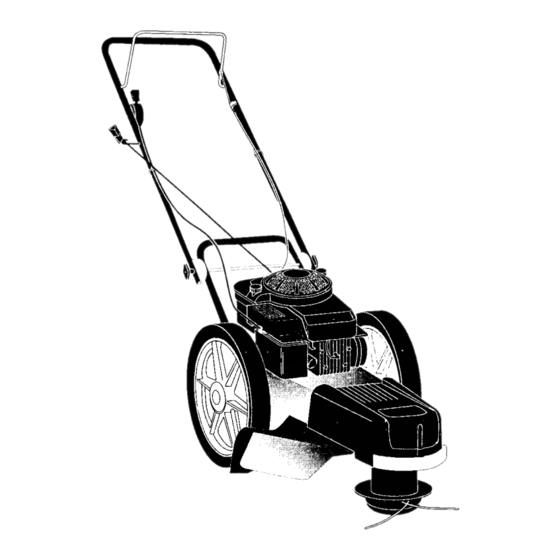
- Page 6 KNOW YOUR TRIMMER READ THIS OWNER'S MANUALANE) SAFETY RULES BEFORE OPERATING YOUR TRIMMER. Compare the illustrationswith your trimmer to familiarize yourself with the location of various controls and adjustments. Save this manual for future reference. These symbols may appear on your trimmer or in Literaturesupplied with the product. Learn and understand their meaning.
- Page 7 TO ADJUST TRIMMING HEIGHT A_:_CAUTION: Stop the engine and wait for all moving parts to stop. Disconnect spark plug wire from spark plug and place wire where it cannot come in contact with plug. The height of cut can be set to six (6) different positions ranging from 1-1/2 The operate, on of any trimmer can result in inches to 3 inches.
- Page 8 3. You receive a 20 oz. container of oil spilled oil or fuel. Do not store, spill or use gasoline near an open flame. with the unit. Slowly pour 3/4 (15 oz.) of the oil from the container down the TO START ENGINE oil fill spout into the engine.
-
Page 9: General Recommendations
MA,NTENANCESC,EDUL F,.,i. DATES S OUOOM ,ET SER 'C OATHS Check f(_r Loose Fasteners Clean Trimmer Clean Under Engine Cover , Ik#'2 Check drive belVpulleys Check/Replace Trimmer Lines Check Engine Oil Level E !Change Engine Oil 1_1.2 Clean Air Filter Inspect Muffler Clean or Replace Spark Plug Replace Air Filter Paper Cartridge Ik'#'2... - Page 10 TRIMMER Always observe safety rules when perform- ing any maintenance. TIRES • Keep tires free of gasoline, oil, or insect control chemicals which can harm rubber. • Avoid stumps, stones, deep ruts, sharp objects and other hazards that may cause tire damage.
-
Page 11: Engine Oil
TO CHANGE ENGINE OIL ENGINE NOTE: Before tipping trimmer to drain LUBRICATION oil, drain fuel tank by running engine Use only high quality detergent oil rated until fuel tank is empty. with API service classification SF-SJ. 1. Disconnect spark plug wire from spark Select the oil's SAE viscosity grade plug and place wire where it cannot... -
Page 12: Air Filter
MUFFLER AIR FILTER Inspect and replace corroded muffler as Your engine will not run properly and may it could create a fire hazard and/or be damaged by using a dirty air filter. damage. Replace the air filter every 100 hours of SPARK PLUG operation... - Page 13 CAUTION: Before performing any TO REMOVE/REPLACE TRIMMER HEAD service and adjustments: DRIVE BELT 1. Stop engine. 1. Remove screw at front of chassis 2. Make sure the rotating lines and all cover. moving parts have completely 2. Lift cover up and away from trimmer. stopped.
-
Page 14: Engine Speed
15. Replace chassis cover and tighten pulleys. 11.Assemble belt, idler pulleys screw securely. Always use Craftsman replacement parts bottom belt keeper to idler bracket. to assure proper fit and long life. Tighten pulley bolts securely. - Page 15 Immediately prepare your trimmer for storage tank during storage. Also, experience at the end of the season or if the unit will not indicates that alcohol blended fuels (called be used for 30 days or more. gasohol or using ethanol or methanol) can attract moisture which leads to separation TRIMMER and formation of acids during storage.
-
Page 16: Troubleshooting
TROUBLESHOOTING CAUSE CORRECTION PROBLEM Doesnotstart 1. Clean/replace air filter. 1. Dirty air filter. 2. Fill fuel tank. 2. Out of fuel. 3. Drain tank and refill with 3. Stale fuel. fresh clean fuel. 4. Drain fuel tank and 4. Water in fuel. -
Page 17: Slope Guide
SLOPE GUIDE ..i'_"-D-.._..Q_'_'S SIGHT AND HOLD THIS GUIDE LEVEL WITH A VERTICAL •,, _ .."..TREE, A CORNER OF A STRUCTURE, A POWER LfNE .':_'i:... I .." ..POLE, OR A FENCE, I _: . """ ...... - Page 18 Sears reparara, gratis todo defecto en el material y la mano de obra. Si la recortadora para mala hierba Craftsman se usa para fines comerciales o de arriendo, esta garantfa solo se aplica por noventa (90) dfas a partir de la fecha de compra.
- Page 19 La operaci6n de cualquier recortadora puede hacer que salten objetos extrafios dentro de sue o os, Io que puede proclucir claflos graves en estos. Siempre use anteojos de seguridad o protecci6n para los ojos mientras opere su recortadora o cuando haga ajustes o reparaciones.
- Page 20 • Alejarse de la zona de abastecimiento II. OPERACION EN PENDIENTE carburante antes de poner en marcha. LOS accidentes ocurren con ma.s frecuencia • Nunca haga funcionar una maquina dentro en las cuestas. Estos accidentes ocurren de un area cerrada. debido a resbaladas o cafdas, las cuales •...
- Page 21 Lea estas instrucciones y este manual PARA REMOVER LA RECORTADORA completamente antes de tratar de montar u LA CAJA DE CART(_N operar su nueva recortadora. Remueva las partes sueltas que se IMPORTANTE: Esta recortadora viene SIN incluyen con la recortadora. ACEITE O GASOLINA en el motor.
- Page 22 FAMILIARiCESE CON SU RECORTADORA LEA ESTE MANUAL DE USUARIO Y LAS REGLAS DE SEGURIDAD ANTES DE OPERAR RECORTADORA. Compare las ilustraciones con su recortadora para familiarizarse con la ubicaci6n de los diversos controles y ajustes. Guarde este manual para referencia en el futuro.
- Page 23 PARA AJUSTAR ALTURA DEL RECORTE _PRECAUCI6N: Pare el motor y espere hasta que todas la piezas m6viles se hayan detenido completamente. Desconecte el alambre de la bujia de la bujia y p6ngalo en donde no pueda entrar en contacto con esta. La altura del corte puede ser fijada en seis (6) El funcionamiento d e cualquier recortadora diversas...
- Page 24 /,_1_11Pb UP I-IAUIr_H AHHAN(.;AH _ADVERTENCIA; La experiencia ha !ndjca,,do que los comoustibles mezclaaos con alconol MOTOR (conociclos como gasohol, o el uso de etanol o AGREGUE ACEITE metanol) pueden atraer la humedad, la que Su recortadora fue enviada sin aceite en el conduce a la separation y formaci6n de _lddos motor.
- Page 25 AVISO PARA RECORTAR PARA HACER ARRANCAR EL MOTOR • Fije el control de la aceleraci6n a la posici6n Para hacer arrancar un motor frio, empuje rapida. Si las malas hierbas o el cesped est_n el cebador tres (3) veces antes de iniciar. altos y gruesos, opere la recortadora a una Empuje firmemente.
-
Page 26: Del Producto
Revisar si hay sujetadores sueltos Limpiarla recortadora Limpiardebajo de lacubiertadel motor V' 2 Revisarlascorreasy laspoleas impulsadas Verifique/reemplazar laslineas i_ 3 dela recortadora Revisarel niveldelaceite Ik _ 1,"I,2 M Cambiarel aceitedel motor Limpiarel filtro de aire el silenciador Inspeccionar R Limpiaro/cambiar l a bujia Cambiarel cartuchode papeldel filtro de aire 1 - Cambiar m_s a menudo cuando se opere bajo carga pesada o en ambientes con altas temperaturas. - Page 27 RECORTADORA Siempre observe las reglas de seguridad cuando haga el mantenimiento. LLANTAS • Mantenga las Ilantas sin gasolina, aceite o substancias quimicas para control de insectos que pueden daFlar la goma. • Evite los tocones, las piedras, las gnetas profundas, los objetos afilados y otros peligros que pueden dahar alas Ilantas.
-
Page 28: Para Cambiar
IVlU I UH PARA CAMBIAR EL ACEITE DEL MOTOR LUBRICACION AMISO: Antes de inclinar la recortadora para Use solamente aceite de detergente de alta drenar el aceite, drene el tanque de calidad clasificado con la clasificaci6n SF-SJ combustible haciendo funcionar el motor hasta de servicio API. -
Page 29: Filtro De Aire
SILENCIADOR FILTRO DE AIRE Su motor puede sufrir avedas y funcionar de Inspeccione y cambie el silenciador siesta manera incorrecta con un filtro del aire sucio. corroido pues producir un peligro de incendio y/ o da,_o. Sustituir el papel del cartucho una vez al argo o BUJiA tras 100 betas de funcionamiento, mas a... - Page 30 _k PRECAUCION" Antes de dar cualquier PARA REMOVER/AJUSTAR LA CORREA sercicio o de hacer ajustes: DE IMPULSION DEL CABEZAL DE LA Pare el motor. RECORTADORA Remueva el tomilto en el frente de la Asegerese que las Ifneas rotatorias y que cubierta del chasis.
- Page 31 Remueva la correa de la polea del cabezal 12. Instale la correa y el conjunto del piSon de la recortadora. Ioco en la recortadora, vuelva a conectar Observe la posici6n del cable de control y un resorte del pi,5on Ioco y monte el pifion del resorte de Ilamada del piSon Ioco.
- Page 32 Prepare inmediatamente su recortadora para gasolina _cideca puede nahar el sistema de el alma cenamiento al final de cada temporada combustible de un motor durante el perido de alcamenmiento. o si la unidad no se va a usar por 30 dfas o m_s.
- Page 33 SOLUCION DE PROBLEMAS PROBLEMA CAUSA CORRECCION 1. Filtro de aire sucio. No arranca 1. Limpie/cambie el filtro de aire. 2. Sin combustible. 2. Llene el estanque de combus tJble. 3. Combustible rancio. 3. Drene el estanque y vuelva a Ilenado con combustible limpio nuevo.
- Page 34 CRAFTSMAN WEED TRIMMER - - MODEL NUMBER 917.773702...
- Page 35 CRAFTSMAN WEED TRIMMER -- MODEL NUMBER 917.773702 PART DESCRIPTION - - - Engine, Briggs & Straiten, Model Number 122H02-0110-D1 (See Breakdown) 150406 Bolt, Engine Mounting 3/8-16 174613 Pulley, Engine (includes Setscrew, Key #4) STD502502 Setscrew, Pulley 169821X479 Handle, Lower 150078 Screw, Hex Washer Head 5/16-18 x .75...
- Page 36 44 21 --26 3-_. o--31...
- Page 37 CRAFTSMAN WEED TRIMMER-- MODEL NUMBER 917.773702 PART DESCRIPTION 174031X558 Chassis Assembly 169802 Line, Trimmer .155 diameter x 18.75 long 173715 Screw, Self-Tapping 5/16-18 x 1 169790 V-Belt 172145X004 Bracket, Idler 166O42 Pulley, Idler, V-Groove 173716 Bolt, Hex Head 3/8-16 x 125...
- Page 38 I_I'(ILI_H & HI HAl I UN 4-UYULP-. I:NL_IN I" MODEL NUMBER 122H02-0110-D1 [1019 LABEL KIT I 287 '_ S231_ 5o_S4_' 383_ 5251 33_;_ 524 _ 635 _ 307_ 1095 VALVE GASKET SET 146_ "/r REQUIRES SPECIAL TOOLS TO INSTALL, SEE REPAIR INSTRUCTION MANUAL, 11058 OWNER'S MANUAL I...
-
Page 39: Briggs & Stratton
BRIGGS & STRATTON 4-CYCLE ENGINE MODEL NUMBER 122H02-0110-D1 9661 159_ 443_ _529'(_) 970_) 163_ 6330 137_ 127_ 121 CARBURETOR OVERHAUL __ I 6330 104_ 276 _ 127 _) - Page 40 BRIGGS & STRATTON 4-CYCLE ENGINE MODEL NUMBER 122H02-0110-D1 949 ' _: _ ]' 332 r_-_ 19o' 65'_' 592i_' 1211 689, ::;, 1210 : I< t ._G_3_4. % if,,,_ ,I, 597_!+...
- Page 41 BRIGGS & STRATTON 4-CYCLE ENGINE MODEL NUMBER 122H02-0110-D1 358 ENGINE GASKET 842_ 524_ ,_668 334_ PART PART DESCRIPTION DESCRIPTION 691092 493260 Cylinder Assembly Screw (Engine Sump) 399269 692315 Flywheel Kit-Bushing/Seal 299819 222698 • Seal-Oil (Magneto Side) Key-Flywheel 493279 499429 Sump-Engine Piston Assembly (Standard) 691160 499430...
- Page 42 _HI_5 & fSTHATTON 4-(;YCLE. ENGINE MODEL NUMBER 122H02-0110-D1 PART PART DESCRIPTION DESCRIPTION PawI-Ratchet 695759 Screw (Connecting Rod) 281505 Valve-Exhaust 231082 Nut (Governor Control Lever) 262651 Valve-Intake 495264 Dipstick 262652 69127O • Seal-Dipstick Tube Spring-Valve (Intake) 692296 Tube-Dipstick 691270 Spring-Valve (Exhaust) 495265 Grommet 694O86...
-
Page 43: Guia De Inclinacion
GUIA DE INCLINACION ..;"'-7-6...G..RADo_ VEA Y DETENGA ESTA GUIA DE NIVEL CON UN ARBOL EN POSICION • ..7..-.. VERTICAL, LA ESQUlNA DE UNA ESTRUCTURA, UN POSTE DE LUZ O UNA CERCA. I......Opere una recortadora de maleza en sentido diagonal a tra- I _,,_. - Page 44 Get it fixed, at your home or ours! For repair of major brand appliances in your own home... no matter who made it, no matter who sold it! 1-800-4-MY-HOME ® Anytime, dayornight (1-80O469-44_) (U.S.A. andCanada) _,se_lll_.com www.sears.ca For repair of carry-in products like vacuums, lawn equipment, and electronics, call for the nearest Sears Parts and Repair Center.
Need help?
Do you have a question about the 917.773702 and is the answer not in the manual?
Questions and answers