Advertisement
Quick Links
Download this manual
See also:
Spare Parts Catalog
SERVICE MANUAL
(TROUBLE SHOOTING AND REPAIRING TIPS)
Fourth Edition – February 2006
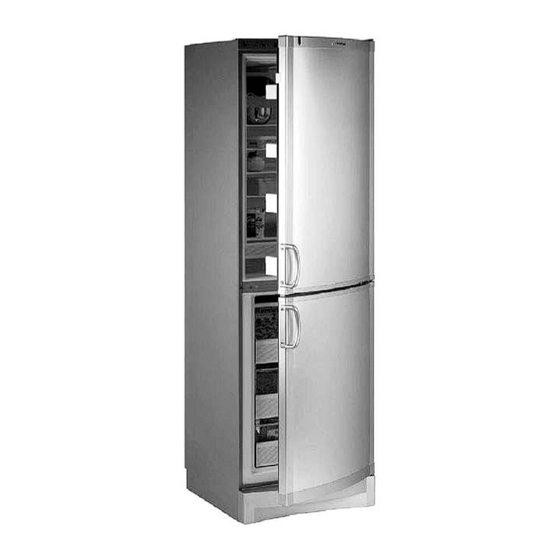
CONSERV REFRIGERATOR
MODELS
375 / 1200 SERIES ( OLD & NEW)
Advertisement

Related Manuals for Equator 375


Summary of Contents for Equator 375
- Page 1 SERVICE MANUAL (TROUBLE SHOOTING AND REPAIRING TIPS) Fourth Edition – February 2006 CONSERV REFRIGERATOR MODELS 375 / 1200 SERIES ( OLD & NEW)
-
Page 3: Warranty Information
Your Equator appliance is protected by this warranty under normal, personal, family or household use (1 Year), and limited commercial use (90 days) in the USA and Canada. WARRANTY Equator Corporation undertakes to the consumer-owner to repair or, at Equator Corporation’s option, to replace... -
Page 5: Troubleshooting Chart
1.1 Trouble-Shooting Chart Disturbance Cause Unit does not Wall socket is dead. Check installation. refrigerate or freeze, compressor does not operate. Mains cable is defective. Thermostat is defective. Defective winding in compressor. Starting device is defective. Wiring for starting device is incorrectly installed. - Page 6 D isturbance Cause O il present in system after horizontal transport. Locked rotor (fault in compressor). Ambient temperature very low. O il in compressor too cold, possibly in connection with undervoltage. Compressor tries to Can be normal. start but does not Ventilation is perhaps always succeed on insufficient.
- Page 7 Disturbance Cause Defective thermostat. 1.Turn thermostat knob to Compressor starts Extremely high normally but stops voltage. again. High ambient temperature. Poor ventilation. Can be normal. Unit Leakage in system refrigerates/freezes with resulting loss of too much, normally, refrigerant. too little or not at all. Compressor may run continuously.
- Page 8 Ditrubance Cause No-Frost No-Frost No-Frost Evaporator blocked by ice. Refrigerates/freezes Capillary tube too little or not at all. completely or Compressor runs partially blocked continuously. (material from filter in capillary tube opening). Capillary tube is inserted so far up in the filter that it touches the filter net.
- Page 9 Disturbance Cause Ice blockage in capillary tube. No or very little compressor capacity. Capillary tube mounted incorrectly at injection site (roll- bond evaporator). Insufficient Thermostat is set too refrigerating/freezing. high. Trouble-shooting Remedy Heat injection area on Blow N2 through system. evaporator with cloth Install outsize service with hot water.
- Page 10 Disturbance Cause Unit has recently been filled with large quantities of food. Built-in thermometer is defective. User’s thermometer is defective. Ambient temperature is below 0°C. refrigerant has collected in the condenser. Ambient temperature is too high, possibly because unit is too close to a heat source, or ventilation is insufficient.
- Page 11 1.2. Trouble-Shooting in the Electric Circuit. Before systematic trouble-shooting is commenced, check to ensure that: - The fuses are intact. - The correct voltage has been used (vo!trneter). - The electrical equipment used is suitable for the cam- pressOr. - The wiring has been correcUy installed (compare with wiring diagram as found in the spare parts list).
- Page 12 1.3. Checking for Leakage to Frame For checking whether there is leakage between the live parts and the frame, the insulation resistance can be tested using an ohmmeter, megger or high-voltage testing device. An ohmmeter can be used for a rough check. When investigating the wires on the unit, a clamp from the ohmmeter is placed on the unit earth terminal.
- Page 13 Starting device with HST Connect a voltmeter between terminals 10 and 13 on the start- ing device. If no voltage can be measured, either the mains cable or the socket is defective. Connect a voltmeter between terminals 10 and 14 on the start- ing device, It no voltage can be measured, a defective ther- mostat or thermostat wiring is indicated.
- Page 14 1.6. The PTC Starting Device It should be noted that starting device 1 03N001 2, which is used for the freezing compressor of refrigerator/freezer uprights, is installed differently than is starting device 1 03N001 1, which is used for the refrigerating compressor.
- Page 15 ~process ppe~. the temperature in the evaporator at which the refrigerant evaporates can be read. This temperature is normally from -15 C to -25 C in a refrigerator and from -3CC to -35 C in a freezer. These temperatures apply when the unit is set at its coldest position.
- Page 16 Examples of trouble-shooting using a manometer on the suc- tion side (process pipe) and a service valve: The system is blocked. The suction pressure is very low. Pressure equalizing takes place very slowly or not at all. Cause: Ice blockage in the capillary tube at the filter or blockage in the system for other reasons.
- Page 17 MAKING REPAIRS TO THE REFRIGERATING SYSTEM 2.1. Opening the Refrigerating System with Refrige- rant R600a (Isobutane) for Repairs The Possibility of Fire/Explosion exists Therefore, it is important to pay attention to the following points before commencing repairs of the refrigerating system: 1.
- Page 18 Actual Evacuation After mounting of the filling hose, the system is ready for the actual evacuation. Evacuate until a stable vacuum of 1 mbar has been reached. Check for stability of the vacuum by closing the valve for the vacuum pump (12). If the vacuum gauge needle falls appreciably, possible leakage in the system is indicated.
- Page 19 First Evacuation of Appliances with R600a in the System 1. Drilling and tapping of filter drier, after thorough cleaning where the gasket of the tongs must be tight. 2. Mount the hose - open the valve. The system can then be blown through with nitrogen (see section: The Blowing Process).
- Page 20 The Blowing Process of the System. the Filling Sta- tion and the Vacuum Pumo and Opening of the Sys- 7. Drilling and tapping of the process pipe. 8. Connect dry nitrogen and equalize the pressure in the system. 9. Open the valve on the tongs at the filter drier and the spherical valve (18).
- Page 21 Actual Evacuation and Filling of R600a 1. Mounting of the filling hose with spherical valve - see fig. 7. Thereafter, evacuate. 2. Testing of the microscales with a weight. 3. Connect the refrigerant tank to the filling hose (16), and open the valve (9). Evacuate the filling hose and the manifold by opening the valve for the vacuum pump (12) and the vacuum gauge (10).
- Page 22 2.1.1. Opening the Refrigerating System for Repairs with Recovery of Refrigerant. If a hermetic refrigerating system is to function correctly and have a reasonably long life, it is essential that the amount of impurities pre-sent in the system, i.e. moisture, foreign gases, dirt, etc., be kept at a minimum.
- Page 23 Pinch the charging pipe with pliers. Remove the service valve and solder the hole together. Brush off all solderings in the system and check for possible leakage with an electronic leak detector. Check the pressure side when the compressor is in operation and the suction side when the system is pressure equalized.
- Page 24 Evacuation with Recovery of Refrigerant 1. Drilling and tapping of filter drier after thorough cleaning where the gasket of the tongs must be tight. 2. Mount the refrigerant bag - open the valve. 3. Close the valve after pressure equalizing-dismount the refrigerant bag.
- Page 25 Opening the System 7. Drilling and tapping of process pipe. 8. Connect dry nitrogen and equalize the pressure. 9. Open the system with capillary tube scissors and remove the drilling and tapping valve. The tongs are removed from the used filter drier and dry nitrogen (N2) is now blown through the process pipe and into the system (see Section 2.1.1.
- Page 26 2.1.2. Emptying used Refrigerant to Pressure Vessel from Refrigerant Bag Connect the suction valve on the emptying unit with hose to the outlet valve on the emptying rack for refrigerant bags. Open the main valve and the valve for the bags to be emptied. Connect the pressure valve on the emptying unit to the vessel for used refrigerant.
- Page 27 2.1.3. Opening the Refrigerating System with Refrigerant R134a for Repairs As R134a has other properties than the R12 used till now, it is important to note the following before opening the hermetic refrigerating system: 1. Service Tools Do not use service tools that have been used for chlorine- containing refrigerants because microscopic chlorine resi- dues may cause a chemical reaction in the refrigerating system.
- Page 28 2.2. Replacing the Filter Drier Some moisture and impurities will always be accumulated in the filter drier, both from residue left in the system after installation and from contamination given off by the compres- sor, pipe system and refrigerant. When repairs are made to the refrigerating system, the filter will often be unable to absorb the extra contamination which results, and ice blockage and contamination of the capillary tube can result.
- Page 29 Capillary tube broken off without the use of special-purpose pliers. Capillary tube broken off using special-purpose pliers or capillary tube scissors. In order to ensure an efficient utilization of the filter drier, it should be positioned with an inclination of at least 15° and with the capillary tube lowered.
- Page 30 2.3. Replacing the Compressor If trouble-shooting in the electric circuit or volumetric measurements indicate that the compressor is defective, a new compressor must be installed. The following procedure is to be used: Ensure that the new compressor is ready for installation. Replace the electrical equipment.
- Page 31 Dismounting: 1. a) Refrigerator evaporator: Release the evaporator by removing the 4 screws for the inner cabinet and thermostat phial. Freezer evaporator: Remove the shelf flaps and baskets. Release by pulling the front edging out of the clips holding it to the middle of the shelves.
- Page 32 2.5. Replacing the Thermostat Uprights Dismount the phial tube and straighten out the phial. Draw off the insulation, if any, around the phial. The phial can now be drawn out of the lead-in pipe from the back of the unit. After the plug has been removed from the socket, remove the cover for the top panel and the panel box.
- Page 33 Positioning of the Thermostat Phial in NFG 307 from No. 501----- In order to ensure the proper functioning of the thermostat 90 mm of the free end of the capillary tube is to serve as thermostat phial. In case of failing thermostat functioning and a possible replacement of the thermostat, be sure that the phial part is placed sufficiently far into the cabinet.
Need help?
Do you have a question about the 375 and is the answer not in the manual?
Questions and answers