
Related Manuals for Sharp VL-Z800S


Summary of Contents for Sharp VL-Z800S
- Page 1 LIQUID CRYSTAL DISPLAY CAMCORDER VL-Z800S OPERATION MANUAL PixLab Install Key H2732778 — 6848310...
- Page 3 Before using the camcorder, please read this operation manual carefully, especially page vi. OPERATION MANUAL ENGLISH WARNING CAUTION To prevent shock, do not open the To prevent fire or shock hazard, cabinet. No user serviceable parts do not expose this apparatus to inside.
-
Page 4: Table Of Contents
Contents Supplied Accessories ..................v Optional Accessories ..................v Precautions ......................vi Operation References Part Names ............. 1 Warning Indicators ..........4 Preparation Attaching and Removing the Battery Pack ..... 6 Charging the Battery Pack ........8 Powering the Camcorder from an AC Outlet ..9 Inserting and Removing a Cassette ..... - Page 5 Control Buttons ............. 32 Useful Features Using the Mode Screens ........32 Using the Menu Screens ........33 Camera Recording Setting the Digital Zoom ........34 Backlight Compensation (BLC) ......35 Gain-up ..............36 Fine Picture ............37 Using the Built-in LED Video Light ......38 Fade In and Fade Out ...........
- Page 6 Contents Playback Advanced Features Using the Time Code ..........67 Audio Dubbing Feature ......... 68 Selecting the Audio Playback Mode ..... 70 Editing ..............71 Recording from an External Source ...... 72 Editing with the DV Terminal (IEEE1394) ....74 Using the Camcorder as a Converter ....
-
Page 7: Supplied Accessories
Supplied Accessories Battery pack Audio/video/S-video Power cord BT-L227 AC adapter cable CR2032 type CR1216 type lithium battery lithium battery for remote control for camcorder Remote control Lens cap 8 MB SD Memory Card CD-ROM USB cable Optional Accessories Standard-life External battery with battery pack Zoom microphone hand strap... -
Page 8: Precautions
Precautions • • Always respect prohibitions or restric- Before recording an important scene, tions on the use of electronic equipment please perform the recording test, then on commercial flights or in other sensi- playback to check if the scene was re- tive areas. -
Page 9: Dew Formation
Dew Formation For example, when bringing the camcorder indoors after skiing, place it in • What is “dew formation”? a plastic bag. When cold water is poured into a glass, dew drops form on the glass. This clinging of water drops is called dew formation. •... -
Page 10: Dirty Video Heads
If the video heads become clogged, the • After about 20 seconds, video head v indicator appears on the screen. Contact cleaning automatically finishes, and the nearest SHARP service centre or your “EJECT THE CASSETTE.” displays. dealer for further advice. Remove the cleaning tape. -
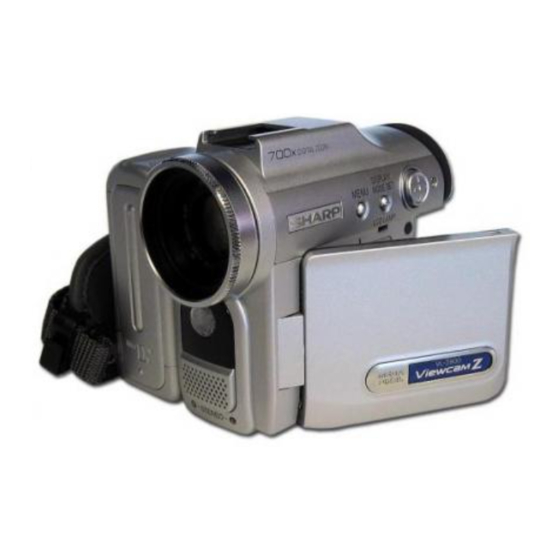
Page 11: Operation References
Operation References Part Names For details on the use of each part, refer to the page number indicated in parentheses. Front view Zoom microphone Operation button (p. 32) shoe* (p. 48) Zoom lens Built-in LED video DISPLAY/MODE SET button (p. 32)/ light (p. - Page 12 Operation References Left view USB terminal (p. 93) Earphones jack (p. 28) LCD monitor (p. 20) DC IN jack (pp. 8, 9) AV terminal (pp. 31, 71, 72, 76) Terminal cover (pp. 28, 31, 71, 72, 74, 76, 93) DV terminal (pp. 74, 76) Lithium battery cover (p.
- Page 13 Right view Power Zoom Wide angle/ Window cleaning cover PHOTO button Telephoto control (p. 24)/ (p. 105) (pp. 41, 55, 79) VOLume control (p. 30) Viewfinder (pp. 18, 19) Media Selection switch (V Tape mode/u Card STANDBY indicator mode selection (p.
-
Page 14: Warning Indicators
L AMP close to the end of its service life. Call your local L AMP authorized Sharp dealer to have it replaced. The battery is almost depleted when the camcorder transfers data through the USB cable. Use the AC adapter or fully charged... - Page 15 Displayed for Description of warning 5 seconds The card is not inserted or is inserted improperly. Check that it is properly inserted (see page 11). MEMORY CARD The capacity of the card is full and cannot store any more images. MEMORY CARD Delete unnecessary images (see page 86) or replace the card with...
-
Page 16: Preparation
Preparation Preparation Attaching and Slide the battery pack in the direction of the arrow with the “m” mark facing Removing the Battery out. Pack Attaching Power switch “m” mark Make sure that the Power switch is set to OFF. Push the battery pack in the direction of the arrow until it clicks. - Page 17 Slide the battery release in the pack while pressing the release. direction of the arrow. • Use only SHARP model BT-L227 battery packs with this camcorder. Use of other batteries may create a risk of fire or explosion.
-
Page 18: Charging The Battery Pack
• See pages 104 and 105 for more information on using the battery pack. • Charge only SHARP model BT-L227 battery packs. Other types of battery packs may burst, causing personal injury and damage. -
Page 19: Powering The Camcorder From An Ac Outlet
Powering the Hold down the Lock button and set the Power switch to v or w. Camcorder from an • The POWER/CHARGE (RED) AC Outlet indicator lights up green. Notes: You can also power the camcorder from a • BEFORE REMOVING THE DC PLUG, power outlet by using the supplied AC ALWAYS STOP RECORDING OR PLAY- adapter. -
Page 20: Inserting And Removing A Cassette
Preparation Inserting and Wait for the cassette holder to fully retract. Close the compartment door Removing a Cassette by pressing its centre until it clicks into place. Inserting Attach the power source to the camcorder, then slide and hold the cassette compartment door release as you open the cassette compart- ment door. -
Page 21: Inserting And Removing A Card
Inserting and Removing Removing a Card Perform steps 1 and 2 above, push the card and release slowly (1). Then pull the card straight out (2) as shown below. You can use an SD Memory Card (supplied) or a MultiMediaCard (commercially available) for storing still images. -
Page 22: Installing The Lithium Batteries
Preparation Installing the Lithium Insert the smaller lithium battery into the compartment with the H side of Batteries the battery facing out. Installing the Memory Battery CR1216 type The supplied CR1216 type lithium battery is lithium battery used to store the memory of the date and time settings. - Page 23 Installing the Battery to Notes on the Use of the Lithium Battery Remote Control CAUTION: Danger of explosion if The supplied CR2032 type lithium battery is incorrectly replaced. For battery is used to power the remote camcorder, replace only with same or control unit.
-
Page 24: Selecting The Language For The On-Screen Display
Preparation Selecting the Language Press the MENU button to display the menu screen. for the On-screen Display Press l or m to select Z, then press the centre of the Operation Available modes: button. All modes Press l or m to select “LANGUAGE” This camcorder allows you to choose (“SPRACHE”... -
Page 25: Setting The Date And Time
Setting the Date and Press m or l to select “2” (day), then press the centre of the Opera- Time tion button. SE T T I NG 2 0 0 4 Available modes: All modes 0 0 0 Example: Setting the date to 2 June 2005 Press m or l to select “6”... -
Page 26: Using The Lens Cap
Preparation Changing to the 12-hour Using the Lens Cap Time Mode Attach the strap of the lens cap to the hand strap as shown below. After performing step 8 on the previous page, press l or m to select “12H/24H”, then press the centre of the Operation button. -
Page 27: Adjusting The Hand Strap
Using the Grip Adjusting the Hand Strap Rotate the grip 135° forward or 105° downward so that you can record images easily from high or low angle (see page 21). Open the hand strap flap (1) and grip strap (2). 135°... -
Page 28: Detaching The Lens Hood
Preparation Detaching the Lens Using the Viewfinder Hood You can record the subject using the electronic viewfinder. You can also watch Before using a commercially available playback through the viewfinder. conversion lens, detach the lens hood as shown below. Viewfinder Power switch Pull out the viewfinder completely. -
Page 29: Adjusting The Dioptre
Closing the viewfinder Adjusting the dioptre Adjust the dioptre according to your Push in the viewfinder completely. eyesight when the picture in the viewfinder or the characters on the on-screen display is not clear. Pull out the viewfinder completely. Hold down the Lock button and set the Power switch to v. -
Page 30: Using The Lcd Monitor
Preparation Using the LCD • You can also fold the LCD monitor into the camcorder with the screen Monitor facing out for watching playback on the monitor. You can use the LCD monitor to play back recordings that you have made or to watch the subject during recording. -
Page 31: Tips On Recording Positions
Tips on Recording Positions To create images that are easy to watch during playback, try to record with an upright posture and steady hands to prevent a shaky image. Holding the camcorder Put your right hand through the hand strap, and place your left hand under the camcorder for support. -
Page 32: Basic Operations
Basic Operations Basic Operations Camera Recording Camera Recording Selecting the Camcorder Mode Media Selection switch This camcorder includes functions for use as both a video camera for recording and playing back images on tapes and as a digital still camera for recording and playing back still images on cards. -
Page 33: Easy Camera Recording On Tape In Full Auto Mode
Press the Record Start/Stop button to Easy Camera begin recording. Recording on Tape in Full Auto Mode Available mode: R E C Tape Camera • Before you start recording, perform the operations described on pages 6 through 21 to prepare your camcorder for Note: recording. -
Page 34: Zooming
Basic Operations Camera Recording Zooming To pause recording Press the Record Start/Stop button again. Available modes: Recording pauses, and the camcorder Tape Camera, Card Camera enters Recording Standby mode. Zooming allows you to move visually closer to or further from a subject without physi- cally changing your position. -
Page 35: Power Standby Mode
Power Standby Mode • The camcorder will enter stop mode automatically 5 minutes after setting Power Standby mode if it remains in Recording Available mode: Standby mode after cancelling Power Tape Camera Standby mode. — When Power Standby mode, for example, Power Standby mode allows you to prevent is cancelled after 3 minutes, the accidental recording by locking all... -
Page 36: Auto Focus
Basic Operations Camera Recording Auto Focus Remaining Recording Time Display Available modes: Tape Camera, Card Camera Available mode: Tape Camera The camcorder is preset to Auto Focus mode, which is designed to focus on most When the camcorder is recording in Tape types of subjects. -
Page 37: Remaining Battery Power Display
Remaining Battery Information Display Power Display for Battery Usage Available modes: Available modes: All modes All modes When using the camcorder with the battery When the camcorder operates with the pack as the power source, the remaining battery pack, the battery usage indicator battery power indicator is displayed. -
Page 38: Using Earphones (Commercially Available)
Basic Operations Camera Recording Using Earphones Adjusting the Phones (Commercially Volume Available) Available mode: Tape Camera Available modes: Tape Camera, Tape Playback You can adjust the phones volume if sound through the earphones is difficult to hear. You can monitor the sound via stereo earphones (commercially available) during Set the Media Selection switch to V, playback or recording. -
Page 39: Playback
Basic Operations Playback Tape Playback Note: • If you press the Record Start/Stop button in Tape Playback mode, the “g” mark appears Available mode: and the camcorder enters Recording Tape Playback Standby mode. If you do not intend to record, press l to turn the “g”... -
Page 40: Volume Control
Basic Operations Playback Volume Control Video Search Available mode: Available mode: Tape Playback Tape Playback When the camcorder is in Tape Playback The video search function makes it easy to mode, push the Volume control to the L or search for a desired scene on the tape. + side to increase (1) or decrease (2) the Searching for a Scene Near volume. -
Page 41: Watching Playback On A Tv
Watching Playback Note: • Check that the camcorder, TV, VCR and on a TV other equipment to be used are turned off before making any connections. Picture noise or malfunction may occur Available modes: if any of the above is left on while Tape Playback, Card Playback making a connection. -
Page 42: Useful Features
Useful Features Useful Features Using the Mode Screens Control Buttons Operation button In the mode screens, you can adjust the Media Selection switch camcorder settings by using the Operation button. Set to the desired camcorder mode by using the Media Selection switch and the Power switch (see page 22). -
Page 43: Using The Menu Screens
Using the Menu Screens Press l or m to select the desired menu item (DGTL ZOOM), then press the centre of the Operation button. Use the menu screens to adjust the various Example camcorder settings. Operation button S E T T I N G 1 Q K . -
Page 44: Camera Recording
Useful Features Useful Features Camera Recording Setting the Digital The “D” digital zoom indicator is displayed during digital zooming. Zoom Available mode: Tape Camera You can select three different zoom ranges: 1–10K (optical zoom), 10–40K (digital zoom) or 10–700K (digital zoom). The digital zoom allows you to record powerful close-up pictures with the same operation as normal zooming. -
Page 45: Backlight Compensation (Blc)
Press the DISPLAY/MODE SET Backlight button to turn off the mode screen. Compensation (BLC) • “x” appears when on-screen indicators are turned on, indicating that the backlight compensation is now Available modes: working. Tape Camera, Card Camera When the subject is backlit, the image will P A U S E P A U S E appear dark if it is recorded normally. -
Page 46: Gain-Up
Useful Features Camera Recording To cancel the gain-up function Gain-up Select “OFF” in step 3 above. Available modes: Notes: Tape Camera, Card Camera • You may experience some picture noise in Gain-up mode, which increases when the When you are recording in a dark or poorly e appears. -
Page 47: Fine Picture
Fine Picture Press l or m to select the desired fine picture setting then press the centre of the Operation button. Available modes: Tape Camera, Card Camera F I N E P I C . L E V E L 1 When the subject is backlit, the image will •... -
Page 48: Using The Built-In Led Video Light
Useful Features Camera Recording Using the Built-in LED Press l or m to select the desired LED light setting, then press the Video Light centre of the Operation button. LE D L I GHT Available modes: Tape Camera, Card Camera Press the DISPLAY/MODE SET button to turn off the mode screen. -
Page 49: Fade In And Fade Out
Fade In and Fade Out Press the DISPLAY/MODE SET button until on-screen indicators appear. Available mode: Tape Camera Press the Record Start/Stop button to begin recording. The fade function allows you to gradually • The picture turns white, and the bring the image and sound in or out at the image and sound fade in. -
Page 50: Quick Return
Useful Features Camera Recording Quick Return Press l or m to select “START”, then press the centre of the Operation button. Available mode: • “SEARCH” flashes, and the tape Tape Camera begins fast forwarding or rewinding If while playing back your tape you want to to the end of the last recorded scene. -
Page 51: Edit Search
Edit Search Still Recording on Tape Available mode: Tape Camera Available mode: Tape Camera The edit search function lets you search, without switching from Tape Camera mode You can record continuous still images of to Tape Playback mode, for the point on the subjects. -
Page 52: Digital Image Stabilization (Dis)
Useful Features Camera Recording Digital Image Press the MENU button to turn off the menu screen. Stabilization (DIS) • The DIS indicator only appears when the on-screen indicators are turned Available mode: Tape Camera DIS indicator The digital image stabilization (DIS) function P A U S E allows you to stabilize the image by electronically compensating for relatively... -
Page 53: Wide Mode
Wide Mode Power Save Mode Available mode: Available modes: Tape Camera All modes Wide mode lets you record scenes with Power save mode will turn off the squeezed images so that you can enjoy camcorder automatically to save battery high-density wide images when you power when the camcorder is not in use for playback the images via widescreen TV. -
Page 54: Self Recording
Useful Features Camera Recording Self Recording Set the Media Selection switch to V or u. Normal self recording Set the Power switch to v. • The subject is displayed in the Available modes: viewfinder, and a mirror image of the Tape Camera, Card Camera subject is displayed on the LCD monitor. -
Page 55: Self Recording With Reversed Grip
Self recording with reversed Open the LCD monitor to a 90° angle to the camcorder body (1), and then grip rotate it 180° vertically (2). Available mode: Tape Camera 90° Rotate the grip 105° and the LCD monitor 180° vertically so that you can record yourself while holding the grip. -
Page 56: Recording In Lp (Long Play Recording) Mode
Useful Features Camera Recording Recording in LP (Long Press the MENU button to turn off the menu screen. Play Recording) Mode • The long play recording mode indicator only appears when the on- Available mode: screen indicators are turned on. Tape Camera This camcorder allows you to record in LP P A U S E... -
Page 57: Selecting The 16-Bit Audio Recording Mode
Selecting the 16-bit Press l or m to select “16bit”, then press the centre of the Operation Audio Recording button. Mode AUD I O MODE 1 6 bit Available mode: Press the MENU button to turn off the Tape Camera menu screen. -
Page 58: Using The Zoom Microphone (Optional Accessory)
Useful Features Camera Recording Removing Using the Zoom Microphone (Optional Turn the screw in the opposite direction than when mounting, then pull off the zoom Accessory) microphone. Available mode: Notes: Tape Camera • Do not pick up the camcorder by the zoom microphone, as this may damage the With the optional zoom microphone VR- equipment. -
Page 59: Windbreak
Windbreak Mount the optional zoom microphone to the camcorder. Available mode: In Tape Camera mode, press the Tape Camera MENU button to display the menu screen. The windbreak function allows you to reduce annoying noise from strong winds Press l or m on the Operation when recording. -
Page 60: Using The Remote Control
Useful Features Useful Features Playback Playback Using the Remote Operating Control Aim the remote control at the remote sensor of the camcorder, and press the control buttons to operate. Available modes: All modes Use the remote control to operate the camcorder from a distance, such as when you want to record yourself in a scene, or when the camcorder is connected to a TV... -
Page 61: Tape Playback Functions With The Remote Control
Tape Playback Slow Functions with the The slow function allows you to play back images in slow motion. Remote Control During Tape Playback, press the Available mode: SLOW button (f). Tape Playback Then, select the tape direction using the advance/reverse buttons You can use the following playback (j or h). -
Page 62: Selecting The Date And Time Of Recording Display
Useful Features Playback Press the MENU button until the date Selecting the Date (or date and time) appears. and Time of Recording Display Available modes: P L A Y S T O P R EW All modes Notes: Follow the procedure below to select the •... -
Page 63: Picture Effect Playback
Picture Effect Press the DISPLAY/MODE SET button to turn off the mode screen. Playback To cancel picture effect playback Available modes: Tape Playback, Card Playback Select “OFF” in step 3 above. Notes: These picture effects let you play back • Video images in picture effect playback images with a more dramatic effect. -
Page 64: Rotate Playback
Useful Features Playback Rotate Playback Notes: • When executing rotate playback during Tape Playback, playback will stop. Press m to Available mode: begin rotate playback. Tape Playback • Even if the camcorder is in rotate playback mode, the image output via a DV connection This function allows you to play back will display as normal playback. -
Page 65: Copying An Image From Tape To Card
Copying an Image Press l or m to select the desired fine picture setting then press the from Tape to Card centre of the Operation button. Available mode: F I N E P I C . L E V E L 1 Tape Playback Press the DISPLAY/MODE SET You can capture your favourite image frame... -
Page 66: Stretch Playback
Useful Features Playback Stretch Playback To cancel stretch playback Press the centre of the Operation button Available mode: in step 3 above. Tape Playback Notes: Stretch playback allows you to playback a • “Squeeze” is an image compression squeezed image with the wide screen feel technology. -
Page 67: Advanced Features
Advanced Features Camera Recording Manual Focus Operation button Power Zoom control Available modes: Tape Camera, Card Camera Auto Focus may not be able to focus on the subject in the situations shown below. In such situations, set the camcorder to Manual Focus mode and focus manually. -
Page 68: Returning To Auto Focus
Advanced Features Camera Recording Returning to Auto Displaying the Manual Focus Setting Screen Available modes: Available modes: Tape Camera, Card Camera Tape Camera, Card Camera You can set Manual Focus mode to Auto You can manually adjust these settings as Focus mode with the operation below. -
Page 69: Adjusting White Balance
Adjusting White Press l or m to select “WHITE BAL.”, then press the centre of the Balance Operation button. Available modes: F U L L A U T O Tape Camera, Card Camera WH I T E B A L . A U T O I R I S G A I N... - Page 70 Advanced Features Camera Recording Locking To return to Auto White Balance mode Select “LOCK MODE” in step 4 in Press j in step 4 in “Selecting” on the “Selecting” on the previous page. previous page or step 3 in “Locking” to Aim the lens at a white object.
-
Page 71: Manual Iris
Manual Iris Press l or m to select “IRIS”, then press the centre of the Operation button. Available modes: Tape Camera, Card Camera F U L L A U T O WH I T E B A L . The camcorder is preset to Auto Iris mode, I R I S A U T O G A I N... -
Page 72: Manual Gain
Advanced Features Camera Recording Manual Gain Press l or m to select “GAIN”, then press the centre of the Operation button. Available modes: Tape Camera, Card Camera F U L L A U T O WH I T E B A L . When recording in a dark or poorly I R I S illuminated location with Auto Gain mode,... -
Page 73: Setting The Shutter Speed
Setting the Shutter Press the DISPLAY/MODE SET button to turn off the MANUAL SET Speed screen. Available modes: To return to Auto Shutter Speed Tape Camera, Card Camera mode The shutter speed is preset to auto mode, Press j in step 4 above to display “AUTO”. which automatically selects the optimal shutter speed for the ambient light. -
Page 74: Tips On Manual Settings
Advanced Features Camera Recording Tips on Using the Manual Setting the Shutter Speed Camcorder to Full Auto Mode • Fast shutter speeds can be used with the still recording functions (see pages 41 and 79) to record higher quality still Available modes: Tape Camera, Card Camera images of fast-moving subjects. -
Page 75: Scene Menu (Program Ae)
Scene Menu • The example screens shown are for Tape Camera mode. (Program AE) In Tape Camera or Card Camera mode, press the DISPLAY/MODE Available modes: SET button until the mode screen Tape Camera, Card Camera appears. You can set the camcorder to a shooting Press l or m on the Operation mode that will create the best results for a button to select “SCENE MENU”,... -
Page 76: Digital Picture Effects
Advanced Features Camera Recording Digital Picture In Tape Camera mode, press the DISPLAY/MODE SET button until the Effects mode screen appears. Press l or m on the Operation Available mode: Tape Camera button to select “PIC.EFFECT”, then press the centre of the Operation These digital picture effects let you record button. -
Page 77: Advanced Features
Advanced Features Playback Using the Time Code Press the MENU button to turn off the menu screen. • The time code appears when the on- Available modes: screen indicators are turned on. Tape Camera, Tape Playback The time code shows the hour, minute and AUDIO 2 second of recording, and the frame number (1 frame = approx. -
Page 78: Audio Dubbing Feature
Advanced Features Playback Audio Dubbing Audio Recording Feature In normal recording mode 12-bit audio recording Available mode: The audio is recorded in stereo on Audio 1. Tape Playback Audio 1: Stereo (left and right) sound Audio 2: No audio You can add narration to recordings made with this camcorder, while preserving the 16-bit audio recording original audio and video recordings. -
Page 79: Audio Dubbing
Audio Dubbing If you wish to change the dubbed audio or dub addi- Play back the Mini DV cassette tional scenes recorded in SP mode and locate the tape position where you wish to start Press the DISPLAY/MODE SET audio dubbing. button to turn off the audio dubbing screen. -
Page 80: Selecting The Audio Playback Mode
Advanced Features Playback Selecting the Audio Press l or m on the Operation button to select V, then press the Playback Mode centre of the Operation button. Press l or m to select “AUDIO”, Available mode: Tape Playback then press the centre of the Operation button. -
Page 81: Editing
Editing Cutting Unwanted Se- quences Available mode: Play back the tape to be edited on the Tape Playback camcorder, and locate the beginning Video editing lets you refine your videos by and end of the sequence you wish to removing unwanted sequences from your cut. -
Page 82: Recording From An External Source
Advanced Features Playback Recording from an Notes: • If your TV or VCR has a 21-pin Euro-SCART External Source connector, use the RCA/21-pin Euro-SCART conversion connector (QSOCZ0361CEZZ). Available mode: 21-pin Euro-SCART on TV or VCR Tape Playback RCA/21-pin Euro-SCART conversion connector You can use this camcorder to record or (QSOCZ0361CEZZ) edit videos from another source, such as a... -
Page 83: To Record From An External Source
To Record from an External Notes: • To pause recording, press m. Press m again Source to resume recording. • To operate by remote control, perform steps 1 In Tape Playback mode, press the to 6 above, and press the TAPE REC START/ MENU button to display the menu STOP button, then press the PLAY/STILL screen. -
Page 84: Editing With The Dv Terminal (Ieee1394)
Advanced Features Playback To Record to Video Equip- Editing with the DV ment Terminal (IEEE1394) See “Cutting Unwanted Sequences” on Available mode: page 71 using the video equipment as the Tape Playback recording source. Note: This camcorder can be used as a digital •... - Page 85 To Record from Video Equip- Notes: • Make sure that the video equipment from ment which you are recording can output dubbing signals via the DV terminal. Set the camcorder to Tape Playback • If the video equipment is not set to playback mode, and insert a Mini DV cassette.
-
Page 86: Using The Camcorder As A Converter
Advanced Features Playback Using the Camcorder Set the camcorder to Tape Playback mode, and make sure that playback is as a Converter stopped. Press the MENU button to display the Available mode: Tape Playback menu screen. Press l or m on the Operation You can use this camcorder to convert from button to select V, then press the analog signal (e.g. -
Page 87: Digital Still Camera Features
Digital Still Camera Features Camera Recording Selecting the Picture Set the Media Selection switch to u, then hold down the Lock button and Quality and Image set the Power switch to v. Size Available mode: Card Camera The picture quality of still images recorded Lock button on the card depends on the picture quality In Card Camera mode, press the... -
Page 88: Selecting The Image Size
Digital Still Camera Features Camera Recording Press the MENU button to turn off the Press l or m to select “IMAGE menu screen. SIZE”, then press the centre of the • The selected picture quality indicator Operation button. only appears when the on-screen indicators are turned on. -
Page 89: Card Recording
Card Recording Press the PHOTO button half-way down to focus on the subject. • The camcorder automatically focuses Available mode: on the subject. When it is set, you will Card Camera hear a sound and see T mark with green light, then the camcorder locks You can take a still picture in the same way the focus. -
Page 90: Recording With The Self-Timer
Digital Still Camera Features Camera Recording Recording with the Selecting the time-lag Self-timer When you hold the PHOTO button half-way down in 2 SEC mode, the camcorder will Available mode: lock the focus. This will prevent the camera Card Camera movement. - Page 91 Recording To cancel the countdown Press the PHOTO button in step 4. Select the desired time lag. To cancel the self-timer Press the DISPLAY/MODE SET button until the mode screen appears. Press the centre of the Operation button again in step 3. Notes: M A N U A L S E T...
-
Page 92: Formatting A Card
Digital Still Camera Features Camera Recording Formatting a Card Press l or m to select “FORMAT”, then press the centre of the Operation button. Available modes: • To cancel formatting, press l or m Card Camera, Card Playback to select “RETURN”, then press the centre of the Operation button. -
Page 93: Setting The File Numbering Method
Setting the File Press l or m to select “SERIAL” or “RESET”, then press the centre of the Numbering Method Operation button. F I L E NO. RE S E T Available mode: Card Camera Press the MENU button to turn off the The camcorder automatically assigns file menu screen. -
Page 94: Card Playback
Digital Still Camera Features Digital Still Camera Features Playback Playback Card Playback Note: • Holding down j or k increases the speed of motion of the selection frame. Available mode: Card Playback Press the centre of the Operation button. You can play back and view still images •... -
Page 95: Delete Protection
Delete Protection Press the centre of the Operation button to set delete protection. • The R indicator appears. Available mode: Delete protection indicator Card Playback You can prevent your important images recorded on the card from accidental erasure. In Card Playback mode, press the DISPLAY/MODE SET button until the P RO T E C T mode screen appears. -
Page 96: Deleting Stored Images
Digital Still Camera Features Playback Deleting Stored Press j, k, l or m to select the image to be deleted. Images Available mode: Card Playback Deleting One Stored Image D E L E T E You can delete unwanted images to free up P A G E NORMA L memory of a card for new images. -
Page 97: Deleting All Stored Images
Deleting All Stored Images Press l or m to select “YES”, then press the centre of the Operation You can delete all stored images on a card button. in one operation. • To cancel the setting, select “NO”. Notes: Press the DISPLAY/MODE SET •... -
Page 98: Print Order
Digital Still Camera Features Playback Print Order Press l or m to select “PRI. SELECT”, then press the centre of the Operation button. Available mode: • The PRINT indicator appears. Card Playback The print order function allows you to add print information called DPOF to still images recorded on a card. - Page 99 To cancel the print order for an image Note: • A warning indicator appears when the Select the image for cancelling out of print order is set to more than 999 print order in step 5 above, then press images. To turn off the warning indicator, press the Operation button.
-
Page 100: Direct Print
Digital Still Camera Features Playback Direct Print Press m to select the number of printouts, then press the centre of the Operation button. Available modes: Card Playback D I R E C T PR I N T When you connect the camcorder to a C H E C K T H E P R I N T E R Seiko Epson’s Direct Print compatible S E T T I N G S . -
Page 101: Transferring Data On Card To Computer
Transferring Data on Card to Computer To transfer data from the card, first install the software from the supplied CD-ROM. The CD-ROM includes “USB Driver”, “PixLab Media Browser” and other related files. • “USB Driver” is the software that transfers images from the camcorder when connecting to the PC with the supplied USB cable. -
Page 102: Installing The Usb Driver
Digital Still Camera Features Playback Installing the USB Driver For installing the USB driver in Windows XP or Windows 2000, you need to log in as the system administrator. Turn on the computer. • Do not connect the camcorder to the computer with the USB cable at this point. Insert the supplied CD-ROM containing the USB driver into the CD-ROM drive. - Page 103 Insert a card that contains recorded still images into camcorder. Connect the camcorder to the computer with the supplied USB cable as shown below. • It is recommended to use the AC adapter as a power source for extended periods of use.
- Page 104 Digital Still Camera Features Playback Using the PDF Manual Use of the installed “PixLab Media Browser” is explained in the PDF Operation Manual. Installing Adobe Reader Adobe Reader 6.0 (or Adobe Acrobat Reader 4.0 or later) is required for viewing the PDF manual.
-
Page 105: Disconnecting The Usb Cable
Transferring the data on Disconnecting the USB Card to Computer cable Connecting the camcorder to the Windows Me/2000/XP computer Close PixLab Media Browser. Connect the camcorder to the computer with the supplied USB cable (see page Click the “Safely Remove Hardware” 93). -
Page 106: Squeeze Playback
Digital Still Camera Features Playback Image Folders and File Squeeze Playback Names Available mode: Double-click the My Computer icon on the Card Playback PC and find a new drive called “Removable Disk (F:)” (or other drive letter, depending When you play back the images recorded on your PC configuration). -
Page 107: Slide Show Playback
Slide Show Playback Press l or m to select S, then press the centre of the Operation button. Available mode: Card Playback Press l or m to select “SLIDE SHOW”, then press the centre of the You can automatically play back consecu- Operation button. -
Page 108: Appendix
Appendix Appendix Picture/Backlight Press the MENU button to turn off the menu screen. Adjustments Note: • When adjusting the colour, the picture on the Available modes: LCD monitor may differ from the picture All modes actually recorded. Do not change the colour setting unless necessary. -
Page 109: Turning Off The Confirmation Sound
Turning off the Setting the Confirmation Sound Camcorder to Factory Presettings Available modes: All modes Available modes: All modes A confirmation sound is made when you turn on or off the Power switch, press the You can set the camcorder to the factory Record Start/Stop button, or perform other presettings in one operation. -
Page 110: Demonstration Mode
Appendix Demonstration Mode Press l or m to select “ON”, then press the centre of the Operation button. Available modes: Tape Camera, Card Camera DEMO MODE You can watch a brief demonstration of the Set the Power switch to OFF, then special camcorder features in Demo mode. -
Page 111: Useful Information
Useful Information • Horizontal panning (lateral movement) and tilting (vertical movement) should be done slowly to emphasize the wide expanse of Hints for Better Shooting a scene or the height of a building, and to make scenes easy to watch during •... - Page 112 Appendix • When a previously recorded Mini DV Copyright Protection cassette is used again for recording, the The digital VCR has far superior recording previously recorded material will be and playback ability than the traditional automatically erased. analog VCR, and in order to protect digital •...
- Page 113 MultiMediaCard, including cryptographic security for copyrighted Note: data and a selectable mechanical write- • Sharp Corporation cannot be held liable for data that is lost through improper protect switch. handling of the storage media. • The card slot on this camcorder is compat-...
-
Page 114: Battery Pack
(see page 7). Note: • Use only SHARP BT-L227 battery packs. These are designed specifically for use with this camcorder. - Page 115 Closing the viewfinder with fluorescent lamp may need to be replaced. the window cleaning cover opened may Contact the nearest SHARP service centre cause malfunction. or your dealer for further advice.
-
Page 116: Using Your Camcorder Abroad
Appendix Using Your Camcorder Abroad Television signal standards and electrical voltages and frequencies vary substantially from country to country. When you are abroad, check the sections below before using the AC adapter or connecting the camcorder to a TV. AC Adapter (Supplied Accessory) The supplied AC adapter is compatible with 50 Hz and 60 Hz electrical systems in the range of 110 V to 240 V AC. -
Page 117: Troubleshooting
Troubleshooting Before calling for service, please check the following troubleshooting table. Symptom Possible cause Suggested solution No power. Power source is not properly con- Connect power source properly nected. (pp. 6, 9). Battery pack is not charged. Charge battery pack sufficiently (p. - Page 118 Appendix Symptom Possible cause Suggested solution No image appears Video input channel on TV or TV Select video input channel or TV on connected TV channel is not selected properly. channel properly (p. 31). screen. Audio/video/S-video cable is not Connect audio/video/S-video cable properly connected.
- Page 119 Symptom Possible cause Suggested solution Cancel the protection setting (p. Cannot delete image Image is delete-protected. on card. 85). Contact your dealer for advice. Cannot format card. —— Warm up battery pack, for example Battery pack is easily Using camcorder in extremely cold in your pocket, just before using it.
- Page 120 Appendix Symptom Possible cause Suggested solution Remote control does REMOTE menu item is set to “OFF”. Set REMOTE menu item to “ON” not function. (p. 50). Remote control battery has run Replace remote control battery with down. new one (p. 13). Remote control used beyond oper- Use remote control within operating ating range.
-
Page 121: Specifications
Specifications Camcorder Signal System: PAL standard Recording System: 2 rotary heads, helical scanning system Cassette: Digital VCR Mini DV video cassette Recording/Playback Time: 90 minutes (DVM60, LP mode) Tape Speed: SP mode: 18.831 mm/second LP mode: 12.568 mm/second Pickup Device: ⁄... -
Page 122: On-Screen Display Index
Appendix On-screen Display Index MENU button Tape Camera mode P A U S E p. 27 p. 42 DISPLAY/MODE SET button p. 64 p. 26 A U T O A U T O A U T O MENU button 3 0min DISPLAY/MODE SET button Menu screens P A U S E... -
Page 123: Menu Button
Tape Playback mode p. 27 AUDIO 2 p. 70 MENU button Menu screens P L A Y S T O P R EW DISPLAY/MODE SET button P L A Y B A C K S E T p. 54 R O T A T E P B p. - Page 124 Appendix MENU button Card Camera mode p. 78 p. 27 E C ONOMY p. 79 Operation button DISPLAY/MODE p. 78 SET button p. 64 A U T O A U T O A U T O MENU button DISPLAY/MODE SET button M A NU A L S E T E X E C U T E...
- Page 125 Card Playback mode - 0 1 0 Operation NORMA L button p. 84 p. 84 P A G E NORMA L S E L E C T I MG S E L E C T I MG F U L F U L L U L L MULT I...
-
Page 126: Index
Appendix Index AC adapter ........8, 9 Earphones jack ........28 Audio dubbing ......68, 69 Edit search .......... 41 Audio playback mode ......70 Erasure protect tab ......102 Audio recording mode ......47 Auto focus ........... 26 Fade ............ 39 AV terminal ...... - Page 127 Manual focus ........57 Scene menu ........65 Manual setting ........58 SD Memory Card ......103 Media Selection switch ....... 22 Self recording ........ 44, 45 MENU button ........33 Self timer ........80, 81 Menu screen ........33 Shutter speed .......
- Page 128 SHARP CORPORATION Printed in Malaysia TINSLA091WJN1 Printed on 100% post-consumer recycled paper. 04P02-M-G...
Need help?
Do you have a question about the VL-Z800S and is the answer not in the manual?
Questions and answers