Canon POWERSHOT ELPH 520 HS User Manual
Hide thumbs
Also See for POWERSHOT ELPH 520 HS:
- Getting started (36 pages) ,
- User manual (218 pages) ,
- User manual (253 pages)
Advertisement
Quick Links
Download this manual
See also:
User Manual
CaHOH
%/
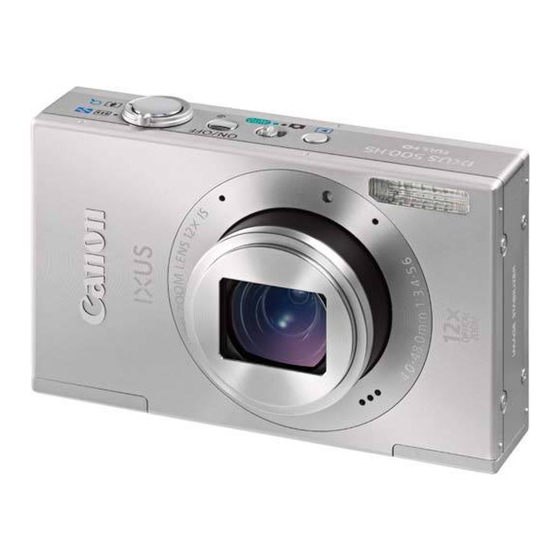
_¢&_o% !,, US 50 0 H5
Cam÷ra
User Geide
Before
use
be sure to read this c
including
the
orecautions,
This guide will familiarize
with how to use the camera
correctly.
Keep the guide handy
for future reference,
Advertisement

Related Manuals for Canon POWERSHOT ELPH 520 HS


Summary of Contents for Canon POWERSHOT ELPH 520 HS
- Page 1 CaHOH _¢&_o% !,, US 50 0 H5 Cam÷ra User Geide Before be sure to read this c including orecautions, This guide will familiarize with how to use the camera correctly. Keep the guide handy for future reference,...
- Page 3 You c an customize many function settings tosuit your preferred shooting style, P mode. Enter Follow steps 1 - 2 on p. 80 and choose Customize the settings as desired (pp. 105 - 123), and then shoot. halfway, shutter speeds and aperture values are displayed in orange. To obtain If adequate exposure cannot be obtained when you press the shutter button adequate exposure, try adjusting the following settings.
- Page 4 The standard exposure set by the camera can be adjusted in 1/3-stop increments, in a range of -2 to +2. Press the A button. As you watch the screen, press the 4 _ buttons to adjust the brightness. When shooting movies, shoot with the exposure...
- Page 5 image Brightness (Exposure Compensation) Adjust the metering method (how brightness is measured) to suit shooting conditions as follows. Press the @ button, choose [:8_ in the menu, and choose the desired option (p. 39). The option you configured is now displayed. 1:®3 ..
- Page 6 image Brightness (Exposure Compensation) To view the automatically set ISO speed when the camera is set to _, press the shutter button halfway. Although choosing a lower ISO speed may reduce image graininess, there may be a greater risk of subject blurriness in some shooting conditions. Choosing a higher ISO speed wit! increase shutter speed, which may reduce subject blurriness and increase the flash range.
- Page 7 ® By adjusting white balance (WB), you can make image colors look more natural for the scene you are shooting. Press the @ button, choose AWB in the menu, and choose the desired option (p. 39). The option you configured is now displayed.
- Page 8 Color and Continuous Shooting @ Custom White Balance For image colors that look natural under the light in your shot, adjust white balance to suit the light source where you are shooting. Set the white balance under the same light source that will illuminate your shot.
- Page 9 Color and Continuous Shooting Change image color tones as desired, such as converting images to sepia or black and white. Press the @ button, choose _FF in the menu, and choose the desired option (p. 39). The option you configured is now displayed.
- Page 10 Color and Continuous Shooting ® Custom Color Choose the desired level of image contrast, sharpness, color saturation, red, green, blue, and skin tones in a range of 1 - 5. Access the setting screen. Follow the steps in "Changing Image Color Tones (My Colors)"...
- Page 11 Color and Continuous Shooting Continuous Continuous shooting, with the focus and exposure determined when you press the shutter button halfway. Continuous Continuous shooting and focusing. Shooting AF [AF Frame] is set to [Center] and cannot be changed. Continuous Continuous shooting, with the focus fixed at the position determined in AF lock.
- Page 12 _<"S'hoot'ing Closeoups (Macro) To restrict the focus to subjects at close range, set the camera to _. details on the focusing range, see "Specifications" in the Getting Started guide. Press the _ button, press the 4_ buttons choose and then press the @ button.
- Page 13 Shooting Range and Focusing The focal length of the lens can be increased by approximately 1.4x or 2.3x. This can reduce camera shake because the shutter speed is faster than it would be if you zoomed (including using digital zoom) in to the same zoom factor.
- Page 14 Shooting Range and Focusing Changing the AF Frame Mode Change the AF (auto focus) frame mode to suit the shooting conditions as follows. MENU Press the button, choose [AF Frame] on the O tab, and then choose the desired option (p.
- Page 15 Shooting Range and Focusing @ Choosing Subjects to Focus On (Tracking AF) Shoot after choosing a subject to focus on as follows. Choose [Tracking AF]. Follow the steps in "Changing the AF Frame Mode" (p. 115) to choose [Tracking AF]. is displayed in the center of the screen.
- Page 16 Shooting Range and Focusing [Serve AF] (p. 118) is set to [On] and cannot be changed. Tracking may not be possible when subjects are too small or move too rapidly, or when subject color or brightness matches that of the background too closely.
- Page 17 Shooting Range and Focusing @ Recomposing Shots While the Focus is Locked As long as you keep the shutter button pressed halfway, the focus exposure are locked. You can recompose shots as needed before shooting. This feature is called Focus Lock. Focus.
- Page 18 Shooting Range and Focusing Focusing may not be possible in some shooting conditions. In low-light conditions, Servo AF may not be activated (AF frames may not turn blue) when you press the shutter button halfway. In this case, the focus and exposure are set according to the specified frame...
- Page 19 Shooting Range and Focusing _ Shooting with the AF Lock The focus can be locked. After you lock the focus, the focal position will not change even when you release your finger from the shutter button. Lock the focus. With the shutter button pressed halfway,...
- Page 20 You can have the flash fire for each shot. For details on the flash range, see "Flash Range" (see "Specifications" in the Getting Started guide). Press the _, button, press the _ buttons choose 6, and then press the @ button.
- Page 21 Flash Just as with the AE lock (p. 105), you can lock the exposure for the flash shots. Set the flash to _. (p. 121). Lock the flash exposure. Aim the camera at the subject to shoot with the exposure locked.
- Page 22 Changing Compression Ratio {image Quality) Choose from two compression ratios, as follows: (Super Fine), (Fine). For guidelines on how many shots at each compression ratio can fit on a memory card, see "Specifications" in the Getting Started guide. Configure the setting. Press the @ button, choose in the menu,...
- Page 23 Other Settings If image stabilization cannot prevent camera shake, mount the camera on a tripod or take other measures to hold it still. In this case, set [IS Mode] to [Off]. @ Deactivating Powered iS Powered IS reduces slow camera shake that may occur when recording telephoto...
- Page 25 After shooting images or movies, you can view them on the screen as follows. ::: Enter Playback mode. Press the [] button. Your last shot is displayed. Browse through your images. To view the previous image, press the 4 button. To view the next image, press the _, button.
- Page 26 Viewing Play movies. To start playback, press the @ button, press the Av buttons to choose and then press the @ button again. Adjust the volume. Press the ._.'v" buttons to adjust the volume. Pause playback. To pause playback, press the @ button.
- Page 27 Viewing Press the "v- button to view other information on the screen, or to hide the information. For details on the information displayed, see p. 202. No information Simple Detailed Enables you to displayed Information Information check the focus *Not shown for movies. _witc_ii_g_i_spia odes ressi_g _ _tion isaisopossibi i_m edia_eiy...
- Page 28 Viewing "Checking Focus To check the focus of your shots, you can magnify the area of the image that was in the AF frame at the time of shooting. Access Focus Check. Press the v button (p. 128). A white frame is displayed where the AF frame was when the focus was set.
- Page 29 ® By displaying multiple images in an index, you can quickly find the images you are looking for. Display images in an index. Move the zoom lever toward to display images in an index. Moving the lever again will increase the number of images shown.
- Page 30 Browsing Filtering images Choose a search condition. Press the @ button, choose h'_ in the menu, and choose a condition (p. 39). View the image search results. Choose the type of images to view by pressing the ,_'_',_ _ buttons, and then press the @ button.
- Page 31 Browsing and Filtering images __Viewi_ng Movie Digest Movies Movies created in _ mode (p. 93) can be viewed by date. Choose a movie. Press the @ button, choose in the menu, and choose the date (p. 39). Play the movie. Press the @ button to start playback.
- Page 32 Editing Face ID information View individual images in the group. Pressing the _), buttons will display only images in the group. To cancel group playback, press the Q button, choose in the menu, and press the Q button again (p. 39). pressing the @ button.
- Page 33 Choose an image. Follow the procedure on p. 126 to choose image, and then press the @ button. An orange frame is displayed around selected face. When multiple names are displayed in an image, press the _)' buttons to choose the name to change, and press the button.
- Page 34 _" Magnifying images ;iii!ii!i:_ ¸ Magnify an image. Moving the zoom lever toward Q, will zoom in and magnify the image, and _% displayed. You can magnify images up to about 1Ox by continuing to hold the zoom lever. To zoom out, move the zoom lever toward You can return to single-image display...
- Page 35 image Viewing Options Automatically play back images from a memory card as follows. Each image is displayed for about three seconds. Choose a slideshow transition start playback. Press the @ button, choose '_ in the menu, and choose the desired option (p.
- Page 36 image Viewing Options @ Changing Slideshow Settings You can set up slideshows to repeat, and you can change the transitions between images and the display duration of each image. Choose from six transition effects between images. Access the setting screen. MENU Press the button...
- Page 37 image Viewing Options _'A'uto °Playback of Similar images Based on the current image, the camera offers four images similar to it that you may wish to view. After you choose to view one of those images, camera offers four more images. This is an enjoyable way to play back images...
- Page 38 Protect important images to prevent accidental erasure by the camera (p. 143). Press the @ button, and then choose the menu (p. 39). [Protected] is displayed. To cancel protection, repeat this process and choose 0"_ again, and then press the @ button.
- Page 39 Protecting images Choose [Select]. Following step 2 on p. 139, choose [Select] and press the @ button. Choose an image. Press the _ buttons to choose an image, and then press the @ button. displayed. To cancel protection, press the @ button again.
- Page 40 Protecting images Sellecting a Range Choose [Select Range]. Following step 2 on p. 139, choose [Select Range] and press the @ button. Choose a starting image. Press the @ button. Press the 4_ buttons to choose an image, and then press the @ button.
- Page 41 Protecting images Protect the images. Press the v button to choose [Protect], then press the @ button. Choose [Select All images]. Following step 2 on p. 139, choose [Select All Images] and press the @ button. Protect the images. Press the ,_'_ buttons to choose [Protect],...
- Page 42 You can choose and erase unneeded images one by one. Be careful when erasing images, because they cannot be recovered. Choose an image to erase. Press the {_ buttons to choose an image. i_iiiiiiiiiiiiiii!i!_!i Erase the images. Press the @ button, and then choose _ in...
- Page 43 Erasing images @ Choosing images individually Choose [Se|ect]. Following step 2 on p. 143, choose [Select] and press the @ button. Choose an image. Once you follow step 2 on p. 140 to choose an image, V _ is displayed. To cancel erasure, press the @ button...
- Page 44 Erasing images @ Specifying All images at Once Choose [Select All images]. Following step 2 on p. 143, choose [Select All Images] and press the @ button. Erase the images. Press the 4_ buttons to choose [OK], and then press the @ button.
- Page 45 Change the orientation of images and save them as follows. Choose @. Press the @ button, and then choose the menu (p. 39). Rotate the image. Press the _ or _ button, depending on the desired direction. Each time you press the button, the image is rotated 90 °, Press the...
- Page 46 Rotating images Deactivating Auto Rotation Follow these steps to deactivate automatic rotation by the camera, which rotates images shot in vertical orientation so they are displayed vertically the camera. MENU Press the button, choose [Auto Rotate] on the [] tab, and then choose [Off] (p.
- Page 47 You can tag images as favorites and assign them to My Category (p. 149). By choosing a category in image search, you can restrict the following operations to all of those images. Viewing (p. 126), Viewing Slideshows (p. 136), Protecting Images (p.
- Page 48 image Categories Finish the setup process. MENU Press the button. A confirmation message is displayed. Press the 4_ buttons to choose [OK], and then press the @ button. Images will not be tagged as favorites if you switch to Shooting mode or turn the camera off before finishing the setup process...
- Page 49 image Categories Finish the setup process. MENU Press the button. A confirmation message is displayed. Press the _ buttons to choose [OK], and then press the @ button. Images will not be assigned to a category if you switch to Shooting mode or turn the camera off before finishing the setup process in step 3.
- Page 50 image Categories Choose a category. Press the Av buttons to choose a category, and then press the @ button. V _ is displayed. To cancel selection, press the @ button again. V _ is no longer displayed. Repeat this process to choose additional images.
- Page 51 mage editing (pp. 152 - 156) is only available when the memory card has sufficient free space. Save a copy of images at a lower resolution. Choose [Resize]. MENU Press the button, and then choose [Resize] on the [] tab (p. 40). Choose an image.
- Page 52 Editing Still images Editing is not possible for images saved as XS in step 3. Images cannot be resized to a higher resolution. _P Cropping You can specify a portion of an image to save as a separate image file. :;...
- Page 53 Editing is not possible for images shot at a resolution of S (P. 69) or resized to XS (P. 152). Images supported for cropping will have the same aspect ratio after cropping. Cropped images will have a smaller resolution than uncropped images. If you crop still images shot using Face ID, only the names of the people left in the cropped image will remain.
- Page 54 Editing Still images y Correcting image Brightness (i-Contrast) Excessively dark image areas (such as faces or backgrounds) can be detected and automatically adjusted to the optimal brightness. Insufficient overall image contrast is also automatically corrected, to make subjects stand out better. Choose from four correction levels, and then save the image as a separate...
- Page 55 Automatically corrects images affected by red-eye. You can save the corrected image as a separate file. Choose [Red=Eye Correction]. MENU Press the button, and then choose [Red-Eye Correction] on the [] tab (p. 40). Choose an image. Press the _ buttons to choose an image.
- Page 56 You can cut movies to remove unneeded portions at the beginning or end. Choose _. Following steps 1 - 3 on pp. 126 - 127, choose and press the @ button. The movie editing panel and editing bar are now displayed. Movie Editing Panel...
- Page 57 Editing Movies Save the edited movie. Press the A'_" buttons to choose ['._, and then press the @ button. Press the _' buttons to choose [New File], and then press the @ button. The movie is now saved as a new file. To overwrite the original movie with the cut one, choose...
- Page 59 Functions can be configured on the _1' tab. Customize commonly used functions as desired, for greater convenience (p. 40). Silence camera sounds and movies as follows. Choose [Mute], and then choose [On]. 6pei_{i canalso i_e silence yi_oi_iii_g_iown_e i_u_io;_s you{ur _e... camera on.
- Page 60 Adjusting Basic Camera Functions _J Customizing Sounds Customize camera operating sounds as follows. Choose [Sound Options], and then press the button. Choose an item, and then press the _* buttons to choose an option. Preset sounds (cannot be modified) Preset sounds Can be changed by using the included software.
- Page 61 Adjusting Basic Camera Functions Adjust screen brightness as follows. Choose [LCD Brightness], and then press the buttons to adjust the brightness. For maximum brightness, press and hoid the "_ button for at least one second when the shooting screen is displayed or when in single-image display. (This will override the [LCD Brightness] setting on the _'1"tab.) To restore the original brightness, press and hold the "_"button again for at least one second or restart the camera.
- Page 62 Adjusting Basic Camera Functions @ Customizing the Start=up Screen Access the [Start=up image] screen in Playback mode. Press the F_q button. Following the step on p. 162, choose [2] and press the @ button. Choose one of your shots. Choose an image and press the @ button.
- Page 63 Adjusting Basic Camera Functions Before using a new memory card or a card formatted in another device, should format the card with this camera. Formatting erases all data on a memory card. Before formatting, copy images on the memory card to a computer, or take other steps to back them up.
- Page 64 Adjusting Basic Camera Functions @ Low=Level Formatting Perform low-level formatting in these cases: [Memory card error] is displayed, the camera is not working correctly, card image reading/writing is slower, continuous shooting is slower, or movie recording suddenly stops. Lowqevel formatting erases all data on a memory card.
- Page 65 Adjusting Basic Camera Functions Regardless of the option selected in this setting, shots may be numbered consecutively after the last number of existing images on newly inserted memory cards. To start saving shots from 0001, use an empty (or formatted (p.
- Page 66 Adjusting Basic Camera Functions y Power-Saving Adjustment Adjust the timing of automatic camera and screen deactivation (Auto Power Down and Display Off, respectively) as needed (p. 36). Access the [Power Saving] screen. Choose [Power Saving], and then press the button. Configure the settings.
- Page 67 Adjusting Basic Camera Functions To ensure that your shots will have the correct local date and time when you travel abroad, simply register the destination in advance and switch to that time zone. This convenient feature eliminates the need to change the Date/ Time setting manually.
- Page 68 Adjusting Basic Camera Functions Date Time Adjust the date and time as follows. Access the [Date/Time] screen. Choose [Date/Time], and then press the @ button. Configure the setting. Press the 4 _ buttons to choose an item, and then press the ,_'_ buttons to adjust the setting.
- Page 69 Adjusting Basic Camera Functions Restoring Defaults If you accidentally change a setting, you can restore default camera settings. Access the [Reset All] screen. Choose [Reset All], and then press the Q button. Restore default settings. Press the _ _ buttons to choose [OK], and then press the Q...
- Page 71 Charge the battery on (or immediately before) the day of use Charged batteries gradually lose their charge, even when they are not used. Long-term battery storage After using up all remaining battery power, remove the battery from the camera. Store the battery with the cover attached. Storing a partially charged battery over extended periods (about a year) may shorten its life or affect performance.
- Page 72 The following camera accessories are sold separately. Note that availability varies by area, and some accessories may no longer be available. x Power Supplies Battery Pack NB-gL Rechargeable lithium-ion battery Battery Charger CB=2LB/2LBE Charger for Battery Pack NB-9L AC Adapter Kit ACK-DCT0 For powering the camera...
- Page 73 TV to enjoy playback on the larger TV screen. HDMI Cable HTC=I00 For connecting the camera to an HDMI input of a high-definition Canon PictBridge=Compatible Printers Printing images without a computer possible by connecting the camera to a...
- Page 74 on a TV Playback By connecting the camera to a TV, you can view your shots on the larger screen of the TV. For details on connection or how to switch inputs, refer to the TV manual. @ Playback on a Standard=Definition Connecting the camera to a TV with the AV Cable AVC-DC400...
- Page 75 Using Optional Accessories Turn the camera on. Press the [] button to turn the camera Images from the camera are now displayed on the TV. (Nothing is displayed on the camera screen.) When finished, turn off the camera and TV before disconnecting the cable.
- Page 76 Using Optional Accessories Display images. Follow steps 3 - 4 on pp. 175 - 176 to display images. It is not possible to connect the included interface cable or an optional AV cable at the same time as an HDMI Cable HTC-100.
- Page 77 Using Optional Accessories Control the camera with the TV remote. Press the _ buttons on the remote browse images. To display the camera control panel, press the OK/Select button. Select control panel items by pressing the _!_ buttons to choose an item, and then pressing the OK/Select button...
- Page 78 Using Optional Accessories y Powering the Camera with Household Power "_ Powering the camera with AC Adapter Kit ACK-DC70 (sold separately) eliminates the need to monitor the remaining battery level. Make sure the camera is off. insert the coupler. Follow step 1 on p.
- Page 79 A Canon SELPHY CP series compact photo printer is used here for the sake of illustration. Screens displayed and available functions vary by printer.
- Page 80 Printing images Access the printing screen. Press the @ button, choose _:l, and press the @ button again. Print the image. Press the ,_'_ buttons to choose [Print], and then press the @ button. Printing now begins. To print other images, repeat steps 5 - 6 after printing is finished.
- Page 81 Printing images Access the printing screen. Follow steps 1 - 6 on pp. 180 - 181 to access the screen at left. Configure the setting. Press the Av buttons to choose an item, and then press the 4_ buttons to choose an option.
- Page 82 Printing images @ Cropping images Before Printing (Trimming) By cropping images before printing, you can print a desired image area instead of the entire image. Choose [Trimming]. After following step 1 on p. 182 to access printing screen, choose [Trimming] and press the @ button.
- Page 83 Printing images @ Choosing Paper Size and Layout Before Printing Choose [Paper Settings]. After following step 1 on p. 182 to access printing screen, choose [Paper Settings] press the @ button. Choose a paper size. Press the ,_'_ buttons to choose an option, and then press the @ button, Choose a type of paper.
- Page 84 Printing images ® Available Layout Options Default Matches current printer settings. Bordered Prints with blank space around the image. Borderless Borderless, edge-to-edge printing. N-up Choose how many images to print per sheet. ID Photo Prints images for identification purposes. Only available for images with a resolution of L and an aspect ratio of 4:3. Fixed Size Choose the print size.
- Page 85 You can also print the folder number, file number, and elapsed time for the frame by setting [Caption] to [On]. To cancel printing in progress, press the @ button. [ID Photo] and [Sequence] are not available with Canon PictBridge-compatible printer models earlier than CP720 and CP730.
- Page 86 Printing images y'_Add'i_ii'g images to the Print List {DPOF) Batch printing (p. 190) and ordering prints from a photo development service can be set up on the camera. Choose up to 998 images on a memory card and configure relevant settings, such as the number of copies, as fellows.
- Page 87 No.] at the same time. The date is printed in a format matching setting details in [Date/Time] on the [tl" tab, accessible by pressing the MENU button (p. 19). Index printing is not available on some Canon PictBridge-compatibie printers (sold separately).
- Page 88 Printing images @ Setting Up Printing for individual images Choose [Select images & Qty.]. MENU Press the button, choose [Select Images & Qty.] on the r[_ tab, and then press the @ button. Choose an image. Press the _ buttons to choose an image, and then press...
- Page 89 Printing images @ Setting Up Printing for All images Choose [Select All images]. Following step 1 on p. 189, choose [Select All Images] and press the @ button. Configure the print settings. Press the 4 _ buttons to choose [OK], and then press the @ button.
- Page 90 Printing images Photobook _ Adding Images to a Photobooks can be set up on the camera by choosing up to 998 images on a memory card and importing them into the included software on your computer, where they are stored in their own folder.
- Page 91 Printing images Choose an image. Press the _ buttons to choose an image, and then press the @ button. is displayed. To remove the image from the photobook, press the @ button again. is no longer displayed. Repeat this process to specify other images.
- Page 93 (pp. 15, 16). The battery is swollen. Battery swelling is normal and does not pose any safety concerns. However, if battery swelling prevents the battery from fitting in the camera, contact a Canon Customer Support Help Desk. Display on a TV...
- Page 94 Troubleshooting is displayed when the shutter button is pressed halfway (p. 56). Set [IS mode] to [Continuous] (p. 123). Set the flash mode to _. (p. 121). Increase the ISO speed (p. 106). Mount the camera on a tripod or take other measures to keep it still. In this case, set [IS Mode] to [Off] (p.
- Page 95 Troubleshooting Subjects are affected by red-eye (p. 70). Set [Red-Eye Lamp] to [On] (p. 77) to activate the red-eye reduction lamp (p. 4) in flash shots. Note that while the red-eye reduction lamp is on (for about one second), it is not possible to shoot, because the lamp is counteracting red-eye.
- Page 96 Use a blower brush to remove dust from the lens. If cleaning is difficult, contact a Canon Customer Support Help Desk. To prevent condensation from forming on the camera after sudden temperature...
- Page 97 (p. 16). Memory card error (p. !65) If the same error message is displayed even when you have inserted a formatted memory card facing the correct way, contact a Canon Customer Support Help Desk (p. 16). insufficient space on card There is not enough free space on the memory card to shoot (pp.
- Page 98 Switch to Playback mode to check for the image. Frequent display of this error message may indicate camera damage. In this case, write down the error number (Exx) and contact a Canon Customer Support Help Desk. File Error It may not be possible to print computer-edited images or images shot with another camera.
- Page 99 ® ® ® ® @ ® ®® _ Battery level (p. 201) Shooting mode (p. 204), @ i-Contrast (p. 107) Camera orientation* Scene icon (p. 49) @ Mercury lamp correction C3)White balance (p. 108) Focusing range (p. 113), (p. 71 ) AF lock (p.
- Page 100 On=Screen information * 6 : Regular orientation, _, (_ : Held vertically The camera detects the shooting orientation and adjusts settings for optimal shots. Orientation is also detected during playback, and in either orientation, the camera automatically rotates images as needed. However, the orientation may not be detected correctly when the camera is pointed straight up or down.
- Page 101 @ @@ @@ @@ Movies (pp. 44, 126), Compression ratio @ Flash (p. 121) High-speed burst (p. 98), (image quality) (p. 123) _ Focusing range (p. 113) Print list (p. 187) Resolution (pp. 69, 72), @ File size _ My Category (p. 149) MOV (movies) @ Still images: Resolution C3)Shooting mode (p.
- Page 102 On=Screen information ® Summary of Movie Control Panel in "Viewing" (p. 126) Exit Play Slow Motion (Press the { _ buttons to ad ust the playback speed. No sound is played.) Skip Backward* (To continue skipping backward, keep holding down the O button.) 411 Previous Frame (For fast-rewind, keep holding down the @ button.) ii_'...
- Page 103 ® _"Functions Available in Each Shooting Mode Exposure Compensation (p. 105) AE Lock/FE Lock.1 (pp. 105, 122) Focusing Range (p. 113) Flash (pp. 56, 121) _£ "2 ..AF Lack (p. 120) Screen Display (p. 38) No Information Display Information Display "1 FE lock not available in _) flash mode.
- Page 104 Functions and Menu Tables 000000000--000 000000000000000000 0 Available or set automatically. - Not available.
- Page 105 Functions and Menu Tables ShoOt ng Mode Metering Method (p. 106) E"+_ C3C-3 ..My Colors (p. 110) _V t_N _e .1 _W*I _p _L _D _B_G_R_C'2 White Balance (p. 108) _,_.+- ,+_ =.,6: _ ,',_ _m_*3 Underwater White Balance Compensation (p. 82) ..
- Page 106 Functions and Menu Tables iii!iiii!iiiii;i;i;iii_ii_!i!i_ii!i!iiiiiiiiiiiiliiii!i!ii!_ii_ii_i_i _!i_!i_i!iiiii_iiiiiiililiiiiiiiiiiiiiiiiiiiiiiiiiii!ii!_i_i_ _i_i_iiiiill!i!_i!_!i_i!iiiiiii!i!!_!_i_!_!_i_i!_!!!i!_i!_i!_i!!i!!!!_i!_i_i_i_ _!!_i!i!i!ii_ii_i!i!i!i!i!i!i 6 6 6 ;8 6 6 6 6 6 o 6 6 6 6 ;8 6 o 6 6 6 o o o o *7 Only 4_1 and 1B'_ are available. O Available or set automatically.
- Page 107 Functions and Menu Tables Sheeting Menu AF Frame (p. 115) Tracking AF Center DigitalZoom p 53) Digital Te e-converter (1.4x/2.3x) ..AF-Point Zoom (p 75) ..Serve AF (p. 118) Off.4 ..... oooo Continuous AP (p. 11g) oooooo AF-assist Beam (p 77) .....
- Page 108 Functions and Menu Tables o o o - o o O o o - o - ..000000-0--- 0-00-0000000000000 0--00000000-0-00 ..0000-0- 000000000000000000 ..000000-0--- 000000 0000000000 000000 0000000-00 000000000000000000 000000000©000000 0©0000000000000000 OO000000Q 0©000000000 OOOQOOOQO O0000QOQOQQO000000 ... 0000--- 0000000000000©0000 O Available or s_ automatically. - Not available. - When using [Face ID] (p.
- Page 109 Functions and Menu Tables Mute p. 160 Lens Retract p. 166 Volume p. 160 Power Saving pp. 36, 167 Sound Options p. 161 Time Zone p. 168 Hints & Tips p. 161 DatelTime p. 19 LCD Brightness p. 162 Video System p.
- Page 110 iiiiiiiiii iiiiiiiiii iiiiiiiiii iiiiiiiiii Functions Menu Tables iiiiiiiiii ili :iiiii_i!_i!iiiiiiiiiiiiii_iiiiiiiiiiiiiiiiiiiiiiiiiiii!_!!_!!i_!i!_!_!!!!!!!i!_i_iiii_i_i_i_i_ii_ii_ii_ iii!!!_i_!i_ii_ii_iii_i_iiii!!i!ii!_i!ii_ii_iill i_!!_!_i_i!_!_!_!_!_!_!_!_!_!_!_!_!_!_! _ii_i_ii!!!ii_!_iii Print Select All Images p. 190 Select Images & Qty. p. 189 Clear All Selections p. 190 Select Range p. 189 Print Settings p. 187...
- Page 111 ® Digitat zoom ..........Display language ........AC adapter kit ........173, 179 DPOF ............Accessories ..........AE lock ............ AF frames ........22, 45, 115 Editing AF -e Focusing Cropping ........... AF tock ............ i-Contrast .......... Aspect ratio ..........My Colors .........
- Page 112 index My Category ..........My Colors ........110, 154 Grid lines ........... P (shooting mode) ........Handheld nightscene (shooting mode)..80 Package contents ........High-speed burst (shooting mode) .... 98 Photobook set-up ........Household power ........PictBridge ........174, 180 Playback _ Viewing Portrait (shooting mode) ......
- Page 113 Index Snow (shooting mode) ......Soft focus (shooting mode) ....... Viewing Software Image search ........DIGITAL CAMERA Solution Disk ..2 Index display ........Installation .......... Magnified display ......Sounds ............ Single-image display ......Stitch Assist (shooting mode) ....Stideshow ......... Strap ............
- Page 114 MEMO...
- Page 115 and Canada only: The Lithium ion/polymer battery that powers the product is recyclable. Please call 1-80O-8-BATTERY for information on how to recycle this battery. i For CA, USA only included lithium battery contains Perchlorate Material - special handling apply. See www.dtsc.ca.gov/hazardouswaste/perchlorate/ for details.
- Page 116 If such changes or modifications should be made, you could be required to stop operation of the equipment. Canon U.S.A., Inc. One Canon Plaza, Lake Success, NY 11042, U.S.A. Tel No. (516) 328-5600 Canadian Radio interference Regulations...
- Page 117 Battery Charger CB-2LBE The adapter can be used with a power supply between 100 and 240 V Contact your Canon dealer for information about plug adapter overseas use. For U.S.A. customers only: For areas where 120 V AC power is not used, you will need a special plug adapter.
Need help?
Do you have a question about the POWERSHOT ELPH 520 HS and is the answer not in the manual?
Questions and answers