Table of Contents
Advertisement
Quick Links
Operator's
Manual
®
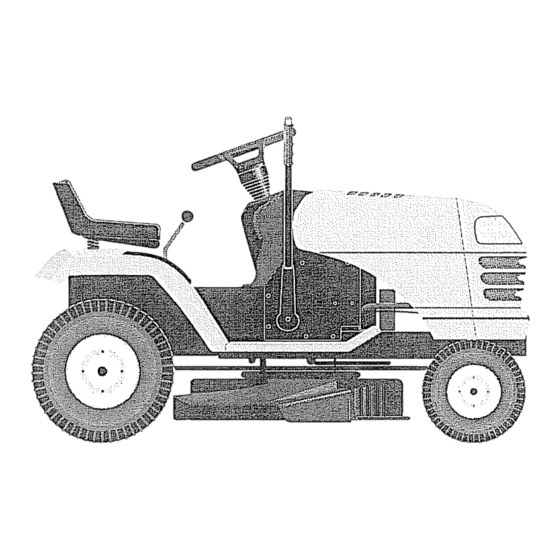
LAWN TRACTO
17.5 HP,*42" Mower
Electric Start
6 Speed Transaxle
Model No.
917.25350
This product
has a low emission
engine
which
operates
differently
from
previously
built
engines.
Before
you start the
engine,
read and understand
this Owner's
Manual.
IMPORTANT:
Read and follow a!! Safety
Rules and Instructions before
operating this equipment.
For answers
to your questions
about
this product,
Call:
1-800-659-5917
Sears Craftsman
Help Line
5 am - 5 pm, Mon - Sat
Sears, Roebuck and Coo, Hoffman Estates, IL 60179 U.S.A.
Visit our Craftsman
website:www.sears,comicraftsman
*As rated
by lhe engine manufacturer
Advertisement
Table of Contents

Subscribe to Our Youtube Channel
Related Manuals for Craftsman 917.25350


Summary of Contents for Craftsman 917.25350
- Page 1 Call: Rules and Instructions before 1-800-659-5917 Sears Craftsman Help Line operating this equipment. 5 am - 5 pm, Mon - Sat Sears, Roebuck and Coo, Hoffman Estates, IL 60179 U.S.A. Visit our Craftsman website:www.sears,comicraftsman *As rated by lhe engine manufacturer...
-
Page 2: Limited Warranty
Operation ..........Maintenance ........LIMITED WARRANTY ON CRAFTSMAN RIDING EQUIPMENT For two (2) years from the date of purchase, if this Craftsman Riding Equipment is main- tained, lubricated and tuned up according to the instructions in the owner's manual, Sears... - Page 3 _DANGER: This cutting machine is capable of amputating hands and feet and throwing objects, Failure to observe the following safety instructions could result in serious injury or death, _WARNING: In order to prevent acciden- • Disengage blades when not mowing. tal starting when setting...
-
Page 4: Safe Handling Of Gasoline
IV, TOWING Always keep the machine in gear when going down slopes, Do not shift to neutral • Tow only with a machine that has a hitch and coast downhill, designed for towing. Do not attach towed • Avoid starting, stopping, or turning on a... -
Page 5: General Service
GENERALSERVICE • Check brake operation frequently, Adjust • Never operate machine in a closed area, and service as required, • Keep all nuts and bolts tight to be sure the • Maintain or replace safety and instruction equipment is in safe working condition, labels, as necessary_ •... -
Page 6: Specifications
PRODUCT SPECIFICATIONS CONGRATULATIONS on your purchase a new tractor, It has been designed, engi- Gasoline Capacity 1.25 Unleaded neered and manufactured to give you the best and "S/pe: Regular possible dependability performance° Oil Type SAE 30 (above 32°F) Should you experience any problem API-SG-SL): SAE 5W-30(below... - Page 7 Steering Wheel Steering (1) Large Flat Washer Wheel Insert (1) 5116 Lock Washer (t) Hex Bolt 5/t 6-18 x 4 <,- 1-..+_-,- Steering Steering Wheel Extension Shaft Steering Adapter Boot Seat (1) Washer _(1) Knob (i) Seat (1) Oil Drain Tube For Future Use Slope Sheet...
- Page 8 Your new tractor has been assembled at the factory with the exception of those parts left unassembled for shipping purposes, To ensure safe and proper operation of your tractor all parts and hardware you assemble must be tightened securely. Use the correct tools as necessary to insure proper tightness.
- Page 9 INSTALL SEAT CHECK BATTERY Adjust seat before tightening adjustment 1. Lift seat pan to raised position. knob. NOTE: If this battery is put into service after Remove adjustment knob and flatwasher month and year indicated on label (label securing seat to cardboard packing located between...
- Page 10 v/CHECKLIST CHECK TIRE PRESSURE The tires on your tractor were overinflated Before operate and enjoy your the factory for shipping purposes, Correct tractor, we wish to assure that you receive tire pressure is important for best cutting the best performance and satisfaction from this Quality...
- Page 11 These symbols may appear on your tractor or in literature supplied with the product, Learn and understand their meaning. REVERSE HIGH CHOKE SLOW NEUTRAL FAST IGNITION SWITCH (@) =@ I£'tOWER LIFT ENGINE OFF REVERSE ENGINE ON ENGINE START PARKING BRAKE MOWER HEIGHT OPERATION SYSTEM(ROS)
-
Page 12: Operation
KNOW YOUR TRACTOR READ THIS OWNER'S MANUAL AND SAFETY RULES BEFORE OPERATING YOUR TRACTOR Compare the illustrations with your tractor to familiarize yourself with the locations various controls and adjustments, Save this manual for future reference. "ON" Position Attachment Clutch Lever ignition Switch Throttle/Choke _.x_:_... - Page 13 The operation of any tractor can result in foreign objects thrown into the eyes, which can result in severe eye damage Always wear safety glasses or eye shields while operating your tractor or performing any adjustments or repairs. We recommend a wide vision safety mask over spectacles standard safety glasses,...
- Page 14 TO OPERATEMOWER OPERATING IN REVERSE Your tractor is equippedwith an operator Your tractor is equipped with a Reverse presence sensing switch. Any attempt Operation System (ROS). Any attempt by the operatorto leavethe seat with the the operator to travel in the reverse direc- engine runningand the attachmentclutch tion with the attachment...
- Page 15 TOWlNGCARTS &OTH ERATTACHMENTS TO START ENGINE Tow only the attachments that are recom- When starting the engine for the first time or mended by and comply with specifications if the engine has run out of fuel, it will take of the manufacturer of your tractor°...
-
Page 16: Mowing Tips
MOWING TIPS " Mower should be properly leveled for best mowing performance. See "TO LEVEL MOWER HOUSING" in the Service Adjustments section of this manual. • The left hand side of mower should used for trimming, Drive sothatclippings are dischargedonto the area that has already been cut. -
Page 17: Before Each Use
EVERY 'BEFORE MAINTENANCE BEFORE EVERY EVERY EVERY EVERY SEASON STORAGE SCHEDULE EAC, HOURS HOURS HOURS HOURS Check Brake Opera,ion Check Tire Pressure Check Operatc, r P_esentte & ROS System! A Check for Loose Fasteners ..C ChecktReplace Mower Blades _" Lubrication Chart 0 Check Battery Level... - Page 18 ROS "ON" Position TRACTOR Engine "ON" Position (Normal Operating) Alwaysobserve safetyruleswhenperforming any maintenance. BRAKE OPERATION If tractor requiresmorethan five (5) feetto stop at highestspeed in highestgear on a level,dry concreteor paved surface,then brakemustbe checkedand adjusted.(See "TO ADJUST BRAKE"in the Service and °...
- Page 19 BATTERY Check the crankcase oil level before starting the engine and after each eight (8) hours of Your tractor has a battery charging system which is sufficient for normal use. However, operation. Tighten oil fill cap/dipstick periodic charging of the battery with an au- curely each time you check the oil level tomotive charger...
- Page 20 IN-LINE FUEL FILTER CLEANING The fuel filter should be replaced once each • Clean engine, battery, seat, finish, etc. of all foreign matter. season. If fuel filter becomes clogged, Keep finished surfaces and wheels free structing fuel flow to carburetor, replacement of all gasoline, oil, etco...
- Page 21 SERVICE OR ADJUSTMENTS: ARNING: TO AVOID SERIOUS INJURY, BEFORE PERFORMING Depress clutch!brake pedal fully and set parking brake. Place gearshift lever in neutral (N) position. Place attachment clutch in "DISENGAGED" position, 4, Turn ignition key to "STOP" and remove key, Make sure the blades and all moving parts have completely stopped.
- Page 22 TO LEVEL [V]OWER HOUSING When distance "D" is 1t8" to 112" lower at front than rear, tighten nut "F" against Adjust the mower while tractor is parked on trunnion on both front links, level groundordriveway. Makesuretires properly inflated (See side of tire for proper Recheck side-to-side adjustment.
-
Page 23: Front Wheel
TO REPLACE MOTION DRIVE BELT TO CHECK BRAKE Park the tractor on level surface. Engage If tractor requires more than five (5) feet to parking brake,, For assistance, there is a stop at highest speed in highest gear on a belt installation guide decal on bottom side level, dry concrete... -
Page 24: Maintenance
TO REMOVE TO START ENGINE WITH A WEAK BAT- WHEEL FOR REPAIRS TERY Block up axle securely_ 24 Remove axle cover, retaining ring and _IbWARNING: Lead-acid batteries geneF washers to allow wheel removal (rear ate explosive gases, Keep sparks, flame wheels have a square key - Do not... - Page 25 REPLACING BATTERY TO REPLACE FUSE Replace with 20 amp automotive-type plug- _WARNING: Do not short battery termF in fuse, The fuse holder is located behind nats by allowing a wrench or any other object the dash, to contact both terminals at the same time.
- Page 26 ENGINE Immediately prepare your tractor for storage at the end of the season or if the tractor will FUEL SYSTEM not be used for 30 days or more. iI_4PORTANT: It is important to prevent _IbWARNING: Never store the tractor with gum deposits from forming in essential...
-
Page 27: Troubleshooting
TROUBLESHOOTING CHART: See appropriate section in manual unless directed to Sears service center CORRECTION PROBLEM CAUSE Fil! fuel tank, Will not start Out of fuel See "TO START ENGINE" in Engine not "CHOKED" proPerlY Operation section Wait several minutes before Engine flooded, attempting to start, Bad spark plug... - Page 28 TROUBLESHOOTING CHART: See appropriate section in manual unless directed to Sears service center PROBLEM CAUSE CORRECTION Cutting too much grass/too fast, Raise cutting height/reduce Loss of power speed, Throttle in"CHOKE" position, Adjust throttle control Clean underside of mower Build-up of grass, leaves and trash under mower housing.
- Page 29 TROUBLESHOOTING CHART: See appropriate section in manual unless directed to Sears service center PROBLEM CAUSE CORRECTION Mower blades will Remove obstruction. Obstruction in clutch mechanisr[ i. not rotate Worn/damage:l mower drive belt Replace mower drive belt Frozen idler plllley, Replace idler pulley. Frozen blade lnandre! Contact a Sears or other qualified service center...
- Page 31 SUGGESTED GUIDE FOR SIGHTING SLOPES FOR SAFE OPERATION ONLY RIDE UP AND DOWN HILL, NOT ACROSS HILL 15 DEGREES MAX. down the face of slopes, never across the face. Do not mow slopes greater than 15 degrees. Make turns gradually to prevent tipping or loss of control.
- Page 32 " fi ..Get=t: ×ed, at your:home or:ours! Your Home For repair - in your home - of all major brand appliances, lawn and garden equipment, or heating and cooling systems, no matter made it, no matter sold For the replacement parts, accessories owner's manuals...
Need help?
Do you have a question about the 917.25350 and is the answer not in the manual?
Questions and answers