Sign In
Upload
Download
Table of Contents
Contents
Add to my manuals
Delete from my manuals
Share
URL of this page:
HTML Link:
Bookmark this page
Add
Manual will be automatically added to "My Manuals"
Print this page
×
Bookmark added
×
Added to my manuals
Manuals
Brands
Asus Manuals
Laptop
A46CB
User manual
Asus A46CB User Manual
User's manual for english edition
Hide thumbs
1
Table Of Contents
2
3
4
5
6
7
8
9
10
11
12
13
14
15
16
17
18
19
20
21
22
23
24
25
26
27
28
29
30
31
32
33
34
35
36
37
38
39
40
41
42
43
44
45
46
47
48
49
50
51
52
53
54
55
56
57
58
59
60
61
62
63
64
65
66
67
68
69
70
71
72
73
74
75
76
77
78
79
80
81
82
83
84
85
86
87
88
89
90
91
92
93
94
95
96
97
98
99
100
101
102
103
104
105
106
107
108
109
110
111
112
113
114
115
116
117
118
119
120
page
of
120
Go
/
120
Contents
Table of Contents
Troubleshooting
Bookmarks
Table of Contents
Table of Contents
Chapter 1: Introducing the Notebook PC
About this User's Manual
Notes for this Manual
Safety Precautions
Sound Pressure Warning
DC Fan Warning
Adapter Information
Transportation Precautions
Airplane Precautions
Preparing Your Notebook PC
Chapter 2: Knowing the Parts
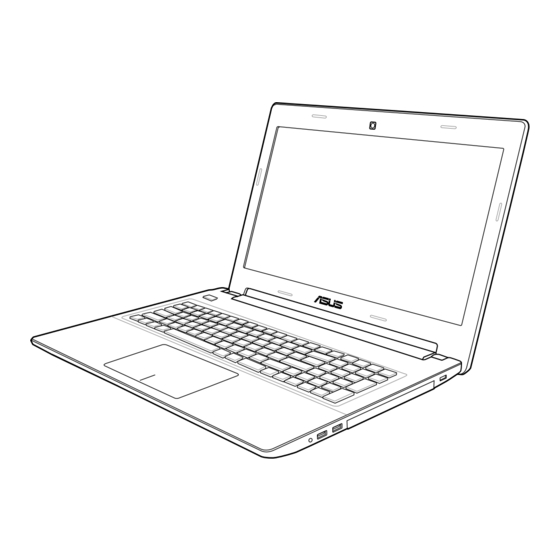
Top Side
Bottom Side
Right Side
Left Side
Rear Side
Front Side
Chapter 3: Getting Started
Power System
Using AC Power
Using Battery Power
Battery Care
Powering on the Notebook PC
The Power-On Self Test (POST)
Checking Battery Power
Charging the Battery Pack
Power Options
Emergency Shutdown
Power Management Modes
Sleep and Hibernate
Thermal Power Control
Special Keyboard Functions
Hot Keys
Microsoft Windows Keys
Keyboard as Numeric Keypad (on Selected Models)
Keyboard as Pointers (on Selected Models)
Multimedia Control Keys
Button and Status Indicators
Button
Status Indicators
Drive Activity Indicator
Chapter 4: Using the Notebook PC
Touchpad
Using the Touchpad
Touchpad Usage Illustrations
Caring for the Touchpad
Disabling the Touchpad Automatically
Storage Devices
Optical Drive (on Selected Models)
Removing an Optical Disc
Memory Card Reader
Hard Disk Drive
Removing the Hard Disk Drive
Installing the Hard Disk Drive
Memory (RAM)
Network Connections
Wired Network Connections
Wireless Network Connections
Bluetooth Wireless Connection (on Selected Models)
USB Charger
Instant on
Appendix
Optional Accessories
Optional Connections
Operating System and Software
Support Software
Boot Device
System BIOS Settings
Security Setting
Hdd Password
Save Changes
Troubleshooting
Using the Battery Pack
Updating the Bios
Recovery Options for Your Notebook PC
Using Recovery Partition
Using DVD Recovery (on Selected Models
DVD-ROM Drive Information
Region Definitions
Blu-Ray ROM Drive Information(on Selected Models
Internal Modem Compliancy
Network Compatibility Declaration
Declarations and Safety Statements
Federal Communications Commission Statement
FCC Radio Frequency (RF) Exposure Caution Statement
Declaration of Conformity(R&TTE Directive 1999/5/EC
CE Marking
IC Radiation Exposure Statement for Canada
Wireless Operation Channel for Different Domains
France Restricted Wireless Frequency Bands
UL Safety Notices
Power Safety Requirement
TV Tuner Notices
Reach
Nordic Lithium Cautions (for Lithium-Ion Batteries
Optical Drive Safety Information
Laser Safety Information
Service Warning Label
CDRH Regulations
Macrovision Corporation Product Notice
CTR 21 Approval(for Notebook PC with Built-In Modem
European Union Eco-Label
Global Environmental Regulation Compliance and Declaration
ASUS Recycling/Takeback Services
Regional Notice for United States for America
Copyright Information
Limitation of Liability
Service and Support
Advertisement
Quick Links
1
Memory (Ram)
Download this manual
E7596
Notebook PC User Manual
July 2012
Table of
Contents
Previous
Page
Next
Page
1
2
3
4
5
Advertisement
Table of Contents
Need help?
Do you have a question about the A46CB and is the answer not in the manual?
Ask a question
Questions and answers
Related Manuals for Asus A46CB
Laptop Asus A56CA User Manual
User's manual for english edition (120 pages)
Laptop Asus R405CA User Manual
User's manual for english edition (120 pages)
Laptop Asus Q400VC User Manual
User guide for english edition (30 pages)
Laptop Asus Notebook PC Hardware User Manual
Notebook pc (76 pages)
Laptop Asus A72F User Manual
Notebook pc (32 pages)
Laptop Asus K42JY User Manual
Notebook pc (110 pages)
Laptop Asus A53TK Manual
(113 pages)
Laptop Asus K52JT User Manual
Notebook pc (108 pages)
Laptop Asus A40JK User Manual
User manual (30 pages)
Laptop Asus A450CA E-Manual
User's manual for english edition (130 pages)
Laptop Asus A451CA E-Manual
User's manual for english edition (114 pages)
Laptop Asus A450JF E-Manual
User's manual for english edition (130 pages)
Laptop ASUS X455WA E-Manual
(130 pages)
Laptop Asus A552EA E-Manual
X552 series 15.6"; x452 series 14.0" (128 pages)
Laptop Asus X455D E-Manual
(114 pages)
Asus A407UB - Notebook PC Manual
(article)
This manual is also suitable for:
E46cb
K46cb
P46cb
Pro4qcb
R405cb
S405cb
...
Show all
S40cb
S46cb
U48cb
K56cm
A56cm
S56cm
R505cm
S505cm
S50cm
K56ca
A56ca
S56ca
R505ca
S505ca
S50ca
K46c
S46c
A46c
R405c
S405c
S40c
Table of Contents
Print
Rename the bookmark
Delete bookmark?
Delete from my manuals?
Login
Sign In
OR
Sign in with Facebook
Sign in with Google
Upload manual
Upload from disk
Upload from URL


Need help?
Do you have a question about the A46CB and is the answer not in the manual?
Questions and answers