Table of Contents
Advertisement
Available languages
Available languages
Quick Links
Owner's Manual
CRRrTSMRH'°
ROTARY LAW
OW
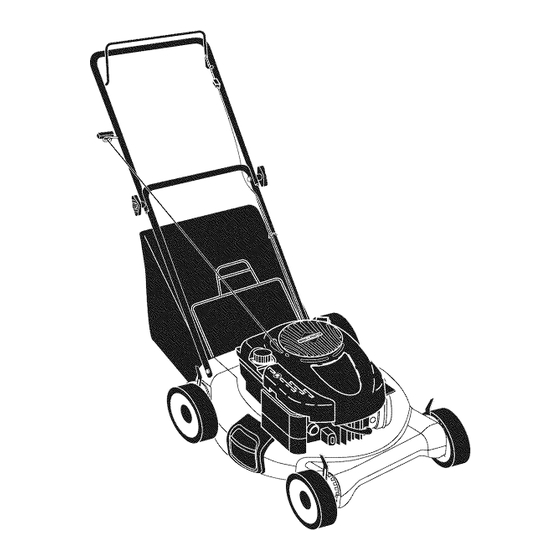
650 Series Briggs & Stratton Engine
21" Multi-Cut
Model No.
917.388120
• Espahol,
p. 18
CAUTION:
Read and follow all
Safety Rules and Instructions
before operating
this equipment
Sears, Roebuck
and Co., Hoffman
Estates,
IL 60179
Visit our Craftsman website: www.sears.com/craftsman
U.S.A.
Advertisement
Table of Contents

Related Manuals for Craftsman 917.388120


Summary of Contents for Craftsman 917.388120
- Page 1 650 Series Briggs & Stratton Engine 21" Multi-Cut Model No. 917.388120 • Espahol, p. 18 CAUTION: Read and follow all Safety Rules and Instructions before operating this equipment U.S.A. Sears, Roebuck and Co., Hoffman Estates, IL 60179 Visit our Craftsman website: www.sears.com/craftsman...
- Page 2 Schedule ......Sears Service ......Back Cover 2=YEAR FULL WARRANTY CRAFTSMAN LAWN MOWER If this Craftsman Lawn Mower fails due to manufacturer defects in material workmanship within two years from the date of purchase, return it to any Sears store, Parts &...
- Page 3 I. GENERAL OPERATION Always wear safety goggles or safety glasses with side shields when operating • Read, understand, and follow mower. instructions on the machine and in the manual(s) before starting. Be thoroughly II. SLOPE OPERATION familiar with the controls and the proper Slopes are a major...
- Page 4 Never fill containers inside a vehicle, Keep nuts and bolts, especially blade a truck or trailer bed with a plastic liner. attachment bolts, tight and keep equip- Always place containers on the ground ment in good condition. away from your vehicle before filling.
-
Page 5: Lawn Mower
Repair Protection Agreements Congratulations on making a smart pur- • Fast help by phone- phone sup- chase. Your new Craftsman® product port from a Sears representative designed and manufactured for years products requiring in-home repair, plus dependable operation. But like all prod- convenient repair scheduling. -
Page 6: How To Set Up Your Lawn Mower
Read these instructions and this manual Operator MOWING its entirety before you attempt to assemble presence POSITION or operate your new lawn mower. control bar /J'_ IMPORTANT: This lawn mower is shipped WITHOUT OIL OR GASOLINE in the engine. Your new lawn mower has been as- sembled at the factory... - Page 7 KNOW YOUR LAWN MOWER READ THIS OWNER'S MANUAL AND ALL SAFETY RULES BEFORE OPERATING YOUR LAWN MOWER. Compare the illustrations with your lawn mower to familiarize yourself with the location of various controls and adjustments. Save this manual future reference. These symbols may appear...
-
Page 8: How To Use
To convert to mulching or discharging The operation of any lawn mower can result in foreign operation, remove grass catcher close rear door. objects thrown into the eyes, which can result in Grass Pivot pins Rear severeeye damage,Always catcher wear safety glasses or eye shields while handle operating your lawn mower or performing any adjustments or repairs, We recom-... - Page 9 NOTE: Initial oil fill requires only 18 oz. due to residual oil in engine from the manufacturers 100% quality testing. When changing oil you may need 20 oz. Insert and tighten dipstick. IMPORTANT: Check oil level before each use. Add oil if needed.
-
Page 10: To Stop Engine
MULCHING MOWING TIPS TO STOP ENGINE • To stop engine, release operator pres- iMPORTANT: For best performance, ence control bar. keep mower housing free of built-up grass and trash. See "CLEANING" in the START ENGINE Maintenance section of this manual. NOTE: Due to protective coatings... - Page 11 MA|NTENANCE BEFORE AFTER EVERY EVERY EVERY BEFORE EACH EACH 25 HOURS SCHEDULE HOURS OR SEASON HOURS STORAGE v" Check for Loose Fasteners v" v" v" _1 Clean / Inspect Grass Catcher * v" Check Tires Check Drive Wheels v" v" Clean Lawn Mower ..
- Page 12 LAWN MOWER IMPORTANT: Blade bolt is heat treated. If bolt needs replacing, replace only with Always observe safety rules when per- approved bolt shown in the Repair Parts forming any maintenance. section of this manual. TIRES TO SHARPEN BLADE * Keep tires free of gasoline, oil, or insect NOTE: We do not recommend...
-
Page 13: Spark Plug
TO CHANGE ENGINEOIL Install cartridge, then replace cover NOTE: Before tipping lawn mowerto drain making sure the tabs are aligned with oil, empty fuel tank by running engine until the slots in the back plate. Fasten fuel tank is empty. screw securely. - Page 14 ,A WARNING: To avoid serious injury, Mowing Mowing r-c_ before performing any service position adjustments: Release control bar and stop engine. Make sure the blade and all moving parts have completely stopped. Disconnect spark plug wire from spark Hairpin plug and place wire where it cannot Handle come...
- Page 15 Immediately prepare your lawn mower Operator MOWING storage at the end of the season or if the presence POSITION control bar unit will not be used for 30 days or more. LAWN MOWER When lawn mower is to be stored for a period of time,...
-
Page 16: Troubleshooting
CYLINDER If possible, store your unit indoors cover it to protect it from dust and dirt. Remove spark plug. • Cover your unit with a suitable protec- Pour one ounce (29 ml) of oil through tive cover that does not retain moisture. - Page 17 TROUBLESHOOTING = See appropriate section in manual unless directed to a Sears Parts & Repair Center. CAUSE CORRECTION PROBLEM Rear of lawn mower 1. Raise cutting height. Loss of power housing or cutting blade dragging in heavy grass. Cutting too much grass. Raise cutting height.
- Page 18 Ias tiendas Sears, al Centro de Repuestos y Reparaci6n, o a otro comercio donde se vendan los equipos Craftsman, a efectos de que se Ia reparen sin costo (o bien se Ia reemplacen, caso que no sea posible repararla).
- Page 19 I. OPERAClON Siempre use gafas de seguridad o anteojos con protecci6n lateral cuando opere la sega- • Antes de empezar, debe familiarizarse dora. completamente con los controles y el uso correcto de la maquina. Para esto, debe leer y comprender todas las instrucciones I!.
- Page 20 Nunca repostar la maquina al interior de un Mantenga las tuercas y los pernos, espe- local. cialmente los pernos del accesorio de la Nunca guardar la m@.quina o el contenedor cuchilla, apretados y mantenga el equipo en buenas condiciones. de gasolina donde hay una llama abierta, chispa o luz piloto como una caldera u otros •...
-
Page 21: Mantenimiento
• Ayuda r_pida pot tel6fono - soporte tele- Congratulaciones por su buena compra. nuevo producto Craftsman@ est& diseflado f6nico por parte de un representante Sears y fabricado para funcionar de modo fiabte por sobre productos que requieren un arreglo en muchos aflos. - Page 22 Lea estas instrucciones y este manual comple- Barra POSICION tamente antes de tratar de montar u operar su PARA que sxige la segadora nueva. SEGAR /_j. presencia IMPORTANTE: Este cortacesped viene SIN operador ACEITE O GASOLINA en el motor. Su segadora nueva ha sido montada en la f&brica con la excepci6n de aquellas partes que se dejaron sin montar pot razones de envio.
- Page 23 FAMILIARICESE CON SU SEGADORA LEA ESTE MANUAL DEL DUENO Y LAS REGLAS DE SEGURIDAD ANTES DE OPARAR SU SEGADORA. Compare las ilustraciones con su segadora para familiarizarse con la ubicaci6n de los diversos controles y ajustes. Guarde este manual para referencia en el futuro. Estos simboloe pueden apareeer eobre su segadora o en la literatura...
-
Page 24: Paraajustar La Alturade Corte
Laoperaci6n de cualquier Para pasar a la operaci6n de acolchamiento, segadora puedehacerque remover la recolectora de hierba y cerrar la SEGURIDAD saltenobjetosextraflos dentrode puerta trasera. susojos,Ioquepuedeproducir Pasador del Mango del daflosgravesenestos.Siempre trasera bastidor del useanteojos deseguridad o protecci6n para recogedor losojosmientras operesu segadora o cuando de cesped hagaajustes o reparaciones. - Page 25 PASOS SIMPLES DERECORDAR 4. Inserte y aprietelavarillamedidora de aceite. CUANDO CONVIERTA S USEGADORA IMPORTANTE: PARA ACOLCHAMIENTO - Revise el nivel del aceite antes de cada uso. 1. Laplancha acolchadora t raserainstalada. Agregue aceite si es necesario. Llene hasta 2. Laprotecci6n contrala descarga cerrada. la linea de Ileno en la varilla medidora de PARAENSACAMIENTO TRASERO - nivel.
- Page 26 PARA PARAR EL MOTOR CONSEJOS PARA SEGAR Y ACOL- CHAR • Para parar el motor, suelte la barra de con- troles que exigen la presencia del operador. IMPORTANTE: Para obtener el mejor PARA HACER ARRANCAR EL MOTOR rendimiento mantenga la caja de la segadora AVlSO: Debido alas capas protectoras del mo- sin acumulacion...
- Page 27 PROGRAMA ANTES DESPUES CADA CADA CADA ANTES DEL DE CADAi DE CADA 25 NORAS O ALMACE- MANTEN|M|ENTO HORAS TEMPORADA HORAS NAMIENTO Revisar si hay Sujetadores Sueltos Limpiar/Inspeccionar el Recogedor de Cesped Controlar los Neumaticos Controlar las Ruedas Motrices Limpiar la Segadora ..
- Page 28 SEGADORA La torsi6n para apretar recomendada es de 35 - 40 pies libras. Siempre observe las reglas de seguridad IMPORTANTE: El perno de la cuchilla es tratado ando haga el mantenimiento. a calo. Si es necesario sustituir los pernos, LLANTAS sustituirlos s61o con pernos aprobados mostrados •...
-
Page 29: Para Cambiar Elaceitedelmotor
PARA CAMBIAR ELACEITEDELMOTOR ,I_PREOAUOI6N: Los solventes de petr61eo, AVlSO: Antesde inclinar l a segadora paradre- tales come el keroseno, no se deben usar para narelaceite,dreneel tanque de combustible limpiar el cartucho. Pueden producir el deterioro haciendo correrel motorhastaqueel tanque de este. No aceite el cartucho. No use aire a estevacio. - Page 30 Ai_ADVERTENClA: Para evitar lesi6nes serias, antes de dar calquier servico o de hacer ajustes: Suelte la barra de control y pare el motor. AsegGrese que la cuchilla y que todas las partes movibles se hayan detenido comple- tamente. Clavija Desconecte el alambre de la bujia y p6n- gale en donde no pueda entrar en contacto Puntal...
- Page 31 POSICION Barra de control Inmediatamente prepare su segadora para el PARA que exig almacenamiento al final de cada temporada o si SEGAR presencia la unidad no se va a usar pot 30 dias o m&s. operador SEGADORA Cuando se va a guardar la segadora por cierto //// DOBLAR...
- Page 32 ACEITE DEL MOTOR • Si es posible, guarde su unidad en un recinto Drene el aceite (con el motor caliente) y c&m- cerrado y cObrala para protegerla contra el bielo con aceite de motor limpio, (Yea "MO- polvo y la mugre. TOR"...
- Page 33 SOLUCION DE PROBLEMAS - Vea la section apropiada en el manual amenos este dirigido a un centro de servico Sears. CORRECCION PROBLEMA CAUSA Falta de Cuchilta desgastada, doblada 1. Ajuste a la posici6n de fuerza o suelta. "Corte m_.s alto." AItura de las ruedas dispareja.
- Page 35 "1:3 o-O(_5 > <d > _0_0 0_0_ b_ N t.O 03 _0_0_ _N_'' _NN,, • • .£Z __tO • 2:2 © • <_ •--_ O hT:_ ,_ co o o0 ® < ® _ w -r o0 o0 m o0 o_Oz >...
- Page 36 BRIGGS & STRATTON 4=CYCLE ENGINE MODEL NUMBER 124T02-0847-EA 718 0 S307...
- Page 37 BRIGGS & STRATTON 4=CYCLE ENGINE MODEL NUMBER 124TO2-O847-EA 977 CARBURETOR GASKET SET 633A ®j 633 ® 443_ 276 _% 358 ENGINE GASKET 3_._ 20@ 842<> s24 334_ 745 _' 505° I 1329 REPLACEMENT ENGINE] I1330 REPAIR MANUAL [ 10'" OWNER'S MANUAL]...
- Page 38 BRIGGS & STRATTON 4=CYCLE ENGINE MODEL NUMBER 124T02-0847-EA 332 _ 1386 1388_ 689 _ 1036 EMISSmONS LABEL 1 PART PART DESCRIPTION DESCRIPTION 695759 697322 Cylinder Assembly Screw (Connecting Rod) 262651s Valve-Exhaust 399269 Kit-Bushing/Seal 262652s Valve-Intake 299819s Seal-Oil (Magneto Side) 691270 493279 Sump-Engine Spring-Valve...
- Page 39 BRJGGS & STRATTON 4-CYCLE ENGINE MODEL NUMBER 124T02-0847-EA PART PART DESCRIPTION DESCRIPTION Seal-Choke Shaft 633A 693867 494870 Jet-Main (High Altitude) 498260 Kit-Carburetor Overhaul 66538s Boot-Spark Plug 790845 Carburetor 493823 Spacer (Includes 2) 694468 Plug-Welch 692294 Spacer-Fuel Tank 696564 Valve-Throttle 690345 Screw (Breather Cover) 398187 Float-Carburetor...
- Page 40 Pare pedir servicio de reparacidn Au Canada pour service en frangais: a domicilio, y pare ordenar piezas: 1-800-LE-FOYER 1-888-SU-HOGAR ® (1-800-533-6937) ,,iiii i www.sears.ca ,_!!iiiiiii;;iiii!!_iiiiiiii!!iiii_' (1-888-784-6427) _iiiiii;;!iiiiiiiiii!!iiiiii;;;iiiiii_' _iiiiii;;!!iiiiii_i;;!!iiiiiiiii;;;iiil _iiiii!!ii!!iiiiiiiiiiii!!iiiii!!iiiiiiii;;i © Sears Brands,LLC ® Registered Trademark / TMTrademark / SMService Mark of Sears Brands, LLC ®...
Need help?
Do you have a question about the 917.388120 and is the answer not in the manual?
Questions and answers