
Related Manuals for LG PA75U


Summary of Contents for LG PA75U
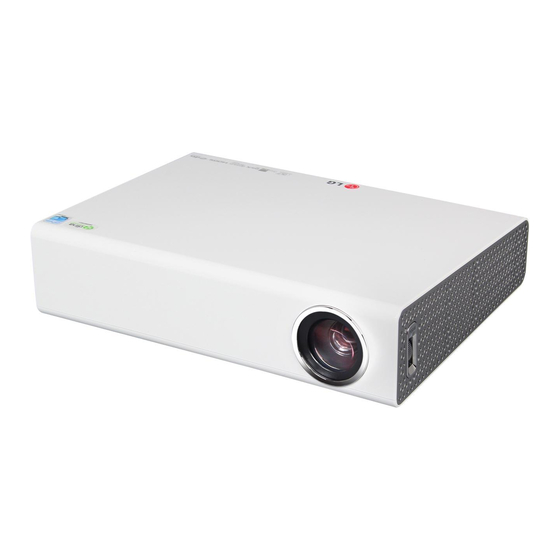
- Page 1 OWNER'S MANUAL DLP PROJECTOR Please read the SAFETY INSTRUCTIONS section carefully before using the product. PA75U www.lg.com P/NO : SAC30666053(1302-REV01)
-
Page 2: License
LICENSE LICENSE Manufactured under license from Dolby Laboratories. "Dolby" and the double-D symbol are trademarks of Dolby Laboratories. ABOUT DIVX VIDEO: DivX® is a digital video format created by DivX, LLC, a subsidiary of Rovi Corporation. This is an official DivX Certified® device that plays DivX video. Visit divx. com for more information and software tools to convert your files into DivX videos. -
Page 3: Safety Instructions
SAFETY INSTRUCTIONS SAFETY INSTRUCTIONS Please take note of the safety instructions to prevent any potential accident or misuse of the projector. Safety precautions are given in two forms, i.e. Warning and Caution as detailed below. WARNING: Failure to follow the instructions may cause serious injury and even death. - Page 4 SAFETY INSTRUCTIONS Read these instructions. Do not place the projector close to Keep these instructions. sources of steam or oil such as a Heed all warnings. humidifier or kitchen counter. Follow all instructions. - This may cause fire or electric shock. Indoor Installation Do not place the projector where it might be exposed to dust.
- Page 5 SAFETY INSTRUCTIONS Power CAUTION When installing the projector on a WARNING table, be careful not to place it near The grounding wire should be con- the edge. nected. - The projector may fall causing injury - Be sure to connect the grounding to persons or product malfunction.
- Page 6 Do not remove any covers except for the lens cap. There is a high risk of Only use the official power cord pro- vided by LG Electronics. Do not use electric shock. Do not look directly into the lens when other power cords.
- Page 7 SAFETY INSTRUCTIONS When the lamp is on or has just been CAUTION turned off, avoid touching the air vent Do not place a heavy object on the or lamp, because these will be very projector. hot. - It may fall down and cause physical If there is a gas leak, do not touch injury.
- Page 8 SAFETY INSTRUCTIONS Cleaning CAUTION Contact your seller or the Service WARNING Center once a year to clean the inter- Do not spray the projector with water nal parts of the projector. when cleaning. Do not allow water to - If you do not clean the contaminated get into the projector or do not allow it interior of the projector for a long to get wet.
- Page 9 SAFETY INSTRUCTIONS Others Always use batteries approved and certified by LG Electronics.- Failure to do so may cause fire or explosion. WARNING Do not store the battery near Only a qualified technician can disas- metallic objects, such as keys and semble or modify the projector. For paper clips.
- Page 10 SAFETY INSTRUCTIONS Antenna Because the receiver sensitivity of the portable antenna may be very If you are using an outdoor antenna, high depending on the location of or please install it away from electrical distance from a TV transmitter, area, wires to make sure it does not touch house structure, surrounding environ- any nearby wires even when it falls ments (mountain, structure, building,...
- Page 11 SAFETY INSTRUCTIONS 1) this device may not cause harmful FCC NOTICE interference, and 2) this device must Federal Communications accept any interference received, Commission (FCC) Statement including interference that may cause You are cautioned that changes or undesired operation of the device of the modifications not expressly approved device.
- Page 12 SAFETY INSTRUCTIONS Avis d’Industrie Canada sur IC (CANADA) l’exposition aux rayonnements Industry Canada Statement: Cet appareil est conforme aux limites This device complies with RSS-210 of d’exposition aux rayonnements the Industry Canada Rules. Operation d’Industrie Canada pour un is subject to the environnement non contrôlé. following two conditions: REMARQUE : LE FABRICANT 1) this device may not cause N’EST PAS RESPONSABLE DES interference and...
- Page 13 SAFETY INSTRUCTIONS Disposal of waste Disposal of your old appliance batteries/accumulators 1. When this crossed-out wheeled bin 1. When this crossed-out wheeled bin symbol is attached to batteries/ac- symbol is attached to a product it cumulators of Your product it means means the product is covered by the they are covered by European Direc- European Directive 2002/96/EC.
- Page 14 SAFETY INSTRUCTIONS For USA NOTE TO CABLE/TV INSTALLER This reminder is provided to call the CATV system installer’s attention to Article 820 - 40 of the National Electric Code (U.S.A.). The code provides guide- lines for proper grounding and, in partic- ular, specifies that the cable ground shall be connected to the grounding system of the building, as close to the point of the cable entry as practical.
-
Page 15: Table Of Contents
Table of contents Table of contents LICENSE Using the Projector Functions - Home Menu Additional Options SAFETY INSTRUCTIONS - Adjusting the Aspect Ratio - Using the Keystone PREPARATION Function Accessories - Using the Input List Optional Accessories Using the Quick Menu Parts and Components Installation ENTERTAINMENT - Installation Precautions Network Setup - Projection Distance per Screen Size - One-Click Network Connection - How to Install the Projector Using a... - Page 16 Table of contents Using SmartShare™ Connecting Headphones - Watching Videos Connecting a Laptop - Viewing the Photos MAINTENANCE - Listening to Music - Viewing the Files Cleaning Using the Magical Mirroring Function - Cleaning the Lens - Cleaning the Projector Case - Running Magical Mirroring How to Fix the Lens Cap - MirrorOp Sender Updating the Software Smart Projector FAQ 3D FUNCTION WIRELESS SPECIFICATIONS...
-
Page 17: Preparation
PREPARATION PREPARATION Accessories Check the accessories provided with the product. The picture may be different from the actual product. ENERGY SAVING INPUT FLASHBK LIST BACK HOME MUTE Q.MENU HOME SETTINGS MY APPS AV MODE EXIT STILL INFO AUTO SLEEP Key’s Key’s RATIO Remote Control... -
Page 18: Optional Accessories
PREPARATION Optional Accessories To purchase optional accessories, visit an electronics store or online shopping site or contact the retail store where you purchased the product. Without prior notice, optional extras are subject to change in order to improve the per- formance of the product, and new optional accessories may be added. Projection Screen Tripod HDMI Cable... -
Page 19: Parts And Components
PREPARATION Parts and Components * The projector is manufactured using high-precision technology. You may, however, see tiny black dots and/or bright colored dots (red, blue or green) that continuously appear on the projector screen. This is a normal result of the manufacturing process and does not indicate a malfunction. -
Page 20: Installation
PREPARATION Installation Installation Precautions Do not place the projector in a hot Place the projector in a well-ventilated or humid environment. environment. - Do not place the projector in a hot, - To prevent internal heat from build- cold, or humid environment. ing up, install the projector in a well- Do not place the projector in a place ventilated place. -
Page 21: Projection Distance Per Screen Size
PREPARATION Projection Distance per Screen Size Place the projector on a sturdy, level surface, together with the computer or audio/ video source. Place the projector at an appropriate distance from the screen. The distance be- tween the projector and the screen determines the actual size of the image. Position the projector so that the lens is perpendicular to the screen. -
Page 22: How To Install The Projector Using A Tripod
PREPARATION How to Install the Projector Using a Tripod You can install this projector using a camera tripod. As shown below, you can mount the projector instead of a camera on the tripod. When stabilizing the tripod, we recommend using the locking bolt of standard size 4.5 mm or less. -
Page 23: Remote Control
REMOTE CONTROL REMOTE CONTROL Open the battery cover on the back of the remote control and insert the specified batteries as per instructions . The same type of batteries (1.5 V AAA) must be used. These must also be new batteries. CAUTION y Do not mix new batteries with old ones. - Page 24 HOME REMOTE CONTROL SETTINGS Displays or closes the Settings menu. ENERGY SAVING INPUT HOME Displays the Home menu. MY APPS/Q.MENU MY APPS: Displays the list of my apps. Q.MENU: Changes the settings easily. FLASHBK Up/Down/Left/Right buttons LIST Switches between menu functions. OK ꔉ Shows the current mode and saves changes to the settings. MUTE ꕣ...
-
Page 25: Magic Remote Control
MAGIC REMOTE CONTROL MAGIC REMOTE CONTROL If the battery low message appears while using the projector, replace the batteries. As shown in the figure, press the top of the battery cover and slide it down the cover. Insert two new and identical alkaline batteries (1.5V, AA type) with + and - poles pointing in the correct direction in the remote control. -
Page 26: Pairing The Magic Remote Control
MAGIC REMOTE CONTROL Pairing the Magic Remote Control You must pair the magic remote control with the projector to use it. Pair the magic remote control prior to use as follows: HOME Turn on the projector and press the wheel (OK) button toward the projector. When the pairing is complete, the pairing completion message is displayed on the projector screen. -
Page 27: Watching With The Projector
WATCHING WITH THE PROJECTOR WATCHING WITH THE PROJECTOR Connecting the NOTE Antenna or Cable y Be careful not to bend the copper wire when connecting the coaxial cable (75Ω). Fix the cable by turning To watch TV using an indoor/outdoor its connector clockwise. antenna, connect a wall terminal to the antenna terminal of the projector using a RF cable (75 Ω). -
Page 28: Connecting The Portable Antenna
WATCHING WITH THE PROJECTOR Connecting the Portable Antenna Antenna connection Cable Projector CAUTION It is recommended to attach the antenna to a window. This makes the reception better than when attaching it to a wall. Install the antenna in a place where it is out of reach of children. The adhesive of the Velcro tape may be weakened if you attach it to an textured or uneven surface or a wall covered with wallpaper made from linen, silk, fabric, or expanded vinyl. -
Page 29: Hdtv Reception
WATCHING WITH THE PROJECTOR HDTV reception Antenna Installation Connect an RF cable to the connec- When attaching the antenna to a tor port on the bottom of the antenna. window, clean the window with a dry If the cable is not long enough, you cloth fi rst. You may also hang the can use a coaxial cable. -
Page 30: Using The Projector
WATCHING WITH THE PROJECTOR Using the Projector Using the Projector In Standby mode, press the POWER button to turn the projector on. Turning on the Projector Press the INPUT button and select Connect the power cord correctly. the input signal you want. After waiting for a moment, press Control the projector using the the POWER button on the remote following buttons while watching the control or the control panel. -
Page 31: Using The Projector Functions
WATCHING WITH THE PROJECTOR Using the Projector Functions The menu screen display in this owner's manual is an example to help users understand how to operate the product and may look different from the actual screen. Home Menu Press the HOME button of the remote control. ❶ ❷... -
Page 32: Additional Options
WATCHING WITH THE PROJECTOR Additional Options Adjusting the Aspect Ratio Resize an image to view at its optimal size by pressing RATIO while you are 4:3: Resizes images to the aspect using the projector. ratio. NOTE y Available options may vary depend- ing on the input signal. Zoom: Enlarges an image to fit the y You can also change the image size screen width. -
Page 33: Using The Keystone Function
WATCHING WITH THE PROJECTOR Using the Keystone Using the Input List Function Using the Input List If the projector is not at a right angle to Press the INPUT button to access the the screen, you can use the trapezoidal input sources. setting to adjust the screen. Because the Keystone function may - The connected input mode appears cause inferior screen image quality, use first. -
Page 34: Using The Quick Menu
WATCHING WITH THE PROJECTOR Using the Quick Menu You can customize frequently used menus. Press the MY APPS button and select the Q.MENU. Press the ︿ or ﹀ button to scroll through the following menus and press OK. Menu Description Aspect Resizes the picture. Ratio Picture Changes the picture Mode mode. -
Page 35: Entertainment
ENTERTAINMENT ENTERTAINMENT Network Setup Expert Settings for Network Connection To use the network media sharing fea- It is used in a specific environment such tures like DLNA, the projector must first as office (where fixed IP, etc. is used). be connected to wireless network. To Press the SETTINGS button. -
Page 36: Wireless Network Connection
ENTERTAINMENT Wireless Network Connection You can use a wireless network by using the built-in wireless network module as shown below. A wireless router must be installed and operating at this time. Refer to the wireless router's user manual to see how to install it. The network settings and connection may be different depending on the network envi- ronment. -
Page 37: Using The Wi-Fi Screen Share Function
Enable Wi-Fi Direct on the device that you want to connect to. program ( The list of devices that can connect to The nearby LG Smart Projectors the Smart Projector is displayed. supporting WiDi are searched. In the list, select the Smart Projector you Select a device to connect. -
Page 38: Tips For Network Setup
It will be working router supports wireless connection. normally. To connect to a wireless router, verify LG Electronics is not responsible for the SSID and security settings of any Internet connection problems, or the wireless router. Please refer to... -
Page 39: Using Media Link
You can download the Plex program The folders appear as set up in the suitable for your PC or notebook from PLEX Media Manager. www.lg.com. After installing the program, select the Plex icon in the system tray on the computer and click the right button of the mouse. -
Page 40: System Requirements For Plex Installation
ENTERTAINMENT Cautions when Using System Requirements for Media Link PLEX installation Only the 0.9.1.14 or higher version of Minimum requirements PLEX media server can be installed PC with 1.6 GHz Intel Core Duo on a Mac or PC. Processor and Windows XP SP3 or For the following languages, the GUI higher, 512 MB RAM or more language is displayed in English and Recommendations for HD contents... -
Page 41: Using The Premium Service
ENTERTAINMENT Using the Premium Service This service gives you easy access to a wide variety of content, such as news and UCC at any time, as long as you are connected to the Internet. In addition to global contents, the premium contents are specialized based on the country you are in. -
Page 42: Smartshare
SmartShare™ SmartShare™ Removing a USB Storage Device Before Using Press the MY APPS button. Select Q.MENU. Connecting a USB Storage Use the ︿ or ﹀ button to move to Device USB Device and press the OK but- ton. Connect a USB storage device (external HDD or USB memory stick) to the USB Remove the USB device. - Page 43 SmartShare™ Tips for Using a USB Device Supported Files for SmartShare™ A USB storage device installed using Maximum data transmission rate: an automatic recognition program or 20 Mbps (Megabit per second) its own driver might not be recogniz- Supported external subtitle formats: able. *.smi, *.srt, *.sub (MicroDVD, Sub- Some USB devices may not be sup- Viewer 1.0/2.0), *.ass, *.ssa, ported or will not work properly.
-
Page 44: Connecting Dlna
SmartShare™ Connecting DLNA Connecting DLNA DMR (Digital Media Renderer) Digital Living Network Alliance (DLNA) allows you to enjoy videos, music and • With the Windows 7 or Window 8 PC photos saved on your PC or server operating system or DLNA-certified using the Smart Projector through a device (e.g. - Page 45 SmartShare™ When DLNA is Malfunctioning Connecting DLNA DMP (Digital Media Player) Check your network settings when the DLNA option does not work properly. • With a PC having SmartShare™ To watch the 1080p video through PC Software, music/video/photo DLNA, a router that uses 5 GHz files may be replayed on the Smart frequency is required.
-
Page 46: Using Smartshare
SmartShare™ Using SmartShare™ Press the HOME button of the remote control. Select SmartShare™. You can open photos, music, videos, and documents form a USB file. You can open open photos, music, and videos from computers on your local network using DLNA and Media Link. The photo, music, video and document files of all devices connected to the projector are displayed. -
Page 47: Watching Videos
SmartShare™ Watching Videos In the Movie List, you can watch movies from a connected USB device. Tips for Playing Videos Some subtitles created by a user may not work. A video file and its subtitle file must be located in the same folder. A video file name and its subtitle file name must be identical in order to display the subtitle properly. - Page 48 SmartShare™ Video Codec Maximum supported resolution: 1920 x 1080 @30p Extension Codec Video VC-1 Advanced Profile, VC-1 Simple and Main Profile .asf .wmv Audio WMA Standard, WMA 9 Professional DivX3.11, DivX4, DivX5, DivX6, XViD, H.264/AVC, Motion Video Jpeg .divx .avi MPEG-1 Layer I, II, MPEG-1 Layer III (MP3), Dolby Digital, Audio Dolby Digital Plus, LPCM, ADPCM, DTS .mp4...
- Page 49 SmartShare™ Controlling the Video Playback You can control playback using the following buttons. ꕊ Option List Options Hide Exit Item Description ◀▶ Shows the current playing position. You can use the < or > button to move forward or backward. ꕗ Stops playing and returns to Movie List. ꕖ...
-
Page 50: Viewing The Photos
SmartShare™ Viewing the Photos You can view photos stored on a connected device. Photo File File Format Item Profile SOF0: baseline Supported SOF1: Extend Sequential format SOF2: Progressive 2D (jpeg, jpg, jpe) Min. 64 x 64 3D (jps) Size Max. Normal Type: 15360 (W) x 8640 (H) Progressive Type: 1920 (W) x 1440 (H) Supported format... - Page 51 SmartShare™ Controlling the Photo Playback You can control playback using the following buttons. Slideshow Option List Item Description Selects the previous or next photo. <, > Slide If no picture is selected, all photos in the current folder are displayed in a show slide show.
-
Page 52: Listening To Music
SmartShare™ Listening to Music You can play audio files stored on the connected device. Audio File Audio Bit rate Sampling rate Remark Codec 32 Kbps - 320 Kbps 16 kHz, 48 kHz MPEG1, MPEG2, Layer2, Layer3 Controlling Music Playback You can control playback using the following buttons. ꕊ... -
Page 53: Viewing The Files
SmartShare™ Viewing the Files You can see document files stored on a connected device. Supported File Formats XLS, DOC, PPT, TXT, XLSX, PPTX, DOCX, PDF Microsoft Office 97/2000/2002/2003/2007 versions Adobe PDF 1.0/1.1/1.2/1.3/1.4 versions File Viewer realigns a document, so it may look different from what is displayed on a PC. For documents that include images, the resolution may look lower during the realign- ing process. -
Page 54: Using The Magical Mirroring Function
SmartShare™ Using the Magical Mirroring Function The magical mirroring feature is used to wirelessly transmit and project the screen of a network- connected laptop (PC) to a projector. To use this feature, the MirrorOp Sender, an application for PC, should be installed in the user's laptop (PC). You can download this PC program from www.MirrorOp.com. - Page 55 SmartShare™ After running Magical Mirroring, execute the MirrorOp Sender program on the com- puter. In the Remote Box IP field of the MirrorOp Sender, enter the IP which is the same as the host IP of the Magical Mirroring and press Connect. <PC Screen>...
- Page 56 SmartShare™ If MirrorOp Sender runs normally, the connected PCs are displayed in the Device List of Magical Mirroring as shown below. (All connected PCs are displayed.) If MirrorOp Sender does not run, the Device List of Magical Mirroring is shown as follows.
-
Page 57: Mirrorop Sender
SmartShare™ MirrorOp Sender Changing MirrorOp Mode ꔈMove the button to this position to change the transfer mode to application mode. ꔈMove the button to this position to change the transfer mode to movie mode. Mode Description Application Mode When MirrorOp is set to this mode, the software will transfer images with greater quality. - Page 58 SmartShare™ Configuring MirrorOp - Search Host - Projection Quality NOTE Using this option, you can select "Normal" or "Best" for the projection quality. If the network connection is good, select "Best"; if not, "Normal".
- Page 59 SmartShare™ - TV Offset Compensation - Auto Power Management When you use the Notebook to run the MirrorOp application, please choose this op- tion. This option helps the notebook switch to the enabled mode. Your Wi-Fi network card will always work at an optimum level. - Auto Wi-Fi Connect When you choose this option, your MirrorOp will automatically connect to the server and log in.
- Page 60 SmartShare™ - Activate This Sender Software Buy a license or import the license if you already have one. - Check for Updates Check the newest version on the network System Requirements Dual core 1.8 GHz or higher (excluding Atom processor) Display Adaptor nVIDIA or ATI graphic card with 64MB VRAM or above Operating System Windows Vista, Windows 7 Wi-Fi...
-
Page 61: 3D Function
3D FUNCTION 3D FUNCTION 3D technology uses different video frames for each eye to add depth to the video. Before Watching 3D Warning about photosensitivity sei- While Watching 3D zures - Some users may experience a WARNING seizure or other abnormal symptoms when they are exposed to a flash- If you view 3D video or images too ing light or particular patterns from a closely for a long period of time, your... - Page 62 3D FUNCTION - Do not view 3D images for a long Please check the following when period of time when you are tired or using 3D glasses. ill. Do not use 3D glasses as ordinary glasses, sunglasses or protective CAUTION goggles. Extra special care is required for chil- - If you do so, this may cause injury.
-
Page 63: Requirements For Watching 3D Images
3D FUNCTION Requirements for Watching 3D Images * Optimum viewing angle: Top/Bottom/Left/Right 9° Recommended viewing distance: 3 m - 5 m Recommended screen size: 101 cm * Watching 3D videos should be done in dark room environments only. * For 3D watching, set the energy saving mode to Minimum. NOTE The pairing with the DLP-LINK glasses is affected by the intensity of light reflected from the screen. -
Page 64: Using The Dlp-Link (Dlp-Ready) Type Glasses
3D FUNCTION Using the DLP-LINK (DLP-Ready) Type Glasses While watching 3D images from the projector, press buttons on the glasses. When you press the button, the glasses flicker while synchronizing with the 3D im- ages. (The flickering is a unique operation method of DLP-LINK type glasses. It may be different depending on the glasses type.) If the glasses flicker or problems occur while watching 3D, first turn the lights off to make the room darker. -
Page 65: Watching 3D Images
3D FUNCTION 3D Manual Conversion Formats Horizontal Vertical Signal Supported 3D Formats Frequency (KHz) Frequency (Hz) 27.00 2D to 3D, S/S, T&B, C/B 33.75 1080p 2D to 3D, S/S, T&B, C/B, F/S, R/I, 67.50 HDMI-DTV 1080i 33.75 2D to 3D, S/S, T&B 720P 45.00 2D to 3D, S/S, T&B, F/S Others 2D to 3D 1024 x 768... -
Page 66: Customizing Settings
CUSTOMIZING SETTINGS CUSTOMIZING SETTINGS Settings Menu Press the SETTINGS button. Use the ︿, ﹀, ︿ or ﹀ button to select a desired item and press the OK button. Use the ︿, ﹀, ︿ or ﹀ button to set up a desired item and press the OK button. Press the EXIT button when completed. -
Page 67: Picture Settings
CUSTOMIZING SETTINGS PICTURE Settings Press the SETTINGS button. PICTURE Press the ︿ or ﹀ button to select PICTURE and ︿ • ꕊ Energy Saving : Medium press the OK button. • 3D Settings • Picture Mode : Vivid Use the ︿, ﹀, ︿ or ﹀ button to set up a desired •... - Page 68 CUSTOMIZING SETTINGS Item Description Advanced Customizes the advanced settings. Control Picture Sets optional settings. Option Picture Restores each mode's options to the factory default. Reset Aspect Changed the image size to view images at its optimal size. Ratio Picture By following the instructions, using the remote control, you can easily ad- Wizard II just the picture quality to technical standards without needing an expen- sive pattern device or a picture quality expert.
- Page 69 CUSTOMIZING SETTINGS Item Description Preferred Skin Color Adjusts the skin color in the picture to your prefer- Color ence. Grass Color Adjusts only the natural color area of e.g., field and mountain. Sky Color Adjusts only the color of the sky. Super Improves blurry and unclear parts in the picture to make the picture Resolution more vivid.
- Page 70 CUSTOMIZING SETTINGS Item Description Color Man- Adjusts Red/Green/Blue/Yellow/Cyan/Magenta colors. Allows an agement expert to adjust the tint using a test pattern. Six colors (Red/Green/ system Blue/Cyan/Magenta/Yellow) can be selectively adjusted without af- fecting other colors. You may not see colors change on a normal picture even after adjust- ment.
-
Page 71: Sound Settings
CUSTOMIZING SETTINGS SOUND Settings Press the SETTINGS button. SOUND Press the ︿ or ﹀ button to select SOUND and • Sound Mode : Standard press the OK button. • User EQ Use the ︿, ﹀, ︿ or ﹀ button to set up a desired •... -
Page 72: Channel Settings
CUSTOMIZING SETTINGS CHANNEL Settings Press the SETTINGS button. CHANNEL Press the ︿ or ﹀ button to select CHANNEL • Auto Tuning and press the OK button. • Manual Tuning • Channel Edit Use the ︿, ﹀, ︿ or ﹀ button to set up a desired item and press the OK button. -
Page 73: Time Settings
CUSTOMIZING SETTINGS TIME Settings Press the SETTINGS button. TIME Press the ︿ or ﹀ button to select TIME and • Clock press the OK button. • Off Time : Off • On Time : Off Use the ︿, ﹀, ︿ or ﹀ button to set up a desired •... -
Page 74: Lock Settings
CUSTOMIZING SETTINGS LOCK Settings Press the SETTINGS button. LOCK Press the ︿ or ﹀ button to select LOCK and ︿ press the OK button. • Set Password • Lock System : On Use the ︿, ﹀, ︿ or ﹀ button to set up a desired •... - Page 75 CUSTOMIZING SETTINGS Setting Description TV Rating- Blocks the TV programs that you want based on the ratings by General using the Parental Control Function (V-Chip). NOTE y The V-Chip electronically reads TV program ratings and al- lows parents to block program that are unsuitable for children. Rating Applies to TV-G, TV-PG, TV-14, TV-MA.
-
Page 76: Option Settings
CUSTOMIZING SETTINGS OPTION Settings Press the SETTINGS button. Press the ︿ or ﹀ button to select OPTION and OPTION press the OK button. ︿ • Language Use the ︿, ﹀, ︿ or ﹀ button to set up a desired • Caption : Off •... - Page 77 CUSTOMIZING SETTINGS Item Description PJT Mode Turns the projected image upside down or flips it horizontally. Auto Auto Keystone provides a rectangular screen image by automatically Keystone adjusting the Keystone number when there is a trapezoidal screen im- age caused by tilting of the projector. Item Automatically adjusts the Keystone number.
-
Page 78: Network Settings
CUSTOMIZING SETTINGS NETWORK Settings Press the SETTINGS button. Press the ︿ or ﹀ button to select NETWORK OPTION and press the OK button. ︿ • Language Use the ︿, ﹀, ︿ or ﹀ button to set up a desired • Caption : Off •... -
Page 79: Connecting External Devices
CONNECTING EXTERNAL DEVICES CONNECTING EXTERNAL DEVICES You can connect various external devices to the projector. Computer/Laptop Video Digital Device HDMI - Page 80 Component - Page 82 Game Console External Input (AV) - Page 81 Headphones RGB - Page 80 USB Device - Page 42 Headphone - Page 82... -
Page 80: Connecting Hd Receiver, Dvd Player, Or Vcr
CONNECTING EXTERNAL DEVICES C onnecting HD C onnecting PC Receiver, DVD Player, The projector supports Plug & Play. Your or VCR PC will automatically detect the projector and requires no driver installation. Connect a HD receiver, DVD Player, or VCR to the projector and select an ap- RGB Connection propriate input mode. -
Page 81: Connecting Av
CONNECTING EXTERNAL DEVICES C onnecting AV Connect the output ports of an external device and the A/V IN port of the projec- tor. Press the INPUT button to select AV. RGB OUT (PC) AUDIO OUT You can connect the audio cable without using a gender as shown in the illustra- tion above. -
Page 82: Component Connection
CONNECTING EXTERNAL DEVICES C onnecting Component Connection Headphones You can enjoy vivid images when you connect an external device with a com- You can listen to the audio through ponent port to the RGB IN port of the headphones. projector. Press the INPUT button on the remote control to select Component. -
Page 83: Connecting A Laptop
CONNECTING EXTERNAL DEVICES Connecting a Laptop The table below shows examples of You can connect the projector to a lap- switching the output. For more infor- top to use various functions. mation, refer to the "External Output", "Connecting to an External Monitor", or similar sections of the owner's manual of your computer. -
Page 84: Maintenance
MAINTENANCE MAINTENANCE Clean your projector to keep it in optimal How to Fix the Lens condition. Cleaning Prepare the lens cap and the strap supplied as accessories. Cleaning the Lens Insert the end of the strap into the hole at the bottom of the lens section If there is any dust or staining on the of the projector. -
Page 85: Updating The Software
MAINTENANCE Updating the Software When a software update is required, run the software update to obtain the latest soft- ware version. You can manually check for and download any software updates. On the HOME screen, press the SETTINGS button. Select SUPPORT and go to Software Update. Item Description Software Update... -
Page 86: Smart Projector Faq
MAINTENANCE Smart Projector FAQ Problem Troubleshooting The 'Initializing' message indicates the CPU and Whenever I enter a hardware booting time, network communication setup, menu, the 'Initializing' or communication time with SDP (device authorization message is always and basic information download). It normally takes displayed. -
Page 87: Wireless Specifications
WIRELESS SPECIFICATIONS WIRELESS SPECIFICATIONS Wireless LAN Module (TWFM-B003D) Specifications Standard IEEE802.11a/b/g/n 2400 MHz to 2483.5 MHz Frequency Range 5150 MHz to 5250 MHz 5725 MHz to 5850 MHz Modulation CCK / OFDM / MIMO 802.11a: 15 dBm 802.11b: 14 dBm Output Power 802.11g: 17 dBm (Typical) 802.11n - 2.4 GHz: 17 dBm 802.11n - 5 GHz: 15 dBm 802.11a/g: 54 Mbps Data Rate... -
Page 88: Bluetooth Module (Bm-Lds302) Specifications
WIRELESS SPECIFICATIONS Bluetooth Module (BM-LDS302) Specifications Standard Bluetooth Version 3.0 Frequency Range 2400 MHz - 2483.5 MHz Output Power (Max.) 10 dBm or lower Data rate (Max.) 3 Mbps Communication Line of Open Sight approx. 10 m Distance ꔈFCC ID of Bluetooth module inside Projector FCC ID: BEJLDS302... -
Page 89: Specifications
SPECIFICATIONS SPECIFICATIONS MODELS PA75U (PA75U-JE) Resolution (Pixel) 1280 (Horizontal) × 800 (Vertical) Aspect ratio 16:10 (Horizontal:Vertical) Panel size (mm) 11.623 Projection distance 0.90 m-3.06 m (76.2 cm - 254.0 cm) (Video size) Ratio of upward 100 % projection Working range of the remote control AC-DC Adaptor 19.5 V, 7.18 A... - Page 90 SPECIFICATIONS Supported Monitor Display HDMI/DVI-DTV mode supported Horizontal Vertical Horizontal Vertical Resolution Frequency Frequency Resolution Frequency Frequency (kHz) (Hz) (kHz) (Hz) 720 x 400 31.469 70.08 720 x 480 31.47 31.47 59.94 640 x 480 31.469 59.94 31.5 800 x 600 37.879 60.31 1280 x 720 44.96 59.94 1024 x 768...
- Page 91 SPECIFICATIONS Component Port Connection Open Source software Information Component Signal To obtain the source code under the 480i / 576i GPL, LGPL, MPL and other open source 480p / 576p licenses, which are contained in this 720p / 1080i product, please visit 1080p (50 Hz / 60 Hz only) http://opensource.lge.com. In addition to the source code, all refer- enced license terms, warranty disclaim- ers and copyright notices are available for download.
- Page 92 The model and serial number of the projec- tor are located on the back or on the side of the projector. Record them below should you ever need service. MODEL SERIAL...
Need help?
Do you have a question about the PA75U and is the answer not in the manual?
Questions and answers