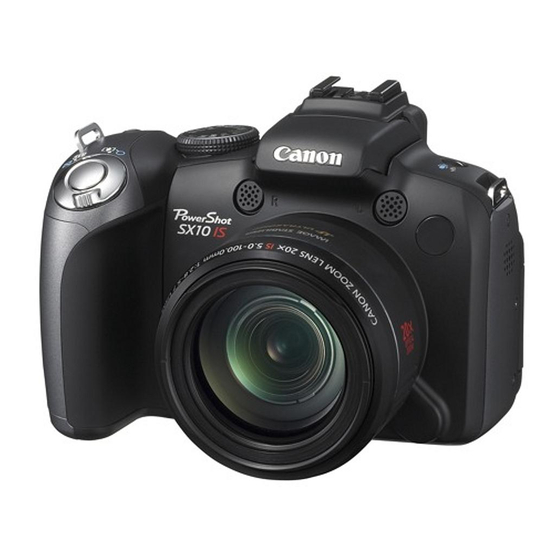
Canon PowerShot SX10 IS User Manual
Hide thumbs
Also See for PowerShot SX10 IS:
- User manual (464 pages) ,
- Specfications (1 page) ,
- Hackers manual (257 pages)
Advertisement
Quick Links
Advertisement

Related Manuals for Canon PowerShot SX10 IS


Summary of Contents for Canon PowerShot SX10 IS
- Page 1 Camera User Guide...
- Page 2 108[ can also use the control dial to select shooting modes or FUNC. menu options. See p. 43. Continuous Shooting The camera shoots continuously while the shutter button is held down. Focus DispJay on wMle the LCD shooting monitor Continuous You can shoot Fixed* Recorded...
- Page 3 To CanceJ Continuous Shooting: Follow Step 1 to display []. ® When will be the default setting. [] cannot be < set. o n [] and Manual Focus modes, [] will not display ([] be selected). AF frame will be set to [Center] in [] mode (p.
- Page 4 _$etting F|ash You can make detailed built-in flash and external flash* settings to fit the shooting conditions. * See Setting the Extema//y Mounted Flash (p. 260), Bui|to_n Flash Settings Menu Item Summary Note lash Mode When set to [Manual], you can control the flash output in the TV or AV...
- Page 5 Menu ffem Summary Note Slow Synchro The flash timing is adjusted to slow Using Slow Synchro shutter speeds. This reduces increases chance that only the background chances for camera will appear dark when a night scene shake. Use of a tripod or an interior shot is taken, is recommended.
- Page 6 Displaying Setting EFlash Control] FUNC. menu (p. 53). ou can also set [Flash Exp. Comp] and [Flash Output] in the...
- Page 7 J113 Checking Focus Peop|e's Expressions -,'_,, ,_., ',,° >> p. 284 You can zoom the display of the AF frame to check focus when shooting or right after taking a shot. Zeem_n9 Frame Sheetin9 < The AF frame area can be zoomed to check focus while shooting. When you want to capture people's expressions, set [AF Frame] to [Face Detect].
- Page 8 1141 The AF frame cannot be zoomed under the following circumstances: - When [AF Frame] hsset to [Face Detect] and a face is not detected, or when the face is extremely large in relation to the overall composition. - When the camera cannot focus. - When the digital zoom is unuse.
- Page 9 Checkin_ Fetus R_ght After Sheeting {Fecus Check) Allows you to check the focus of an image taken, It is also easy to check people's expressions and look for closed eyes when shooting because a frame the size of the face displays when Face Select and Track (p, 118) or AF frame mode is set to [Face Detect] (p, 118), You are recommended to set [Review] to [Hold] in the _...
- Page 10 To Cancel the Focus Check: Press the shutter button halfway. ® You can also check the focus in Playback mode (p. 157).
- Page 11 _$witching between Focus Settings You can set the AF mode. whatever it is aimed IThe camera continually focusing Continuous even when the shutter button is not pressed, allowing you to shoot without missing opportunities. IThe camera only focuses when the shutter button is pressed <...
- Page 12 Se|ecting an AF Frame Mode The AF frame indicates the area of the composition on which camera focuses. The camera detects a face and sets the focus, exposure .1 and white balance .2. In addition, camera meters the subject so that the face is Face Detect correctly illuminated...
- Page 13 J119 The AF frame appears as follows when the shutter button is pressed halfway. - Green: Shooting preparations complete - Yellow: Focusing difficulty ([Center] or [FlexiZone] option) - No AF frame: Focusing difficulty ([Face Detect] option) Face Detect Feature ® When the camera detects faces, AF frames will be displayed on a maximum of three faces.
- Page 14 Moving Frame ([Flex[Zone] Selected) The AF frame can be moved manually allowing you to focus precisely on the desired area of your subject. ® Selection cannot be made while in the manual focus mode (p. 127). ® If you turn off the camera or the lens retracts in playback mode (p.
- Page 15 Changing Frame Size ([Flex_Zon÷] selected) You can change the size of the AF frame to match the size of the subject. When your target subject is small or when you want to focus on a specific portion of the subject, you can decrease the size of the AF frame to shrink the area of focus.
- Page 16 1221 Selecting a Subject to Focus (Face Select and Track) _o,,._; o," >> p. 284 Once the focus is fixed to a subject's face, the frame can be set to follow the subject within a certain range. Set the AF frame mode in the menu to [Face Detect] in advance (p.
- Page 17 J123 • The face frame (_) of main subject will change into a green r-1. _ • if the camera has difficulty focusing, the face frame will display in yellow. In the following Cases, the face select mode will be canceled. _n turning the power off and back 0 n -When switcMng to another shooting mode...
- Page 18 _$hooting with Serve With Servo AF, the focus remains on a subject for as long as the shutter button is pressed halfway, so you do not miss opportunities capture a moving subject. n0t avai!ab le !n the f0!!owing situations, is selected when MF is set...
- Page 19 Shooting HardoteoFeCus Subjects _Focus Leek, AF Leek, Manual Focus, Safety it may be difficult to focus on the following types of subjects, ° Subjects with extremely low contrast to the surroundings ° Scenes with a mixture of near and far subjects °...
- Page 20 1281 To Release the AF Lock: Press the MF button. When [Se[vo AF] (P. 124)is set to IOn], AF !ock cannot be used. ® The AF frame does not appear in the F[_ mode, so be sure to point the camera at the subject on which you want to focus.
- Page 21 Shootin_ in Manual Focus Mode The focus can be manually set. dJspJay • The MF indicator is displayed. • When the rTj menu's [Mr=Point Zoom] is set to [On], the portion of the image in the AF frame will appear magnified*.
- Page 22 To CanceJ the Manual Focus: Press the MF button. frame setting. Using Manua! Fetus in Cembinatien with Aute Feeus (Safety First, manual focus is used to roughly focus, then from that focus position the camera automatically focuses more accurately. You can use the following two methods.
- Page 23 Setting the Safety _,IF <...
- Page 24 _Focus 5racketing (Focus°SKT Mode) The camera automatically takes three shots: one at the manual focus position, and one each with focus positions preset farther and nearer. The three shots are taken at the same interval as continuous shooting (p. 108). The farther and nearer focus positions can be set in three steps: large, medium and small.
- Page 25 J131 _Locking the Exposure Setting (AE Lock) You can set the exposure and focus separately. This is effective when the contrast is too strong between the subject and background or when a sub act is backlit. To ReJease the AE Lock: Operate a button other than the control dial.
- Page 26 Chanyin_ Shutter Speed Aperture VaBu÷ Combination The automatically selected combinations of shutter speeds and aperture values can be freely changed without altering the exposure to shoot images (Program Shift). wish to |ock the exposure. haBfway and press the [_ button. •...
- Page 27 J133 Locking Flash Exposure Setting Lock) You can lock the flash exposure so that the exposure settings are correctly set regardless of the composition of your subject. <: To ReJease the FE Lock: Operate a button other than the control dial. Control] menu is set to [Manual].
- Page 28 _Adjusting the Expesure Compensatien Adjust the exposure compensation to a positive value to avoid making the subject too dark when it is backlit or shot against a bright background. Adjust the exposure compensation to a negative value to avoid making the subject too bright in night shots or when shot against a dark background.
- Page 29 Sheeting while Brightening Dark Areas When shooting scenes in which faces or subjects appear darkened, you can set the camera to automatically detect faces and dark areas and compensate brightness levels while shooting. epending on ihe Scene Being shot, the compensation results may not be as expected, ®...
- Page 30 _Auto Exposure Bracketing (AEB Mode) In this mode, the camera automatically changes the exposure within a set range to take three shots at the same interval as continuous shooting (p. 108). The images are shot in the following order: Standard exposure, underexposure and overexposure.
- Page 31 _Switching between Metering Modes ' 0,°- >> po284 Appropriate for standard shooting conditions, including backlk scenes. The camera divides _mages into several zones for metering. Evaluative evaluates complex lighting conditions, such as the 3osition of the subject, the brightness, the direct light, and the backlighting, and adjusts the settings...
- Page 32 Moviny Spot AE Point to the Frame/ Centering Spot AE Point 1, Press the MENU button. 2, In the [_ menu, use the 4_ or 4, button to select [AF Frame]. 3. Use the @ or ¢_ button to select [FlexiZone].
- Page 33 _Adjusting Tene {White Balance} >>p.284 Normally, the _ (Auto) white balance setting selects an optimal white balance. When the _ setting cannot produce natural looking colors, change the white balance using a setting appropriate for the light source. Auto Settings are automatically set by the camera.
- Page 34 Usin_ Custom White Balance Take a custom wMte balance _ (Custom) reading for the following situations that are difficult for the _ (Auto) setting to detect correctly. , Shooting subjects of monotone color (such as sky, sea or forest) , Shooting with a particular source of light (such as a mercury-vapor lamp) , Shooting close-ups (Macro) 1, Press the _E"_ button.
- Page 35 Seiihe s hooting mode toP and the exposure compensation setting to[_+0] before setting a custom w Mte b alance. The correct white b alance may not beobtained when t he exposure setting isincorrect (image appears completely black o rwhite). ®When taking awhite b alance data reading atclose r ange while u sing f lash, you may not b eable t oobtain p roper exposure.
- Page 36 _$hooting in a My Colors Mode You can change the look of an image when it is shot= Records normally with this setting. Emphasizes the contrast and color saturation record bold colors. Tones down the contrast and color saturation to record neutral hues.
- Page 37 1. Press the _'_ button. 2, Use the @ or @ button to select and the 4" or ¢_ button to change the option. 3o Press the _ button. <: {Setting Custem Celet Merle)
- Page 38 1441 _Changing Colors Shooting You can easily change the colors in an image when it is shot for both stills and movies, allowing you to enjoy producing vadous effects. Depending on the shooting conditions, however, the images may appear rough, or you may not get the expected color. Before photographing important subjects, we recommend taking trial shots and checking the results.
- Page 39 i145 & _ The dei_uii Coioi £cceni isgreen........® You may not obtain the expected results if you use the flash, ® The specified Color Accent and color range is retained even if the camera's power is turned off.
- Page 40 Shooting with CoJor Swap _!od÷ Original Color Desired Color (Before Swapping) (After Swapping) The camera will switch to color input mode, and the display will alternate between the original image and the color swap image (using the previously set color).
- Page 41 <: into white, ®You may n ot o btain the expected results ifyou use the flash, ®The colors and color range specified inthe Color Swap mode are retained even i fthe camera's power isturned off,...
- Page 42 Savin_ Ori_ina! images Not only can you save images with altered colors when shooting still images with the Color Accent or Color Swap modes, but you can also choose to save the odginal images (before the color change). Select [Save Or_ginal]o !.
- Page 43 Categorizing |mages Automatically (Auto Categery) if you set Auto Category to [On], images are automatically sorted into preset categories as they are recorded. IFor images shot in E_ or _ mode, or images with faces People detected when in face select mode or [AF Frame] is set to <: I [Face Detect].
- Page 44 Saving Custo_ Settings Jo, ... ',o_° _,_p. 284 You can save frequently used shooting modes and various shooting settings to the C (Custom) mode. When necessary, you can then shoot images with previousiy saved settings by simpiy turning the mode diai to C. Settings that are not retained when the shooting mode is changed or when the power is turned off (such as continuous shooting or self-timer) are also retained.
- Page 45 1. Use the @ or @ button to select [OK1_ _ 2. Press the @, button. 3. Press the NENU button. ® The setting contents do not influence other shooting modes. ® Saved settings can be reset (p. 222). 6" _Negistering Functions to the...
- Page 46 To CanceJ the Shortcut Button: Select _ in Step 2, Using Button • _, [_, _: Each time that the tr_ button is pressed, the settings of the registered functions are switched. The corresponding setup screen is displayed. • _: Each press of the irsU button records the white balance data.
- Page 47 _8ettimg My Menu You can quickly access commonly used menu items from a single screen by registering them in My Menu, You can also configure My Menu to appear immediately after pressing the MENU button in shooting mode. register. 1, Use the @ or @ button to select [Select items], 2, Press the _x_"_button, 3, Use the @ or ,_ button to select the...
- Page 48 1.Use the4_or@button toselect [Set default view], 2,Use the@or€_button toselect [Yes]. • [Yes]: When pressing the MENU button, [My Menu] will b e displayed. [No]: When p ressing the MENU b utton, [Rec. Menu] will b e displayed.
- Page 49 Inplayback mode, you can select images with the control dial. Turning itcounterclockwise selects the previous image while t urning it clockwise selects the next image. Please also see Viewit_g Still Images (p. 19). _O, Viewing Magnified images To CanceJ the Magnified DispJay: Press the zoom lever toward _'-_.
- Page 50 Viewing l_ages in Sets of Nine {index Playback) To Return to Single image Playback: Press the zoom lever toward Q.. Switching between Sets of Nine Images The jump bar will display if you press the _ button while in index playback and you can switch the display between sets of nine images.
- Page 51 Checking Focus People's Expressions (Focus Check Display} Focus Check display allows you to check the focus of images taken. Moreover, as you can change the display size and switch images, you can easily check facial expressions and whether a subject's eyes are closed= •...
- Page 52 Changing Display _lagnification Display Position To CanceJ Changing the DispJay Size and DispJay Position: Press the MENU button. Switchin8 Frames • If there are multiple focused AF frames or detected faces, the orange frame changes its position when you press the FUNCJSET button.
- Page 53 _Ju_ping to |mages When you have many images recorded onto a memory card, it is handy to use the search keys below to jump over images to find the object of your search. Jumps to the first image of each shooting date.
- Page 54 following circumstances. The defined playback mode will be canceled under the o Changing categories (while using My Category to define images). o When you press the FUNCJSET button while specifying a range of images, and the first or last image is displayed. o When displaying images not supported in defined playback (except when selecting images in a range).
- Page 55 Organizin 8 Images by Catesery {My Catesory) You can organize images into prepared categories. Category information recorded with the [Auto Category] function (p, 149) can be edited, You can also organize one image into multiple categories, The following operations can be performed if the images are sorted into categories.
- Page 56 1,Use the4,or@button toselect images to categorize. 2, Use the 4_ or @ button to select a category. 3. Press the (('J_ button. Pressing the FUNCJSET button again cancels the setting. This also can be set in the index playback mode. , Press the MENU button to complete the setting.
- Page 57 !. Use the @button toselect [Last image], 2,Press the _N_ button. 3.Use the4,or4,button toselect the last i mage inthe range tocategorize, 4.Press the _ button, • An image with a lower number than the first image cannot be selected as the last image, •...
- Page 58 _Tri_ing a Pe_ien ef an l_age You can tdm a required portion of a recorded image and save it as a new image file. 1, Use the 4- or ,_ button to select an image for trimming. 2, Press the i_q_"_ button. The tdmming frame (the area of the image wMch can be trimmed) displayed in green.
- Page 59 _. You can change the size of the tdmming frame using the zoom lever. However, the resolution of the saved image will differ according to the size of the trimmed image. • You can change the position of the t_ tdmming frame using the _, or ¢, button.
- Page 60 1661 • _, or _ images, and hmages recorded in '_ cannot be trimmed. o Some images shot with another camera may not be trimmed • The aspect ratio for images which can be trim reed will be fixed to 4 3 (or 3:4 if the image is vertically oriented). •...
- Page 61 _Viewing Movies Display a movie° 1. Use the 4' or @ button to select a movie. 2. Press the _ button. Images with a _ icon are movies. PUay the l_ll@V_@. MovieControlPanel B" 1. Use the @ or @ button to select _.
- Page 62 Operating Movie Control Panel Ends playback and returns to single image playback_ An icon will display when a printer is connected*.See the Direct Pnnt User Guide for details, Starts playback. You can use the @ button to slow down or the @ button to speed up playback.
- Page 63 _Editing Movies You can delete portions of recorded movies. second long cannot be edited.
- Page 64 save an edited movie. If the battery runs out of charge partway epending on the movie's file size, it may take some time to through, edited movie clips cannot be saved. When editing movies, it is recommended that you use four new AAosize alkaline batteries, fully charged AAosize NiMH batteries, or the separately sold Compact Power Adapter CAoPS700 (p.
- Page 65 _Rotating l_ages in the Disp|ay Images can be rotated clockwise 90 ° or 270 ° in the display. Original 90 ° 270 ° used to down!oad the images: The orientation is recorded in the image.
- Page 66 _Piayback with Transition Effects You can select the transition effect displayed when switching between images. No transition effect. IThe displayed image darkens and the next image gradually brightens _--J until it is displayed. I Press the _ button to have the previous image display from the left land the @ button to have the next image display...
- Page 67 _Automated Playback (Slide Shows) Automated playback of memory card images. Imagesettingsfor slideshowsare basedon the DigitalPrintOrderFormat (DPOF) standard (p. 202). AI! Images Plays all images on a memory card in order. Date Plays images bearing a specified date in order. My Category Plays the images in the selected category in order. Folder Plays images in a specified folder in order.
- Page 68 To Stop the SJide Show: Press the MENU button. Transitien Effects You can select the transition effect used when one image is replaced by another. transition effect. The new image gradually brightens as it moves upward from the bottom, F'_ IThe new image first appears in a cross shape and gradually expands L_ to display the full image, I Portions of the new image move horizontally, then the image expands display the full image,...
- Page 69 $elect a date/category/folder I :o play back Select a playback methedo !. Use the _, or @ button to select @,Dor , /_-% 2. Press the _ button. back. !. Use the @. or @ button to select a datelcategorytfolder to playback.
- Page 70 S÷|÷cting I_ages Playback - _) Select only the images that you wish to play back and save them as a slide show (Custom 1,2 or 3). Up to 998 images can be selected. They will be played back in their order of selection. 1.
- Page 71 Selecting AllImages 1.After selecting _1 = _ in Step 1, use the 4_ button to select [Mark all] and press the FUNC./SET button. 2. Use the 4_ button to select [Mark all], press the FUNCJ SET button. 3. Use the 4, button to select [OK] and press the FUNCJ SET button.
- Page 72 1781 _Red°Ey÷ Correction Functien You can correct red eyes in recorded images. Red eyes may not be automatmcally detected in some images or the results may not turn out as you intended. We recommend that you use [New File] to save corrected images. Examples: - Faces near the screen edges or faces that appear extremely small, large, dark or bright in relation to the overall...
- Page 73 e When there i snot e nough space left o nthe memory card, red-eye correction cannot be performed.
- Page 74 1801 ..you can apply red-eye correction any number Oi....times to an image, the image quality will gradually deteriorate with each application. ® Since the correction frame will not appear automatically images that have already been corrected once with the Red- Eye Correction function, use the [Add Frame] option to correct them.
- Page 75 Add Correction Frame 1. Use the _, _,, _, or ¢_ button to select [Add Frame]. 2. Press the _ button. • A green frame will display....cerrectien frame° 1. Use the _, @, 4- or ¢_ button to move the frame.
- Page 76 _e_oving Correction Frames !. Use the ,_, _,, 4- or ¢, button to select [Remove Frame]. 2. Press the (_2_ button. r@n!_@ve. !. Use the ÷ or €_ button to select a frame to remove. • The selected frame will appear in green.
- Page 77 _Brightening Dark Areas _ioContrast_ You can automatically detect and brighten dark areas in an image, and then save it as a new image.
- Page 78 • You can perform brightness compensation an unlimited number of times, but the picture quality may drop.
- Page 79 Addia 8 Effects with My Colors Fenctien You can add effects to recorded images (stills only) using the My Colors function. The following selection of My Colors effects available. For details, see p. 142. Vivid Lighter Skin Tone Neutral Darker Skin Tone Sepia Vivid Blue Vivid Green...
- Page 80 _861...
- Page 81 times to an image, the image quality will gradually deteriorate with each application and the intended colors may not be achieved. ® Color in images taken using My Colors (p. 142) in shooting mode and images edited with the My Colors function in playback mode may differ slightly.
- Page 82 _881...
- Page 83 _¢ Attaching Sound Memes images In playback mode, you can attach sound memos (up to 1 min.) to an image. The sound data is saved in the WAVE format (stereo). Seund Meme Pan÷! Use the _, or ¢_ button to select and press the FUNO./SET button. Returns to the playback screen.
- Page 84 1.Use the_'or'_button toselect El. 2.Press the _'_'_ b utton. * Recording time will be displayed. * Use the ÷ or @ button to change the sample rate. Sound quality will improve in the order of [11.025kHz], Control Panel [22.050kHz], [44.100kHz], but the recorded file size will also increase AvailableRecording...
- Page 85 Seund Recerder Panel Use the 4" or €_ button to select an option and press the FUNOJSET button. Returns to the menu screen. Exit Record Starts recording. Pause Stops recording, playback. Use the 4_ or @ button to select a sound to play and Play )ress the FUNC./SET...
- Page 86 _ Protecting |mages You can protect important images and movies from accidental erasure, Select You can configure the protection settings for each image singly while viewing them, Select Range You can select a first and last image and protect all the images in the range, Select by Date...
- Page 87 [Select] [Select Range] $e|ect first _mageo • You can use the control dial to select the first or last image. 1. Press the _ button. 2, Use the _, or €_ button to select the first image in the range to protect. 3o Press the _,N_ button.
- Page 88 _941...
- Page 89 [Select by Date]/[$eJeet by Categery]f[$elect by Folder] 1. Use the 4F or @ button to select a date/category/folder to protect. 2, Press the Q button. , A ,/will appear on selected images. , Pressing the FUNCJSET button again cancels the setting. , If a portion of the images are already protected, _ appears gray.
- Page 90 button during [Protect] mode. oumay cancel the operation bypressing the FUNCJSET...
- Page 91 _Erasing l_ages You can erase images from a memory card. ® Protected images cannot be erased with this function. Select Erase images after selecting them one at a time. Select Range For picking a first and last image and erasing the images in the range.
- Page 92 1.Use the@or@button toselect [OK]. 2,Press the _N_ button. Selecting [Stop] cancels selection the image you are about toerase and returns toStep 2 .
- Page 93 [Select Range]...
- Page 94 2ool 1, Press the _" button to select [Erase]. 2, Press the _ button. Pressing the MENU button cancels selection of the image you are about to erase and returns to Step 2. [Select by Date]/[$e|ect by CategenjJ/[$e|eet by Fe|der:l 1.
- Page 95 [A|| I_ages] se the 4= or @ button to select [OK]. 2o Press the @ button. _, Selecting [Cancel] cancels selection of the image you are about to erase --------------- and returns to Step 2. ® Pressing the FUNCJSET button while erasing is in progress cancels the procedure, ®...
- Page 96 CDI-E376-010 XXXXXX © CANON INC. 2008 PRINTED IN JAPAN...
Need help?
Do you have a question about the PowerShot SX10 IS and is the answer not in the manual?
Questions and answers