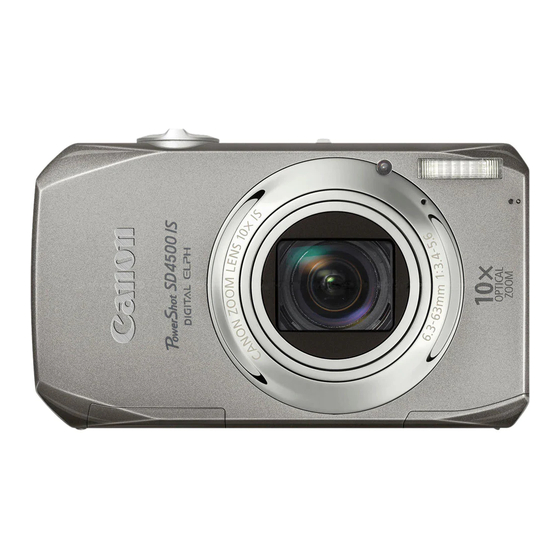
Canon PowerShot SD4500 IS Digital ELPH User Manual
Hide thumbs
Also See for PowerShot SD4500 IS Digital ELPH:
- User manual (97 pages) ,
- Software manual (60 pages) ,
- Printing manual (6 pages)
Table of Contents
Advertisement
Quick Links
Download this manual
See also:
User Manual
Advertisement
Table of Contents

Related Manuals for Canon PowerShot SD4500 IS Digital ELPH


Summary of Contents for Canon PowerShot SD4500 IS Digital ELPH
- Page 1 CaHOH IXUS 1000 HS Camera User Guide Make sure this guide, including the "Safety Precautions" section before using the camera. use it in the future.
- Page 2 Using Various Functions Shooting Movies This chapter serves as a more advanced version of the "Shooting Movies" and "Viewing Movies" sections in Chapter 1, and explains to use various functions for shooting and viewing movies. This chapter assumes that the mode switch is set to '_ The latter half of the chapter explaining...
- Page 3 ..........Enter',_, mode. Set the mode switch to _. Adjust the settings according your purposes (pp. 98 - 103). shoot. Press the movie button. To stop shooting the movie, press the movie button again. You can choose between five Movie modes. Choose a Movie mode.
- Page 4 You can shoot fast moving subjects and play them back in slow motion. maximum clip length you can record is approximately 30 seconds !ong, which will take approximately 4 minutes to play back in s_ow motion. choose Follow the steps for "Changing the Movie Mode"...
- Page 5 Shoot Movies That Look Like a Miniature ModeJ tMiniature Effect) A white frame (the area that will not be blurred) appears on the screen. Choose t he ,eatokeep foous. MENU Press the button for more than one second. Move the zoom lever to change the frame size, and press the ._v buttons...
- Page 6 I hr. 58 rain. 19 sec. 8 hrs. 4 min. 30 sec. Based on Canon's testing standards. Recording will automatically stop when the clip fite size reaches 4 GB, or when the recording time reaches approximately 10 minutes when shooting in _-_ or _, approximately 1 hour when shooting in _ or _.
- Page 7 You can lock the exposure or change it in 1/3 steps within a range of -+2 before shooting, Focus. Press the shutter button halfway to focus. Lock the exposure. After releasing the shutter button, press the _ button to lock the exposure. exposure shift bar appears= Press the _ button...
- Page 8 The following functions can be used in the same way as for still images. Functions marked with a * can be used in the same way as for still images when in _ ,w ;_ Zooming in More CIosety On Subjects - The optical and digital zooms (p, 57) are available in _, - Only the opticaJ zoom is available...
- Page 9 The following functions can be used in the same way as for still images. Erasing _mages (p,29) Quickly Searching images (p.108} Viewing Images in Filtered Playback (p,109) Viewing $Hdeshows (p,110) Changing image Transitions (p,114) Viewing images on a TV (p.115) Viewing images on a High@efinition...
- Page 10 You can trim the beginnings and ends of recorded mov[es. Choose _. ili!ii!! Follow Steps 1 = 3 on p. 32 to choose _'_, then press the _ button. The movie editing panel and the movie editing bar wi![ appear. Movie Editing Panel Set the editing...
- Page 11 Editing Check the edited movie. Press the ,_v buttons to choose (Play), then press the @ button. edited movie will play. To edit the movie again, repeat Step 2. To cance! editing, press the ,_v buttons, and choose _D. After pressing the @ button, press the 4_...
- Page 12 Using Various Playback Editing Functions This chapter explains various ways to play back and edit images. Press the _ button to enter Playback mode before operating the camera.
- Page 13 Searching I_ages Using index #_splay Displaying multiple images at the same time lets you quickly find the image you want..........................Move the zoom meyertoward _. images will display in an index. The number of images increases each time you move the lever toward The number of images decreases...
- Page 14 When there are many images on the memory card, you can filter and display them by a specified filter. You can also protect (p. 117) or delete (p. 120) all images at once wMle filtered. Choose t_. ili!ii!! After pressing the _,_ button, press the ,_"...
- Page 15 Viewing $1ideshows In filtered playback (Step 3), you can view filtered images with "Quickly Searching Images" (p. 108), "Viewing Slideshows" (p. 110), and "Magnifying Images" (p. 113). You can process all filtered images at once while performing operations in "Protecting Images"...
- Page 16 Viewing $tideshows You can set a slideshow to repeat, or change transition effects and the time that slideshow images are displayed. You can choose from six transition effects when switching between images. choose [SJideshow]. Press the M E N U button to choose [Slideshow] from the []...
- Page 17 You can magnify the area of a recorded image that was inside the AF Frame, or the area of a face that was detected, to check the focus. Press the v button _o switch _o _he focus check display (po44)o A white frame will appear where the AF frame or face was when the focus was set.
- Page 18 Move the zoom lever toward O,. The display wil! zoom in on the image, if you continue to hold the zoom lever, it will zoom in up to a maximum factor of 10x. If you press the ,_'_ 4 _ buttons, you can move the location of the displayed...
- Page 19 Changing image Transitions Chooseanimage. Press the _.v 4 _ buttons to choose the image you want to view next. The chosen image will be displayed in the middle, and the next four possibilities wil! appear. Pressing the _ button will display middle image at ful! size.
- Page 20 Using the supplied stereo AV cable (p. 2), you can connect the camera to a TV to view images you have shot. Turn off the camera and TV......................... Connect the camera to the TV° Open the camera's terminal cover and fully insert the cable plug into the camera's terminal.
- Page 21 Use the separately sold HDMI Cable HTC-100 to connect the camera to a high-definition TV for an enhanced viewing experience. Turn off the camera and TV. Connect the camera to the TV. Open the camera's terminal cover and fully insert the cable plug into the camera's termina!.
- Page 22 You can protect important images so that they cannot be accidentally erased with the camera (pp. 29, 120). Protect the image. After pressing the @ button, press the buttons or turn the {_!i::dial to choose O'_, then press the @ button again.
- Page 23 Protecting Images Choosei_ages. Press the 4 I_ buttons or turn the dia! to choose an image, then press the @ button. will appear on the screen. Pressing the @ button again deselects the image and _ will disappear. To choose additiona! images, repeat the...
- Page 24 Protecting _mages Choose an ending image. Press the _ button to choose [Last image], then press the @button. Press the 4 _ buttons or turn the dial to choose an image, then press the @ button. You cannot choose images before the first image.
- Page 25 You can choose images and then erase them in groups. Since erased images cannot be recovered, exercise adequate caution before erasing. Protected images (p. 117) cannot be erased. Ch@@s_ se|ec_i@n Pne_h@d Choose[Erase]. MENU Press the button to choose [Erase] in the DE] tab, then press the @ button.
- Page 26 Erasing Images Choose [SeJect Range]. Follow Step 2 on p. 120 to choose [Select Range], then press the @ button, choose_mages. Follow Steps 2 and 3 on p, 118 to choose images, Erase. Press the v button to choose [Erase], then press the @ button, ..Choose [All Mmages].
- Page 27 When you tag images as favorites, you can easily categorize just those images. You can also filter out just those images for viewing, protecting erasing (p. 109). Make the setting. After pressing the _._ button, press the buttons or turn the _iii_' dial to choose "_f_, then press the _ button again,...
- Page 28 Organizing Images by Category (My Category) You can organize images into categories. You can display the images in a category in Filtered Playback (p. 109) and process all images at once by using the functions below. Viewing Slideshows (p. 110), Protecting Images (p.
- Page 29 Organizing _mages by Category (My Category) M.kethe setting. MENU If you press the button, confirmation screen will appear..P ress the 4 _ buttons or turn the :::!/dia! choose [OK], then press the @ button. Using Menu C hoose [My Category]. ":;ii:!ii!_!iii_ :¸¸...
- Page 30 Organizing _mages by Category (My Category) _/will appear on the screen. @ Pressing the @ button again deselects the image and _ will disappear. To choose additional images, repeat the above procedure. Make the setting. MENU Rfyou press the button, a confirmation screen will appear,...
- Page 31 You can change the orientation of an image and save it. Choose _. After pressing the _ button, press the buttons or turn the _i: . _ dial to choose I:_, then press the @ button again. Rotate the mage. Press the 4 _ buttons to rotate the image 90 °...
- Page 32 You can resize images to a lower pixel setting and save the resized image as a separate file, Choose [Resize]. Press the M E N U button to choose [Resize] in the [] tab, then press the @ button. choose an image. Press the 4 _ buttons or turn the _!_ dial to choose...
- Page 33 You can cut out a portion of a recorded image and save it as a new image file. choose [Trimming]. MENU Press the button to choose [Trimming] in the FCl tab, then press the @ button. choosean mage. Press the _ _ buttons or turn the _::i_ dia! to choose an image, then press the_-...
- Page 34 Adding Effects with the My Colors Function You can change the color of an image and save it as a separate image. Refer to p. 79 for details on each menu item. Choose [My Colors]. Press the MENU button to choose Colors] in the [] tab, then press the @...
- Page 35 The camera can detect areas in an image, such as faces or backgrounds, that are too dark and automatically adjust them to the optimum brightness. Also, when the overall image is lacking in contrast, the camera will automatically correct the image for a sharper impression.
- Page 36 You can automatically correct red eyes in images and save them as new files. Choose [Red-Eye Correction]. Press the MENU button to choose [Red= Eye Correction] in the DE] tab, then press the @ button. Choose image, Press the 4 _ buttons or turn the _:_i dial to choose an image.
- Page 38 This chapter explains how to choose images for printing, and print using a Canon-brand PictBridge compliant printer (sold separately) (p. 40). Please also refer to the Personal Printing Guide. Canon-Brand PietBridge Compliant Printers...
- Page 39 You can easily print the pictures you take by connecting the camera to a PictBridge compliant printer (sold separately) using the supplied interface cable (p. 2). Turn off the camera and printer. Connect the camera to the printer. Open the cover and insert the small plug of the included interface cable (p.
- Page 40 Printing _mages choo, After pressing the _ button, press the buttons or turn the :_::i dial to choose r[_, then press the @ button again. Printimages. Press the ,_'_ buttons or turn the dial to choose [Print], then press the @ button. Printing wil! start.
- Page 41 You can add images to the print list (DPOF) directly after shooting or during playback in the FUN(:. menu. These selection methods comply with the DPOF (Digital Print Order Format) standards. Choose an image. Press the _ _ buttons or turn the _:!i: dia! to choose an image.
- Page 42 You can choose up to 998 images on a memory card for printing and specify settings such as the number of copies so that they can be printed together (p. 140) or processed at a photo developer service. These selection methods comply with the DPOF...
- Page 43 Choosing _mages for Printing (DPOF) Choosing Number of Cop_es Choose [Setect images & Qty.]. MENU Press the button to choose [Select images & Qty.] in the r_ tab, then press the @ button. choose an mage. Press the 4 _ buttons or turn the dia! to choose...
- Page 44 Choosing _mages for Printing (DPOF) Select Range Choose [Select Range]. In Step 1 on p= 138, choose [Select Range], then press the @ button= Follow Steps 2 and 3 on p= 118 to choose images= Makeprint settings. Press the ,_'_ buttons to choose [Order],...
- Page 45 You can print images added to the print list by connecting the camera to a PictBridge compliant printer (pp. 136 - 139). Number o fcopies toprint Connect the camera to the printer. Follow Steps 1 to 4 on p. 134. Print.
- Page 46 Custe_izing Camera Settings You can customize various settings to suit your shooting preference& The first part of this chapter explains convenient and commoniy used functions, The latter part explains how to change shooting and playback settings to suit your purposes.
- Page 47 You can customize convenient and commonly used functions from the ?'_ tab (p, 47). Choose [Sound Options], then press the button. Press the ,_v buttons or turn the _J!i: dial to choose an option. Press the 4 _ buttons to choose an option.
- Page 48 Changing Camera Settings Changing S_rt-up Screen You can change the startoup screen that appears when you turn on the camera. Choose [Start-up image], then press the button. Press the 4 _ buttons or turn the _ii_i dial to choose an option. Preset images You can set recorded images, and use the included software to change the images.
- Page 49 Changing Camera Settings The dedicated operation sounds and start-up images on the included software can be registered to the camera. Refer to the Software Guide for details. Changing FiJe Number Assignment Images you shoot are automatically assigned file numbers in the order they were taken, from 0001 = 9999, and saved to folders of up to 2,000 images.
- Page 50 Changing Camera Settings Changing Lens Retract T_m÷ For safety reasons, the lens retracts about 1 minute after pressing the [] button when in a Shooting mode (p, 28). if you want the tens to retract immediately when you press the [] button, set the retract time to [0 sec,], Choose...
- Page 51 Changing Camera Settings USing W@rld CJ@ck iiiiiiiiiiiiiiiiiiiiiiiiiiiiiiiiiiiiiiiiiiiiiiiiiiiiiiiiiiiiiiiiiiiiiiiiiiiiiiiiiiiiiiiiiiiiiiiiiiiiiiiiiiiiiiiiiiiiii When traveling abroad, you can record images with _oca} dates and times simply by switching the time zone setting. If you pre=register the destination time zones, you can enjoy the convenience of not having to switch the Date/ Time settings.
- Page 52 Changing Function Settings Shooting Bfyou set the mode switch to O, and the mode to you can change settings in the O tab (p= 47)= Switching Focus Setting The camera focuses on whatever it is aimed at even when the shutter button is not pressed.
- Page 53 Changing Shooting Function Settings Turn_ng Off the Red-Eye Reduction Function The red-eye reduction lamp lights in order to reduce the red-eye effect that occurs when shooting in dark conditions with the flash. You can turn off this function. Choose [Flash Settings], then press the button.
- Page 54 Changing Shooting Function Settings Changing the Way the |mage gisplays R_ght After Shoo_ng You can change the way the image displays right after shooting. Choose [Review hfo], then press the 4 buttons to choose an option. Dispiays the image oniyl Detailed Displays detailed inforrnation (p.t64).
- Page 55 Changing Shooting Function Settings Changing IS°Mode Settings Choose [iS Mode], then press the 4_ buttons to choose an option. Image stabilization is always on. You can confirm the effects directly on the display, which makes it easier to check the Continuous composition or focus.
- Page 56 You can adjust the settings in the [] tab by pressing the [] button (p= 47).
- Page 58 Useful Infor ation This chapter introduces how' to use the AC adapter kit and EyeoFi card (both sold separately), troubleshooting tips, and contains lists of functions and items that appear on the screen.
- Page 59 if you use AC Adapter Kit ACK=DC70 (sold separately), you can use the camera without worrying about how much charge is left in the battery. Turn off the camera. Terminals Insert the coupler. Follow Step 1 on p. 17 to open the cover, ..
- Page 60 Before using an EyeoFi card, be sure to check whether EyeoFi card use is authorized in the country or territory of use (p. 16). When you put a prepared EyeoFi card into the camera, you can automatically transfer your images wirelessly to a computer, or upload them to a web...
- Page 61 Using an Eye-Fi Card You can check the Eye-Fi card's access point SSID, or connection status. Choose [Connection info]. Press the MFNU button, then choose [EyeoFi Settings] from the 71' tab, and press the @ button. Press the _.v buttons or turn the _!.:i;...
- Page 62 Bfyou think there is a problem with the camera, first check the following. If the items below do not solve your )roblem, contact a Canon Customer Support Help Desk as listed on the included customer support list. Power You pressed the power...
- Page 63 TroubJeshooting image is blurredo Press the shutter button hat%'ay to focus on the subject, then press fully to shoot (p. 24). Shootthe subject w ithin t hefocusing distance (p,172). Setthe [AF-assist Beam] to [On](p.147). Confirm that functions whichyou do notintend touse (macro,etc.) a re notset, Shoot using the focus tock or AF tock (pp.
- Page 64 Troub,eohoo i !i _iiiii Recording images to the memory card takes a long time, or continuous shooting slows down. Perform a low-level format of the memory card in the camera (p. 52). Cannot make settings for shooting functions or FUNC. menu° The items in which settings can be made differ depending on the shooting mode.
- Page 65 Memory card error (p. 52) If the same message appears even when a formatted memory card is installed in the correct direction, contact a Canon Customer Support Help Desk (p. 18). insufficient space on card There is not enough free space on the memory card to shoot (pp. 25, 30, 55, 71, 98) or edit images (pp.
- Page 66 If an error code appears directly after taking a picture, the shot may not have been recorded. Check the image in Playback mode. If this error code reappears, note the Error number (Exx) and contact a Canon Customer Support Help Desk as there may be a problem with the camera.
- Page 67 ® ® @©@@@ ® ®@ ® Battery Charge Indicator @ Movies: Remaining Time ISO Speed (p. 76) (p. 15) (pp. 31, 10I) @ Self-Timer C2) Camera Orientation* @ AF Frame (p. 84) (pp. 60, 80, 81, 66) (:_) White Balance (p.
- Page 68 _nformation Displayed on the Screen Bn _ mode, the camera displays an icon for the scene it has determined and then automatically focuses and seJects the optimum settings for subject brightness and color. icon Background Color * Appears when the scene is dark and the camera is attached to a tripod.
- Page 69 ® Eye=Fi Transfer (_ Focusing Range (p. 73) ¢_ Print List (pp. 136, 137) Complete (p. 155) (_ File Size (pp. 75, 101) @_My Category (p. 123) @ Battery Charge Indicator @ Still Images: Recording @ Shooting mode (p. 166) (p.
- Page 70 Use a commercially available blower brush to remove dust from the lens. For stubborn dirt contact a Canon Customer Support Help Desk as listed on the customer support leaflet supplied with your camera. When you move the camera...
- Page 71 Flash (pp. 56_ 73, 89) O_i 0 ]]Compression Ratio "1 The number of shots cannot be specified, and the time delay cannot be set to 0 seconds *2 Not selectable but switches to _ depending on the circumstances. *3 Not selectable but switches to _ when the flash fires.
- Page 72 Functions AvaHabte Each Shooting Mode *6 Recording pixels are fixed to M . *7 Fixed to *8 Recording pixel setting not selectable *g Fixed to _. "10 _ or _ is not available O Se]ectable, or set automafically - Not selectable...
- Page 73 Face Detect OiiO ........O!f/Date/Date & Time "1 9 points when a face is not detected. *2 Only available for shooting still images. *3 [On] when movement is detected *4 Fixed to [On] *5 Fixed to [Auto]. *6 Fixed to [Continuous].
- Page 74 iiiiiiiiii iiiiiiiiii_ iiiiiiiiii_ iiiiiiiiii_ o o o 0 Selectable, or set automatically. - Not selectable...
- Page 75 Menus up Men_ Mute On/Off* p. 48 Volume Set all operation sounds (5 levels), p. 48 Sound Options Set the sounds for each camera operation, p. 142 Hints & Tips On*lOft p. 142 Start-up Image Add an image as a start-up image, p.
- Page 76 P,oyback Mode FO.O. Menu ii!! Playback Menu Slideshow Plays back images automatically, p. 1 I0 Images) Protect Protects images (Select, Setect Range, Alt p. 117 Images) Rotate Rotates images, p. 126 Favorites Tags or untags images as favorites, p. I22 My Category Categorizes images (Select, Select Range) p.
- Page 77 _mage Sensor Camera Effective Pixels ..Approx. 10 mitlion pixels Lens Focal Length ...... 10x zoom: 6.3 (W)- 63.0 (T) mm (35ram film equivalent: 36 (W) - 360 (T) mm) Focusing Range ....t cm (0.4 in.) - infinity (W), 1 m (3.3 ft.) - infinity (T) * Macro: 1 - 50 cm (0.4 in.
- Page 78 Specifications Digita_ Zoom ......Stitl images/Movies: Approx. 4x (up to approx. 40x in combination with the opticat zoom) Safety Zoom, Digital Tele-converter Continuous Shooting Modes ......... Normal, AF, LV Speed (Normal) ....Approx. 3.7 shots/sec. (In P mode) Approx. 8.8 shots/sec. (In High-speed Burst mode Number of Possible Shots...
- Page 79 (3.23 x 2.32 x 0.96 in. (Protrusion:l.04 in.)) Weight ........CB-2LB: Approx. 73 g (2.57 oz.) CB-2LBE: Approx. 67 g (2.36 oz.) (excluding power cord) All data is based on tests by Canon. Camera specifications or appearance are subject to change without notice.
- Page 80 Numerics 3:2 Guide ..........Date and Time -> Date/Time Date/Time Adding to image ........AC Adapter Kit ........39, t54 Changing ..........Accessories ..........Date/Time Battery ....... AE Lock ..........88, t02 Setting ..........AF _ Focus Wortd Clock ........AF Frames ........
- Page 81 1ride× On ............Long Shutter (Shooting Mode) ....Slow Synchro ........Low Light (Shooting Mode) ....... Focus AF Frame ........26, 84 AF Lock ..........Magnified Display ........t 13 AF-Point Zoom ........Manual White Balance ......Servo AF ..........Memory Cards ...........
- Page 82 _ndex Super Vivid (Shooting Mode) ..... Recording Pixels (Image Size) ....74 Red-Eye Correction ......90, t3t Tag Images as Favorites ......Resizing (Making _mages Smaller) ..t27 Terminal ..... 35, 115, tt6 134, 154 Rotate ............Travel Abroad ......t5, 39, 146 Trimming ..........
- Page 83 Disclaimer o Repr.nt_r_g transm,tt_ng o Fstonr, g _na retne,Jai s_,ste._7 any part of th_s guide ,v,tho,at the aerr_slss'on of Canon i_ pronlbited o Canor, reser,,es the right to ohan_e the contents of this guide at an/ hme ',_.ithout pnor not,ee...
Need help?
Do you have a question about the PowerShot SD4500 IS Digital ELPH and is the answer not in the manual?
Questions and answers
can't downloads pictures to my computer. what are the setting to make that happen