Canon PowerShot A720 IS User Manual
Hide thumbs
Also See for PowerShot A720 IS:
- User manual (211 pages) ,
- Getting started manual (37 pages) ,
- Software manual (60 pages)
Table of Contents
Advertisement
Quick Links
Advertisement
Table of Contents

Related Manuals for Canon PowerShot A720 IS


Summary of Contents for Canon PowerShot A720 IS
- Page 1 IIII I IIIIII CDI-E334 Camera User Guide...
- Page 2 Connect the camera • Connecting to a printer • Connecting to a TV set Guide • Connecting to a computer irect Print User GuideS°ftware Starter ZoomBrowser ImageBrowser Software User Guide • PDF manuals available on the Canon website. http:/iweb.canon.jptlmaging/information-e.html...
- Page 3 Camera AA AlkalineBatteries(x2) MemoryCard (16MB) Interface Cable AM Cable Wrist Strap IFC-400PCU AVC-DC300 WS-200 Canon Digital Camera Warranty Card Solution Disk User Guides Camera User Guide . Direct Print User Guide Software Starter Guide . _Canon Customer Support" Leaflet You may not be able to achieve the full performance of this camera with the included memory card.
- Page 4 Table of Contents Items marked with a_" are lists or charts that summarize camera functions or procedures. Please Read Preparations ........Shooting Still Images (m_ Auto Mode) ....Viewing Still Images ....... Shooting Movies ([] Standard Mode) ....Viewing Movies ........Erasing .........
- Page 5 Shooting Close-ups (Macro) ..... Using the Self-Timer ......Setting the Image Stabilizer Function ....Configuring the Postcard Mode ...... Embedding the Date i nthe Image Data ....
- Page 6 Symbol Conventions in this Guide Mode switch position: Rec. ([_)lPlay ([_) Available shooting modes These modes are available This mark denotes issues that maY affect the camera!s operaUon, This mark denotes additional topics that complement the basic operating procedures. Explanations in this guide are based on the camera's default settings at t me of purchase.
- Page 7 Warning Against Copyright Infringement Please note that Canon digital cameras are intended for personal use and should never be used in a manner that infringes upon or contravenes international domestic copyright laws and regulations. Please be advised that in certain cases...
- Page 8 Getting Started e Preparations o Shooting Still Images oViewing Still Images e Shooting Movies o Viewing Movies o Erasing o Printing e Downloading Images to a o System...
- Page 9 I Preparations • Attaching the Wrist Strap lt is recommended to US e the Wrist Strap to avoid droPPing during camera use. _ Installing batteries 1 = Slide the battery cover lock in the direction of the arrow (_) and hold it there while moving the entire cover in the direction of the arrow (_) and opening it up in the direction of the arrow (_).
- Page 10 Preparations 2= Install two batteries. Positive end Negative end (-) 3= Close the cover (_), and press downward as you slide it until it clicks into place (_). ®...
- Page 11 10 I Preparations Memory i Inserting Card t = Slide the battery cover lock in the direction of the arrow (_) and hold it there while moving the entire cover in the direction of the arrow (_) and opening it up in the direction of the arrow (_).
- Page 12 Preparations I 11 (;lose the cover ((_)), and press downward as you slide it until it clicks into place ((_). 11Ensure that the memory card is correctly oriented before p inserting it in the camera. Inserting it backward may cause the camera to fail to recognize the memory card or to malfunction.
- Page 13 I Preparations JSetting Date and Time The Date/Time settings menu will appear the first time the power is turned on. Set the date and time as shown in steps 3 and 4 in the explanation below. Power Button Button IL / _lk / _./-b Buttons Button MENU...
- Page 14 Preparations I 13 (p. 71). You can imprint the date and time you have set onto images _ Setting Display Language You can change the language displayed in the LCD monitor menus and messages. Mode Switch Bu_on Bu_on MENU Set the mode switch to [] (Playback).
- Page 15 Shooting Still Images Power Button Button DIS_ Mode Switch 1 = Press the power button. • The start-up sound will play and the start-up image will display in the LCD monitor. • Pressing the power button again turns the power off. 2= Select a shooting mode.
- Page 16 Shooting Still Images _ 15 4= Press the shutter button lightly (press halfway) to set the focus. • When the camera focuses, it beeps twice and the indicator lights green (orange when the flash fires). Shooting Preparations Complete- lights green •...
- Page 17 16 I Shooting Images Still Reviewing an Image Right After Shooting (Rec. Review) Recorded images are displayed on the LCD monitor for approximately 2 seconds immediately after shooting. You can also use the following methods to continue displaying the image immediately after shooting so that you can check it.
- Page 18 I 17 Viewing Still Images Mode Switch 1 = Set the mode switch to [] (Playback). • The last recorded image will display. 2= Use the ÷ or ,_ button to display the image you wish view. • Use the ÷ button to move to the previous image and the ,_ button to move to the next image.
- Page 19 I Shooting Movies Power Button Mode Dial {:":81t Mode Switch Press the power button. Select a shooting mode. 1. Set the mode switch to a (Shooting), 2. Set the mode dial to D ll (Movie), • Confirm that the camera is set to (Standard).
- Page 20 I 19 Shooting Movies Press the shutter button lightly (press halfway) to set the focus. • An electronic beep will sound twice and the indicator will light green when the camera focuses. • The exposure, focus and white balance are automatically set when you press the button halfway.
- Page 21 20 I Viewing Movies Mode Switch t _ Set the mode switch to [] (Playback). 2= Use the 4"or 4, button to display a movie and press the button. • Images with a l_'_ icon are movies. Use the 4- or 4, button to select (Play) and press the @...
- Page 22 Erasing I 21 [-_,, Button Mode Switch Button 4" / '_ Buttons t = Set the mode switch to [] (Playback). 2= Use the 4- or "b button to select an image to erase and press the _ button. 3= Confirm that [Erase] is selected and press the _ button.
- Page 23 Series Compact Photo Printers Interface Cable Camera PIXMA Sedes Bubble Jet Printers "1 Since this camera uses a standard protocol (PictBddge), you can use it with other PictBddge-compliant printers in addition to Canon-brand printers. *2 You can also use the CP-IO/CP-IO0/CP-200/CP-300.
- Page 24 Printing I 23 24 Turn on the printer. Set the camera's mode switch to [] (Playback) and press the power button. • The _,,,v button will light blue. • A [], or [] icon will appear in the LCD monitor if the connection is correct (the displayed icons differ according to the connected printer).
- Page 25 Images to a Computer Items to Prepare • Camera and computer • Canon Digital Camera Solution Disk supplied with the camera • Interface cable supplied with the camera System Requirements Please install the software on a computer meeting the following minimum requirements •...
- Page 26 Images to a Computer Images i Preparing to Download 1 = Installing the software. • Windows 1. Place the Canon Digital Camera Solution Disk in the computer's CD-ROM drive. 2. Click [Easy Installation]. i_Mi_ Follow the onscreen messages to proceed with the installation.
- Page 27 Downloading Images to a Computer 2= Connecting the camera to a computer. 1. Connect the supplied interface cable to the computer's port and to the camera's DIGITAL terminal, • Open the Camera's terminal cover and insert the interface cable all the way into the connector. USB Port DIGITAL Terminal...
- Page 28 Downloading Images to a Computer • Windows Select [Canon CameraWindow] click [OK]. _-IL If this Events dialog does net appear clickthe [Start] menu and select [All Programs] or [Pregrams], followed by [Canon Utilities], [CameraWindowl, [CameraWindowl [CameraWindewl. CameraWindow will display. Preparations for downloading images are now finished.
- Page 29 Downloading Images to a Computer • Macintosh CameraWindow will appear when you establish a connection between the camera and computer. If it fails to appear, click the [CameraWindow] icon on the Dock (the bar which appears at the bottom of the desktop). Preparations for downloading images are now finished.
- Page 30 Downloading Images to a Computer Downloading Images Using Camera (Direct Transfer) Use this method to download images using camera operations (except Windows 2000). rZ_N Button Button L 4F / 4F / _"/* Butt°ns Button MENU Transfers and saves all images to the All Images computer.
- Page 31 I Downloading Images to a Computer ! = Confirm that the Direct Transfer menu is displayed the camera's LGD monitor. • The _,,_* button will light blue. • Press the MENU button if the Direct Transfer menu fails to appear. Direct Transfer Menu •...
- Page 32 Downloading Images to a Computer 4= Press the button after downloading finishes. MENU • You will return to the Direct Transfer menu. Only JPEG images can be downloaded as wallpaper fora comnufer. the camera's power is turned off. The previous setting will be in The option selected with the _,_, button is retained even when effect the next time the Direct Transfer menu is displayed.
- Page 33 32 I SystemMap Supplied with Camera _o,F_OOPCU'_ ° oo_o_:,i_) ....AVO°b,oAVC WP-DC16 •_a%_ho_ge_ C_._A., nAA-size NiMH batteries • Compact Power Adapter (x4) CA-PS8OO • NiMH Battery NB4-300 (set of 4 • Power Cord Waterproof Case AA-size) also available separately Weight WW-DCl...
- Page 34 System I 33 Wide Converter Tele-converter Close-up Lens WC-DC58N TC-DC58N 250D (58mm) Conversion Lens Adapter LA-DC58G Direct Interface Cable .2 Direct Print Compatible PCMClA USB Card Bubble Jet Printers Adapter Reader (PIXMA series) Compact Photo Printers .2 .3 (SELPHY Series) SD Memory Card .5 - SDC-128M...
- Page 35 34 I SystemMap J Optional Accessories The following camera accessories are sold separately. Some accessories are not sold in some regions, or may no longer be available. • Lenses, Lens Adapter • Conversion Lens Adapter LA-DC58G This adapter is required for mounting the wide converter, tele- converter and close-up lens to the camera.
- Page 36 Accessories • SD Memory Card SD Memory Cards are used to store images recorded by the camera Canon brand cards are available in 128 MB and 512 MB capacities. • Interface Cable IFC-480PCM Use this cable to connect the camera to a computer, Compact Photo Printer (SELPHY series), or to a Bubble Jet printer (refer to your Bubble Jet printer user guide).
- Page 38 Learning More...
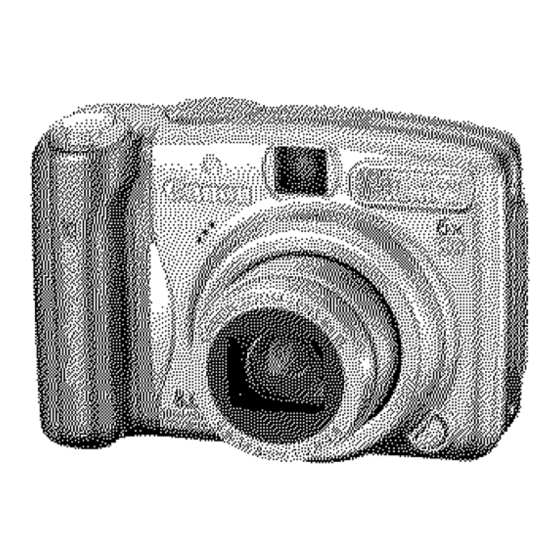
- Page 39 I Components Guide • Front View (_ Microphone (_ AF-assist Beam (p. 45) (_ Red-Eye Reduction Lamp (p. 88) (_ Self-Timer Lamp (p. 66) (_ Speaker (_) Viewfinder Window (_ Flash (p. 64) (_ Terminal Cover A/V OUT (Audio/Video output) Terminal (p. 146) DIGITAL Terminal (p.
- Page 40 I 39 Components Guide • Back View (_ LCD Monitor (p. 49) (_ Viewfinder (_ Wrist Strap Mount (_ Memory Card Slot/Battery Cover Lock (pp. 8, 10) (_ Memory Card Slot/Battery Cover (pp. 8, 10) (_ Tripod Socket protection against scratches during shipment. If so, remove the The LCD monitor may be covered with a thin plastic film for film before using the camera.
- Page 41 40 I Components G uide • Controls (_ Indicators (p. 41) (_ Power Lamp (_ Power Sutton (p. 14) (_ Zoom Lever (pp. 59, 122) Shooting: [] (Wide Angle)/E_ (Telephoto) Playback: :-" (Index)/ O, (Magnify) (_ Shutter Button (p. 14) (_ Mode Dial (pp.
- Page 42 Components Guide I Indicators The camera indicators on the back of the camera will light or blink under the following conditions. • Upper Indicator Green: Ready to shoot (camera beeps twice) Blinking Green: Image recording/reading/erasing/transferring (when connected to a computer) Orange: Ready to shoot (flash on) Blinking Orange:...
- Page 43 Operations Basic I Menus Settings Settings for the shooting or playback modes or such camera settings as the print settings, date/time and sounds are set using the FUNC. menu or the Rec., Play, Print or Set up menu. • @Button (FUNC.
- Page 44 J 43 Basic Operations • OButton (Rec, Play, Print and Set up Menus) MENU Convenient settings for shooting, playback or printing can be set with these menus. (Rec.) Menu -- (Set up) Menu MENU MENU between menus with You can switch 3L _ the _, or ,_ button.
- Page 45 44 I Operations Basic Settings i Menus Default See Functions Available in Each Shooting Mode FUNC. Menu The icons shown here indicate the default settings (factory settings). Menu Item Page Menu Item Page ISO Speed p. 100 Metering Mode p. 102 Compression White Balance p.
- Page 46 I 45 Basic Operations Menu Item Options Page/Topic Safety FE On*/Off p. 113 Spot AE Point Center*/AF Point p. 103 MF-Point Zoom On*/Off p. 96 Safety MF On*/Off p. 97 AF-assist Beam On*/Off p. 151 Review Off/2"-10 seconds/Hold You can set the length of time images display after being shot...
- Page 47 46 I Operations Basic Print Menu Play Menu Menu Item Page Menu Item Page Print Auto Play p. 129 Select Image & Qty. Red-Eye p. 130 Correction Select All Images p. 139 Clear All Selections Resize p. 134 Sound Memo p.
- Page 48 I 47 Basic Operations Menu Item Options Page/Topic Shuiiei iAdiusis i hevoiume o i ihesound Volume played when the shutter releases. The shutter sound does not play when a mov e s record ng. Imovies and sound memos. Start-up Image On*/Off Sets whether or not the Start-up Image Ianppearswhen the camera is powered...
- Page 49 [] (Widescreen) mode at the full page setting for wide paper using a Canon SELPHY CP75O/74O/7301CP720/CP71O/CP510 Compact Photo Printer. Since this setting saved even when the power is turned...
- Page 50 Basic Operations I 49 I Using Monitor Press button. The display mode changes as follows with each press. Shooting Mode (1_1) Playback Mode (r_) _((No ,nSt_nrdara_ion) No ,nfo]rmation The shooting information displays for approximately 6 sec. when a setting is changed, regardless of the selected display camera power is turned off.
- Page 51 I Basic Operations i lnformation Displayed on the LCD Monitor Shooting Information (Shooting Mode) [ ] Spot AE Point Frame/ AF Frame ISO Speed* p. 100 White Balance p. 104 Drive Mode pp. 66, 87 My Colors p. 107 Flash Exposure pp.
- Page 52 Basic Operations _ 51 p. 118 Create Folder Stills: Recordable Shots Camera Shake Warning [_J (Red) AE Lock/FE Lock pp. 98,99 15-1/2000 Shutter Speed* pp. 83,86 F2.8-F8.0 Aperture Value* pp. 85,86 W'"• Exposure Compensation p. 101 Movies: Remaining Time/Elapsed Time Macro p.
- Page 53 52 I Operations Basic Playback Information (Playback Mode) • Standard Displayed image number/Total number of images Folder Number-File Number p. 121 p. 57 Compression (Still Images) _3 _Wl _P'_ p. 57 Recording Pixels (Still Images) ]rml_]l_'_ll_1][L"4r_'_] p. 125 Movie pp. 130,134 Red-Eye Correction/Resize p.
- Page 54 Basic Operations I 53 Shutter Speed 15-1/2000 pp. 83, 86 Aperture Value F2.8-F8.0 pp. 85, 86 Recording Pixels/Frame Rate i (Movies) F_ [] F_ FI'_[PI_ [] p. 57 (_) Exposure Compensation r_][],oo_-_ p. 101 Flash Exposure __ Compensation/Flash Output _"_'] _ '_'°°[] PP111110' White Balance [_D[I_...
- Page 55 Operations Basic Histogram Function The histogram is a graph that allows you to check the brightness of the image. The greater the bias toward the left in the graph, the darker the image. The greater the bias toward the right, the brighter the image.
- Page 56 Basic Operations I 55 i Resetting Settings to Their Default Values 1. Press the uEOu button. 2. Use the ÷ or "I' button to select [_1] Menu. 3. Use the "IF or _1,button to select [Reset All]. ,,,__;, _" 4. Press the @ button.
- Page 57 56 I Operations Basic Cards i Formatting Memory You should always format a new memory card or one from which you wish to erase all images and other data. Please note that formatting (initializing) a memory card erases all data, including protected images and other file types. 1.
- Page 58 ] 57 Commonly Used Shooting Functions Changing Recording Pixels/ Compression (Still Images) See Functions Available in Each Shooting Mode (p. 206). 1. Press the __J button. 2. Use the ÷ or 41,button to select [] and the ÷ or 4, button to change the option.
- Page 59 I Commonly Used Shooting Functions Approximate Values Recording Pixels Recording Pixels Purpose* High Printing to about A3-size (Large) 3264 x 2448 297 x 420 mm (11.7 x 16.5 pixels in.) Printing to about A4-size 2592 x 1944 216 x 297 mm (8.3x 11.7 in.) (Medium 1) pixels Printing to about Letter-size...
- Page 60 Commonly Used Shooting Functions [ 59 l Shooting with Optical Zoom See Functions Available in Each Shooting Mode (p. 206). The zoom can be adjusted from 35 mm - 210 mm (focal length) in 35mm film equivalent terms. The zoom bar will display while you adjust the zoom.
- Page 61 Commonly Used Shooting Functions j Using the Digital Zoom/Digital Tele-Converter []See Functions Available in Each Shooting Mode (p. 206). * Digital tele-converter cannot be set. You can combine digital zoom with optical zoom when shooting. The available shooting characteristics and focal lengths (35mm film equivalent) are as follows: Selection Focal Length...
- Page 62 Commonly Used Shooting Functions Shooting with the Digital Zoom _,.Presst,e 2 button. 2. In the [r_] menu, use the 4_ or 4" button to select [Digital Zoom]........1. Use the ÷ or + button to select [Standard]. . Press the _ button.
- Page 63 Commonly Used Shooting Functions Safety Zoom Zone Depending on the number of recording pixets set, you can shift from optical zoom to digital zoom without pausing up to a factor where the image quality does not deteriorate (Safety Zoom). The [] displays when reaching the maximum zoom factor without image deterioration (not available in I_3).
- Page 64 Commonly Used Shooting Functions Shooting with the Digital Tele-Converter The digital tele-converter feature uses digital zoom to achieve the effects of a tele-converter (a lens used in telephoto shooting).
- Page 65 Commonly Used Shooting Functions Using Flash []See Functions Available in Each Shooting Mode (p. 206). * Cannot be set in [] mode.._ _ button.................. 1. Use the ÷ or 41, button to change the flash mode. • II: [Auto] •...
- Page 66 I 65 Commonly Used Shooting Functions Shooting Close-ups (Macro) See Functions Available in Each Shooting Mode (p. 206). * Cannot be set in [] mode. Use this mode to shoot close-ups of flowers or small items. At maximum wide angle, the image area is 24 x 18 mm (0.94 x 0.71 in.) when at the minimum focusing distance (1 cm from the end of the lens to the subject).
- Page 67 Commonly Used Shooting Functions j Using Self-Timer []See Functions Available in Each Shooting Mode (p. 206). * Cannot be set in [] mode. You can set the time delay and the numbers of shots you wish to take in advance. 10 sec.
- Page 68 Commonly Used Shooting Functions Changing the Delay Time and Number of Shots (m) Occurs. f the [Shots] option is set to 2 or more shots, the following - The exposure and white balance are locked at the settings selected for the first shot. - If the flash is used, the interval between shots lengthens because the flash must charge.
- Page 69 Commonly Used Shooting Functions j Setting Image Stabilizer Function []See Functions Available in Each Shooting Mode (p. 206). * Only [Continuous] can be set. The lens shift type image stabilizer function allows you to minimize the camera shake effect (blurred images) when you shoot distant subjects that have been magnified or when you shoot in dark conditions without a flash.
- Page 70 I 69 Commonly Used Shooting Functions Monitor Icons [Continuous] [Shoot Only] [Panning] [Converter] setting Reference in Rec. menu Page None WC-DC58N/ p. 179 TC-DC58N/250D • Camera shake may not be fully corrected when shooting with slow shutter speeds, such as with eyening shots. Use of a tripod is recommended.
- Page 71 Commonly Used Shooting Functions j Configuring Postcard Mode []See Functions Available in Each Shooting Mode (p. 206). You can shoot images with the optimal settings for postcards by composing them inside the print area (width-to-height ratio of approximately 3:2) shown in the LCD monitor. 1.
- Page 72 I 71 Commonly Used Shooting Functions l Embedding the Date in the Image Data See Functions Available in Each Shooting Mode (p. 206). You can embed the date in the image data when [] (Postcard) is selected. _ 1. Press the @ button.
- Page 73 72 I Commonly Used Shooting Functions the supplied sof_vare (ZoomBrowser EX or ImageBrowser) To imprint the date on all but [] (postcard) size images, use printer settings. For details, please see the user guide for each product.
- Page 74 CallOll CDI-E334-010 © 2007 CANON INC. PRINTED IN CHINA...