Table of Contents
Advertisement
OWNER'S
MANUAL
COLOR TV/DVD/VCR TRIPLE COMBO
EWC19T3
EWC27T3
This Owner's Manual is
made of recycled paper.
INSTRUCCIONES EN ESPAÑOL INCLUIDAS.
As an E
S
NERGY
TAR
Partner, our company has
determined that this product meets
the E
S
®
guidelines for
NERGY
TAR
energy efficiency. E
S
NERGY
a U.S. registered mark.
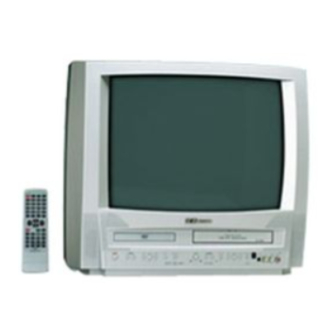
27" MODEL ILLUSTRATED
®
If you need additional operating assistance after reading this owner's
manual or to order replacement accessories, please call
TOLL FREE : 1-800-256-2487.
®
is
TAR
Or visit our WEB SITE at http://www.funai-corp.com
"EMERSON AND THE G-CLEF LOGO ARE REGISTERED TRADEMARKS
OF EMERSON RADIO CORP., PARSIPPANY, NEW JERSEY, U.S.A."
(19 inch)
(27 inch)
Please read before using this equipment
SUPPLIED ACCESSORIES
ACCESSORIES
Remote Control Unit
NE211UD
Batteries
2 AA Batteries
Owner ' s Manual
0EMN02182
PART NO.
Advertisement
Table of Contents

Related Manuals for Emerson EWC19T3, EWC27T3


Summary of Contents for Emerson EWC19T3, EWC27T3
- Page 1 NERGY ® energy efficiency. E NERGY a U.S. registered mark. “EMERSON AND THE G-CLEF LOGO ARE REGISTERED TRADEMARKS OF EMERSON RADIO CORP., PARSIPPANY, NEW JERSEY, U.S.A.” (19 inch) (27 inch) 27” MODEL ILLUSTRATED If you need additional operating assistance after reading this owner’s manual or to order replacement accessories, please call TOLL FREE : 1-800-256-2487.
-
Page 2: Important Safeguards
WARNING: TO REDUCE THE RISK OF FIRE OR ELECTRIC SHOCK, DO NOT EXPOSE THIS APPLIANCE TO RAIN OR MOISTURE. CAUTION RISK OF ELECTRIC SHOCK DO NOT OPEN CAUTION: TO REDUCE THE RISK OF ELECTRIC SHOCK, DO NOT REMOVE COVER (OR BACK). NO USER SERVICEABLE PARTS INSIDE. - Page 3 EXAMPLE OF ANTENNA GROUNDING AS PER NATIONAL ELECT RICAL CODE NEC - NATI O NAL EL ECTRI CAL CO DE S2 8 9 8 A 13.Outdoor Antenna grounding-If an outside antenna or cable system is connected to the TV/DVD/VCR, be sure the antenna or cable system is grounded so as to provide some protection against voltage surges and built-up static charges.
-
Page 4: C Precautions
IMPORTANT COPYRIGHT INFORMATION Unauthorized copying, broadcasting, public perfor- mance and lending of discs are prohibited. FCC WARNING- This equipment may gener- ate or use radio frequency energy. Changes or modifications to this equipment may cause harmful interference unless the modifications are expressly approved in the instruction man- ual. -
Page 5: Location
LOCATION For safe operation and satisfactory performance of your TV/DVD/VCR, keep the following in mind when selecting a place for its installation: • Shield it from direct sunlight and keep it away from sources of intense heat. • Avoid dusty or humid places. •... -
Page 6: Table Of Contents
C IMPORTANT SAFEGUARDS . . .2, 3 C PRECAUTIONS ....4 LOCATION ....5 AVOID THE HAZARDS OF ELECTRICAL SHOCK AND FIRE .5 WARNING . -
Page 7: C Features
TV/VCR Mode • The Hi-Fi stereo recording system Hi-Fi system– offers you excellent sound quality with a dynamic range of 80dB, frequency response from 20Hz to 20kHz, and 0.005% wow and flutter. • Rotary 4-head Record/Playback System– ensure excellent picture quality and special effects playback. •... -
Page 8: Dvd Mode
DVD Mode ¡ Dolby Digital sound This player can handle Dolby Digital surround sound having 5.1 channels when connected to a Dolby Digital decoder ¡ Still/fast/slow/step playback Various playback modes are available including still pictures, fast forward/reverse, slow motion and step frames. -
Page 9: C Operating Controls And Functions
OPERATING CONTROLS AND FUNCTIONS - TV/DVD/VCR FRONT PANEL - [Fig.1] DVD buttons POWER p VOLUME o H SKIP BPLAY SEARCH - REMOTE CONTROL - POWER PICTURE SLEEP SELECT +100 PAUSE SPEED C.RESET ZOOM MUTE (DVD) PLAY (TV/VCR) STOP RECORD MENU DISPLAY ENTER SETUP... - Page 10 - TV/DVD/VCR REAR PANEL - [Fig.3] ANT. AUDIO L/R input Jacks Connect to the audio output jacks of a video camera or VCR. Cassette compartment PICTURE Button Press to adjust the picture. Number Buttons TV Mode: [P.15] Press two digits to directly access the desired channel.
-
Page 11: C Preparation For Use
ANT. in Jack Connect to an antenna, cable system, or satellite system. Power cord Connect to a standard AC outlet (120V/60Hz). Remove the power cord from the hook to NOTE: avoid breaking a wire before you connect to a standard AC outlet. PREPARATION FOR USE ANTENNA/CABLE CONNECTION Satellite Box or... -
Page 12: Connecting To External Input Jacks
TO RECORD A SCRAMBLED/UNSCRAM- BLED CHANNEL 1. Set the TV/DVD/VCR channel selector to the out- put channel of the Cable Converter Box or Satellite Box. (Ex. CH3) 2.Select the channel to record from your Cable Converter Box or Satellite Box. Note to CATV system installer: This reminder is provided to call the CATV sys- tem installer’s attention to Article 820-40 of the... -
Page 13: Connecting To A Stereo System
CONNECTING TO A STEREO SYSTEM Stereo system NOTES: • Be sure to turn off the power to all components in the system before connecting another component. • Refer to the Owner's Manuals for your stereo system and any other components to be connected to the TV/DVD/VCR. -
Page 14: Connecting To A Dolby
CONNECTING TO A DOLBY DIGITAL DECODER (for DVD) If using this TV/DVD/VCR to play a DVD disc in a 5.1 channel Dolby Digital surround format, the TV/DVD/VCR outputs a DOLBY DIGITAL Data stream from its COAXIAL digital audio out jack. By hook- ing the player up to a Dolby Digital decoder, you can enjoy a more convincing, realistic ambience with pow- erful and high-quality surround sound as enjoyed in movie theaters. -
Page 15: Tv/Vcr Section
You can program the tuner to scan all the channels you receive in your area. NOTE: Channel memory programming is NOT needed when connected to a cable box or satellite box. Just select the TV/DVD/VCR channel selector to the output channel of the cable box or satellite box (Ex CH3). Then select the channel to be viewed on the Cable Box or Satellite Box. -
Page 16: Channel Set Up Again
CHANNEL SET UP AGAIN Make sure ... • Press the POWER button to turn on the TV/DVD/VCR. Select “CHANNEL SET UP” Press the SETUP button on the remote control. Press the Arrow button K or L to point to “CHANNEL SET UP”. Then, press the ENTER button. -
Page 17: Clock Set Up (Auto / Manual)
CLOCK SET UP (AUTO / MANUAL) The TV/DVD/VCR clock must be set correctly before VCR timer recording is possible. It is suggested that the clock be set manually when first setting up the TV/DVD/VCR. Then, setup auto clock correction which will periodically correct the setting if necessary. - Page 18 AUTOMATIC CLOCK SETTING Make sure ... • The TV/DVD/VCR is turned on. • Confirm the TV/DVD/VCR is receiving a RF (Radio Frequency) signal from either an antenna or cable system connection using the ANT IN jack on the rear of the TV/DVD/VCR. NOTE: •...
-
Page 19: C Tv Operation
WATCHING A TV PROGRAM Turn on the TV/DVD/VCR Press the POWER button to turn on the TV/DVD/VCR. Select the channel number Press the CHANNEL button K or L to select your desired channel number or press the number on the remote control. -
Page 20: Closed Caption System
CLOSED CAPTION SYSTEM You can view specially labeled (cc) TV programs, movies, news, pre-recorded tapes with either a dia- logue caption or text display. By choosing the caption mode, you CAPTION mode: can watch dramas, movies and news while captioning the dialogues and the contents of news. -
Page 21: V-Chip Set Up
V-CHIP SET UP V-CHIP SET UP Make sure ... • TV/DVD/VCR is turned on. Select “V-CHIP SET UP” Press the SETUP button on the remote control. Press the Arrow button K or L to select “V-CHIP SET UP”. Then, press the ENTER button. Enter Access code Use the number buttons on the remote control to enter the access code. -
Page 22: Change Access Code
CHANGING V-CHIP BLOCKED PRO- GRAMMING Note: To change the rating, the TV must be turned to a station that is not protected. If the (PROTECTED) appears on the screen, please change the channel to a station that is not protected. 1)Follow steps [1] and [2]. -
Page 23: C Mts(Multi-Channel Television Sound)System
MTS(Multi-Channel Television sound)SYSTEM You can record or listen to a program in MTS stereo. CHECKING THE SELECTED MTS MODE When you play a VHS tape, or receive a broadcast on the tuner channel you are watching, TV/DVD/VCR the status shown below will appear when you press the DISPLAY button on the remote control. -
Page 24: Selecting The Mts System
SELECTING THE MTS SYSTEM Make sure ... • TV/DVD/VCR power must be turned on. TO SELECT HIFI MODE Select “USER’S SET UP” Press the SETUP button on the remote control. Press the Arrow button K or L to point to “USER’S SET UP”. Then, press the ENTER button. -
Page 25: Erase Prevention
This TV/DVD/VCR will operate with any cassette that has the we recommend the use of high-quality tapes. Do not use poor quality or damaged tapes. PRECAUTIONS • Avoid moisture. Moisture condensation may occur on the tape if it is moved from a cold place to a warm place or visa versa. -
Page 26: C Playback
NORMAL PLAYBACK Make sure ... • TV/DVD/VCR power must be turned on. Insert a prerecorded tape If the erase-protection tab has been removed, the TV/DVD/VCR will start playback automatically. To begin playback Press the PLAY button. To stop playback Press the STOP button when play- back is completed. -
Page 27: Special Playback
Make sure ... • TV/DVD/VCR power must be turned on. • Insert a prerecorded tape. RENTAL PLAYBACK This function enables you to improve the picture quality when playing back worn cassettes such as rented tapes. Select “USER’S SET UP” Press the SETUP button on the remote control. -
Page 28: C Search
Make sure ... • TV/DVD/VCR power must be turned on. • Insert a tape. ZERO RETURN This function allows you to search easily a beginning point that you want to review by rewinding or fast forwarding. NOTE: Zero Return WILL NOT work on a blank tape or a blank portion of a tape. -
Page 29: Index Search
INDEX SEARCH This feature provides a method of indexing the start- ing point so that it can be easily returned to in either fast forward or rewind mode. • The index mark will be made automatically when the REC button is pressed. It will also be marked at the starting point of Timer recording and OTR. -
Page 30: C Recording
Make sure ... • TV/DVD/VCR power must be turned on. • Insert a cassette tape with its erase prevention tab in place. (If necessary, rewind or fast forward the tape to the point at which you want to begin recording.) NOTES: •... -
Page 31: Otr (One Touch Recording)
OTR (One Touch Recording) This function enables you to set a recording length simply by pressing the REC/OTR button on the TV/DVD/VCR. Make sure ... • TV/DVD/VCR power must be turned on. • Insert a cassette tape with its erase prevention tab in place. -
Page 32: Automatic Timer Recording
AUTOMATIC TIMER RECORDING You may set the TV/DVD/VCR to start and end a recording while you are away. You can set 8 pro- grams to record on specific days, daily or weekly within a 1 year period. In the example below, the timer is being set to record: DATE: July 4th, 2003 SETTING TIME: from 7:30PM to 8:50PM... -
Page 33: Timer Program Extension
Set beginning hour Press the Arrow button K or L until the desired hour appears. (Example: “ 7, PM” for 7:30PM) Then, press the Arrow button B. Set beginning minute Press the Arrow button K or L until the desired minute appears. (Example: “30”... -
Page 34: Timer Recording
TO CHECK THE BEGIN/END TIME 1)Press the POWER button so that the RECORDING indicator goes off. 2)Press the SETUP button on the remote control. 3)Confirm “TIMER PROGRAMMING” is pointed. 4)Press the ENTER button. The details of programs appear on the TV screen. 5)Press the SETUP button on the remote control to return to TV mode. -
Page 35: C On Screen Display
To check the Counter, Clock and Channel number on the TV screen, press the DISPLAY button on the remote control. Each time you press the DISPLAY button on the remote control, the TV screen will change as follows: When the Closed Caption mode is OFF: •... -
Page 36: Dvd Section
DVD SECTION PLAYABLE DISCS The following discs can be played back on this TV/DVD/VCR. ¡ DVD video ¡ DVD+R/RW* ¡ CD-R/RW* * Depending on the types or the writing method of the medium some discs can not be played. • Some DVD-R/RW, DVD+R/RW, or CD-R/RW discs made on personal computers, or on DVD recorders may not be played back properly due to the factors such as scratches, dirt or special properties of the disc. -
Page 37: C Playing A Disc
BASIC PLAYBACK Getting started ¡ Turn on the power of amplifier and any other com- ponents, if necessary. Press the POWER button. ¡ The power will turn on. Press the OPEN/CLOSE button to open disc loading tray. Place the chosen disc in the tray, with the label facing up. -
Page 38: Resume
RESUME During playback, press the STOP button. ¡ Resume message will appear on the TV screen. Press the PLAY button, playback will resume from the point at which playback was stopped. ¡ To cancel resume, press the STOP button twice. ¡... -
Page 39: C Search Function
TRACK SEARCH There are three ways to begin playback on an Audio CD at a specific Track. Using the Number buttons on the remote control Press the Number buttons to enter the desired Track number. ¡ Playback will start at the selected track. ¡... -
Page 40: C Special Playback Function
SPECIAL PLAYBACK FUNCTION REPEAT REPEAT is available only during playback. REPEAT TITLE / CHAPTER To activate the repeat function, press the REPEAT button during playback. ¡ The repeat mode changes as described below every time you press the button. CHAPTER TITLE (current chapter repeat) (current title repeat) NOTES... -
Page 41: C Playing A Mp3 Disc
MP3 PLAYBACK When a CD with MP3 files is in the TV/DVD/VCR, the MP3 menu will appear on the TV screen in stop mode. In stop mode, press the Arrow buttons ) to select the desired group track. ¡ If a group is selected, press the Arrow or ENTER but- ton to go on to the track selec-... -
Page 42: C Changing The Settings
CHANGING THE SETTINGS SUBTITLE LANGUAGE The DVD allows you to select a language for subtitles during DVD disc (if available) playback. Press the SUBTITLE button during playback. Press the SUBTITLE button repeatedly to select your desired subtitle language. ¡ The subtitle language will be displayed on the dis- play bar at the top of the screen. -
Page 43: C The On-Screen Information
THE ON-SCREEN INFORMATION You can check the information about the current disc by pressing the DISPLAY button on the remote control. For DVD-Vs Press the DISPLAY button during playback to show current Chapter. ¡ The elapsed and remaining playing time of the current chapter will be displayed. -
Page 44: Items
CHANGING THE DVD SETUP ITEMS Language options are not available with some discs. Press the SETUP button twice in STOP mode so that the DVD SETUP menu appears. ¡ If the menu does not appear, press the PLAY button, the STOP button, then the SETUP button twice. QUICK SETUP TV MODE 4:3 LETTER BOX... -
Page 45: Display Setting
DISPLAY SETTING You can change certain aspects of the DVD display screens and on-screen messages on the TV screen. Press the SETUP button twice in STOP mode so that the DVD SETUP menu appears. ¡ If the menu does not appear, press the PLAY button, the STOP button, then the SETUP button twice. -
Page 46: Parental Control
Parental Control limits the disc viewing that exceed your settings. (with a password or playback will stop.) This feature allows you to prevent discs with alterna- tive scenes from being played by your children. PARENTAL LEVEL Parental Level allows you to set the rating level of your DVD discs. -
Page 47: Troubleshooting Guide
TROUBLESHOOTING GUIDE If the TV/DVD/VCR does not perform properly when operated as instructed in this Owner’s Manual, check the player, consulting the following checklist. PROBLEM No power. The TV/DVD/VCR does not respond to the remote control. TV/VCR Mode Sometimes a performance problem can be easily solved by checking seemingly apparent but often overlooked possibilities. - Page 48 PROBLEM Picture OK, Sound Poor Timer recording is not possible. Cannot go into Record mode. Playback picture is partially noisy. No picture but the audio is OK in playback. No operation by infrared Remote Control. Video or color fades in and out when making a copy of a video tape.
- Page 49 DVD Mode PROBLEM No picture. Disc cannot be played . No sound . No DTS audio is output . Distorted picture . Audio or subtitle language does not match the set up The camera angle cannot be changed • The DVD does not contain sequences recorded from different camera Audio or subtitle language cannot be •...
-
Page 50: C Maintenance
CABINET CLEANING • Wipe the front panel and other exterior surfaces of the TV/DVD/VCR with a soft cloth immersed in lukewarm water and wrung dry. • Never use a solvent or alcohol. Do not spray insec- ticide liquid near the TV/DVD/VCR. Such chemi- cals may cause damage and discoloration to the exposed surfaces. -
Page 51: General Specifications
GENERAL SPECIFICATIONS TV/VCR [19 inch model]: 19 inch in-line gun, 90˚ deflection tube [27 inch model]: 27 inch in-line gun, 110˚ deflection tube Television system : NTSC-M Closed caption system :§15.119/FCC Video Heads : Rotary four-head Tape width : 1/2 inch Tape speed SP : 33.40mm/sec. -
Page 52: Vista Posterior
INDICE I CONTROLES DE OPERACIÓN Y FUNCIONES ..52 PANEL FRONTAL DEL TELEVISOR/DVD..52 MANDO A DISTANCIA ......52 VISTA POSTERIOR . -
Page 53: Conexiones De Antena/Cable
30. Botón CLEAR Para cancelar ajustes. 31. Botón MODE Activa el modo de reproducción programada o el modo de reproducción aleatoria. 32. Botón SEARCH MODE Presione este botón para localizar un punto deseado. 33. Botón AUDIO Presione este botón para seleccionar un idioma de audio o el modo de sonido deseado. -
Page 54: Conexión A Un Sistema Estéreo
PARA INSERTAR LAS PILAS 1) Abra la cubierta del compartimiento de las pilas empujando la cubierta del mando a distancia en el sentido de la flecha. 2) Inserte 2 pilas "AA" en el compartimiento de las pilas, en el sentido indicado por las marcas de polaridad (+/-). -
Page 55: Preajuste De Canales
PREAJUSTE DE CANALES Conecte el cable de alimentación del televi- sor/DVD/videograbadora Conecte el cable de alimentación del televisor/DVD/videograbadora NOTA: • Si aparecen algunos dígitos en la esquina de la pan- talla, presione el botón POWER sin desconectar el cable de alimentación. Encienda el televisor/DVD/videograbadora Presione el botón POWER para encender el televi- sor/DVD/videograbadora. -
Page 56: Limited Warranty
FUNAI CORP. will repair this Emerson product, free of charge in the USA in the event of defect in materials or workmanship as follows: DURATION: PARTS: FUNAI CORP. will provide parts to replace defective parts without charge for one (1) year from the date of original retail purchase.
Need help?
Do you have a question about the EWC19T3, EWC27T3 and is the answer not in the manual?
Questions and answers