Meridian G Series Installation Manual
G series
Hide thumbs
Also See for G Series:
- Installation manual (67 pages) ,
- User manual (46 pages) ,
- User manual (36 pages)
Table of Contents
Advertisement
Advertisement
Table of Contents

Subscribe to Our Youtube Channel
Related Manuals for Meridian G Series


Summary of Contents for Meridian G Series
- Page 1 G Series CD Player Installation Guide...
-
Page 2: Important Safety Instructions
Important safety instructions P r e f a c e • Read the instructions. To avoid interference • Keep these instructions. Do not position the product: • Follow all instructions. • Near strong magnetic radiation, such as near a power amplifier. •... -
Page 3: Table Of Contents
i i i Contents C o n t e n t s Introduction Provides information about the CD player models, a description of each product, and technical specifi cations. CD player models Specifications Installing the CD player Describes how to install the CD player and connect it to the other equipment in the system. - Page 4 Meridian Audio Ltd. Copyright © 2003 Meridian Audio Ltd This guide was produced by Human-Computer Interface Ltd, Designed and manufactured in the UK by Meridian Audio Ltd. http://www.interface.co.uk/ Meridian Audio reserves the right to make changes and improvements to any of the products described in this document without prior notice.
-
Page 5: Introduction
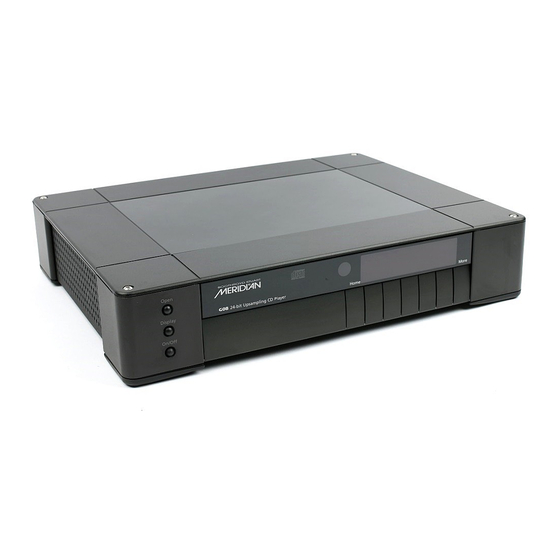
I n t r o d u c t i o n Introduction This guide provides full information about unpacking the CD player and connecting it to the other equipment in the system. Once you have connected the product, refer to the G Series System Guide for information about operating it. - Page 6 I n t r o d u c t i o n G07 24-bit CD Player An RS232 serial port is provided for remote control operation. This port can be used to update the G07’s system software, thanks to The G07 incorporates advanced design – both digital and Flash ROM storage.
- Page 7 I n t r o d u c t i o n The G08 employs a triple buffering system to minimise jitter. This maximises high-frequency transparency and stereo image precision and stability. This, and the digital electronics as a whole, is driven by a new design of high-stability clocking system which further reduces jitter and ensures that the highest level of detail is recovered from a disc.
-
Page 8: Specifications
Specifications I n t r o d u c t i o n Less than 0.003%. Less than 0.0025%. Noise Better than -99dB A weighted. Better than -100dB A weighted. Mechanism Triple-beam laser. ATAPI ROM Drive. Upsampling using 150MIPS Motorola DSP56367. Convertors 192kHz capable, 24-bit, dual differential, Delta-Sigma, superb Class A analogue design. -
Page 9: Installing The Cd Player
I n s t a l l i n g t h e C D p l a y e r Installing the CD player This chapter explains how to install the CD player. It describes what you should find when you unpack the product, and how you should connect it to the other equipment in the system. -
Page 10: Audio Connections
I n s t a l l i n g t h e Audio connections C D p l a y e r G07 24-bit CD Player Analogue outputs G07 24-BIT CD PLAYER DESIGNED AND MADE IN ENGLAND BY MERIDIAN AUDIO LTD DESIGN AND COPYRIGHT 2003 SERIAL NUMBER VOLTAGE VOLTAGE VOLTAGE TESTED... - Page 11 WARNING SHOCK HAZARD - DO NOT OPEN DO NOT OPEN NO USER SERVICEABLE PARTS INSIDE DESIGNED AND MADE IN ENGLAND BY NO USER SERVICEABLE PARTS INSIDE MERIDIAN AUDIO LTD DESIGN AND COPYRIGHT 2003 SERIAL NUMBER CLASS 1 LASER PRODUCT VOLTAGE...
- Page 12 I n s t a l l i n g t h e C D p l a y e r To connect to a digital surround controller (eg G68) G07/G08 G68 Digital Surround Controller COMMS DIGITAL IN DIGITAL IN DIGITAL OUT COMMS COMMS LEAD...
- Page 13 I n s t a l l i n g t h e C D p l a y e r To connect to a preamplifier with unbalanced inputs (eg G01/G51) G07 24-bit CD Player G01/G51 ANALOGUE IN ANALOGUE OUT COMMS COMMS COMMS LEAD...
-
Page 14: Communications Connections
I n s t a l l i n g t h e Communications connections C D p l a y e r G07 24-BIT CD PLAYER DESIGNED AND MADE IN ENGLAND BY MERIDIAN AUDIO LTD DESIGN AND COPYRIGHT 2003 SERIAL NUMBER VOLTAGE VOLTAGE... - Page 15 I n s t a l l i n g t h e C D p l a y e r To connect to other Meridian G Series, 500 Series, or 800 Series equipment G07/G08 G Series, 500 Series, or 800 Series unit COMMS COMMS COMMS LEAD...
- Page 16 I n s t a l l i n g t h e C D p l a y e r...
-
Page 17: Resetting The Cd Player
R e s e t t i n g t h e C D p l a y e r Resetting the CD player This chapter explains how to reset the CD player using the front-panel controls. Resetting the product •... - Page 18 R e s e t t i n g t h e C D p l a y e r A description of each Type is shown on the top line of the display. As you select each Type the CD player is reset to that Type. When you have selected the Type you want: •...
-
Page 19: Troubleshooting
Tr o u b l e s h o o t i n g Troubleshooting We expect you to achieve superb results with the CD player. If, however, you encounter any problems, either when installing it, or during operation, please check the following pages for suggested solutions. -
Page 20: Audio Problems
Tr o u b l e s h o o t i n g No lights are displayed when switching on • Check that the correct source has been selected on your • Check that the AC power supply is connected correctly. preamplifier. -
Page 21: Maintenance
Maintenance Tr o u b l e s h o o t i n g Cleaning To change the mains fuse • Remove the mains connector, and pull out the drawer above the To clean the case, display panel, and keypad power input to access the fuse. -
Page 22: Service And Guarantee
In the unlikely event that your product fails to function correctly, in any way without the written authorisation of Meridian Audio it should be returned, in its original packaging, to your Meridian Limited. -
Page 23: Index
I n d e x accessories 5 mains fuse, changing 17 audio connections 6 models 1 MP3 discs, creating 16 balanced preamplifier, connecting to 8 preamplifier, connecting to 8 product, resetting 13 cleaning 17 COMMS, connecting 11 communications connections 10 resetting the product 13 connections audio 6... - Page 24 I n d e x...
Need help?
Do you have a question about the G Series and is the answer not in the manual?
Questions and answers