Table of Contents
Advertisement
EMERSON AND THE G-CLEF LOGO ARE REGISTERED TRADEMARKS
OF EMERSON RADIO CORP., PARSIPPANY, NEW JERSEY, U.S.A.
HIGH-DEFINITION TELEVISION
IF YOU NEED ADDITIONAL ASSISTANCE WITH SET-UP OR OPERATING AFTER
READING OWNER'S MANUAL, PLEASE CALL TOLL FREE 1-800-256-2487, OR
VISIT OUR WEB SITE AT http://www.EmersonAudioVideo.com
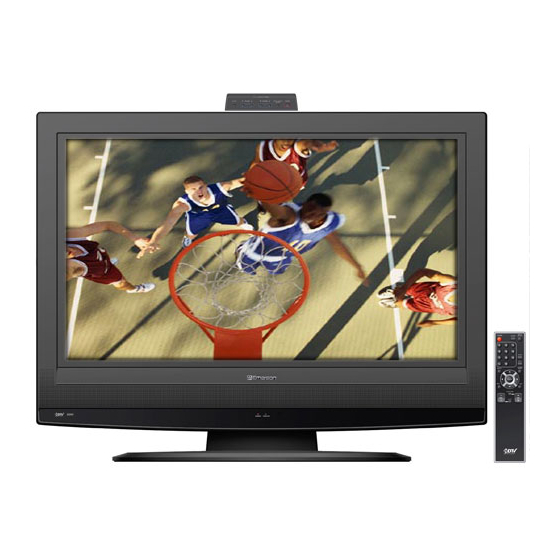
37 inch Digital / Analog
TM
TO RECEIVE DIGITAL/ANALOG SIGNAL,
YOU MUST CONNECT ANTENNA.
Owner's Manual
EWL3706 A
EWL3706
LCD TV
INPUT
POWER
SLEEP
SELECT
1
2
3
4
5
6
AUDIO
7
8
9
STILL
-
0
SCREEN
SETUP
MODE
ENTER
INFO
BACK
CH RETURN
VOL.
CH
MUTE
Advertisement
Table of Contents

Related Manuals for Emerson EWL3706 A


Summary of Contents for Emerson EWL3706 A
- Page 1 EMERSON AND THE G-CLEF LOGO ARE REGISTERED TRADEMARKS OF EMERSON RADIO CORP., PARSIPPANY, NEW JERSEY, U.S.A. HIGH-DEFINITION TELEVISION IF YOU NEED ADDITIONAL ASSISTANCE WITH SET-UP OR OPERATING AFTER READING OWNER’S MANUAL, PLEASE CALL TOLL FREE 1-800-256-2487, OR VISIT OUR WEB SITE AT http://www.EmersonAudioVideo.com...
-
Page 2: Important Safeguards
WARNING: TO REDUCE THE RISK OF FIRE OR ELECTRIC SHOCK, DO NOT EXPOSE THIS APPLI- ANCE TO RAIN OR MOISTURE. CAUTION RISK OF ELECTRIC SHOCK DO NOT OPEN CAUTION: TO REDUCE THE RISK OF ELEC- TRIC SHOCK, DO NOT REMOVE COVER (OR BACK). NO USER SERVICEABLE PARTS INSIDE. -
Page 3: Precautions
15. POWER LINES - An outside antenna system should not be located in the vicinity of overhead power lines or other electric light of power circuits, or where it can fall into such power lines or circuits. When installing an out- side antenna system, extreme care should be taken to keep from touching such power lines or circuits as contact with them might be fatal. -
Page 4: Supplied Accessories
SUPPLIED ACCESSORIES • Owner’s Manual (1EMN21950A) • If you need to replace these accessories, please refer to the PART NO. with the illustrations and call our toll free customer support line found on the cover of this manual. • Depending on your antenna system, you may need different types of Combiners (Mixers) or Separator (Splitters). -
Page 5: Table Of Contents
ONTENTS IMPORTANT SAFEGUARDS ............2 PRECAUTIONS . -
Page 6: Functions
UNCTIONS REMOTE CONTROL, TOP AND REAR PANEL FUNCTION SLEEP button Press to activate the sleep timer. POWER button Press to turn the TV on and off. Number buttons Press to select a channel. SETUP button Press to display on-screen menu. buttons s / B / K / L To move left / right / up / down through... -
Page 7: Installing The Batteries
ANT. IN jack Coaxial cable connection for your antenna or cable box. DIGITAL AUDIO OUT (COAXIAL) jack Digital audio coaxial cable connection for decoder or audio receiver. Connect cable to DIGITAL AUDIO IN jack of external device. COMPONENT1 and AUDIO jacks Component cable connection for external audio/video devices. -
Page 8: Preparation For Use
REPARATION FOR USE CONNECTION This section describes how to connect your TV to an antenna, cable box, etc. MAKE SURE YOU HAVE AN ANTENNA. As DTV is only available over the air, you need an antenna to receive a digital signal. NOTE: •... -
Page 9: Connecting Other Devices
CONNECTING OTHER DEVICES [HDMI] 1) High Definition Multimedia Interface (HDMI) uses the latest technology to ensure the signal maintains the highest degree of integrity from source to TV. Both video and audio travel through a single cable. DVD Player with the HDMI output jack NOTES: •... -
Page 10: Component Cable Connection
[COMPONENT CABLE CONNECTION] Offers better picture quality for video devices connected to your TV. Use a component video cable (not included) to connect your TV to external video devices equipped with component video jacks. If you connect to your TV’s COMPONENT1 input jack, connect audio cables to the AUDIO L/R jacks of COM- PONENT1. -
Page 11: Video Connection
[VIDEO CONNECTION] Offers standard picture quality for video devices connected to your TV. When the audio jack of the video device is monaural, connect the audio cable to the audio L input jack. Camcorder Video Game [DIGITAL AUDIO CONNECTION] If you connect this TV to an external digital audio device, you can enjoy multi-channel audio like 5.1ch digital broadcasting sound. -
Page 12: Initial Settings
NITIAL SETTINGS INITIAL SETUP This section will guide you through your TV’s initial set up which includes selecting a language for your on-screen menu and AUTOSCAN, which automati- cally scans and memorizes viewable channels. POWER POWER SLEEP SELECT SCREEN SETUP ENTER ENTER BACK... -
Page 13: Channel Settings
HANNEL SETTINGS AUTOSCAN With AUTOSCAN, your TV automatically scans and memorizes your area’s viewable channels. Activate AUTOSCAN when you turn on your TV for the first time, change broadcast sources (e.g. from antenna to CATV), or move your TV to a different broadcast area. -
Page 14: Channel List
CHANNEL LIST This function lets you remove undesired channels from the Channel Registration List. SCREEN SETUP SETUP ENTER ENTER BACK CH RETURN VOL. MUTE Display the setup screen. • Press [SETUP]. The following setup screen appears. Select “CHANNEL” and press [ENTER] to con- firm. -
Page 15: Manual Register
MANUAL REGISTER This function lets you manually add channels not memorized due to poor broadcast strength during AUTOSCAN. INPUT POWER SLEEP SELECT AUDIO STILL SCREEN SETUP SETUP MODE ENTER ENTER INFO BACK Display the setup screen. • Press [SETUP]. The following setup screen appears. Select “CHANNEL”... -
Page 16: Antenna Confirmation
ANTENNA CONFIRMATION Displays signal strength for each channel. POWER SLEEP SELECT SCREEN SETUP SETUP ENTER ENTER BACK CH RETURN VOL. MUTE Display the setup screen. • Press [SETUP]. The following setup screen appears. Select “CHANNEL” and press [ENTER] to con- firm. -
Page 17: Language Selection
LANGUAGE SELECTION You can choose English, Spanish, or French as your on screen language. STILL SCREEN SETUP SETUP MODE ENTER ENTER INFO BACK CH RETURN VOL. MUTE Display the setup screen. • Press [SETUP]. The following setup screen appears. Select “LANGUAGE” and press [ENTER] to con- firm. -
Page 18: Watching Tv
ATCHING TV CHANNEL SELECTION Select channels by pressing [CH K/L] found on remote control or on the TV’s control panel, or by pressing [the Number buttons] found on the remote control. INPUT POWER SLEEP SELECT AUDIO STILL SCREEN SETUP MODE ENTER ENTER BACK... -
Page 19: Still Mode
STILL MODE You can freeze the image shown on the screen. AUDIO STILL STILL SCREEN SETUP MODE Pause the image. • When you press [STILL], the image shown on the screen is paused. Still • The audio is not paused and keeps on reading out. -
Page 20: Accessing External Devices
ACCESSING EXTERNAL DEVICES Use your remote control to access DVD recorders, home audio systems and other external devices when they are connected to your television. INPUT INPUT POWER SLEEP SELECT SELECT AUDIO SCREEN SETUP ENTER BACK CH RETURN VOL. MUTE Use your remote control to select external com- ponent. -
Page 21: Changing The Screen Display Mode
CHANGING THE SCREEN DISPLAY MODE Each of 4 display modes can be selected in either 4:3 or 16:9 aspect ratios. AUDIO STILL SCREEN SCREEN SETUP MODE MODE ENTER BACK INFO When the broadcast is sending 4:3 video signal... Sidebar (normal) Wide [Sidebar] Sidebar displays a 4:3 picture at its standard... -
Page 22: Screen Information
SCREEN INFORMATION You can display the currently selected channel or other information such as the audio mode on the screen. SCREEN SETUP ENTER BACK BACK CH RETURN VOL. MUTE In the analog mode, the current channel and the audio mode are displayed. Display the channel number and the audio mode. -
Page 23: Sleep Timer
SLEEP TIMER The Sleep Timer can be set to automatically turn off your television after an incremental period of time. INPUT POWER SLEEP SLEEP SELECT AUDIO STILL SCREEN SETUP MODE ENTER Press [SLEEP] on the remote control to set the Sleep Timer. -
Page 24: Picture Adjustment
PICTURE ADJUSTMENT You can select from four default picture color set- tings. You can also adjust brightness, contrast, color, tint, sharpness and color temperature as well as energy saving settings. SCREEN SETUP SETUP ENTER ENTER BACK Display the setup screen. •... -
Page 25: Closed Caption
CLOSED CAPTION You can view closed captioning (cc) for TV pro- grams, movies, news, and prerecorded tapes. Closed captions refer to text of dialogue or descrip- tions displayed on-screen for the hearing impaired. SCREEN SETUP SETUP MODE ENTER ENTER INFO BACK CH RETURN VOL. -
Page 26: Dtv Closed Caption
DTV CLOSED CAPTION Apart from closed captions, DTV has its own closed captions called DTV CC. Use this menu to change the settings for DTV CC. Display the setup screen. • Press [SETUP]. The following setup screen appears. Select “DETAIL” and press [ENTER] to confirm. •... - Page 27 Set each item. • When “User Setting” is set to “On”, you can set the following items. • CC style set by “User Setting” will be displayed. • Using [ K / L ], select the item you want to set. •...
-
Page 28: V-Chip
V-CHIP You can block certain programming inappropriate for children. This block can be released by entering a password. POWER SLEEP SELECT SCREEN SETUP SETUP ENTER ENTER BACK Display the setup screen. • Press [SETUP]. The following setup screen appears. Select “DETAIL” and press [ENTER]. •... - Page 29 Set “MPAA Rating”. • Using [ K / L ], select the rating. • Press [ENTER] and set to “View” or “Block”. V-Chip V-Chip NC-17 PG-13 BACK Select ENTER View/Block Back To exit the setup, press [SETUP]. <Selection> <Rating Category Explanations> Mature audience only NC-17 : No one under 17 admitted...
-
Page 30: Hdmi Audio
C New Password Display the “New Password” screen. • Using [ K / L ], select “New Password”. V-Chip V-Chip MPAA Rating TV Rating New Password • Press [ENTER]. Change the password. • Use [the Number buttons] on the remote con- trol and enter the NEW 4-digit password. -
Page 31: Miscellaneous
ISCELLANEOUS ATTACHING A WALL MOUNT BRACKET (SOLD SEPARATELY) The following is a description of the method for attaching a wall mount to this TV. When performing this operation, refer to the instruction manual included with the wall mount kit. You need the following wall mount unit (commercially available) for this TV. EZLCDM-02: Market Link USA, Inc. -
Page 32: Troubleshooting Guide
TROUBLESHOOTING GUIDE Before calling for service, please refer to the following information. Symptom No power No picture or sound No color Sound OK, picture poor Picture distorted Weak picture Lines or streaks in picture Picture blurred Ghosts in picture Bars on screen Remedy •... - Page 33 Symptom Picture rolls vertically Different color marks on screen Poor reception on some channels Picture OK, sound poor No reception of digital signals Channel changes automatically Remote Control doesn’t work Problems with Closed Caption Feature Misspelled captions are displayed. Captions are not entirely displayed, or captions are delayed behind the dia- logue.
-
Page 34: Glossary
GLOSSARY ATSC Acronym that stands for Advanced Television Systems Committee and the name of the digital broadcasting standards. Aspect ratio The width of a TV screen relative to its height. Conventional TVs are 4:3 (in other words, the screen is almost square);... -
Page 35: Specifications
PECIFICATIONS GENERAL SPECIFICATIONS Television System: ATSC NTSC-M TV Standard Closed Caption System: §15.119/FCC (Analog CC) §15.122/FCC (Digital CC) Channel Coverage (ATSC/NTSC) VHF: 2 ~ 13 UHF: 14 ~ 69 CATV: 2 ~ 13, A ~ W, W+1 ~ W+94, A-5 ~ A-1, 5A Tuning System: Channel frequency synthesized tuning system... -
Page 36: Limited Warranty
FUNAI CORP. will repair this product, free of charge in the USA in the event of defect in materials or workmanship as follows: DURATION: PARTS: FUNAI CORP. will provide parts to replace defective parts without charge for one (1) year from the date of original retail purchase.