Table of Contents
Advertisement
Advertisement
Table of Contents

Related Manuals for Emerson Nickelodeon SpongeBob SquarePants SB315


Summary of Contents for Emerson Nickelodeon SpongeBob SquarePants SB315
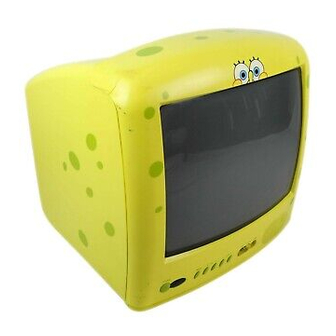
- Page 3 Thank you for purchasing the SpongeBob SquarePants 13” Color TV with On-Screen Display and Remote Control from Emerson. Please read this manual before operating this unit to become familiar with its features and obtain the performance that will bring you continued enjoyment for many years. In the event you require technical assistance, please call the Emerson service Department at: 1-800-695-0098.
- Page 4 IMPORTANT SAFETY INSTRUCTIONS CAUTION RISK OF ELECTRIC SHOCK DO NOT OPEN CAUTION: TO REDUCE THE RISK OF ELECTRIC SHOCK, DO NOT REMOVE COVER (OR BACK). NO USER-SERVICEABLE PARTS INSIDE. REFER SERVICING TO QUALIFIED SERVICE PERSONNEL. WARNING: TO REDUCE THE RISK OF FIRE OR ELECTRIC SHOCK, DO NOT EXPOSE THIS APPLIANCE TO RAIN OR MOISTURE. TO PREVENT ELECTRIC SHOCK, MATCH THE WIDE BLADE OF PLUG TO WIDE SLOT, FULLY INSERT.
- Page 5 IMPORTANT SAFETY INSTRUCTIONS (CONTINUED) 13. LIGHTNING To protect your product from a lightning storm, or when it is left unattended and unused for long periods of time, unplug it from the wall outlet and disconnect the antenna or cable system. This will prevent damage to the product due to lightning and power-line surges.
-
Page 6: Location Of Controls
FRONT POWER Button-Use this button to turn your TV on or off. Remote Control Sensor-This receiver receives a signal from your remote control. Do not block it. MENU Button-Use this button to turn the TV's menu system on and off. CHANNEL UP ( )/DOWN ( ) Buttons-Use these buttons to change channels on your TV, or to select items in the menu system. -
Page 7: Remote Control
LOCATION OF CONTROLS (CONTINUED) REAR VHF/UHF IN Jack-Connect a VHF/UHF antenna, CATV, VCR, satellite, etc. cable to this jack. AV button must be set to TV/CATV. VIDEO IN Jack-Use this jack to receive a video signal from another A/V component. AUDIO IN Jack-Use this jack to receive an audio signal from another A/V component. -
Page 8: Battery Installation
BATTERY INSTALLATION Loosen the screw to open the battery compartment cover. Follow these precautions when using batteries in this device: 1. Use only the size and type of batteries specified. 2. Be sure to follow the correct polarity when installing the batteries as indicated in the battery compartment. Reversed batteries may cause damage to the device. -
Page 9: Cable (Catv)/Satellite Connections
CABLE (CATV)/SATELLITE CONNECTIONS This TV has an extended tuning range and can tune most cable channels without using a Cable TV converter box. Some Cable TV companies offer “premium pay channels” in which the signal is scrambled. Descrambling these signals for normal viewing requires the use of a descrambler device which is generally provided by the cable company. -
Page 10: Indoor Antenna Connection
Connecting the Rod Antenna (not included) Insert the Rod Antenna on top of the rear cabinet and connect other end to the antenna jack as shown below. ROD ANTENNA IS NOT SUPPLIED. OUTDOOR ANTENNA CONNECTIONS OUTDOOR VHF/UHF ANTENNA CONNECTION (ANTENNA NOT SUPPLIED) Follow the instructions for the type of antenna system you intend to use. -
Page 11: External Audio/Video Connections
EXTERNAL AUDIO/VIDEO CONNECTIONS When you watch a program recorded on another source (VCR, video camera, DVD, etc.), you can use the Audio/Video input jacks on the front of the TV. Connect the Audio/Video output jacks of the external unit to the Audio Input jack and the Video Input jack of the TV. To access the unit connected to these jacks, press the AV IN button so AV appears on the screen. -
Page 12: Vcr Connections
Follow the instructions below to connect a VCR to your television using a 75 ohm coaxial cable (CABLES NOT INCLUDED). INCOMING CATV CABLE 1. Connect the cable, satellite or incoming antenna to the VHF/UHF IN jack on the rear of the VCR. 2. -
Page 13: Setting The Language
This TV can show the On-Screen display in English, Spanish or French. Press the Power button 1 to turn on the TV. Press the MENU button 2; the MENU screen will appear. Press the VOLUME UP ( ) 1/DOWN ( ) 2 buttons to select the desired language (English, French or Spanish). -
Page 14: Setting The Clock
Press the Power button 1 to turn on the TV. Press the MENU button 2; the MENU screen will appear. Press the CHANNEL UP ( ) 1/DOWN ( ) 2 buttons to select SET CLOCK. Press the VOLUME UP ( ) 3/DOWN ( ) 4 buttons to set the hour, then press the CHANNEL DOWN ( ) 2 button. -
Page 15: Setting The Channels Into Memory
SETTING THE CHANNELS INTO MEMORY This TV is equipped with a channel memory feature which allows channels to skip up or down to the next channels set into memory, skipping over unwanted channels. Before selecting channels, they must be programmed into the TV’s memory. In addition to normal VHF/UHF channels, this TV can receive up to 113 Cable TV channels. -
Page 16: Adding And Deleting Channels
ADDING AND DELETING CHANNELS After setting channels into memory, you can add or delete channels as follows: Press the Power button ‚ to turn on the TV. Press the MENU button ƒ; the MENU screen will appear. Press the CHANNEL UP ( ) 1/DOWN ( ) 2 buttons to select CHANNEL. - Page 17 Press the Power button to turn on the Adjust the volume level by pressing the VOLUME UP ( )1/DOWN ( ) 2 buttons. NOTES: • When AIR/CATV option is set to AIR, only channels up to 69 can be selected. When set to CATV, channels up to 125 can be selected.
-
Page 18: Display Button
MUTE Press the MUTE button 1 to turn off the sound. The TV’s sound will be silenced and MUTE will appear briefly on the screen. The sound can be turned back on by pressing this button again or one of the VOLUME UP ( )2/DOWN ( ) 3 buttons or the MUTE button 1 again. -
Page 19: Closed Captions
WHAT IS CLOSED CAPTIONING? This television has the capability to decode and display Closed Captioned television programs. Closed Captioning will display text on the screen for hearing impaired viewers or it will translate and display text in another language. CLOSED CAPTIONING WITH A VCR Closed Captioned programs can be recorded and played back on a VCR with the Closed Captioned text intact. -
Page 20: On-Screen Control Adjustments (Picture)
ON-SCREEN CONTROL ADJUSTMENTS (PICTURE) Press the Power button ‚ to turn on the TV. Press the MENU button ƒ; the MENU screen will appear. Press the CHANNEL UP ( ) 1/DOWN ( ) 2 buttons to select the desired picture setting (CONTRAST, BRIGHTNESS, COLOR, SHARPNESS or TINT). -
Page 21: Parental Control Set-Up
PARENTAL CONTROL SET-UP: You can set the CHANNEL BLOCK to block out any channels that you do not want to be viewed as follows: Press the Power button ‚ to turn on the TV. Press the MENU button ƒ; the MENU screen will appear. Press the VOLUME UP ( ) button 1 to confirm. -
Page 22: Movie Rating Set Up
SETTING PARENTAL CONTROL (CONTINUED) Movie Rating enables parents to prevent their children from watching inappropriate material on TV. Movie Rating reads the ratings for programming (except for news, sports, unedited movies on premium cable and emergency system signals), then denies access to programming if the program’s rating meets the limitations previously set. In this case, the program will be blocked. -
Page 23: Tv Parental Rating Set Up
SETTING PARENTAL CONTROL (CONTINUED) TV Parental Guidelines have one or more letters added to the basic rating to let parents know when a show contains higher levels of violence, sex, adult material or suggestive dialogue. TV PARENTAL RATING SET UP Closed Caption: Parental Control Change Password... - Page 24 SETTING PARENTAL CONTROL (CONTINUED) Press the Power button ‚ to turn on the TV. Press the MENU button ƒ; the MENU screen will appear. Press the VOLUME UP ( ) button 1 to confirm. Using the Direct Channel Selection buttons (0-9) 2, enter the password (“1111”...
-
Page 25: Setting The Wake-Up Time
Press the Power button ‚ to turn on the TV. Press the MENU button ƒ; the MENU screen will appear. Press the CHANNEL UP ( ) 1/DOWN ( ) 2 buttons to select WAKE-UP TIME. Press the VOLUME UP ( 3/DOWN ( ) 4 buttons to set the hour, then press the CHANNEL DOWN ( ) 2 button. -
Page 26: Setting The Off Timer
Press the Power button ‚ to turn on the TV. Press the MENU button ƒ; the MENU screen will appear. Press the CHANNEL UP ( ) 1/DOWN ( ) 2 buttons to select OFF TIME. Press the VOLUME UP ( ) 3/DOWN ( ) 4 buttons to set the hour, then press the CHANNEL DOWN ( ) 2 button. -
Page 27: Troubleshooting Guide
Check the following before requesting service: SYMPTOM POSSIBLE CAUSE POWER No power. The AC power cord is not connected. TV BROADCAST RECEPTION TV station experiencing problems. Poor or no picture. Picture control is not adjusted. Possible local interference. Antenna/CATV connector is not connected. TV station experiencing problems. -
Page 28: Reception Disturbances
RECEPTION DISTURBANCES Most types of television interference can be remedied by adjusting the height and position of the VHF/UHF antenna. Outdoor antennas are recommended for best results if not using cable or a satellite. The most common types of television interference are shown below. - Page 29 Depot Repair Facility, or replace the product in our discretion. For repair or replacement, pack your unit in a padded box, enclose your check or money order payable to Emerson Radio Corp. in the amount of $9.00 (not required by California residents) to cover shipping and handling costs, and enclose a copy of your proof of purchase.
- Page 30 EMERSON Printed in China PART NO. 21-2062 506-04...
Need help?
Do you have a question about the Nickelodeon SpongeBob SquarePants SB315 and is the answer not in the manual?
Questions and answers