Table of Contents
Advertisement
Advertisement
Table of Contents

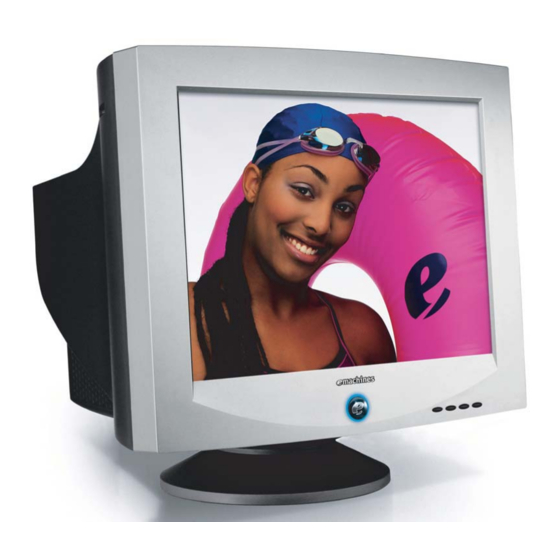
Summary of Contents for eMachines 17f3
- Page 1 17f3 User Guide...
-
Page 3: Table Of Contents
Contents 17f3 Monitor ............. . . 1 Setting up the monitor . - Page 4 www.emachines.com...
-
Page 5: 17F3 Monitor
17f3 Monitor • Setting up the monitor • Adjusting settings • Maintenance • Troubleshooting • Specifications... -
Page 6: Setting Up The Monitor
Slide the base toward the front of the monitor so all hooks are securely in place. A retaining latch built into the base clicks into place when the base is correctly attached. Carefully set the monitor upright and place it on a sturdy, level surface. www.emachines.com... - Page 7 Connect the power cable that came with the monitor to the AC power connector on the back of the monitor. Only use the power cable that came with the monitor. Plug the other end of the power cable into a correctly grounded electrical outlet. AC power connector www.emachines.com...
- Page 8 To turn on the monitor: Press the power button on the front of the monitor. Turn on your computer. Power MENU button button Brightness/ button www.emachines.com EXIT button Contrast/ button...
-
Page 9: Adjusting Settings
OSD inactive: Adjusts the contrast. OSD active: Navigates to and adjusts the selected OSD menu option. Exit. Exits the OSD menu or sub-menu. To adjust monitor settings: Press the button. The OSD menu opens. MENU 1024 x 768 / 85Hz CONTRAST EXIT www.emachines.com... -
Page 10: On-Screen Display Menu Options
V SIZE. Controls the vertical size of the display image. buttons to highlight an OSD menu option to adjust (for example button to select the option. The change menu for that MENU buttons to adjust an OSD menu option. www.emachines.com EXIT button twice to save your EXIT... - Page 11 LANGUAGE. Changes the display language for the OSD. OSD TIME. Changes the display time that the OSD is on the screen. DEGAUSS. Demagnetizes the screen. INFORMATION. Provides information on available preset modes. Current selection is highlighted. EXIT. Displays current settings and exits the OSD menu. www.emachines.com...
-
Page 12: Video Modes
640 × 480 31.47 640 × 480 43.27 800 × 600 46.88 800 × 600 37.88 800 × 600 53.67 800 × 600 64.02 1024 × 768 48.36 1024 × 768 60.02 1024 × 768 68.67 1280 × 768 60.3 www.emachines.com... -
Page 13: Maintenance
Keep the monitor out of direct sunlight. Keep the monitor away from any equipment that generates a magnetic field. Use a screen saver to avoid permanent image burn-in. For more information about screen savers, see the documentation that came with your computer. www.emachines.com... -
Page 14: Troubleshooting
The monitor is not positioned too close to another monitor, power transformer or adapter, electric fan, fluorescent light, metal shelf, or laser printer. If none of these suggestions solves the problem, try plugging the monitor into another outlet, preferably one on a different circuit. www.emachines.com... - Page 15 Some video modes used by the monitor produce images that cannot be adjusted all the way out to the bezel edge (the edge where the screen glass and monitor casing meet). This condition does not indicate that the monitor is defective. www.emachines.com...
-
Page 16: Specifications
Gross: 40 lbs (18.2 kg) 15.98 × 16.16 × 16.53 inches (406 × 410.5 × 420 mm) Temperature: 50°F to 91°F (10°C to 33°C) Humidity: 0% ~ 90% Temperature: -4°F to 140°F (-20°C to 60°C) Humidity: 5% ~ 90% www.emachines.com... -
Page 17: Safety, Regulatory, And Legal Information
Safety, Regulatory, and Legal Information • Safety information • Regulatory statements • Notices... -
Page 18: Important Safety Information
■ If your system is fitted with a TV Tuner, cable, or satellite receiver card, make sure that the antenna or cable system is electrically grounded to provide some protection against voltage surges and buildup of static charges. www.emachines.com... - Page 19 Replacement parts and accessories Use only replacement parts and accessories recommended by Gateway. Warning Do not use Gateway products in areas classified as hazardous locations. Such areas include patient care areas of medical and dental facilities, oxygen-laden environments, or industrial facilities. www.emachines.com...
-
Page 20: Regulatory Compliance Statements
Changes or modifications not expressly approved by Gateway could void the FCC compliance and negate your authority to operate the product. California Proposition 65 Warning Warning This product contains chemicals, including lead, known to the State of California to cause cancer, birth defects or reproductive harm. www.emachines.com... -
Page 21: Epa Energy Star
Classe B prescrites dans le règlement sur le brouillage radioélectrique édicté par Industrie Canada. EPA ENERGY STAR As an ENERGY STAR STAR guidelines for energy efficiency when used with a computer equipped with a Display Power Management System. ENERGY STAR ® Partner, Gateway has determined that this product meets the ENERGY www.emachines.com... - Page 22 © 2004 eMachines, Inc. All rights reserved. eMachines, stylized “e” and fi gure logo are trademarks or regiestered trademarks of eMachines, Inc, in the United States and/or other countries. All other product and brand names are trademarks of their respective owners.
- Page 24 MAN LGE 17F3 USR GDE R2 12/04...


Need help?
Do you have a question about the 17f3 and is the answer not in the manual?
Questions and answers