Table of Contents
Advertisement
Quick Links
Download this manual
See also:
Owner's Manual
Advertisement
Chapters
Table of Contents

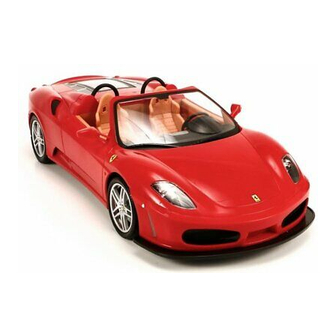
Related Manuals for Ferrari F430 SPIDER


Summary of Contents for Ferrari F430 SPIDER
- Page 1 Owner’s Manual...
- Page 2 Traction Stability Control See the “Sales and Service Organisation” therefore, some information may vary Engine torque regulation manual for the locations of the Ferrari depending on the gearbox installed. Electronic Control Unit Dealers and Authorised Service Centres. Consulting the manual...
-
Page 3: Spare Parts
Ferrari. the levers on the steering wheel. The Ferrari warranty is voided if Original Even though the system can be used Ferrari Spare Parts are not used for in “Automatic” mode, it should not repairs. - Page 5 Introduction 1 - General information 2 - About your vehicle 3 - Driving your vehicle 4 - In an emergency 5 - Maintenance 6 - Technical Information 7 - Table of contents...
-
Page 7: Table Of Contents
1 - General information Identification and homologation data _____ 8 Instruction labels ______________________ 9 Main engine specifications _____________ 10 Transmission ratios ___________________ 10 Performance _________________________ 10 Consumption and CO2 emissions ________ 11 Dimensions and weights _______________ 11 Rims and tyres _______________________ 12 Electric system _______________________ 13 Capacities ___________________________ 14... -
Page 8: Identification And Homologation Data
Identification and Punched engine type and number. Punched gearbox type and number. homologation data � � Identification data: Punched chassis number. � Assembly number plate. Vehicle identification. � � Summary plate with chassis type and ... -
Page 9: General Information
1 - General information Instruction labels Fuel label. Homologation labels: ECE homologation. Paint code label. � � � Antifreeze label. High beam homologation. Lubricants label. � � �... -
Page 10: Main Engine Specifications
Tyre pressure label. Main engine specifications Type F 136 E Number of cylinders 8 - V 90° Cylinder bore Piston stroke Total displacement 4308 Compression ratio 11.3 (*) Max power (2002/80B/CE) kW (HP) 360.3 (490) Corresponding r.p.m. 8500 Maximum torque (2002/80B/CE) Corresponding r.p.m. -
Page 11: Consumption And Co2 Emissions
1 - General information Consumption and CO2 emissions Dir. 1999/100 EEC (g/km) l/100 km • City cycle 26.9 • Motorway 13.3 • Combined cycle 18.3 Dimensions and weights Wheel base 2600 mm Max. length 4512 mm Max. width 1923 mm Max. -
Page 12: Rims And Tyres
Rims and tyres Wheel rims Front Rear Spare wheel 7.5” J X 19” 10” J X 19” 3.5” J X 19” Tyres tested by F (all tyres are without air chamber) Inflation pressure (cold) ERRARI Front Rear Front Rear Pirelli P Zero Rosso 225/35 ZR19”... -
Page 13: Electric System
1 - General information Electric system “Run flat” tyres (optional) The vehicle can be fitted with “Run Flat” Supply voltage • Shock absorber calibration control tyres”. This type of tyre has reinforced 12 V system sidewalls which permit the vehicle to •... -
Page 14: Capacities
Capacities Parts to be refilled Quantity Fill with: Ref. Page Engine Total system capacity 10 l HELIX ULTRA SAE 5W-40 111-122 Oil quantity between MIN and MAX 1.5 l Oil consumption (depending on driving conditions) 1.0 - 2.0 l / 1,000 km Gearbox and differential (including lines) 3.5 l... - Page 15 2 - About your vehicle Keys _______________________________ 16 Alarm system ________________________ 16 Steering wheel controls _______________ 21 Instrument panel _____________________ 29 Warning lights _______________________ 32 Multi-function display _________________ 34 Dashboard controls ___________________ 36 Controls on the tunnel console _________ 43 Doors_______________________________ 47 Seat controls _________________________ 48 Interior rear view mirror ________________ 50...
-
Page 16: Keys
The code numbers shown on the device which transmits a code signal to the CODE CARD should be kept in a Ferrari CODE control unit, and engine safe place. ignition is enabled only if the key code is You are advised to always keep the acknowledged by the system. -
Page 17: About Your Vehicle
CODE EOBD Emergency start procedure described previously leaving the key at 0 for more that 30 seconds. If the Ferrari CODE fails to disable the engine immobilizer, the CODE warning If the problem persists, contact the Ferrari light comes on fixed and the EOBD Service Network. - Page 18 The engine immobilizer function is ensured remaining digits in the code on the After about 25 seconds, the system is active by the Ferrari CODE system, which is CODE CARD. and the alarm will be triggered if: automatically activated when the ignition 7) When the last digit has been entered, - a door is opened;...
- Page 19 - the CODE CARD for the Ferrari CODE Ministerial homologation surveillance. system and the red CODE CARD for the The electronic alarm system has been Check that the doors and lids are properly alarm system;...
- Page 20 If you accidentally activate the alarm during Replacing the radio control batteries � � engine starting, the engine starts normally If the corresponding function is not and the alarm siren will be activated after activated when the key remote control 30 seconds.
-
Page 21: Steering Wheel Controls
2 - About your vehicle Steering wheel controls Key switch Start button Driving mode switch Horn control UP gearshift lever (*) DOWN gearshift lever (*) Exterior lights and direction indicator control lever Windscreen and headlight wiper/ ... - Page 22 To facilitate steering wheel release, turn the allowing the vehicle to still be driven. In these steering wheel slightly in both directions cases, contact the Ferrari Service Network. while turning the ignition key. Position II - Ignition on When turning the key to this position, the system checks the signals coming from the systems installed on the vehicle.
- Page 23 2 - About your vehicle “ICE” ( ) mode “Low-grip” ( ) mode SPORT mode This mode can be used when the road This can be activated to enhance driving This is the ideal setting for vehicle conditions are particularly slippery (e.g., comfort, even even when driving in a racing performance.
- Page 24 When the CST system is active and the amber warning light comes on, it means that there is a fault in one of the system parts. Contact the Ferrari Service Network. Every time the ignition is turned on, the CST system will reactivate.
- Page 25 2 - About your vehicle 4 - Horn control 6 - “DOWN” gearshift lever 7 - Exterior lights and direction (vehicles with F1 gearbox) indicator control lever The horn is activated by pressing the sides of Pull the left-hand towards the The exterior lights and the direction the upper spokes on either side of the steering DOWN...
- Page 26 Operate the lever to activate: Position (lever turned by two clicks): - headlight flashing: with the high beams, it is activated by Low beams on. - the exterior lights: pulling the lever towards the steering Position 0: Position (lever pushed forward): wheel.
- Page 27 2 - About your vehicle Position (lever up): - the direction indicators The direction indicators work only when the Right-hand side indicators. ignition key is in position II. � The instant the lever is moved, the relevant warning light on the instrument panel also comes on.
- Page 28 - to adjust the intermittent speed: - the windscreen washer: 9 - Steering wheel adjustment lever In position , turn the lever to change the Pull the lever towards the steering wheel Both the height and depth of the steering intermittent speed: to simultaneously activate the windscreen wheel can be adjusted.
-
Page 29: Instrument Panel
2 - About your vehicle Instrument panel Electronic speedometer Revolution counter Oil pressure gauge Oil temperature gauge Water temperature gauge Fuel level gauge Gear display (*) Warning lights display Multi-function display (*) for versions with F1 gearbox only. - Page 30 In this case, turn the engine off immediately and carry out the necessary checks. � If the problem persists, contact the Ferrari Service Network. 2 - Revolution counter Indicates the engine RPM. Avoid engine speeds in the red sector.
- Page 31 If the temperature remains In this case, reduce the engine speed high, turn off the engine and contact the immediately. If the temperature remains Ferrari Service Network. high, turn off the engine and contact the Ferrari Service Network. �...
-
Page 32: Warning Lights
II , it driving, have the necessary checks the CST. displays the gear engaged. performed by the Ferrari Service In this case, contact the Ferrari Service - Neutral Network. Network. - Reverse gear In addition to turning on when the self-... - Page 33 When the rear fog lights are If the failure permits, pull off the road and turned on. contact the Ferrari Service Network. External rear-view mirror defroster Flashing: low pressure in the system. When the button which controls Caution: Danger of rear wheels...
-
Page 34: Multi-Function Display
40). Amber = When one of the available systems system. has been activated Clock Contact the Ferrari Service Network. Multi-function display signals Displays the time It can be The multi-function display shows symbols Instrument panel lighting disabled with the multi-function... - Page 35 Indicates that the luggage and the E-DIFF. engine compartment lids are Vehicle set to ICE mode Contact the Ferrari Service Network. open or not properly closed. When ICE driving mode is selected on the steering wheel Driving mode switch failure...
-
Page 36: Dashboard Controls
Dashboard controls Fuel tank door opening button Rear fog lights button External rear-view mirror defroster button Luggage compartment lid opening button Multifunction buttons (MODE, SET) Power window control Car stereo system Air conditioning and heating system ... - Page 37 2 - About your vehicle 1 - Fuel tank door opening button Emergency opening If the opening button does not work, the door can be opened manually by pulling the lever located on the left-hand side of the engine compartment. �...
- Page 38 2 - Rear fog lights button 3 - External rear-view mirror defroster 4 - Luggage compartment lid opening button button The lid can also be opened with the ignition key removed. When the button is pressed, the rear The defroster is activated by pressing the fog lights are turned on only if the high button on the dashboard.
- Page 39 2 - About your vehicle The lid is held open by two gas struts. Emergency opening 5 - Multi-function buttons If the opening button malfunctions, pull the The luggage compartment is illuminated by The multi-function buttons work only when lever located under the dashboard, on the a courtesy light.
- Page 40 Press the left-hand button at length has been pressed briefly from the MODE MODE (for longer than 2 seconds) to enter the minute-setting option. programming mode, where you can scroll Briefly pressing the right-hand button through the options by briefly pressing the switches the odometer between trip and same button.
- Page 41 2 - About your vehicle be shown simultaneously on the multi- 6 - Power window control function display: time and deactivated The power windows can only be used with symbol, low fuel symbol or RACE driving the ignition key in position II. mode.
- Page 42 The window can move up to the “target” • Antenna incorporated in the windscreen. 7 - Car stereo system position in order to prevent the door from For use, consult the Instruction Handbook • CD-changer on the left-hand side of the hitting the upper weather strip when it contained in the bag on board the vehicle.
-
Page 43: Controls On The Tunnel Console
2 - About your vehicle Controls on the tunnel console Hazard lights switch Parking lights switch External rear view mirror controls Parking brake lever Mechanical gearbox lever 12V power socket Soft top opening/closing button ... - Page 44 The symbol will be shown on the multi- 1 - Hazard light switch 2 - Parking light switch function display. The warning light on the Press the switch to turn on the hazard Press the switch to turn on the parking instrument panel and on the switch itself lights.
- Page 45 2 - About your vehicle To release the parking brake, pull the lever 3 - External rear view mirror controls 4 - Parking brake lever upwards slightly and press the release The rear view mirrors can be adjusted To engage the parking brake, pull the lever button on the end of the lever A.
- Page 46 Prolonged use of this device may For closing the compartment, push it until 5 - Mechanical gearbox lever discharge the battery. you hear the lock click. For use of the gearshift lever see “Starting and driving the vehicle (Mechanical Do not try to insert plugs that are Keep the glove compartment closed incompatible in size and shape into the while driving.
-
Page 47: Doors
2 - About your vehicle Doors “target position” and stop, and if the door is not opened after 15 seconds, the window will When the doors are opened or closed, the move back up until it meets the “upper ledge”. windows will automatically move down Therefore, the handle must be released and approximately 2 centimetres and stop... -
Page 48: Seat Controls
Seat controls � � Proper seat adjustment is essential to obtain the best driving comfort and maximum effectiveness of the passive safety systems. Never adjust the seat while driving, � as you could lose control of the vehicle. The driver’s seat must only be �... - Page 49 2 - About your vehicle Adjusting the headrest Backrest inclination and lumbar support Move the headrest until the desired Operate control to incline the backrest height has been reached. Once the desired to the desired position or to obtain the position has been found, the headrest can desired arching of the lumbar area.
-
Page 50: Interior Rear View Mirror
Interior rear view mirror Adjusting the headrest Heating System (optional) Move the headrests until the desired The heating is activated by turning control This can be adjusted manually. height has been reached. Once the desired F. Two heating pads are used to heat the To set the mirror in the anti-dazzle position, position has been found, the headrest can seat. -
Page 51: Safety
In the event of more severe head-on Active safety collisions (up to 30° angle): in addition to The active safety system has been designed Ferrari has designed and constructed the seat belts, the pretensioners activate to prevent collisions. this vehicle to offer the best possible with a restraining action. -
Page 52: Seat Belts
Particular attention must be paid to: fixed parts of the passenger compartment. gases. • Overheated components: high Ferrari recommends you use the • Fuel is highly flammable and emits temperatures develop in the engine seat belts correctly fastened and vapours which may be noxious if inhaled. - Page 53 2 - About your vehicle For maximum protection, keep the backrest If the driver’s seat belt is not fastened, when Do not allow a child to sit on the you turn the ignition key to position II, passenger’s lap with both of them in the upright position, rest your back the warning light on the instrument panel fastened with the passenger’s seat belt.
- Page 54 Contact injury to the child in the event of a collision. pretensioners must be replaced. the Ferrari Service Network to have • The pretensioner must be replaced at them replaced. the intervals specified in the “Warranty When the pretensioners are activated, a Booklet and Maintenance Schedule”.
-
Page 55: Airbag
In this case, you must deactivate the immediately contact the Ferrari Service passenger airbag using the dedicated Network. control and ensure that the LED on the roof’s console comes on (see... - Page 56 Schedule”, even if the vehicle has not been Never remove the steering wheel; if necessary, the inflating bag, with the risk of extremely involved in a collision. have this done only by the Ferrari Service hot gas leakages. Network. When the system starts operating, gases are...
- Page 57 If a child is to be transported in the this expiry date is approaching, contact the front passenger seat, always deactivate Ferrari Service Network in order to the passenger-side airbag before fitting have the system replaced. the child seat. The device is disabled by...
-
Page 58: Passenger Compartment Accessories
The LED remains on until the passenger Passenger compartment The compartment is illuminated by an accessories airbag is reactivated. internal light which turns on automatically when the lid is opened. when the lid is opened. When the passenger door is open, the Glove compartment key can be inserted or removed in both Located on the dashboard on the... - Page 59 2 - About your vehicle To close the compartment, push the upper The cigarette lighter is turned on by Ashtray/Cigarette lighter end of the lid until you hear the central lock To gain access to the ashtray or to the pushing it fully in.
- Page 60 The pocket-change compartment on the Sun visors Courtesy mirror The sun visors can be lowered by moving On the back of the passenger-side visor front of the console is only present on them downwards. there is a courtesy mirror. vehicles with F1 gearbox. On the back of the driver-side visor there is a document pocket.
-
Page 61: Internal Lights
2 - About your vehicle Internal lights Hands-free microphone Engine compartment lid (optional) You can select when the dome light should Opening come on with the switch on the roof: The hands-free microphone is positioned • Pull the release lever located on the door on the roof, next to the dome light. - Page 62 Closing • Lower the lid until it is about 20 centimetres from closing, then let it drop. • Always check that it is properly closed. Emergency opening If the opening lever malfunctions, pull the cable located in the fuel filler cap compartment (see page 37).
-
Page 63: Soft Top
2 - About your vehicle Soft top The soft top is operated by means of a hydraulic system, driven by a pump and controlled by a set of sensors that monitor each stage of its movement. Do not keep the soft top open for long periods of time, especially if the vehicle is new, since the soft top canvas may become permanently creased and closing could become difficult. - Page 64 Operating the soft top Always make sure, before activation and during motion, that people or things are at a safe distance from the soft top’s movable parts. Never leave children unattended in the vehicle. Soft top movable parts Soft top unit ...
- Page 65 2 - About your vehicle Before opening the soft top, make sure that Do not leave the soft top in an intermediate the rear window is clean, in order to avoid position for more than 3 minutes, in order to scoring or scratching.
- Page 66 67 or, in the event and polycarbonate (rear window) may be Special warnings of difficulties, please contact the Ferrari damaged by the brushes. The soft top operation is interrupted (STOP Service Network to have the malfunction The high jet pressure could cause, in some function) in the following cases: corrected.
-
Page 67: Soft Top Emergency Closing
Ferrari Service Centre. They will identify and correct the problem that does not allow the soft top to close normally using the control button. - Page 68 Ferrari Service Network • When you reach the end section of centre to have the controls checked and the retaining clip , push it upwards synchronised.
- Page 69 2 - About your vehicle • Using the wrench with socket turn • Working on both sides of the vehicle at the cable inside the flexible shaft for the the same time, lift the soft top from its LH flap control in a clockwise direction, housing bay and, holding it as illustrated while turning the RH one in an anti- in the figure, tilt it forwards.
- Page 70 After this operation, leave the soft top closed and go to the nearest Ferrari Service Network Centre to have the automatic system repaired so that it is fully functional and safe. Operating the soft top in these...
-
Page 71: Air Conditioning And Heating System
2 - About your vehicle Air conditioning and heating system Fixed air vents for windscreen. Fixed air vents for side windows. Adjustable central and side vents. Air vents for foot area. Sun radiation sensor. Outside temperature sensor. ... - Page 72 Operating modes Air conditioning control switch Temperature selection control This is used to set the desired Automatic Released temperature in the passenger This mode automatically adjusts humidity The air conditioner is on. compartment. and ventilation according to the selected The air is cooled and/or only temperature.
- Page 73 2 - About your vehicle Air recirculation switch Adjusting the air vents Air flow direction adjustment Released The air flow comes from the Air flow rate. outside. Turned anti-clockwise: open. When outside temperatures exceed 25°C, Turned clockwise: closed. the air recirculation function remains on with a 1-minute pause every twenty �...
-
Page 75: Driving Your Vehicle
3 - Driving your vehicle Running-in __________________________ 76 Before a trip _________________________ 76 While driving ________________________ 76 Starting and driving the vehicle (F1 gearbox) _______________________ 77 Starting and driving the vehicle (Mechanical gearbox) ________________ 82 Parking _____________________________ 83 Parking manoeuvre ___________________ 83 Safe driving _________________________ 85 Respecting the environment ___________ 90... -
Page 76: Running-In
Running-in Before a trip While driving State-of-the-art production methods allow Always drive carefully and never exceed the Preliminary checks high precision in the construction and maximum engine speed indicated by the Check the following at regular intervals and coupling of components. Nonetheless, red area on the revolution counter. -
Page 77: Starting And Driving The Vehicle (F1 Gearbox)
II. Contact the Ferrari Service Network to have the malfunction identified and repaired. Operation with the engine off Once the “System start-up” stage has been R: press button on the central console. - Page 78 • Press the ENGINE START button and If the gearshift is in position N, starting is Release the UP and DOWN levers and the button R soon after the gear engaged is shown release it as soon as the engine starts. immediate.
- Page 79 3 - Driving your vehicle With the engine on and the vehicle • open the door without pushing the brake UPshifting standing, you can change directly from 1st pedal or the accelerator; Operate the right-hand UP lever without to R by pressing button R on the central •...
- Page 80 • If a DOWNshift is requested in order to Turning off the engine and the system Other system functions start overtaking where rapid acceleration The engine can be turned off either with “Automatic gearshift” mode is required, push the accelerator pedal the gearshift in N or a gear engaged.
- Page 81 3 - Driving your vehicle power requested by the driver. “Launch Control” strategy for performance Push start starting When the vehicle is stationary, a N, 1st gear In the event that the ignition system With the aim of optimising standing starts, or R request will not result in a change from malfunctions, you can “push start”...
-
Page 82: Starting And Driving The Vehicle (Mechanical Gearbox)
Starting and driving Warming up the engine the vehicle (Mechanical Do not run the engine at speeds higher than gearbox) 4000 RPM until the engine oil temperature has reached at least 65-70°C. Starting the engine Driving the vehicle Before starting the engine, make sure that When the engine has started: the alarm system and all electrical devices •... -
Page 83: Parking
3 - Driving your vehicle Parking Parking manoeuvre During parking manoeuvres, the sensors provide the driver with information on the To assist the driver during parking Engage the handbrake, put the gearshift lever distance between the vehicle and obstacles into 1st whether parking uphill or downhill, manoeuvres, the vehicle can come equipped found in front of or behind it. - Page 84 10 cm away from the sensors. Bumper repainting or touching up the paintwork in the sensor areas may exclusively be carried out by the Ferrari Service Network. Incorrect paint application could affect the parking sensor operation.
-
Page 85: Safe Driving
Ferrari Service Network during a subsequent inspection. - Page 86 If the vehicle was used in the RACE Before you drive - Adjust the position of the seat, steering wheel and rear view mirrors, in order to obtain the best driving position. - Adjust the backrest so that the chest is upright and the head is as close to the headrest as possible.
- Page 87 3 - Driving your vehicle death in the event of a collision. Always Driving at night Driving in the rain fasten the seat belts, including those of the When you are travelling at night, follow Rain and wet roads can cause hazardous child seats.
- Page 88 Driving in fog Driving on mountain roads Driving on snowy or icy roads - Whenever possible, avoid setting off if - Position the selector on the steering Below is some advice for driving in these the fog is thick. If you have to drive in wheel to “Low Grip”...
- Page 89 3 - Driving your vehicle Driving with the “ABS” braking system Driving using the driving mode switch The “Low grip” mode ensures The ABS system provides the following The driving mode switch on the steering stability on both dry and wet roads. It is advantages: wheel allows the driver to use the vehicle advisable to use this mode in low-grip...
-
Page 90: Respecting The Environment
F1 gearbox, gearshifting is faster so protecting the environment. as to reduce the time involved as much as Ferrari has designed and constructed a possible. The CST shifts to Level 3 (engine vehicle using technologies, materials and load will only be limited as far as necessary) devices to reduce the harmful impact on the and the suspensions stiffen further. - Page 91 4 - In an emergency Toolkit _____________________________ 92 Replacing the wheels _________________ 94 Replacing a bulb______________________ 96 Bulbs ______________________________ 100 Replacing a fuse _____________________ 100 Emergency ignition __________________ 106 Towing the vehicle ___________________ 107 Fuel cut-off inertia switch _____________ 108...
-
Page 92: In An Emergency
• set of flat wrenches system. In these cases, always have the • insulated cutting pliers � � sensor replaced by an authorised Ferrari • screwdriver for Phillips/slotted screws Service Centre. In the event of a puncture or low pressure • tow hook If the vehicle is equipped with a spare wheel, •... - Page 93 4 - In an emergency • Lower the lever and start the compressor. � • Inflate to the specified pressure (see page 12). � Replacing the puncture repair fluid cartridge � • Remove the terminal from the union � on the cartridge and slide out the union for the transparent tube from the compressor.
-
Page 94: Replacing The Wheels
Replacing the wheels Spare wheel (optional) Warning On request, the vehicle can be equipped • Always keep the spare wheel in perfect If one or more wheels need to be with a kit containing: working order, periodically checking that replaced, proceed as follows: the inflation pressure is 4.2 bar. - Page 95 4 - In an emergency If the jack is not positioned correctly, Replacing a wheel • Position the vehicle on a flat surface, the vehicle could slip off. engage 1st gear and lock the rear wheels The jack supplied must only be used for by engaging the parking brake.
-
Page 96: Replacing A Bulb
113. Low beams/high beams The low/high beams have high-voltage bi- xenon light bulbs. These bulbs have a high voltage power supply. Avoid any operation with the ignition key in position II. For replacement, contact the Ferrari Service Network. - Page 97 4 - In an emergency • Turn the bulb-holder in an anticlockwise • Remove the bulb holder and remove it Replacing the side direction indicator bulb direction and remove it from its seat. from its seat, • First remove the indicator transparent cover and then the bulb holder •...
- Page 98 Auxiliary stop light Reflector Replacing the auxiliary stop light bulbs For replacement, contact the Ferrari Service Network. • Remove the bulb from the bulb holder and replace it. Replacing other light bulbs Replacing the dome light bulb •...
- Page 99 4 - In an emergency Replacing the glove compartment light bulb Replacing the “door open” light bulbs Replacing the “door open” light bulbs Replacing the luggage compartment light • Using a screwdriver, gently pry at the bulb point indicated by the arrow and remove •...
-
Page 100: Bulbs
Door open lights incandescent Luggage compartment light incandescent 5W (W5W) If the fault is repeated, contact the Ferrari Service Network. When replacing a fuse, always use fuses of the same amperage (same colour). Spare fuses are found in the toolkit. - Page 101 4 - In an emergency Use the pliers found in the toolkit to Location of the fuse and relay boxes Symbol legend remove the fuses. + permanent battery Power fuses. + key operated Luggage compartment fuses. Fuses in passenger compartment, RH side (behind RH seat).
- Page 102 60A +30 ABS/ASR/ESP 30A RH seat maxi7 maxi8 30A LH seat If a power fuse has blown, contact the Ferrari Service Network to have the system checked. � � - lower the battery protection panel; - remove the fuse box cover .
- Page 103 4 - In an emergency 15A Taillights Relays: C - Right-hand side passenger compartment fuses and relays 7.5A LH high-beam. AR1 30A LH Fan To access them, remove the protection 15A LH low beam AR2 30A RH Fan panel and box covers . +30 Instrument panel, AR3 30A Lid opening actuator Bluetooth ECU...
- Page 104 PDF17 15A Windscreen washer/ wipers Fuses (MINI): Relays: PDF18 15A +30 key PDF1 10A +15 RH Motronic, Pin 86 on PDR1 Bosch PDR8 and PDR9 relays Immobilizer (spec. BOSCH PDF19 - Position available switch) PDF2 7.5A Rear fog lights PDF20 10A RH Timing variators PDR2 30A Key-operated devices PDF3 7.5A External rear view mirror PDF21 7.5A +30 RH Motronic...
- Page 105 4 - In an emergency PSF4 15A LH oxygen sensor PSF12 15A Air flow meter, exhaust by- D - Left-hand side passenger compartment fuses and relays pass valves, anti-evaporation PSF5 7.5A +15 shock absorber damping To access them, remove the protection diagnostic pump, anti- (Skyhook), +15 alternator, panel and box covers .
-
Page 106: Emergency Ignition
PSF21 7.5A +30 LH Motronic. PSR10 20A Main for LH Motronic Emergency ignition (BOSCH) PSF22 10A Reverse light Flat battery PSR12 50A F1 Pump PSF23 30A LH Motronic (main) Consult the section “Battery” in chapter 5 PSF24 15A Power socket E - Megafuse “Maintenance”, to always keep the battery in Located behind the battery, on the... -
Page 107: Towing The Vehicle
If the engine does not start after a few the tow hook (provided in the toolkit) to pedal. attempts, contact the Ferrari Service points different from those provided. Network. Towing the vehicle with the wheel axle lifted •... -
Page 108: Fuel Cut-Off Inertia Switch
Fuel cut-off inertia switch Resetting the system After checking that there are no fuel leaks: The fuel system is fitted with an automatic • Remove the cover and press button safety switch which is activated in the event the switch. the switch. - Page 109 5 - Maintenance Warranty booklet ____________________ 110 Maintenance________________________ 110 Level checks ________________________ 111 Battery ____________________________ 113 Windscreen wipers ___________________ 115 Wheels and tyres ____________________ 115 Headlight adjustment ________________ 117 Cleaning the vehicle__________________ 117 If the vehicle is stored for long periods __ 118...
-
Page 110: Warranty Booklet
Warranty booklet Maintenance proper working order. This will help ensure The vehicle is provided with a “Warranty At each indicated period, the Ferrari its condition over time and may prevent Booklet and Maintenance Schedule”. Service Centres must carry out all the... -
Page 111: Level Checks
61). notches on the dipstick. Use only lubricants and/or fluids The oil level check must be carried out with recommended by Ferrari (see the table the cap resting on the tank. “Capacities” on page 14). • Top up if necessary with the specified oil... - Page 112 If frequent top-ups are required after • After topping up, screw the filler cap back short trips, have the system checked ��� by the Ferrari Service Network. • Refit the inspection cover. • Screw the cap back on tightly. ���...
-
Page 113: Battery
5 - Maintenance Battery Have the electric system of the vehicle checked Battery master switch if the battery tends to discharge easily. The earth wire of the battery can be The battery is positioned in the passenger • To remove the battery from the vehicle, disconnected by means of the master switch compartment, behind the passenger disconnect it from the electric system... - Page 114 Proceed as follows, using a lead acid battery If accessories that absorb power other than charger: those installed by Ferrari are fitted on the • Disconnect the battery using the vehicle (e.g., cell phones, navigators, satellite battery master switch and disconnect alarm systems etc.), the battery may discharge...
-
Page 115: Windscreen Wipers
5 - Maintenance Windscreen wipers Wheels and tyres Windscreen wipers and washer fluid In order not to damage the wiper blades, To ensure performance, endurance and avoid using them when: the best tyre adjustment on the rim, it is important to comply with the following •... - Page 116 Check the tyres regularly for any signs of The wheels complete with tyres must side indicating the rolling direction or the damage (e.g., scratches, cuts, cracks, bulges, be balanced by the Ferrari Service outside. When changing the tyres, ensure etc.). Network or by skilled staff.
-
Page 117: Headlight Adjustment
It is advisable to soften any dirt first then of the leather upholstery in your Ferrari is remove it with a jet of water at room maintained unaltered over time. temperature. -
Page 118: If The Vehicle Is Stored For Long Periods
If the vehicle is stored for long periods products are also available (cleaner and cream) perfected and tested by Ferrari. If the vehicle is not used for long periods These products can be ordered through of time, it is advisable to take certain... -
Page 119: Technical Information
6 - Technical Information Engine ____________________________ 120 Cooling system ______________________ 122 Ignition-Injection system _____________ 123 Fuel system and fuel vapour emission control system _____________________ 124 Exhaust system______________________ 126 Clutch _____________________________ 128 Gearbox ___________________________ 128 Driving and steering _________________ 130 Air conditioning/heating system _______ 131 CST system _________________________ 132 Braking system ______________________ 132 Suspensions ________________________ 135... -
Page 120: Engine
Engine The vehicle has a normally aspirated 8- cylinder engine with a displacement of 4.3 litres, which produces a power of 490 HP and a torque of 465 Nm. The engine’s high performance is achieved through a number of technical solutions derived, in part, from racing vehicles: •... - Page 121 6 - Technical Information by system; from here, a part condenses and A dedicated pipe in the system releases the Engine lubrication system and flows into the oil tank underneath. The pressure that accumulates in the oil tank. gas and oil vapour recirculation remaining gases, thanks to the vacuum Blow-by system ...
-
Page 122: Cooling System
Centrifugal pump with thermostatic Twin contact fan on/off switch the intervals shown in the “Maintenance valve Water temperature sensor Schedule” by an Authorised Ferrari Right-hand radiator Oil/water heat exchanger Service Centre. Left-hand radiator Expansion tank ... -
Page 123: Ignition-Injection System
“Maintenance pump unit (see page 121) and driven by the • peripheral functions connected with Schedule” by an Authorised Ferrari crankshaft by means of a chain. engine operation. Service Centre. After cooling the engine, the coolant flows... -
Page 124: Fuel System And Fuel Vapour Emission Control System
Fuel system and fuel vapour emission control system Electronic accelerator (Drive by Wire system) Fuel tank Upper tank connection pipe Drive by Wire is a system that allows the Electric pump with filter Canister purge solenoid valves ... - Page 125 6 - Technical Information The fuel is supplied by the two submerged Ambient air is taken into the active carbon electric pumps in the tank, that are filter through a pipe equipped with a controlled by the ignition-injection ECUs. filter that prevents foreign particles from entering the system.
-
Page 126: Exhaust System
Exhaust system Exhaust manifold Front oxygen sensor Thermocouple Catalytic converter Rear oxygen sensor CO sampling port cap Muffler Exhaust tips Exhaust by-pass pneumatic valve Exhaust by-pass solenoid valve Vacuum tank ... - Page 127 If the engine malfunctions with consequent The system is made up of two pre- Ferrari is not liable for any damage to catalytic converters and two main catalytic high temperature in the exhaust system,...
-
Page 128: Clutch
Clutch Gearbox Engine malfunction alarm devices If the warning light “Engine check system The clutch is of the dry double-plate type, The gearbox has 6 synchronised gears plus failure” flashes or remains on fixed while with elastic hub and diaphragm spring; its reverse gear. - Page 129 “Maintenance Schedule” by differential in proportion to the lateral and clutch pedal. an Authorised Ferrari Service Centre. acceleration, the speed, the gear engaged Compared with the manually-controlled and the torque delivered by the engine.
-
Page 130: Driving And Steering
In this • Steering diameter: 10.8 m Adjustable steering wheel case, it is advisable to stop the vehicle and Hydraulic steering pump contact an Authorised Ferrari Service Oil tank Centre. Steering box delivery pipe ... -
Page 131: Air Conditioning/Heating System
6 - Technical Information Air conditioning/heating • cool outside or inside air Replace the pollen filter of the A.C. system at system the intervals indicated in the “Maintenance • dehumidify and, if desired, heat outside Schedule”. or inside air Compressor ... -
Page 132: Cst System
CST system Level 4: CST off (position CST is Ferrari’s acronym for Stability and Traction Control. The CST is composed of two main systems: Vehicle Dynamics Control, through the braking system; Vehicle Dynamics Control, through the engine torque; as well as the always active secondary systems such as ABS, EBD, etc. - Page 133 When a wheel tends to lock, the sensor and make approved for this model by the Ferrari is relieved of all responsibility for warns the ECU which, in its turn, signals Manufacturer. damage caused to persons or things.
- Page 134 Driving extremely carefully, immediately road traffic conditions. go to the nearest workshop of the Ferrari The maximum deceleration obtainable is Service Network to have the system however always dependent on the tyre grip checked. on the road. Obviously, when there is snow...
-
Page 135: Suspensions
6 - Technical Information Suspensions Shock absorbers Vertical acceleration sensor Driving mode switch Electronic control unit Failure warning light on instrument panel Wheel acceleration sensor ... - Page 136 “Skyhook” system. The suspensions use the “Skyhook” system developed by Mannesmann-Sachs and perfected by Ferrari for continuous automatic damping control via acceleration sensors which record the movements of each wheel and the vehicle body.
- Page 137 6 - Technical Information Tyre pressure monitoring system Tyre pressure calibration button (optional) To calibrate the system, with the ignition The vehicle can come equipped with a key in position II, press the button located system that monitors the tyre pressure by on the left, lower part of the dashboard, means of special sensors fitted inside the holding it for 4-10 seconds: the symbol...
- Page 138 Have the system repaired by an Authorised –.– instead of the value. “Replacing the wheels” on page 94, when Ferrari Service Centre. Tyre pressure check request without only one tyre has a puncture. indication of the wheel System calibration request Activated for a few seconds Activated for a few seconds after the engine has started.
-
Page 139: Chassis - Bodywork
The moving parts secured with screws, such 200 °C. as the luggage compartment lid, the engine All body repair work must be carried out compartment lid and the doors, complete exclusively by expert mechanics certified the body. by the Ferrari Technical Service Department. -
Page 140: Electronic Control Units
Electronic control units The figure shows the location of all the ECUs installed on the vehicle. Motronic (one per bank) Instrument panel Air conditioning/heating system Shock absorber calibration adjustment ABS-ASR Airbag Alarm system Power windows ... - Page 141 The ECUs can be connected to the “SD-3 diagnostic system”. This is an instrument made available to the Ferrari Service Network and allows: • finding the origin of an error recorded by the ECU and guiding the workshop technician through solving the problem •...
-
Page 143: Table Of Contents
7 - Table of contents... - Page 144 12V power socket_____________________ 46 Consumption and CO emissions ________ 11 devices __________________________ 127 Abbreviations ________________________ 2 Controls on the tunnel console__________ 43 Exterior lights and direction indicator control lever _______________________ 25 ABS and EBD systems ________________ 133 Cooling system______________________ 122 External rear view mirror controls________ 45 Adjustable air vents __________________ 73 CST system _________________________ 132...
- Page 145 7 - Table of contents Level checks ________________________ 111 Replacing the radio control batteries _____ 20 Towing the vehicle___________________ 107 Light bulbs _________________________ 100 Replacing the wheels _________________ 94 Transmission ratios ___________________ 10 Load limiting devices _________________ 53 Requesting new keys _________________ 19 Turning off the engine and the system (F1 gearbox) _______________________ 80 Location of the fuse and relay boxes ____ 101...
- Page 146 Information in this publication is therefore not binding in any way. Ferrari reserves the right to make any modification to the vehicles described in this manual, at any time, for either technical or commercial reasons.
Need help?
Do you have a question about the F430 SPIDER and is the answer not in the manual?
Questions and answers