Table of Contents
Advertisement
DiamondMax™ 2160
88400D8, 86480D6, 84320D4
83240D3 and 82160D2
Part #1384/A
All material contained herein Copyright © 1997 Maxtor Corporation.
CrystalMax™, CrystalMax™ 1080, DiamondMax™, DiamondMax™
1750, DiamondMax™ 2160 and MaxFax™ are trademarks of Maxtor
®
Corporation. No Quibble
Service is a registered trademark of Maxtor
Corporation. Other brands or products are trademarks or registered
trademarks of their respective holders. Contents and specifications
subject to change without notice. All rights reserved. Printed in the
U.S.A. 9/97
Corporate Headquarters
510 Cottonwood Drive
Milpitas, California 95035
Tel: 408-432-1700
Fax: 408-432-4510
Research and Development
Engineering Center
2190 Miller Drive
Longmont, Colorado 80501
Tel: 303-651-6000
Fax: 303-678-2165
Advertisement
Table of Contents

Related Manuals for Maxtor DIAMONDMAXTM 2160


Summary of Contents for Maxtor DIAMONDMAXTM 2160
- Page 1 DiamondMax™ 2160 88400D8, 86480D6, 84320D4 83240D3 and 82160D2 Part #1384/A All material contained herein Copyright © 1997 Maxtor Corporation. CrystalMax™, CrystalMax™ 1080, DiamondMax™, DiamondMax™ 1750, DiamondMax™ 2160 and MaxFax™ are trademarks of Maxtor ® Corporation. No Quibble Service is a registered trademark of Maxtor Corporation.
- Page 2 Revisions Manual No. 1384...
-
Page 3: Before You Begin
Before You Begin Thank you for your interest in the Maxtor DiamondMax™ 2160 AT hard disk drives. This manual provides technical information for OEM engineers and systems integrators regarding the installation and use of the 88400D8, 86480D6, 84320D4, 83240D3 and 82160D2. -
Page 4: Table Of Contents
DIAMONDMAX 1750 PRODUCT MANUAL Contents Section 1 — Introduction Maxtor Corporation 1 - 1 Products 1 - 1 Support 1 - 1 Manual Organization 1 - 1 Abbreviations 1 - 1 Conventions 1 - 2 Key Words 1 - 2... - Page 5 DIAMONDMAX 1750 PRODUCT MANUAL Section 3 — Product Specifications Configuration 3 - 1 Performance 3 - 1 Physical Dimensions 3 - 2 Power Requirements 3 - 3 Power Mode Definitions 3 - 3 Environmental 3 - 3 Shock and Vibration 3 - 4 Reliability and Maintenance 3 - 4...
- Page 6 DIAMONDMAX 1750 PRODUCT MANUAL Section 6 — Host Software Interface Task File Registers 6 - 1 Data Register 6 - 1 Error Register 6 - 1 Features Register 6 - 1 Sector Count Register 6 - 2 Sector Number Register 6 - 2 Cylinder Number Registers 6 - 2...
- Page 7 DIAMONDMAX 1750 PRODUCT MANUAL Section 7 — Interface Commands Command Summary 7 - 1 Read Commands 7 - 2 Read Sector(s) 7 - 2 Read Verify Sector(s) 7 - 2 Read Sector Buffer 7 - 2 Read DMA 7 - 3 Read Multiple 7 - 3 Set Multiple...
- Page 8 DIAMONDMAX 1750 PRODUCT MANUAL Figures Figure Title Page 2 - 1 PCBA Jumper Locations and Configuration 2 - 6 3 - 1 Outline and Mounting Dimensions 3 - 2 4 - 1 Multi-pack Shipping Container 4 - 2 4 - 2 Single-pack Shipping Container (Option A) 4 - 3 4 - 3...
-
Page 9: Section 1 - Introduction
DiamondMax™ 1750 and CrystalMax™ 1080 series hard drives deliver industry-leading capacity, performance and value for many PC applications. Support No matter which capacity, all Maxtor hard drives are supported by our commitment to total customer ® satisfaction and our No Quibble Service guarantee. -
Page 10: Conventions
DIAMONDMAX 1750 – INTRODUCTION Conventions If there is a conflict between text and tables, the table shall be accepted as being correct. Key Words The names of abbreviations, commands, fields and acronyms used as signal names are in all uppercase type (e.g., IDENTIFY DRIVE). -
Page 11: Section 2 - Product Description
SECTION 2 Product Description Maxtor DiamondMax™ 2160 AT disk drives are 1-inch high, 3.5-inch diameter random access storage devices which incorporate an on-board Ultra DMA/ATA controller. High capacity is achieved by a balanced combination of high areal recording density and the latest data encoding and servo techniques. -
Page 12: Product Features
UltraDMA - Mode 2 Maxtor DiamondMax 2160 hard drives fully comply with the new ANSI Ultra DMA protocol, which greatly improves overall AT interface performance by significantly improving burst and sustained data throughput. Multi-word DMA (EISA Type B) - Mode 2 Supports multi-word Direct Memory Access (DMA) EISA Type B mode transfers. -
Page 13: Logical Block Addressing
PRODUCT DESCRIPTION Logical Block Addressing The Logical Block Address (LBA) mode can only be utilized in systems that support this form of translation. The cylinder, head and sector geometry of the drive, as presented to the host, differs from the actual physical geometry. -
Page 14: Cache Management
PRODUCT DESCRIPTION Cache Management Buffer Segmentation The data buffer is organized into two segments: the data buffer and the micro controller scratch pad. The data buffer is dynamically allocated for read and write data depending on the commands received. A variable number of read and write buffers may exist at the same time. Read-Ahead Mode Normally, this mode is active. -
Page 15: Major Hda Components
(depending on the model), read pre-amplification and write drive circuitry. Read/Write Heads and Media Low mass, low force magneto-resistive read/write heads record data on 3.5-inch diameter disks. Maxtor uses a sputtered thin film medium on all disks for DiamondMax 2160 drives. -
Page 16: Subsystem Configuration
PRODUCT DESCRIPTION Subsystem Configuration Dual Drive Support Two drives may be accessed via a common interface cable, using the same range of I/O addresses. The drives are jumpered as device 0 or 1 (Master/Slave), and are selected by the drive select bit in the Device/Head register of the task file. -
Page 17: Section 3 - Product Specifications
PRODUCT SPECIFICATIONS SECTION 3 Product Specifications Models and Capacities Drive Configuration Performance Specifications 3 – 1... -
Page 18: Physical Dimensions
PRODUCT SPECIFICATIONS Physical Dimensions Figure 3 - 1 Outline and Mounting Dimensions 3 – 2... -
Page 19: Power Requirements
The time-out value for this mode is programmable. The buffer is active to accept write data. EPA Energy Star Compliance Maxtor Corporation supports the goals of the U.S. Environmental Protection Agency’s Energy Star program to reduce the electrical power consumption of computer equipment. -
Page 20: Shock And Vibration
The annualized average failure rate (AFR) applies to the period prior to the expiration of component design life, and is based on failures chargeable to Maxtor. Determination of the AFR takes into account: a.) in-warranty field failure returns less quality acceptance-related failures and b.) an AFR equaling an exponentially weighted moving... -
Page 21: Emc/Emi
The CE Marking indicates conformity with the European Union Low Voltage Directive (73/23/EEC) when the disk mechanism is installed in a typical personal computer. Maxtor recommends that testing and analysis for EMC compliance be performed with the disk mechanism installed within the user's end-use application. -
Page 22: Section 4 - Handling And Installation
There are a number of system BIOS’s currently in use which do not support hard drives with more than 4095 cylinders (2.1 gigabytes). This section contains information describing the conditions which may identify this limitation. In order to obtain the full capacity of your Maxtor drive, you will need to follow the recommended installation instructions. -
Page 23: Unpacking And Inspection
As they are removed, inspect drives for evidence of shipping damage or loose hardware. If a drive is damaged (and no container damage is evident), notify Maxtor immediately for drive disposition. Figure 4 - 1 Multi-pack Shipping Container 4 –... -
Page 24: Repacking
Single Pack Shipping Container (Option A) Single Pack Shipping Container (Option B) Repacking If a Maxtor drive requires return, repack it using Maxtor packing materials, including the antistatic bag. Physical Installation Recommended Mounting Configuration The DiamondMax™ 2160 drive design allows greater shock tolerance than that afforded by larger, heavier drives. -
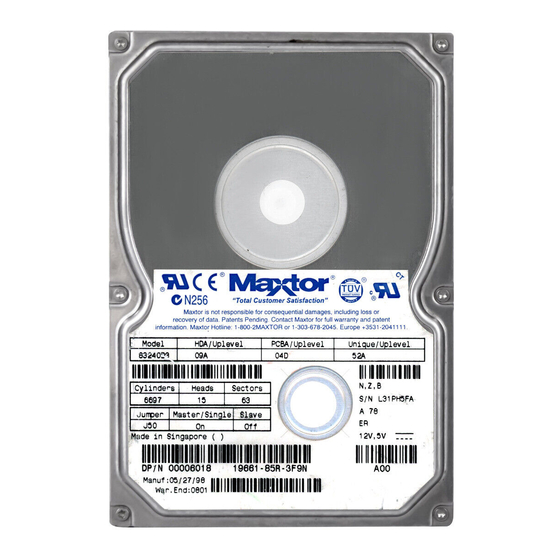
Page 25: Drive Jumper Settings
INSTALLATION Drive Jumper Settings Figure 4-4 shows the valid jumper settings for the Maxtor hard drive. Master Device Slave Device J50 J48 J46 J44 J42 J50 J48 J46 J44 J42 EIDE Interface Connector J1 Power Connector J2 J50 – Master/Slave J48 –... -
Page 26: Inch Installation
Maxtor hard drive is being installed in may have implemented a different mounting and placement methodology. Mounting Drive in 5.25-inch Bay If the Maxtor hard drive will be mounted in a 5.25-inch bay, install it as shown in Figure 4-6 below. Figure 4 - 6 5.25-inch Installation Mounting Drive in 3.5-inch Bay... -
Page 27: Attaching Ide Interface And Power Cables
Attaching IDE Interface and Power Cables In order for your computer to recognize that the Maxtor hard drive is in the system, the IDE interface and power cables must be connected to the hard drive, the mother board or the IDE hard drive interface card. -
Page 28: Attaching System Cables
INSTALLATION Attaching System Cables Attach the 40-pin IDE interface cable from the Maxtor hard drive to the IDE connector on the IDE interface card. Figure 4 - 9 System Interface Card Cabling Attach the 40-pin IDE interface cable from the Maxtor hard drive to the IDE connector on the mother board. -
Page 29: System Setup
Setting the BIOS (CMOS) In order for the computer system to recognize the new Maxtor hard drive, it is necessary to set the system BIOS with the correct information about the hard drive. To do this, run the system SETUP (BIOS) program. - Page 30 System Hangs During Boot If the system hangs after installing the Maxtor hard drive, either before or after setting the system BIOS, the system many have a BIOS with a cylinder limitation. This may occur for hard drives with capacities larger than 2.1 GB.
-
Page 31: Hard Drive Preparation
Maxtor Technical Assistance representative in the event that you call for assistance. The Maxtor hard drive model number and serial number are also located on the top cover label of the hard drive. System information should be available in the computer users’s manual or in the documentation for the different devices attached to the system. -
Page 32: Section 5 - At Interface Description
AT INTERFACE DESCRIPTION SECTION 5 AT Interface Description Interface Connector All DiamondMax™ 2160 AT drives have a 40-pin ATA interface connector mounted on the PCBA. The drive may connect directly to the host; or it can also accommodate a cable connection (max cable length: 18 inches). Figure 5-1 Data Connector Pin Description Summary... -
Page 33: Pin Description Table
AT INTERFACE DESCRIPTION Pin Description Table 5 – 2... -
Page 34: Pio Timing
AT INTERFACE DESCRIPTION PIO Timing Figure 5 - 2 PIO Data Transfer To/From Device 5 – 3... -
Page 35: Dma Timing
AT INTERFACE DESCRIPTION DMA Timing Figure 5 - 3 Multi-word DMA Data Transfer 5 – 4... -
Page 36: Ultra Dma Timing Parameters
AT INTERFACE DESCRIPTION Ultra DMA Timing DMARQ (device) DMACK- (host) STOP (host) HDMARDY- (host) ZIORDY DSTROBE (device) DD(15:0) DA0, DA1, DA2, CS0-, CS1- Figure 5 - 4 Initiating an Ultra DMA Data In Burst 5 – 5... -
Page 37: Sustained Ultra Dma Data In Burst
AT INTERFACE DESCRIPTION 2CYC 2CYC DSTROBE at device DD(15:0) at device DSTROBE at host DD(15:0) at host Figure 5 - 5 Sustained Ultra DMA Data In Burst DMARQ (device) DMACK- (host) STOP (host) HDMARDY- (host) DSTROBE (device) DD(15:0) (device) Figure 5 - 6 Host Pausing an Ultra DMA Data In Burst 5 –... -
Page 38: Device Terminating An Ultra Dma Data In Burst
AT INTERFACE DESCRIPTION DMARQ (device) DMACK- (host) STOP (host) HDMARDY- (host) IORDYZ DSTROBE (device) DD(15:0) DA0, DA1, DA2, CS0-, CS1- Figure 5 - 7 Device Terminating an Ultra DMA Data In Burst DMARQ (device) DMACK- (host) STOP (host) HDMARDY- (host) IORDYZ DSTROBE (device) -
Page 39: Initiating An Ultra Dma Data Out Burst
AT INTERFACE DESCRIPTION DMARQ (device) DMACK- (host) STOP (host) ZIORDY DDMARDY- (device) HSTROBE (host) DD(15:0) (host) DA0, DA1, DA2, CS0-, CS1- Figure 5 - 9 Initiating an Ultra DMA Data Out Burst 2CYC 2CYC HSTROBE at host DD(15:0) at host HSTROBE at device DD(15:0) -
Page 40: Device Pausing An Ultra Dma Data Out Burst
AT INTERFACE DESCRIPTION DMARQ (device) DMACK- (host) STOP (host) DDMARDY- (device) HSTROBE (host) DD(15:0) (host) Figure 5 - 11 Device Pausing an Ultra DMA Data Out Burst DMARQ (device) DMACK- (host) STOP (host) IORDYZ DDMARDY- (device) HSTROBE (host) DD(15:0) (host) DA0, DA1, DA2, CS0-, CS1- Figure 5 - 12... -
Page 41: Device Terminating An Ultra Dma Data Out Burst
AT INTERFACE DESCRIPTION DMARQ (device) DMACK- (host) STOP (host) IORDYZ DDMARDY- (device) HSTROBE (host) DD(15:0) (host) DA0, DA1, DA2, CS0-, CS1- Figure 5 - 13 Device Terminating an Ultra DMA Data Out Burst 5 – 10... -
Page 42: Section 6 - Host Software Interface
HOST SOFTWARE INTERFACE SECTION 6 Host Software Interface The host communicates with the drive through a set of controller registers accessed via the host’s I/O ports. These registers divide into two groups: the Task File, used for passing commands and command parameters and the Control/Diagnostic registers. -
Page 43: Sector Count Register
HOST SOFTWARE INTERFACE Sector Count Register Holds the number of sectors to be sent during a Read or Write command, and the number of sectors per track during a Format command. A value of zero in this register implies a transfer of 256 sectors. A multi- sector operation decrements the Sector Count register. -
Page 44: Command Register
HOST SOFTWARE INTERFACE Command Register Contains code for the command to be performed. Additional command information should be written to the task file before the Command register is loaded. When this register is written, the BUSY bit in the Status register sets, and interrupt request to the host clears;... -
Page 45: Summary
HOST SOFTWARE INTERFACE Summary 6 – 4... -
Page 46: Control Diagnostic Registers
HOST SOFTWARE INTERFACE Control Diagnostic Registers These I/O port addresses reference three Control/Diagnostic registers: Alternate Status Register Contains the same information as the Status register in the Task File. However, this register may be read at any time without clearing a pending interrupt. Device Control Register Contains the software Reset and Enable bit to enable interrupt requests to the host. -
Page 47: Reset And Interrupt Handling
HOST SOFTWARE INTERFACE Reset and Interrupt Handling Reset Handling One of three different conditions may cause a reset: power on, hardware reset or software reset. All three cause the interface processor to initialize itself and the Task File registers of the interface. A reset also causes a set of the Busy bit in the Status register. -
Page 48: Section 7 - Interface Commands
INTERFACE COMMANDS SECTION 7 Interface Commands The following section describes the commands (and any parameters necessary to execute them), as well as Status and Error register bits affected. Read Commands Read Sector(s) Read Verify Sector(s) Read Sector Buffer Read DMA Multi-word DMA Ultra DMA Read Multiple... -
Page 49: Read Commands
INTERFACE COMMANDS Read Commands Read Sector(s) Reads from 1 to 256 sectors, as specified in the Command Block, beginning at the specified sector. (A sector count of 0 requests 256 sectors.) Immediately after the Command register is written, the drive sets the BSY bit and begins execution of the command. -
Page 50: Read Dma
INTERFACE COMMANDS Read DMA Multi-word DMA Identical to the Read Sector(s) command, except that The host initializes a slave-DMA channel prior to issuing the command, Data transfers are qualified by DMARQ and are performed by the slave-DMA channel The drive issues only one interrupt per command to indicate that data transfer has terminated and status is available. -
Page 51: Set Multiple
INTERFACE COMMANDS Set Multiple Mode Enables the controller to perform Read and Write Multiple operations, and establishes the block count for these commands. Before issuing this command, the Sector Count register should be loaded with the number of sectors per block. The drives support block sizes of 2, 4, 8 and 16 sectors. When this command is received, the controller sets BSY and examines the Sector Count register contents. -
Page 52: Write Dma
INTERFACE COMMANDS Write Multiple Performs similarly to the Write Sector(s) command, except that: 1. The controller sets BSY immediately upon receipt of the command, 2. Data transfers are multiple sector blocks and 3. The Long bit and Retry bit is not valid. Command execution differs from Write Sector(s) because: 1. -
Page 53: Set Feature Commands
INTERFACE COMMANDS Set Feature Commands Set Features Mode Enables or disables features supported by the drive. When the drive receives this command it: 1. Sets BSY, 2. Checks the contents of the Features register, 3. Clears BSY and 4. Generates an interrupt. If the value of the register is not a feature supported by the drive, the command is aborted. -
Page 54: Power Mode Commands
INTERFACE COMMANDS Power Mode Commands Standby Immediate – 94h/E0h Spin down and do not change time out value. This command will spin the drive down and cause the drive to enter the STANDBY MODE immediately. If the drive is already spun down, the spin down sequence is not executed. - Page 55 INTERFACE COMMANDS When enabling the Automatic Power Down sequence, the value placed in the Sector Count register is multiplied by five seconds to obtain the Time-out Interval value. If no drive commands are received from the host within the Time-out Interval, the drive automatically enters the STANDBY mode. The minimum value is 5 seconds.
-
Page 56: Initialization Commands
INTERFACE COMMANDS Initialization Commands Identify Drive Allows the host to receive parameter information from the drive. When the command is received, the drive: 1. Sets BSY, 2. Stores the required parameter information in the sector buffer, 3. Sets the DRQ bit and 4. - Page 57 INTERFACE COMMANDS 7 – 10...
- Page 58 INTERFACE COMMANDS 7 – 11...
-
Page 59: Initialize Drive Parameters
INTERFACE COMMANDS Initialize Drive Parameters Enables the drive to operate as any logical drive type. The drive will always be in the translate mode because of Zone Density Recording, which varies the number of sectors per track depending on the zone. Through setting the Sector Count Register and Drive Head Register, this command lets the host alter the drive's logical configuration. -
Page 60: Seek, Format And Diagnostic Commands
INTERFACE COMMANDS Seek, Format and Diagnostic Commands Seek Initiates a seek to the track, and selects the head specified in the Command block. 1. Sets BSY in the Status register, 2. Initiates the Seek, 3. Resets BSY and 4. Generates an interrupt. The drive does not wait for the seek to complete before returning the interrupt. -
Page 61: S.m.a.r.t. Command Set
INTERFACE COMMANDS S.M.A.R.T. Command Set Execute S.M.A.R.T. The Self-Monitoring Analysis and Reporting Technology (S.M.A.R.T.) command has been implemented to improve the data integrity and data availability of hard disk drives. In some cases, a S.M.A.R.T. capable device will predict an impending failure with sufficient time to allow users to backup their data and replace the drive before data loss or loss of service. -
Page 62: Section 8 - Service And Support
Service and Support Service Policy Repairs to any DiamondMax™ 2160 drive should be made only at an authorized Maxtor repair facility. Any unauthorized repairs or adjustments to the drive void the warranty. To consistently provide our customers with the best possible products and services, Maxtor developed the Total Customer Satisfaction (TCS) program. - Page 63 A 24-hour seven-day-a-week Bulletin Board Service (BBS) is available. Use the BBS to access and download information and utilities maintained in the Maxtor data files, including utilities, drive specifications and jumper options. Modem settings are 14,400 Baud or lower, 8, 1, N.
Need help?
Do you have a question about the DIAMONDMAXTM 2160 and is the answer not in the manual?
Questions and answers