Table of Contents
Advertisement
Quick Links
Advertisement
Table of Contents

Related Manuals for Element EFG272

Summary of Contents for Element EFG272
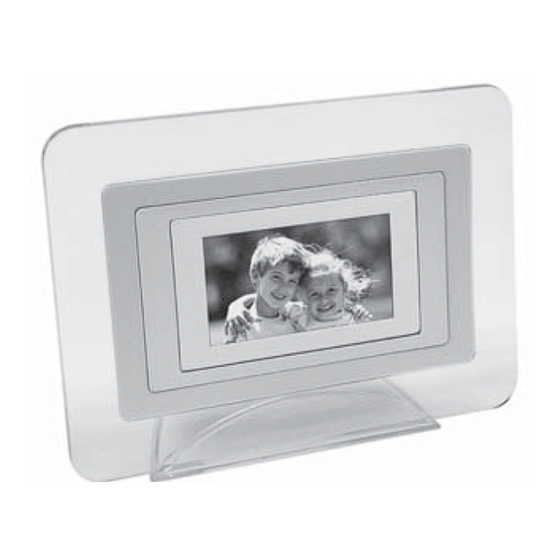
- Page 1 Digital Photo Frame EFG272 USER MANUAL A271.indd 1 7/28/08 1:53:26 PM...
- Page 2 • Power off the Digital Photo Frame before performing care and maintenance. • Clean the outer surface or the screen of the Digital Photo Frame with a soft cloth. Do not use liquid cleaners. • The LCD panel is made of plastic and can be easily damaged. If the panel is damaged be cautious of A271.indd 2...
-
Page 3: Table Of Contents
2. Features...4 3. What’s In the Box ...5 ...5 5. Product Diagram...6 6. Using Your Digital Photo Frame...7 • Use the Control Buttons...7 • Charging the Battery ...7 • Select Slide Show Mode or USB Mode ...8 • Viewing Photos and Entering Display Adjustment Menu ...10 •... -
Page 4: Introduction
Introduction Welcome to the Element Multimedia Photo Frame! Simply connect your Digital Photo Frame to your computer to download images and then play. It’s as easy as that. Features The Digital Photo Frame includes following key features: 2.7 inch TFT LCD screen... -
Page 5: What's In The Box
What’s In the Box • Digital Photo Frame • User Guide • USB Cable • Warranty Card • Stand Panel Size Screen Resolution (Pixels) Brightness Contrast Ratio Horizontal / Vertical Viewing Angle Screen Size Mode File Format Type A271.indd 5 2.7 inches... -
Page 6: Product Diagram
Product Diagram 1. Power Button 2. Shift Left Button 3. Enter Button 4. Shift Right Button 5. Menu Button A271.indd 6 6. SD Card Slot 7. USB Port 7/28/08 1:53:33 PM... -
Page 7: Using Your Digital Photo Frame
Using Your Digital Photo Frame (DPF) Use the Control Buttons: POWER Power on or off Move the selection up or left, display the previous photo, set time value ENTER MENU Charging the Battery: A built-in Li-Ion battery is supplied with your... -
Page 8: Select Slide Show Mode Or Usb Mode
Select Slide Show Mode or USB Mode: When you first connect your Digital Photo Frame (DPF) to the computer, the DPF will automatically enter the charging state. While the DPF is is powered on and connected to the computer via the USB cable, a pop up window is displayed on the screen. - Page 9 NOTE: 1. In Windows XP, Windows Media Player 11 (WMP11) must be installed. If your XP system already has service pack 2 installed, your WMP is automatically upgraded to version 11. You can download WMP 11 from www.microsoft.com. The current link to WMP 11 is located at: http://www.microsoft. com/windows/windowsmedia/player/11/default.aspx 2.
-
Page 10: Viewing Photos And Entering Display Adjustment Menu
Viewing Photos and Entering Display Adjustment Menu 1. Press and hold the button until the DPF is powered on. POWER The system will enter Slide Show mode automatically. 2. Press the button to select previous picture or press the button to select next picture. 3. -
Page 11: Setup Menu
Setup Menu: 1. Press the MENU button in slide show mode to enter “SETUP” mode. 2. Press the button again to exit Setup mode. MENU 3. In “SETUP” mode, press the button or the up and down through menu options. 4. -
Page 12: Setting Effect
Setting Effect: 1. Press the button or the button to select “EFFECT”. 2. Press the button to enter. ENTER 3. Press the button or the button to select the desired setting. 4. Press the ENTER 5. Or press the MENU Setting Brightness: 1. -
Page 13: Setting Language
Setting Language: 1. Press the button or the button to select “Language”. 2. Press the button to enter. ENTER 3. Press the button or the button to select the desired setting. 4. Press the ENTER 5. Or press the MENU Setting Current Time: 1. -
Page 14: Resetting To Default Settings
Resetting to Default Settings: 1. Press the button or the button to select “Default”. 2. Press the ENTER appear on LCD screen. 3. Press the button or the button to select the desired setting. 4. Press the ENTER MENU button to exit. A271.indd 14 Interval Effect... -
Page 15: Copying Pictures From The Sd Card
Copying Pictures from the SD card 1. Insert a SD card into SD card slot. 2. Press and hold the button until the DPF power on. System POWER will enter Slide Show mode automatically. 3. Press the ENTER 4. Press the button to select “Thumbnail”... -
Page 16: Deleting Pictures From Internal Memory Without Using The Pc
Deleting Pictures from Internal Memory without using the PC 1. Press and hold the button until the DPF power on. System POWER will enter Slide Show mode automatically. 2. Press the ENTER 3. Press the button to select “Thumbnail” and press the ENTER 4. -
Page 17: Storage Capacities
Storage Capacities The chart below indicates the approximate number of pictures your Digital Photo Frame can hold at each setting based on the internal memory. Resolution 10 M ( 3648 X 2736 ) ( 2560 X 1920 ) ( 2048 X 1536 ) -
Page 18: Frequently Asked Questions
Question: Why is the picture display slower with some pictures and faster with others? Answer: Higher resolution pictures load more slowly. Try using lower resolution pictures. Question: How do I restart my Digital Photo Frame? Answer: When using your DPF on battery power, remember to always charge your unit when it is out of power BEFORE using it again. -
Page 19: Limited Warranty
Limited Warranty Grand City (Hong Kong) Ltd. warrants to the orignial purchaser of this product, that should the product or any part thereof be proven defective in material or workmanship within 90 days from the date of the original purchase, such defects will be replaced or repaired without charge for parts or labor. - Page 20 THERE ARE NO EXPRESS WARRANTIES OTHER THAN THOSE EXPRESSLY DESCRIBED ABOVE, AND NO WARRANTIES WHETHER EXPRESSED OR IMPLIED, INCLUDING, BUT NOT LIMITED TO, ANY IMPLIED WARRANTIES OF MERCHANTABILITY OR FITNESS FOR A PARTICULAR PURPOSE, SHALL APPLY AFTER THE EXPRESS WARRANTY PERIOD STATED ABOVE, AND NO OTHER EXPRESS WARRANTY OR GUARANTEE GIVEN BY ANY PERSON, FIRM OR ENTITY WITH RESPECT TO THE PRODUCT SHALL BE BINDING ON GRAND CITY.
-
Page 21: Fcc Statement
FCC Statement FCC Part 15 Information reasonable protection against harmful interference in a residential installation. there is no guarantee that interference will not occur in a particular installation. If this equipment does following measures: connected. • Consult the dealer or an experienced radio/TV technician for help. WARNING: A271.indd 21 7/28/08 1:54:39 PM... - Page 22 Part No.: OMEFG272 US001 Made in China A271.indd 22 7/28/08 1:54:39 PM...
Need help?
Do you have a question about the EFG272 and is the answer not in the manual?
Questions and answers