Table of Contents
Advertisement
Advertisement
Table of Contents

Related Manuals for Sunfire Series II


Summary of Contents for Sunfire Series II
-
Page 2: Safety Instructions
Sunfire Component is operated. to cords at plugs, convenience receptacles, and the point where they exit the Component. - Page 3 User's Manual 15. To prevent electric shock, do not use this This apparatus does not exceed the Class A/ polarized plug with an extension cord, recep- Class B (whichever is applicable) limits for radio tacle or other outlet unless the blades can be noise emissions from digital apparatus as set fully inserted to prevent blade exposure.
-
Page 4: Table Of Contents
Biwiring, Mono .............. 18 Biamping ..............19 Speaker connections ............20 Troubleshooting guide..........21-22 Limited Warranty .............. 23 Service assistance ............23 To find out more about this and other Sunfire products, please visit our website: www.sunfire.com Table of Contents... -
Page 5: Signature And Standard Editions
The illustrations in this manual are of the Edition and the Standard Edition of the Signature Edition, but the operational details, Sunfire Series II Amplifiers. features and connections to loudspeakers and preamplifiers are the same for both models. The Signature Edition has more power output and uses premium quality output terminals compared to the Standard Edition. -
Page 6: Introduction
Bob Carver, Amplifier Designer, Physicist Dear Friend: Thank you for purchasing my Sunfire two channel power amplifier. I hope you enjoy it and the music it makes as much as I have enjoyed creating it for you. This magnificent amplifier represents my very latest thinking - and my best amplifier design ever. -
Page 7: Unpacking
User's Manual Unpacking Your Sunfire Amplifier should reach you in perfect condition. If you do notice any ship- ping damage, please contact your Sunfire Dealer immediately. Gently lift out the unit and remove all the packing material and accessories. It is... -
Page 8: Signature Edition Specifications
User's Manual Signature Edition Specifications Power Consumption Power output At idle 625 watts continuous, per channel, 300W Typical (1/8th power) both channels driven into eight ohms, 1800W Absolute Max (Fuse Limit) from 20Hz-20kHz with no more than 0.5% T.H.D. Dimensions Power at clipping, minimum: 19.0 inches wide 6.5 inches high (including feet) -
Page 9: Standard Edition Specifications
Pin 1 is ground Pin 2 is negative (cold) Pin 3 is positive (hot) © 2001 Sunfire Corporation. All rights reserved. Sunfire Corporation reserves the right to improve its products at any time. Therefore, specifications are subject to change without notice. -
Page 10: Installation
: Observe the following precautions when • Always make sure that your compo- choosing a location for your Sunfire Amplifier: nents are all turned OFF before making or changing connections. • Protect it from prolonged exposure to direct sunlight and other direct •... -
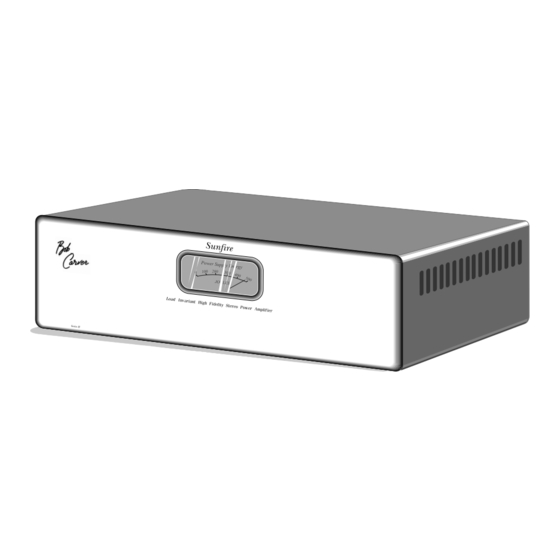
Page 11: Front Panel Features
I like the brighter of the two settings, as that the needle does not move under normal it illuminates the meter nicely and matches my use. other Sunfire equipment. Feel free to choose the setting that suits you. Crystal Base The glass base is intended to ensure proper airflow under the amplifier. -
Page 12: Rear Panel Features
5mV. If a fault 1. RCA Normal Inputs occurs within your preamp, and it sends a Your Sunfire Amplifier has three sets of large DC offset into the Lab Direct inputs of inputs for each of the channels. Two are... - Page 13 User's Manual 4. Voltage Source Outputs and 6. Current Source Fuses Each current source output has an in-line 5. Current Source Outputs fuse to protect your speakers. If one ever Each channel has two sets of outputs. opens, there will be no output to that speaker. The voltage source output has a source 7.
-
Page 14: System Configurations
The following diagrams show some typical connections that you might make in your installation. They show how the inputs and outputs of the Sunfire Amplifier are connected to your preamplifier and speakers. U N B A L A N C E D... -
Page 15: Balanced Inputs, Current Source Outputs
User's Manual B A L A N C E D P R E A M P O U T P U T S R IG H T L E F T R IG H T L E F T L O U D S P E A K E R S If your preamplifier has XLR outputs, it can be connected to the XLR inputs as... -
Page 16: Parallel Mono
User's Manual Parallel Mono • Connect your preamplifier’s right The Sunfire Amplifier can be connected in output to the amplifier’s right Normal Parallel Mono to create an immensely power- input jack. ful system. You will need one amplifier for each speaker, unless you are driving a single •... -
Page 17: Biwiring, Stereo
Consult your speaker source output to the left speaker’s owner’s manual for details. upper range input terminals. Each channel of the Sunfire Amplifier has • Connect your preamplifier’s outputs to two pairs of outputs. One idea is to use the the amplifier’s corresponding inputs. -
Page 18: Biwiring, Mono
User's Manual Mono Biwire connections • Connect the right Lab Direct input to If you have two Sunfire amplifiers and the left Lab Direct input with a short your speakers can be biwired, you can create patch cord. a very powerful and efficient system as follows: •... -
Page 19: Biamping
User's Manual Biamping connections This diagram shows how to create a very Make sure that you adjust the crossover frequency to suit your speakers. Check the efficient system with an external active crossover. The crossover will split your speaker’s specifications. incoming preamp signal into two frequency An alternative connection method is to ranges: one above and one below the cross-... -
Page 20: Speaker Connections
User's Manual Speaker connections If your speakers cannot be biwired, the Parallel normal configuration is to have one speaker For example, if you want to parallel- connected per channel. The connection of connect two speakers to the front right more than one per channel will tend to channel of the amplifier: degrade the speaker’s frequency response. -
Page 21: Troubleshooting Guide
User's Manual Troubleshooting The Sunfire Amplifier is expertly designed • If you have connected speakers in paral- lel, the overall impedance may be too low. and built to provide years of trouble-free It is recommended that you rearrange the performance. Most problems that occur can... - Page 22 Turn on your preamplifier and components before turning on the amplifier. • If you are still having a problem, remem- ber that Sunfire’s dealers and technical • At the end of your listening session, turn support staff will assist you. Make a list of off the amplifier first.
-
Page 23: Limited Warranty
Sunfire Warranty and keep these in a safe place. Corporation offers the following warranty to Thank you for your choice of a Sunfire you, the owner of a new Sunfire product: Corporation product. The Sunfire Corporation Warranty for the... - Page 24 Manual part number : 913-042-00 Rev A...
Need help?
Do you have a question about the Series II and is the answer not in the manual?
Questions and answers